
Categorie popolari
State cercando un filato?


Commenti / Domande (33)
![]() Lonnie Braagaard ha scritto:
Lonnie Braagaard ha scritto:
Jeg forsøger at hækle huen, men kan ikke forstå starten af opskriften. 1. række er hæklet og jeg har 68 fastmasker. 2. række ? der hækles iefter diagram men hvad skal der hækles? *T*TT og så videre eller? Håber jeg kan få hjælp
27.10.2021 - 15:14DROPS Design ha risposto:
Hej Lonnie, nej, * = denne række skal ikke hækles, den er allerede hæklet og viser kun hvordan næste række skal hækles i maskerne - det vil sige at du hækler næste række :)
28.10.2021 - 14:07
![]() Olga ha scritto:
Olga ha scritto:
Hola, he comenzado a hacer el cuello. Si lo pongo en plano sobre la mesa me queda circular, no un rectángulo, como pensaba que tendría que quedar. Pienso que pasa esto porque en la primera vuelta dice que hay que saltarse una cadena. ¿Esto es correcto? O yo no lo he entendido bien? Gracias
19.05.2021 - 15:40DROPS Design ha risposto:
Hola Olga, la forma obtenida no es por la cadeneta saltada, sino que por la tensión del tejido. Efectivamente, se tiene que saltar una cadeneta; siempre se montan más cadenetas que las necesarias para evitar que la labor se tense.
30.05.2021 - 20:53
![]() Jean ha scritto:
Jean ha scritto:
Thanks. However the instructions for the box (□) say 'skip 1 puff-stitch + 1 chain stitch, work 1 treble crochet in the next treble crochet' - this uses 3 stitches. The instructions for the cross (X) say 'skip 1 stitch, work 1 treble crochet in next stitch' - this uses 2 stitches. It worked in the second row of the pattern fine because the box (□)was used all the way along the row (not the cross X). Please could you get someone to explain this. Thanks.
14.04.2021 - 13:10
![]() Jean ha scritto:
Jean ha scritto:
The very top row of the pattern (before the last row of double crochet) doesn't seem to work for me. I am working it right to left, A1 over 1st stitch, A2 until the last 3 stitches, A3 over last 2 stitches and A1 over last stitch. Because A2 is a cross (X) and not a box (□) (like row No 2), there ends up being more puff stitches because the chain stitch isn't being missed (there is a puff stitch being made every 2 stitches instead of 3). Should this symbol not be a box to prevent this?
13.04.2021 - 21:08DROPS Design ha risposto:
Dear Jean, the X is worked over 2 stitches (1 treble in the 2. one, and one puff into the first one, cossing the tr), and the square is also wprked over two stitches (puff stitch into the 2. stotch, and treble into the first one) so you should not end up (both symbols have crossed stitches, only teh direction is different), so you should not end up with extra stitches. Happy Crafting!
13.04.2021 - 21:58
![]() Annette Fuglsang ha scritto:
Annette Fuglsang ha scritto:
Hej ! I flere af Drops opskrifter møder jeg 3 tal med bindestreg imellem f. eks. i Drops 204-16: "hækl 1 fastmaske i hver af de 0-2-1 næste luftmasker, . . . " Hvad betyder 0-2-1 næste luftmaske ? Eller i strikkeopskriften Drops Clementin Hat "Strik 0-1-0 maske ret, strik derefter . . ." Hvad betyder det ? Med venlig hilsen Annette
25.02.2021 - 06:50DROPS Design ha risposto:
Hej Annette, det er tallene i de 3 forskellige størrelser. Strikker du den mindste, følger du det første tal igennem hele opskriften osv. God fornøjelse!
25.02.2021 - 14:20
![]() Annica Lindgren ha scritto:
Annica Lindgren ha scritto:
Efter att ha virkat de två första varven (först fastmaskor... sedan första varvet på diagrammet) står: "Fortsätt mönstret fram och tillbaka så". Hur menas? Är det det nedersta varvet som ska upprepas till 20 cm och för att sedan gå uppåt i diagrammet? Eller ska jag följa hela diagrammet uppåt direkt? Med vänlig hälsning, Annica
31.01.2021 - 20:02DROPS Design ha risposto:
Hei Annica. Den nederst raden i diagrammet hekler du kun 1 gang, slik det står beskrevet i oppskriften. I diagramteksten med sort stjerne står det: denne raden skal ikke hekles, den er allerede heklet og viser kun hvordan neste rad skal hekles i maskene . Så du skal kun repetere de 6 radene i diagrammet (starter med 3 luftmasker) i høyden. God Fornøyelse!
08.02.2021 - 10:18
![]() Béatrice Lassalle ha scritto:
Béatrice Lassalle ha scritto:
Bonjour, Pour faire mon échantillon, vous dites : "13 double-brides/mailles serrées de large avec 1 fil de chaque qualité = 10 cm." Je ne comprends pas bien : je fais des double-brides ou des mailles serrées ? Et dans la hauteur, comment je peux voir ce qu'il y a dans 10 cm ? Merci de me répondre car je reste bloquée sur mon échantillon !
17.11.2020 - 11:14DROPS Design ha risposto:
Bonjour Mme Lasalle, vos mailles doivent être toutes de la même largeur, autrement dit 13 double-brides = 13 mailles serrées = 10 cm de large. La hauteur est indiquée pour A.2 = 3 rangs de A.2 = environ 3,25 cm. Bon crochet!
17.11.2020 - 13:56
![]() Roro ha scritto:
Roro ha scritto:
Thanks so much for your patience. That explains well how the row of 78 dbl crochet stitches are worked into. However, after you have done the first row of puff stitches, and then count the stitches, there are 116 stitches. This is because each X box contains 3 stitches (a treble, a chain and a puff) and this is being worked into 2 dc stitches. So at the end of the row you have 38 extra stitches (because there are 38 puff stitches). Can you possibly work out why I am going wrong here. Thanks
30.07.2020 - 09:40DROPS Design ha risposto:
Dear Roro, work simply following the diagram and video previously linked, making sure you have 38 puff stitches on every row - if your tension is right, you should have then the right measurements. Happy crocheting!
30.07.2020 - 12:34
![]() Roro ha scritto:
Roro ha scritto:
Thanks for your response. However, there is an increase from the row of double crochets to the 1st row of puff stitches if you follow the pattern (see question below). In the pattern it looks like each 3rd double crochet is possibly missed, which would actually even out the number of stitches if that was the case - is this where I'm possibly going wrong? Thanks for your patience.
29.07.2020 - 18:01DROPS Design ha risposto:
Dear Roro, on neck warmer you cast on 94-101-108 sts and work first row skipping chains evenly so that there are 78-84-90 sts at the end of this first row. Then work: A.1 over 1st st, repeat A.2 until 3 sts remain = repeat A.2 a total of 37-40-43 times in width (= over the next 74-80-86 sts), and finish with A.3 (= 2 sts) and A.4 over the last stitch = 1+74-80-86+2+1=78-84-90 sts and 38-41-44 puff stitches. Hope this help. Happy crocheting!
30.07.2020 - 08:54
![]() Roro ha scritto:
Roro ha scritto:
Thanks for all your help. The fundamental reason I don't understand this pattern is this: On the 1st row (after dbl crochet row ) the puff stitches which produce 3 stitches (1 treble + 1 chain + 1 puff) are worked into 2 dbl crochet stitches (1 missed - into which a puff stitch goes after the treble + 1 for the treble). This results in an increase of stitches. That would maybe make sense in the 1st row of the item, but not further up. Should the 'X' box say 'miss 2 stitches' instead? Thanks
29.07.2020 - 16:02DROPS Design ha risposto:
Dear Roro, there shouldn't be any increase, you should work "straight", each treble will be worked in the treble from the previous row so that the number of sts will remain constant. This video shows how to crochet these 2 rows with same symbols. Happy crocheting!
29.07.2020 - 17:11
|
|||||||||||||||||||||||||
Fields of Blue#fieldsofblueset |
|||||||||||||||||||||||||
 |
 |
||||||||||||||||||||||||
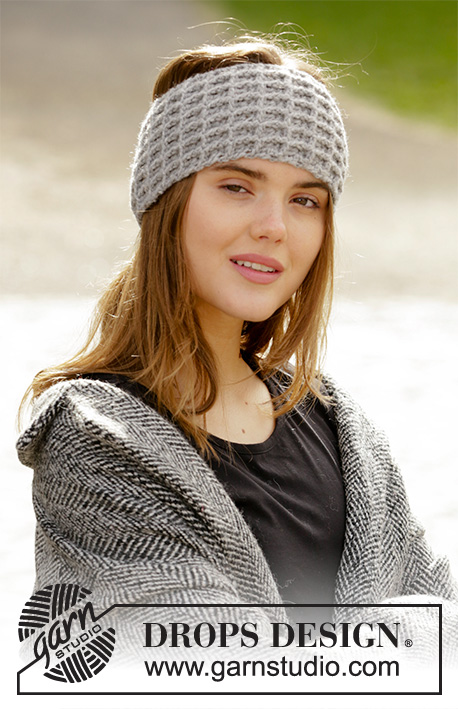
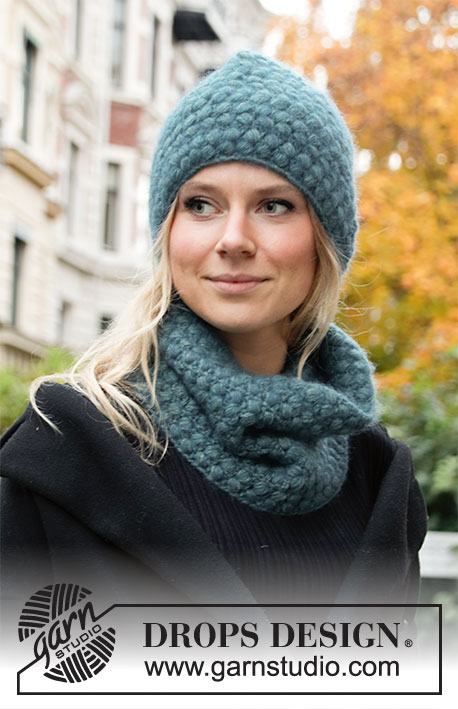
Cappello e scaldacollo lavorati all'uncinetto con puff-stitches. Tutto il completo è lavorato in DROPS Sky e DROPS Kid-Silk.
DROPS 204-16 |
|||||||||||||||||||||||||
|
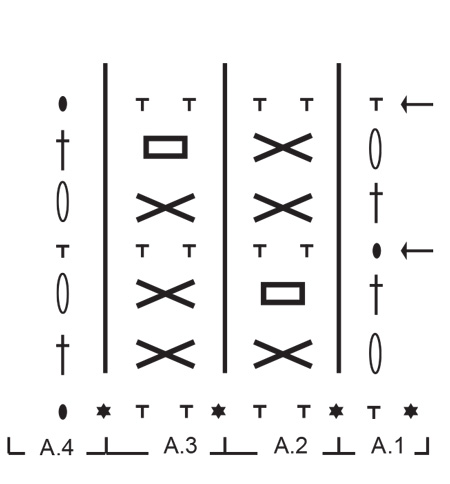
------------------------------------------------------- TECNICHE IMPIEGATE: ------------------------------------------------------- MOTIVO (sia per il cappello che per lo scaldacollo): Vedere i diagrammi A.1 - A.4. CATENELLA: Se lavorate principalmente sulla parte finale dell'uncinetto, la catenella risulterà troppo spesso tirata; 1 catenella dovrebbe essere lunga come la larghezza di una maglia bassa/maglia alta. 1 PUFF-STITCH: Lavorare come segue nella stessa maglia (è importante lavorare nella maglia e non attorno alla maglia): * 1 gettato, inserire l'uncinetto nella maglia, fare 1 gettato e far passare entrambi i gettati attraverso la maglia; fare i gettati abbastanza lunghi (per evitare che il puff-stitch risulti piccolo e compatto è importante tenere i gettati lunghi circa 2 cm) *, lavorare *-* per un totale di 5 volte, fare un gettato e farlo passare attraverso tutti gli occhielli sull'uncinetto. SUGGERIMENTO PER LE DIMINUZIONI (distribuite in modo uniforme): Per stabilire ogni quanto diminuire in modo uniforme, prendere il n° totale di maglie sulla riga (ad esempio 63 maglie) e dividerlo per il n° di diminuzioni da fare (ad esempio 28) = 2,3. In questo esempio diminuire lavorando insieme ogni 1° e 2° maglia circa come segue: Inserire l'uncinetto nella maglia successiva, fare 1 gettato e farlo passare attraverso la maglia, inserire l'uncinetto nella maglia successiva, fare 1 gettato e farlo passare attraverso la maglia, fare un altro gettato e farlo passare attraverso tutti e 3 gli occhielli sull'uncinetto (= 1 maglia diminuita). ------------------------------------------------------- INIZIO DEL LAVORO: ------------------------------------------------------- CAPPELLO - BREVE RIASSUNTO DEL LAVORO: Il cappello è lavorato avanti e indietro dal centro dietro, dal basso verso l'alto, e cucito al centro dietro per finire. CAPPELLO: Avviare 75-77-82 catenelle con l'uncinetto n° 5,5 mm, usando 1 capo di Sky + 1 capo di Kid-Silk (= 2 capi). Lavorare la 1° riga come segue: lavorare 1 maglia bassa nella 3° catenella dall'uncinetto, 1 maglia bassa in ognuna delle 0-2-1 catenelle successive, * saltare 1 catenella, lavorare 1 maglia bassa in ognuna delle 5 catenelle successive *, lavorare *-* fino alla fine della riga = 62-64-68 maglie basse sulla riga. Lavorare la riga successiva come segue: lavorare A.1 sulla 1° maglia, A.2 fino a quando rimangono 3 maglie sulla riga, A.3 su 2 maglie e finire con A.4 sull'ultima maglia. Continuare questo motivo avanti e indietro. FARE ATTENZIONE ALLA TENSIONE DEL LAVORO! Quando il lavoro misura circa 20-21-22 cm, diminuire 28-30-30 maglie in modo uniforme, o sulla riga 3 o sulla riga 6 del diagramma (indicato con la freccia del diagramma) – leggere il SUGGERIMENTO PER LE DIMINUZIONI = 34-34-38 maglie. Lavorare altre 2 righe di puff-stitches. Sulla riga successiva (una riga di maglie basse), diminuire lavorando tutte le maglie basse insieme 2 a 2 = 17-17-19 maglie basse rimaste. Poi lavorare 2 righe a maglie basse in cui tutte le maglie basse vengono lavorate insieme 2 a 2 su entrambe le righe = 5 maglie basse rimaste per tutte le taglie. Tagliare i fili ma lasciare un'estremità lunga abbastanza per la cucitura. Far passare il filo dentro e fuori dalle 5 maglie in cima al cappello, tirare e affrancare bene. Il cappello misura circa 26-27-28 cm dall'alto in basso. CONFEZIONE: Cucire il cappello al centro dietro – cucire margine a margine nel filo più esterno della maglia più esterna in modo che la cucitura sia piatta. ------------------------------------------------------- SCALDACOLLO - BREVE RIASSUNTO DEL LAVORO: Lavorato avanti e indietro dal centro dietro, dal basso verso l'alto e cucito al centro dietro per finire. SCALDACOLLO: Avviare 94-101-108 catenelle con l'uncinetto n° 5,5 mm usando 1 capo di Sky + 1 capo di Kid-Silk (= 2 capi). Lavorare la 1° riga come segue: lavorare 1 maglia bassa nella 3° catenella dall'uncinetto, 1 maglia bassa in ognuna delle 1-2-3 catenelle successive, * saltare 1 catenella, lavorare 1 maglia bassa in ognuna delle 5 catenelle successive *, lavorare *-* fino alla fine della riga = 78-84-90 maglie basse sulla riga. Lavorare la riga successiva come segue: lavorare A.1A sulla 1° maglia, A.2 fino a quando rimangono 3 maglie sulla riga, A.3 su 2 maglie e finire con A.4 sull'ultima maglia. FARE ATTENZIONE ALLA TENSIONE DEL LAVORO! Continuare questo motivo avanti e indietro fino a quando il lavoro misura circa 24-27-30 cm (o fino alla lunghezza desiderata) ma finire dopo la riga 3 o riga 6 dei diagrammi. Tagliare il filo ma lasciare un'estremità lunga abbastanza per cucire. CONFEZIONE: Cucire lo scaldacollo al centro dietro – cucire margine a margine nel filo più esterno della maglia più esterna in modo che la cucitura sia piatta. |
|||||||||||||||||||||||||
Spiegazioni del diagramma |
|||||||||||||||||||||||||
|
|||||||||||||||||||||||||
 |
|||||||||||||||||||||||||
Avete terminato questo modello?Allora taggate le vostre foto con #dropspattern #fieldsofblueset o inviatele alla #dropsfan gallery. Avete bisogno di aiuto con questo modello?Troverete 8 video tutorial, una sezione per i commenti/domande e molto altro guardando il modello su www.garnstudio.com © 1982-2026 DROPS Design A/S. Ci riserviamo tutti i diritti. Questo documento, compreso tutte le sue sotto-sezioni, è protetto dalle leggi sul copyright. Potete leggere quello che potete fare con i nostri modelli alla fine di ogni modello sul nostro sito. |
|||||||||||||||||||||||||


Con oltre 40 anni di esperienza nel design di modelli di maglia e uncinetto, DROPS Design offre la più estesa collezione di modelli gratuiti su internet - tradotti in 17 lingue. Ad oggi vi possiamo fornire 325 cataloghi e 12298 modelli - 9569 dei quali sono tradotti in Italiano.
Ci stiamo impegnando molto per darvi il meglio che vi possiamo offrire in termini di maglia e uncinetto, ispirazioni e consigli così come filati di grande qualità ad un prezzo incredibile! Volete utilizzare i nostri modelli per qualcosa d'altro oltre al vostro uso personale? Potete leggere tutto ciò che è consentito nel testo sul Copyright in basso su tutte le pagine dei nostri modelli. Buon lavoro!
Lasciare un commento sul modello DROPS 204-16
Noi saremmo felici di ricevere i tuoi commenti e opinioni su questo modello!
Se vuoi fare una domanda, fai per favore attenzione a selezionare la categoria corretta nella casella qui sotto per velocizzare il processo di risposta. I campi richiesti sono indicati da *.