
Categorie popolari
State cercando un filato?


Commenti / Domande (73)
![]() Frinkata ha scritto:
Frinkata ha scritto:
I'm confused about this Cast on 1 edge st (worked in garter st until finished measurements), * K 1, P 1 *, repeat from *-* a total of 3-3-3-3-4-4 times, K 1 (= 7-7-7-7-9-9 sts in rib), work in stockinette st until 7-7-7-7-9-9 sts remain, repeat from *-* a total of 3-3-3-3-4-4 times, K 1 (= 7-7-7-7-9-9 sts in rib), cast on 1 edge st (worked in garter st until finished measurements) = 84-90-98-106-114-124 sts. Can you describe the details one by one so that it becomes 106 ? Thank you
07.09.2020 - 15:09DROPS Design ha risposto:
Dear Frinkata, work as follows: Cast on 1 edge st, * K 1, P 1 *, repeat from *-* a total of 3 times (= over the next 6 sts), K 1 (= 7 sts in rib), work in stocking st until 7 sts remain (90 sts), * K 1, P 1 *, repeat from *-* a total of 3 times (= over the next 6 sts), K 1 (= 7 sts in rib), cast on 1 edge st = 1+ 7+ 90+ 7+1= 106 sts. Happy knitting!
07.09.2020 - 15:27
![]() Petronelle ha scritto:
Petronelle ha scritto:
Jeg skal til at strikke skuldrene, skal der strikkes en kantmaske i retstrik ind mod halsen, eller skal det være i glatstrik?
24.08.2020 - 16:43DROPS Design ha risposto:
Hej Petronelle, ja kantmasken kan du strikke i glatstrik eller i retstrik, det er den du samler masker op i til halskant bagefter. God fornøjelse!
27.08.2020 - 14:37
![]() Robin Preston ha scritto:
Robin Preston ha scritto:
174-9 Moorland jumper my question is, do you have instructions for doing the set in sleeve which is on the Main Picture. i have read the instructions and it only has a dropped sleeve. i am making this for my a gift for a friend as he said he likes the picture. i wouldnt want him to have any dissapointment about having the dropped shoulder instead of the inset sleeve. many thanks for your time Robin
15.07.2020 - 12:47DROPS Design ha risposto:
Dear Mrs Preston, the pattern for sleeve is the one used for the sleeves on the picture. Happy knitting!
15.07.2020 - 14:25
![]() Gabriele Schuldt ha scritto:
Gabriele Schuldt ha scritto:
Ich würde gerne einen Herrenpullover in Gr 52 mit Ihrer Wolle Fabel auf Nadelstärke 3 stricken. Haben Sie hierfür eine Strickanleitung? Kann ich auf Ihrer Internetseite Strickanleitungen nach der Nadelstärke aussuchen. Wenn ja, wo finde ich diese Möglichkeit.
07.07.2020 - 21:19DROPS Design ha risposto:
Liebe Frau Schuldt, hier finden Sie die Pullover für Herren mit Garngruppe A gestrickt - die mit 23 M unter dem Foto sind die jenigen, die nur mit 1 Faden gestrickt sind. Gerne benutzen Sie unseren Garnumrechner, um die neue Menge in Fabel kalkulieren zu lassen. Viel Spaß beim stricken!
08.07.2020 - 08:05
![]() Lacie ha scritto:
Lacie ha scritto:
At the transition from circular knitting on the body to the front/back separation, you knit 41 sts, place marker, knit 82 more sts, place marker, and then to do you NOT finish the row with another 41 sts? But turn and start on the back piece - on the WS? Purl a full row on the back piece (82 sts) then turn to RS and start with the cast on etc? Or how do you start on the upper back piece from the RS - new yarn?
28.04.2020 - 02:01DROPS Design ha risposto:
Dear Lacie, the rounds are on the middle of back piece, this means you count from beg of round to the next 41 sts = you have worked mid back, insert a marker, count 82 sts = the marker will be after the 123rd stitch, and there are now 41 sts to the beg of the round. Happy knitting!
28.04.2020 - 10:32
![]() Daphne ha scritto:
Daphne ha scritto:
Re: length of sleeve...I am following the 3rd size up and the pattern says knit until work measures 51cm. However the schematic size has a further 7cm for the cuff making 58cm.... Am I missing something?
13.02.2020 - 11:44DROPS Design ha risposto:
Dear Daphne, the sleeve in 3rd size should be 51 cm as shown in the chart, these 51 cm include the 7 cm ribbing at the bottom. Happy knitting!
13.02.2020 - 12:19
![]() Tiffany ha scritto:
Tiffany ha scritto:
I'm confused from where it separates, reading other questions I realise there is meant to be ribbing on arm hole edges inside of last st. But why is the pattern increasing for arm hole instead of decreasing? I've not made a round jumper before and understand that the sleeve will fit in the separated bit as there will be an opening for it, but normal jumpers (back and forth on circular needles ) decrease at arm hole? Kind regards
15.12.2019 - 07:56DROPS Design ha risposto:
Dear Tiffany, in this pattern, you will have to increase for armholes to give the desired shape for the jumper - see measurement chart. Happy knitting!
16.12.2019 - 08:24
![]() Cinzia ha scritto:
Cinzia ha scritto:
Buongiorno. Non mi è chiaro come dividere le maglie tra il davanti ed il dietro. Seguendo le istruzioni per la taglia Small dovrei mettere il primo segno dopo 41 maglie ed il secondo dopo 123...ma a questo punto mi ritroverei al primo segno essendo 164 le maglie totali. Potete chiarire per favore? Grazie
27.09.2019 - 06:59DROPS Design ha risposto:
Buongiorno Cinzia. Le 123 maglie vanno contate dall’inizio del giro; il secondo segno viene messo quindi dopo 82 maglie dal primo. Ci devono essere 82 maglie sia per il davanti che per il dietro. Buon lavoro!
27.09.2019 - 10:14
![]() Lucky ha scritto:
Lucky ha scritto:
Str. L, jeg har sat 2 mærker, efter 48m og 144. 1. Skal jeg begynde at lave rygstk på 48m? 2. Skal jeg også slå 1 kantm.op hverside start fra 1 omg (før først maske og efter sidst maske)? Målet er 96, dvs jeg skal slå 24 kant masker op hvis jeg laver det hverside? Tak for hjælpe
01.09.2019 - 09:56DROPS Design ha risposto:
Hei Lucky Klipp tråden, legg opp 1 maske (= kantmaske) og start i 48. maske, strikk mønster forklart i oppskriften, legg opp 1 maske (=kantmaske) = 98 masker. Første rad av bakstykket er nå strikket. På neste pinne fra RETTEN skal det økes med 1 maske i hver side av glattstrikkpartiet. Øk slik på hver 5.pinne totalt 7 ganger = 112 masker (du har økt med 14 masker). God Fornøyelse!
02.09.2019 - 13:13
![]() Rika Van Den Berg ha scritto:
Rika Van Den Berg ha scritto:
Is het correct dat er niet meer gesproken wordt te meerderen na de boord..volgens mij zit daar een fout waardoor het hele werk niet meer klopt...erg vervelend!Voorals nadat jd bij het splitsen daar achter komt!
14.04.2019 - 17:41
|
|
Moorland Jumper#moorlandjumper |
|
 |
 |
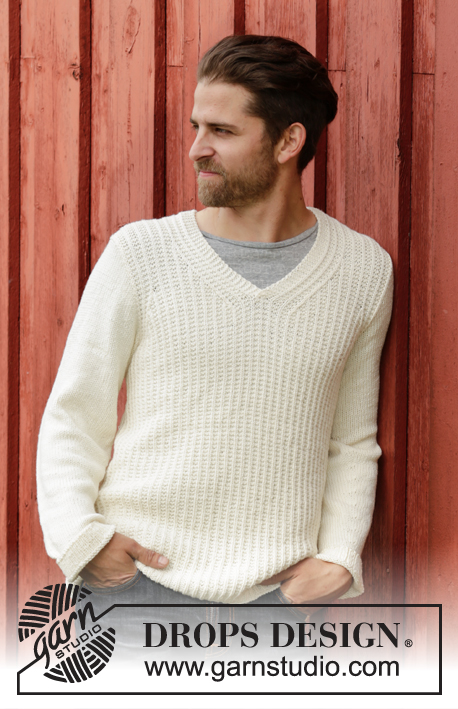
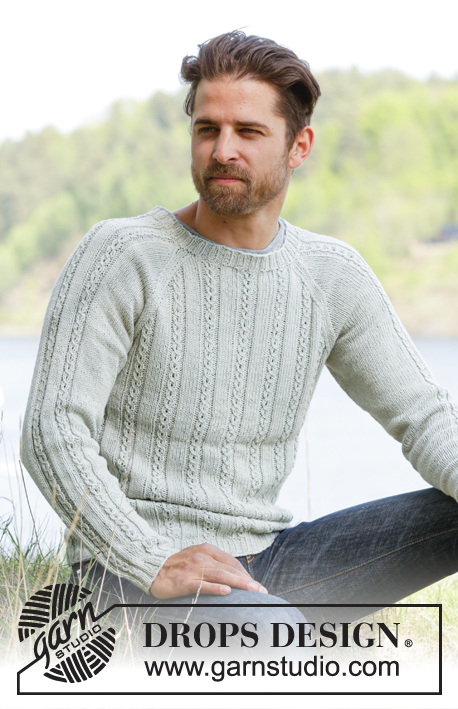
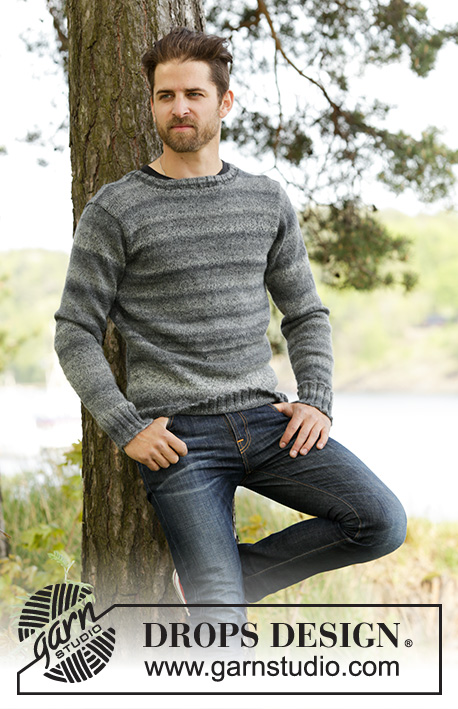
Maglione DROPS per uomo in Fabel e Delight. Taglie: Dalla S alla XXXL.
DROPS 174-9 |
|
|
PUNTO LEGACCIO (avanti e indietro sui ferri): Lavorare tutti i ferri a dir. 1 costa a legaccio = 2 ferri a dir. SUGGERIMENTO PER LE DIMINUZIONI (per diminuire a intervalli regolari): Per calcolare ogni quante m diminuire, dividere il numero complessivo delle m sul giro (p.es: 210 m) per il numero di diminuzioni da fare (p.es 50) = 5,3. Quindi, in questo caso, bisogna lavorare insieme ogni 4a e 5a m ca. SUGGERIMENTO PER GLI AUMENTI (per il davanti e il dietro): Per aumentare 1 m fare 1 m gettata. Al ferro successivo, lavorare la m gettata a rov ritorta (= lavorare la m nel filo dietro e non quello davanti) per evitare che si formi un buco. SUGGERIMENTO PER GLI AUMENTI (per le maniche): Aumentare da ciascun lato del segno come segue: Lavorare finché non rimangono 4 m prima del segno, 1 m gettata, lavorare 8 m (il segno si trova al centro di queste m), 1 m gettata. Al giro successivo, lavorare le m gettate a dir ritorto per evitare che si formino dei buchi. ---------------------------------------------------------- MAGLIONE: Si lavora in tondo sui ferri circolari fino agli scalfi; finire poi il davanti e il dietro separatamente. I giri iniziano al centro, sul dietro. DAVANTI e DIETRO: Avviare 204-216-234-252-276-300 m con 1 capo del filato Fabel + 1 capo del filato Delight (= 2 capi) sui ferri circolari n° 4,5. Lavorare 1 giro a dir. Proseguire a coste = 3 m dir / 3 m rov per 5 cm. Lavorare 1 giro a dir e, ALLO STESSO TEMPO, diminuire 40-40-42-44-52-56 m a intervalli regolari - VEDERE IL SUGGERIMENTO PER LE DIMINUZIONI (per diminuire a intervalli regolari) = 164-176-192-208-224-244 m. Passare ai ferri circolari n° 5 e proseguire in tondo a maglia rasata. RICORDARSI DI MANTENERE LA CORRETTA TENSIONE DEL LAVORO! Quando il lavoro misura 42-43-44-45-46-47 cm, inserire 2 segni nel lavoro, come segue: il primo segno dopo 41-44-48-52-56-61 m ed il secondo segno dopo 123-132-144-156-168-183 m. Dividere ora il lavoro in corrispondenza dei segni e finire ogni parte separatamente. DIETRO: Lavorare avanti e indietro. = 82-88-96-104-112-122 m. Al ferro successivo sul diritto del lavoro, lavorare come segue: avviare 1 m vivagno (lavorare questa m a punto legaccio fino alla fine del lavoro), * 1 m dir, 1 m rov *, ripetere da *-* per un totale di 3-3-3-3-4-4 volte, 1 m dir (= 7-7-7-7-9-9 m a coste), lavorare a maglia rasata finché non rimangono 7-7-7-7-9-9 m, ripetere da *-* per un totale di 3-3-3-3-4-4 volte, 1 m dir (= 7-7-7-7-9-9 m a coste), avviare 1 m vivagno (lavorare questa m a punto legaccio fino alla fine del lavoro) = 84-90-98-106-114-124 m. Al ferro successivo sul diritto del lavoro, aumentare 1 m da ciascun lato della sezione lavorata a maglia rasata - Vedere il SUGGERIMENTO PER GLI AUMENTI (per il davanti e il dietro). Aumentare in questo modo ogni 3-4-5-7-9-12 ferri 10-9-7-6-5-4 volte in tutto = 104-108-112-118-124-132 m. Lavorare le nuove m a maglia rasata. Proseguire a maglia rasata e a coste finché il lavoro non misura 58-60-62-64-66-68 cm, poi intrecciare le 28-30-32-34-36-36 m centrali per lo scollo e finire ogni spalla separatamente. Al ferro successivo intrecciare 2 m per lo scollo = per ogni spalla rimangono 36-37-38-40-42-46 m. Quando il lavoro misura 60-62-64-66-68-70 cm, intrecciare tutte le m senza stringere troppo il filo. DAVANTI: Lavorare come indicato per il dietro. Quando il lavoro misura 52-54-55-57-58-60 cm, mettere in attesa su un ferma maglie le 16-18-18-18-20-20 m centrali per lo scollo e finire ogni spalla separatamente. Poi intrecciare le m per lo scollo ad ogni ferro con inizio dallo scollo, come segue: Intrecciare 4 m 1 volta, 2 m 2 volte e 1 m 0-0-1-2-2-2 volte = per ogni spalla rimangono 36-37-38-40-42-46 m. Intrecciare le m senza stringere troppo il filo quando il lavoro misura 60-62-64-66-68-70 cm. MANICHE: Si lavorano in tondo sui ferri a doppia punta. Avviare 48-48-54-54-54-60 m con 1 capo del filato Fabel + 1 capo del filato Delight (= 2 capi) sui ferri a doppia punta n° 4,5. Lavorare 1 giro a dir. Proseguire a coste = 3 m dir / 3 m rov finché il lavoro non misura 7 cm. Al giro successivo, diminuire 8-6-10-8-8-12 m a intervalli regolari = 40-42-44-46-46-48 m. Passare ai ferri a doppia punta n° 5. Proseguire a maglia rasata. Quando il lavoro misura 8-8-8-8-11-11 cm, inserire un segno all’inizio del giro (= centro, sotto la manica). Spostare il segno verso l’alto man mano che si procede con il lavoro. Al giro successivo, aumentare 1 m da ciascun lato del segno al centro, sotto la manica - vedere il SUGGERIMENTO PER GLI AUMENTI (per le maniche)! Aumentare in questo modo ca.ogni 10-9-9-8 -6 -5 giri 10-11-11-12-14-16 volte in tutto = 60-64-66-70-74-80 m. Proseguire finché il lavoro non misura 52-52-51-51-50-49 cm (misure più corte per le taglie più grandi perché le spalle sono più larghe). Poi intrecciare tutte le m senza stringere troppo il filo. Lavorare la seconda manica in modo uguale. CONFEZIONE: Cucire le spalle. Cucire le maniche all’interno di 1 m vivagno. COLLO: Con i ferri circolari n° 4,5 e 1 capo del filato Fabel + 1 capo del filato Delight (= 2 capi), riprendere sul diritto del lavoro ca.96-114 m (comprese le m al centro sul davanti messe in attesa sul ferma maglie). Lavorare in tondo a coste * 3 m dir, 3 m rov * finché le coste non misurano 3 cm. Intrecciare le m senza stringere troppo il filo e lavorando a dir le m dir e a rov le m rov. Tagliare e fermare il filo. |
|
 |
|
Avete terminato questo modello?Allora taggate le vostre foto con #dropspattern #moorlandjumper o inviatele alla #dropsfan gallery. Avete bisogno di aiuto con questo modello?Troverete 30 video tutorial, una sezione per i commenti/domande e molto altro guardando il modello su www.garnstudio.com © 1982-2026 DROPS Design A/S. Ci riserviamo tutti i diritti. Questo documento, compreso tutte le sue sotto-sezioni, è protetto dalle leggi sul copyright. Potete leggere quello che potete fare con i nostri modelli alla fine di ogni modello sul nostro sito. |
|


Con oltre 40 anni di esperienza nel design di modelli di maglia e uncinetto, DROPS Design offre la più estesa collezione di modelli gratuiti su internet - tradotti in 17 lingue. Ad oggi vi possiamo fornire 324 cataloghi e 12290 modelli - 9561 dei quali sono tradotti in Italiano.
Ci stiamo impegnando molto per darvi il meglio che vi possiamo offrire in termini di maglia e uncinetto, ispirazioni e consigli così come filati di grande qualità ad un prezzo incredibile! Volete utilizzare i nostri modelli per qualcosa d'altro oltre al vostro uso personale? Potete leggere tutto ciò che è consentito nel testo sul Copyright in basso su tutte le pagine dei nostri modelli. Buon lavoro!
Lasciare un commento sul modello DROPS 174-9
Noi saremmo felici di ricevere i tuoi commenti e opinioni su questo modello!
Se vuoi fare una domanda, fai per favore attenzione a selezionare la categoria corretta nella casella qui sotto per velocizzare il processo di risposta. I campi richiesti sono indicati da *.