
Categorie popolari
State cercando un filato?


Commenti / Domande (76)
![]() Hélène ha scritto:
Hélène ha scritto:
Bonjour. Pouvez vous me renseigner sur la hauteur maximum de ce poncho au niveau de la pointe pour une taille S/M. Merci. Cordialement, Hélène
10.01.2026 - 16:26DROPS Design ha risposto:
Bonjour Hélène, les seules mesures dont nous disposons sont celles du schéma, en espérant qu'elles puissent quand même vous aider. Bon tricot!
12.01.2026 - 10:13
![]() Vanhoutte ha scritto:
Vanhoutte ha scritto:
Bonjour je tente de reproduire les diagrammes mais les torsades du A4 se trouvent alors sur l'envers du tricot alors que les Nopes sont bien sur l'endroit qu'ai je fait de mal ? merci
29.12.2025 - 12:25DROPS Design ha risposto:
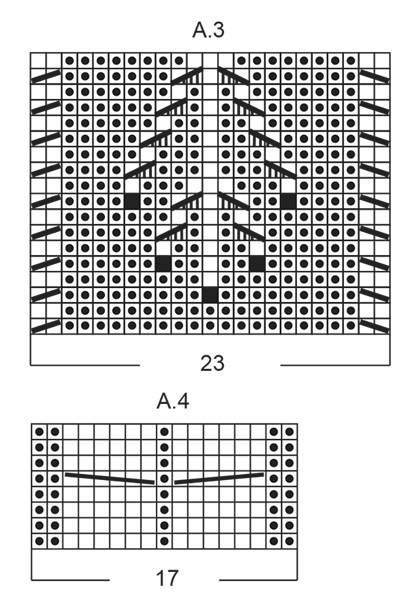
Bonjour Mme Vanhoutte, le 1er rang (et tous les rangs impairs) des diagrammes se tricote sur l'endroit, ainsi, la torsade de A.4 se fait au 5ème rang = sur l'endroit. De même les notes de A.2 (- 3ème rang) et A.3 se font aux rangs impairs: 3ème, 5ème, etc.. Bon tricot!
02.01.2026 - 13:07
![]() Ester Tenenhaud ha scritto:
Ester Tenenhaud ha scritto:
Is this poncho one piece or two?
08.12.2025 - 16:55DROPS Design ha risposto:
Hi Ester, there is one long piece, rectangle shape. Happy knitting!
08.12.2025 - 17:04
![]() Ester ha scritto:
Ester ha scritto:
Hello, I understand the knitting pattern. What I didn\'t understand is this poncho is one long piece? It would be very easy for me if I could get a drawing of the poncho before folding, the website has a diagram of it already folded I hope I was able to explain myself Thank you
06.12.2025 - 07:51DROPS Design ha risposto:
Dear Ester, the poncho is made of a long rectangle folded and sewn together to make the poncho; in this video we show how to assembly such a poncho, hope it will help. Happy knitting!
08.12.2025 - 08:05
![]() Patrizia Adorni Parma ha scritto:
Patrizia Adorni Parma ha scritto:
Per quanto riguarda la fase A2 dove ci sono punti diversi, come faccio a lavorarli? Vado sopra agli altri e mi si scombussola tutta la simmetria! Ho provato a farlo perché è bellissimo ma con wuell\'anonalìa non riesco a lavorare
03.11.2025 - 16:37DROPS Design ha risposto:
Buongiorno Patrizia, A.2 parte da 1 maglia ma ha aumenti e diminuzioni per tornare ad 1 maglia: in quale punto trova difficoltà? Buon lavoro!
17.01.2026 - 11:34
![]() Lena ha scritto:
Lena ha scritto:
Hej Kan man lave denne i kun retstrik? Jeg kan ikke finde ud af at lave mønster mm. og jeg synes den er så sød - hvis ja, kan man så bare følge opskrift med antal masker UDEN at lave mønster?
16.10.2025 - 12:03
![]() Cris ha scritto:
Cris ha scritto:
Wie weeden die Rückreihen gestrickt. Sieht man in der Strickanleitung leider nicht.
15.10.2025 - 11:29DROPS Design ha risposto:
Hi Cris, you will find the answer HERE. Happy knitting!
16.10.2025 - 10:14
![]() MARTY Christiane ha scritto:
MARTY Christiane ha scritto:
Je ne comprends l'explication A2 du poncho DROPS 173-12 Pourriez-vous me fournir de plus amples explications. Merci
21.09.2025 - 17:09DROPS Design ha risposto:
Bonjour Mme Marty, cette vidéo devrait pouvoir vous aider, nous y montrons comment tricoter A.2. Bon tricot!
24.09.2025 - 07:59
![]() Mary McClelland ha scritto:
Mary McClelland ha scritto:
Thank you for this lovely pattern! I found that for me, the most troublesome pattern was A1! It looks the easiest as it's only over 4 rows but I think I was concentrating so much on A2, A3 and A4 that the most mistakes I had to fix were on A1! I also found it helpful to put a row counter on A3. I also found it helpful to read the lessons and the comments other knitters have left. Although I must admit some comments had me confused??
02.04.2025 - 22:23
![]() Dawn MacWhinnie ha scritto:
Dawn MacWhinnie ha scritto:
Hi. I’m working these charts for the first time. It’s Snowbeads 173-12. When working on the first row of the diagrams simultaneously, I am hung up on A2 on the first row. I just don’t know what to do when it shows no stitches but the stem in the middle. What do I do on that first row going right to left?
26.11.2024 - 03:50DROPS Design ha risposto:
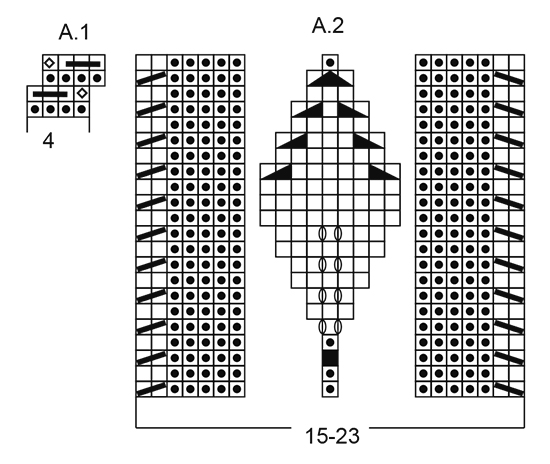
Hi Dawn, A.2 is worked across the first 7 stitches (as shown on the right hand side of the diagram), then you go straight to the 1 stitch in the middle (which is purled from the right side, knitted from the wrong side), then work the next 7 stitches as shown on the left hand side of the diagram. So the whole of A.2 begins with 15 stitches, will increase to 23 stitches in the middle, then decrease to 15 stitches again. Hope this helps and happy knitting!
26.11.2024 - 06:45
|
|||||||||||||||||||||||||||||||||||||||||||||||||
Snow Beads#snowbeadsponcho |
|||||||||||||||||||||||||||||||||||||||||||||||||
 |
 |
||||||||||||||||||||||||||||||||||||||||||||||||
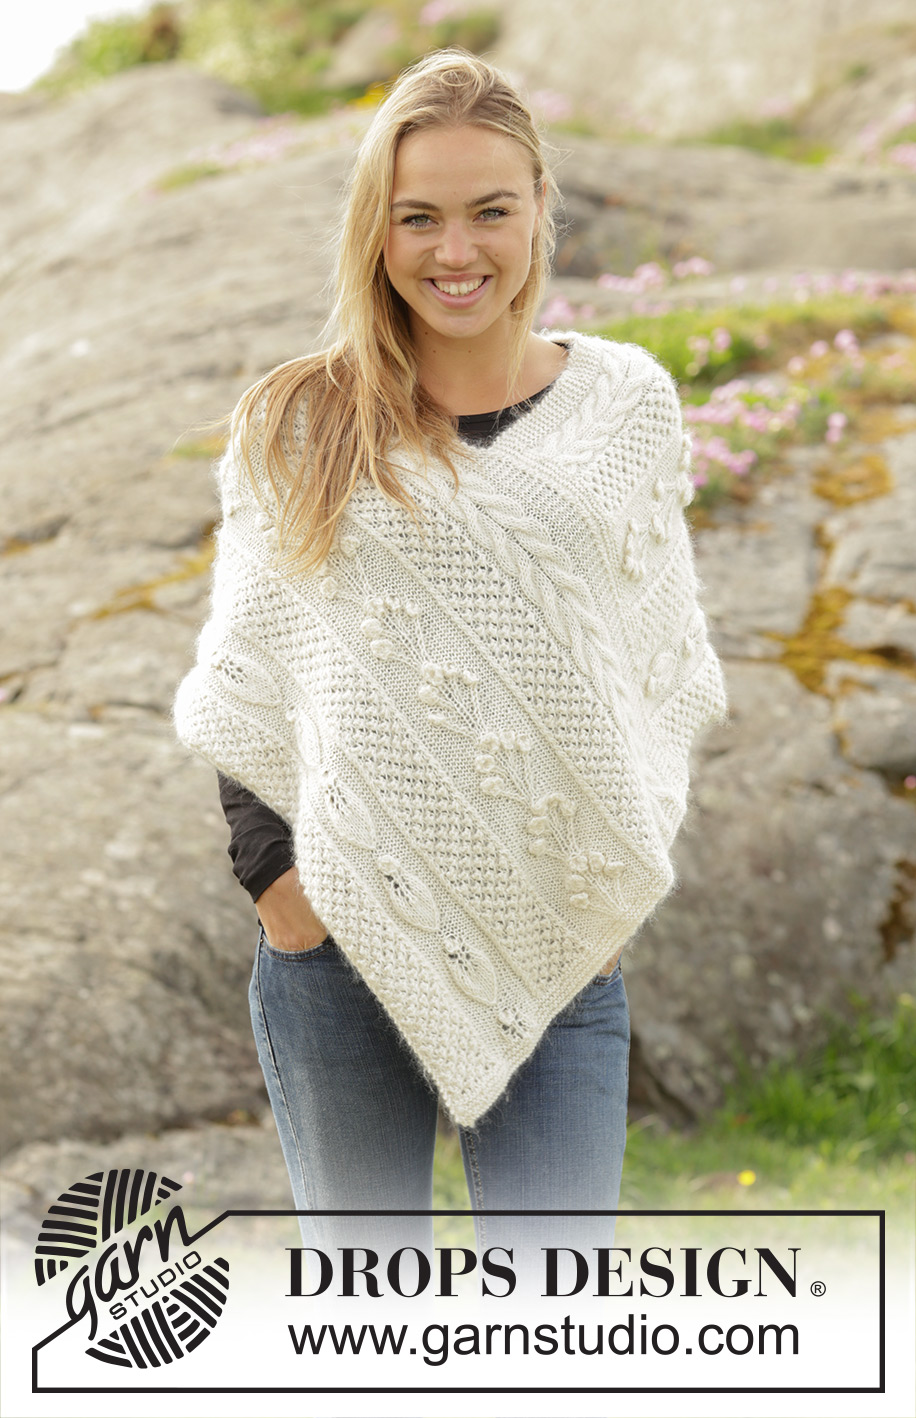
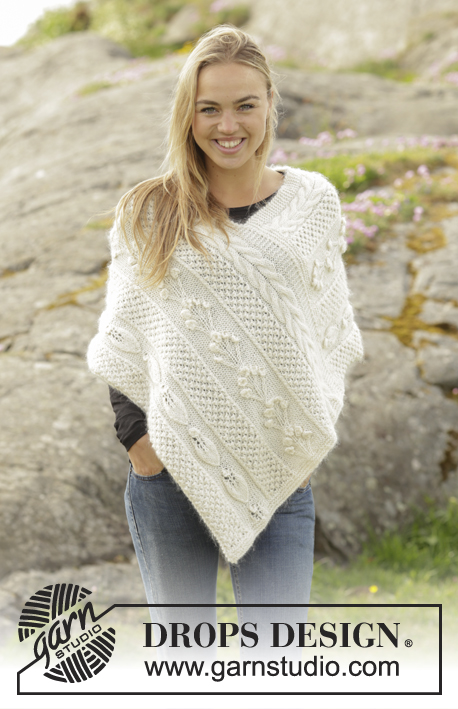
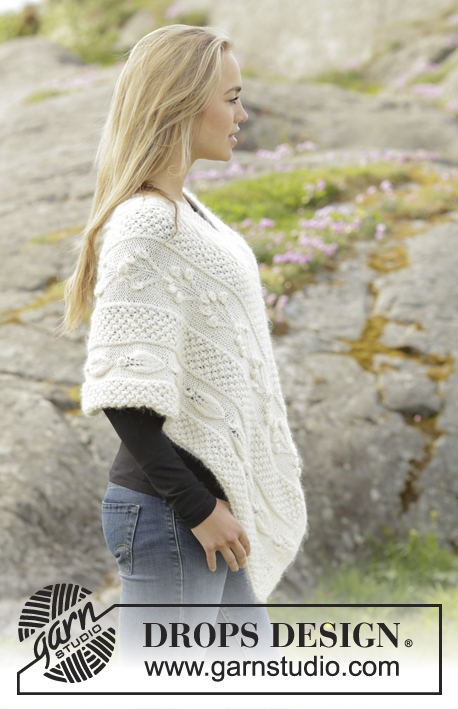
Poncho DROPS ai ferri, con diversi motivi a punto fantasia, in "Alpaca" e "Brushed Alpaca Silk". Taglie: Dalla S alla XXXL.
DROPS 173-12 |
|||||||||||||||||||||||||||||||||||||||||||||||||
|
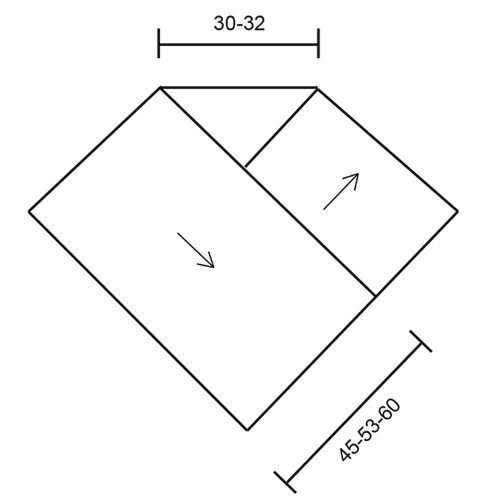
PUNTO LEGACCIO (avanti e indietro): Lavorare tutti i ferri a dir. 1 costa a legaccio = 2 ferri a dir. MOTIVO: Vedere i diagrammi da A.1 a A.4. I diagrammi mostrano 1 ripetizione del motivo vista sul diritto del lavoro; il numero delle m nel diagramma A.2 varia da 15 a 23 m. ---------------------------------------------------------- PONCHO: Si lavora avanti e indietro sui ferri circolari per avere sufficiente spazio per tutte le m. Avviare 82-96-110 m sui ferri circolari n° 4,5 con 1 capo del filato Alpaca + 1 capo del filato Brushed Alpaca Silk. Lavorare 3 coste a PUNTO LEGACCIO - vedere le spiegazioni sopra, ALLO STESSO TEMPO, nel corso dell’ultimo ferro (= sul rovescio del lavoro) aumentare 17 m a intervalli regolari = 99-113-127 m. Nel corso del ferro successivo (= sul diritto del lavoro), lavorare il motivo come segue: 2 m a punto legaccio, diagramma A.1 sulle 12-16-20 m successive, diagramma A.2 (= 15 m), diagramma A.1 sulle 12-16-20 m successive, diagramma A.3 (= 23 m), diagramma A.1 sulle 12-16-20 m successive, diagramma A.4 (= 17 m) e 6-8-10 m a punto legaccio. RICORDARSI DI MANTENERE LA CORRETTA TENSIONE DEL LAVORO ! Proseguire con il motivo in questo modo finché il diagramma A.3 non è stato lavorato 16-17-18 volte in verticale. Il lavoro misura ca.127-135-150 cm (il numero delle m sarà diverso da quello all’inizio dei diagrammi e varierà a seconda della riga del diagramma A.2 che state lavorando). Lavorare 3 coste a legaccio e, ALLO STESSO TEMPO, nel corso del primo ferro, portare il numero delle m a 82-96-110 m. Intrecciare le m e fermare i fili. CONFEZIONE: Mettere uno dei lati lunghi contro uno dei lati corti e cucire (il lato lungo opposto formerà un punta al centro sul davanti). |
|||||||||||||||||||||||||||||||||||||||||||||||||
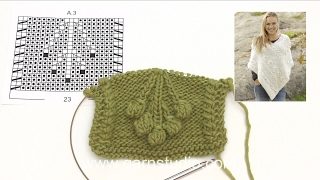
Spiegazioni del diagramma |
|||||||||||||||||||||||||||||||||||||||||||||||||
|
|||||||||||||||||||||||||||||||||||||||||||||||||
 |
|||||||||||||||||||||||||||||||||||||||||||||||||
 |
|||||||||||||||||||||||||||||||||||||||||||||||||
 |
|||||||||||||||||||||||||||||||||||||||||||||||||
Avete terminato questo modello?Allora taggate le vostre foto con #dropspattern #snowbeadsponcho o inviatele alla #dropsfan gallery. Avete bisogno di aiuto con questo modello?Troverete 24 video tutorial, una sezione per i commenti/domande e molto altro guardando il modello su www.garnstudio.com © 1982-2026 DROPS Design A/S. Ci riserviamo tutti i diritti. Questo documento, compreso tutte le sue sotto-sezioni, è protetto dalle leggi sul copyright. Potete leggere quello che potete fare con i nostri modelli alla fine di ogni modello sul nostro sito. |
|||||||||||||||||||||||||||||||||||||||||||||||||


Con oltre 40 anni di esperienza nel design di modelli di maglia e uncinetto, DROPS Design offre la più estesa collezione di modelli gratuiti su internet - tradotti in 17 lingue. Ad oggi vi possiamo fornire 324 cataloghi e 12290 modelli - 9561 dei quali sono tradotti in Italiano.
Ci stiamo impegnando molto per darvi il meglio che vi possiamo offrire in termini di maglia e uncinetto, ispirazioni e consigli così come filati di grande qualità ad un prezzo incredibile! Volete utilizzare i nostri modelli per qualcosa d'altro oltre al vostro uso personale? Potete leggere tutto ciò che è consentito nel testo sul Copyright in basso su tutte le pagine dei nostri modelli. Buon lavoro!
Lasciare un commento sul modello DROPS 173-12
Noi saremmo felici di ricevere i tuoi commenti e opinioni su questo modello!
Se vuoi fare una domanda, fai per favore attenzione a selezionare la categoria corretta nella casella qui sotto per velocizzare il processo di risposta. I campi richiesti sono indicati da *.