
Categorie popolari
State cercando un filato?
















Commenti / Domande (170)
 Marilyn Growns ha scritto:
Re - Sleeve....when piece measures 48 cm ( size large) the pattern says... cast off 6 stitches mid under sleeve which leaves 60 stitches.. I have placed markers all the way up the sleeve, therefore should I decrease 3 stitches either side of the last marker? The video is not working. Thankyou
02.04.2024 - 00:10DROPS Design ha risposto:
Hi Marilyn, Yes you cast off 3 stitches on each side of the marker. Happy knitting!
02.04.2024 - 06:38
Marilyn Growns ha scritto:
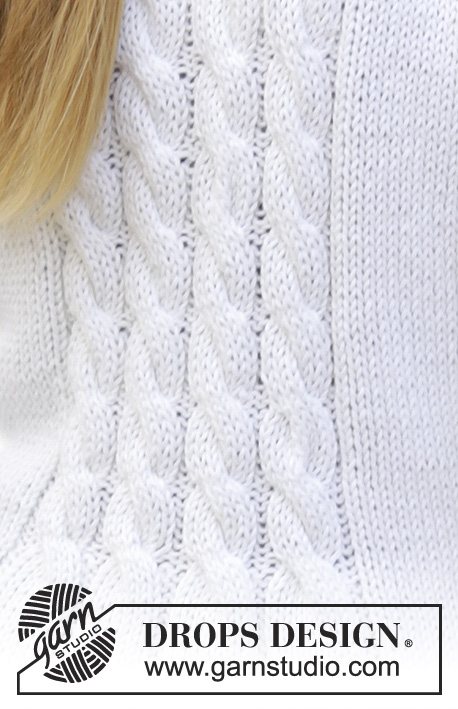
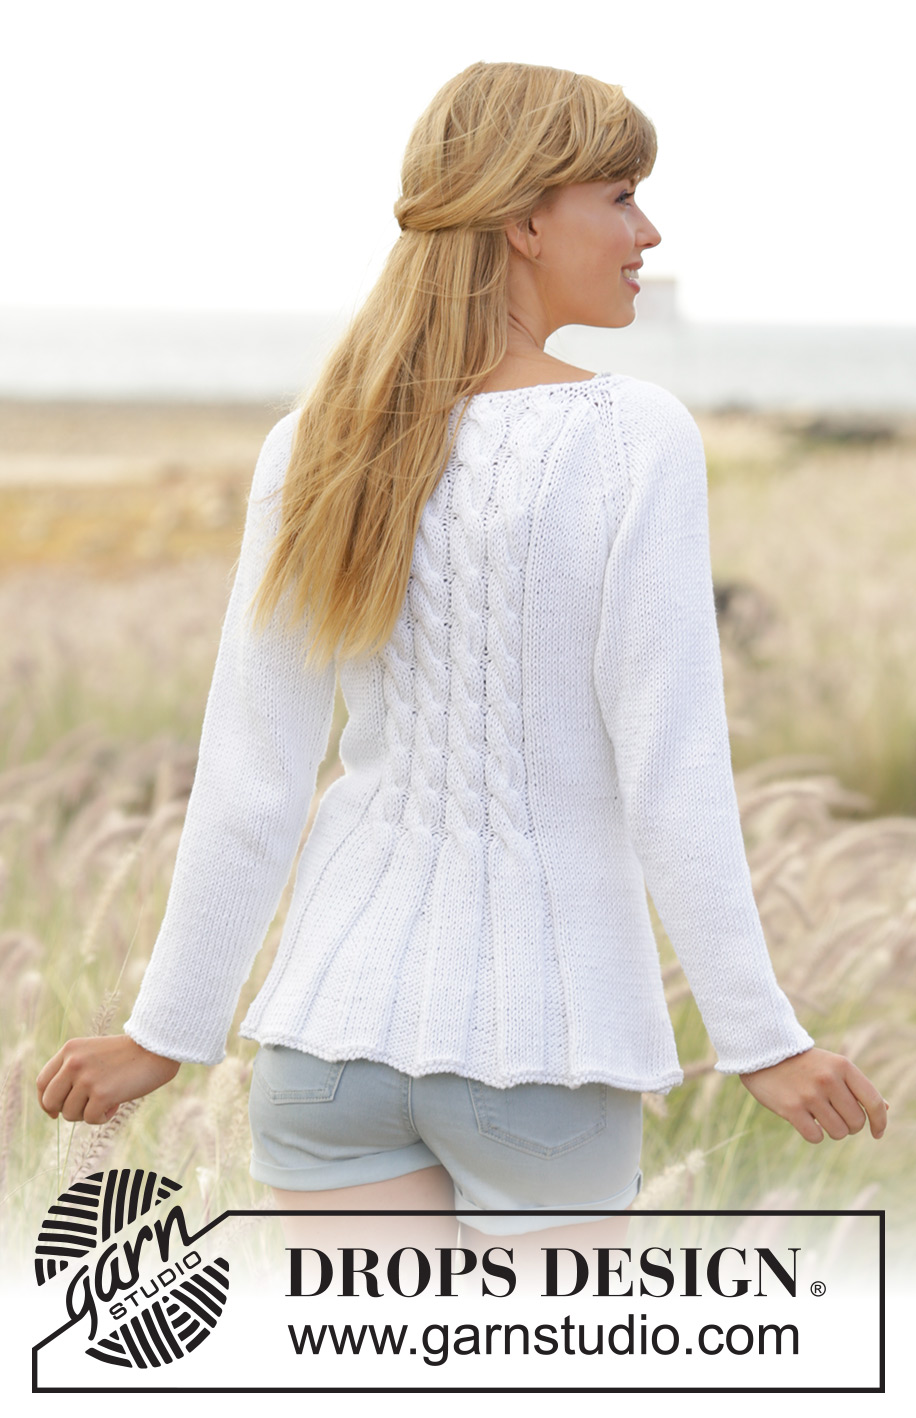
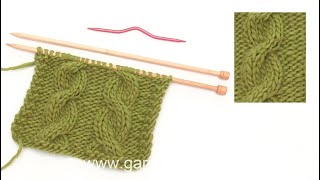
Can you please let me know how often the cable is done? i cannot see it in the pattern. I am making size L. I do however note that on 16/06/21 you answered Jenny's question - every 8th row. Have I interpreted that correctly? Looking at the picture of the cardigan it looks like in total there are 11 cables to the neckline. Please could you confirm. Sorry for the many questions. I love this pattern and really want to be able to complete it. Thanks in advance
23.01.2024 - 14:54DROPS Design ha risposto:
Dear Mrs Growsn, cables are worked on every 8th row as follows in A.1: Row 1 with cable, Row 2 til 8 without cable, repeat these 8 rows. Happy knitting!
24.01.2024 - 08:14
Marilyn Growns ha scritto:
I posted 7/01/24 re the 11 decreases for size L. Decrease at the beginning of first Purl section and decrease at the end of the next purl section. Julia's question on 29/04/17 says in one row you do all decreases at the beginning of each P section and in the second decrease row you do them at the end of each P section. This contradicts what I have done and is concerning me that I have done this incorrectly. Please can you clarify. Thanks in advance
23.01.2024 - 14:35DROPS Design ha risposto:
Dear Mrs Growns, you should decrease 11 stitches on every decrease row = 1 stitch in each of the P-sections and work these decreases a total of 5 times. the first time you will decrease at the beg of every P-section, the 2nd time at the end of every P-section and continue like this decreasing alternately one time at the beg of every P-section and next time at the end of every P-section. Happy knitting!
24.01.2024 - 08:10
Marilyn Growns ha scritto:
Thanks for answering my question. However, what I am confused with is 'When piece measures 5 cm, dec 1 sts in all P-sections (= 11-11-11-12-12-12 dec per dec round)' Read decrease tip which is ' Dec 1 st by P 2 tog. Dec alternately at beg and end of P section'. From 8 stitches it would mean each purl section decreases to 6 which would make the calculation wrong. What does it mean - alternately? I am just totally confused. :(
05.01.2024 - 22:50DROPS Design ha risposto:
Dear Marilyn, you decrease by purling 2 together in each section once. However, in each purl section you will decrease either at the beginning or the end of the section (alternately means every other or on alternate sections). For example, in the first section you purl together the first 2 stitches, in the second section you purl together the last 2 stitches, in the third section you purl together the first 2 stitches, e.t.c. Happy knitting!
07.01.2024 - 23:34
Marilyn Growns ha scritto:
When the body measure 5cm, should the decrease start from the RS?
03.01.2024 - 22:39DROPS Design ha risposto:
Hi Marilyn, Yes, the decreases are from the right side. Happy knitting!
04.01.2024 - 07:42
Marilyn ha scritto:
Drops pattern 169-1 Can you explain please on the BODY when following instructions for the first row after 1 ridge of garter stitch....do I reverse all stitches when doing row 2 ( except the first 5 garter stitches which is the band)
27.12.2023 - 23:00DROPS Design ha risposto:
Dear Marilyn, as explained in GARTER ST (back and forth): 1 ridge = 2 knit rows. So you knit from the right side and the wrong side. Then, start working as indicated on the next row from the right side. Happy knitting!
29.12.2023 - 00:15
 Carol ha scritto:
A woman is selling this pattern on Etsy. I can't send you the link but the seller's name is ThistleandTwigCrafts
23.03.2023 - 09:10
 Věra ha scritto:
Jak mám převést rukávy a trup na jednu kruhovou jehličí, aby se dalo dobře pokračovat. děkuji
25.07.2022 - 20:52DROPS Design ha risposto:
Dobrý den, Věro, rukávy připletete k trupu v místech, kde jsou uzavřená oka pro průramky, takto: upletete přední díl, v místě průramku připletete na stejnou kruhovou jehlici jeden odložený rukáv, pak upleteze zadní díl, druhý rukáv a druhý přední díl. Podívejte se na tuto video-ukázku , kde je postup hezky vidět. Hodně zdaru! Hana
26.07.2022 - 05:26
 Maja Hulgaard Pedersen ha scritto:
Hej Jeg er ved at lave str. M og er kommet til der hvor man laver raglan. Men forstår ikke helt hvordan det skal gøres, er med på det med hvornår, men bare ikke helt hvordan. På retsiden skal jeg så strikke raglan når jeg kommer til mærket ved ærmet eller er det først ved sidste mærke for ærmet? Tusind tak for hjælpen
08.05.2022 - 14:26DROPS Design ha risposto:
Hei Maja. Fra retten strikk til det gjenstår 3 masker før 1. merke , strikk 2 masker rett sammen, strikk 2 masker rett (merketråden sitter mellom disse maskene), ta 1 maske løs av pinnen som om den skulle strikkes rett, 1 rett, løft den løse masken over. Du har nå felt 1 maske på hver side av 1. merketråd. Når du kommer til de andre merketrådene gjør du det samme. Når du skal felle fra vrangen strikker du til det gjenstår 3 masker før 4. merketråd, deretter strikkes det 2 masker vridd vrang sammen, 2 m vrang (merketråden sitter mellom disse maskene), 2 masker vrang sammen, Gjenta ved de 3 andre merketrådene. mvh DROPS Design
09.05.2022 - 13:06
Bente ørslev ha scritto:
Opskrift 169-1. Han nu strikket 10 cm og omkreds er 150 cm!!!!! Jeg strikker i str. small, slog op til str large, den nåede rundt om mig to en halv gang. Jeg er på garnnøgle 2, har købt 15, men er bange for at jeg kommer til at drukne i den jakke Er I helt sikker på at opskriften er rigtig.
29.04.2022 - 15:36DROPS Design ha risposto:
Hei Bente. Pga vrangmaskene foran og bak, bil plagget trekke seg sammen, Men det er viktig å overholde strikkefastheten som er oppgitt i oppskriften. Omkretsen nederst på jakken skal i str. S være 118 cm og i str. L 132 cm. mvh DROPS Design
02.05.2022 - 11:45
|
||||||||||
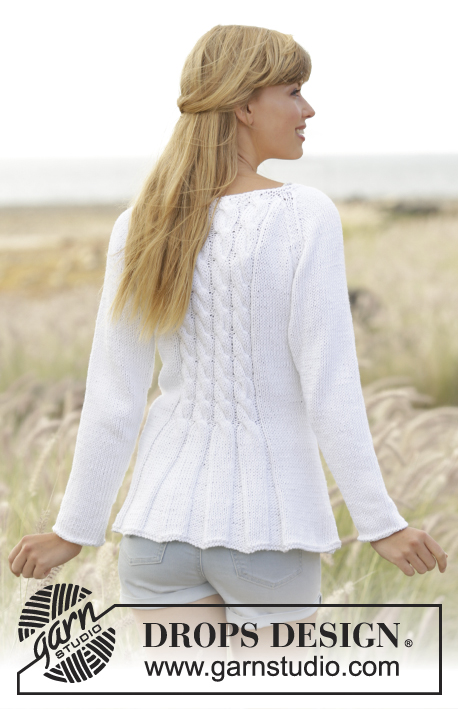
Romantic Twist#romantictwistcardigan |
||||||||||
 |
 |
|||||||||
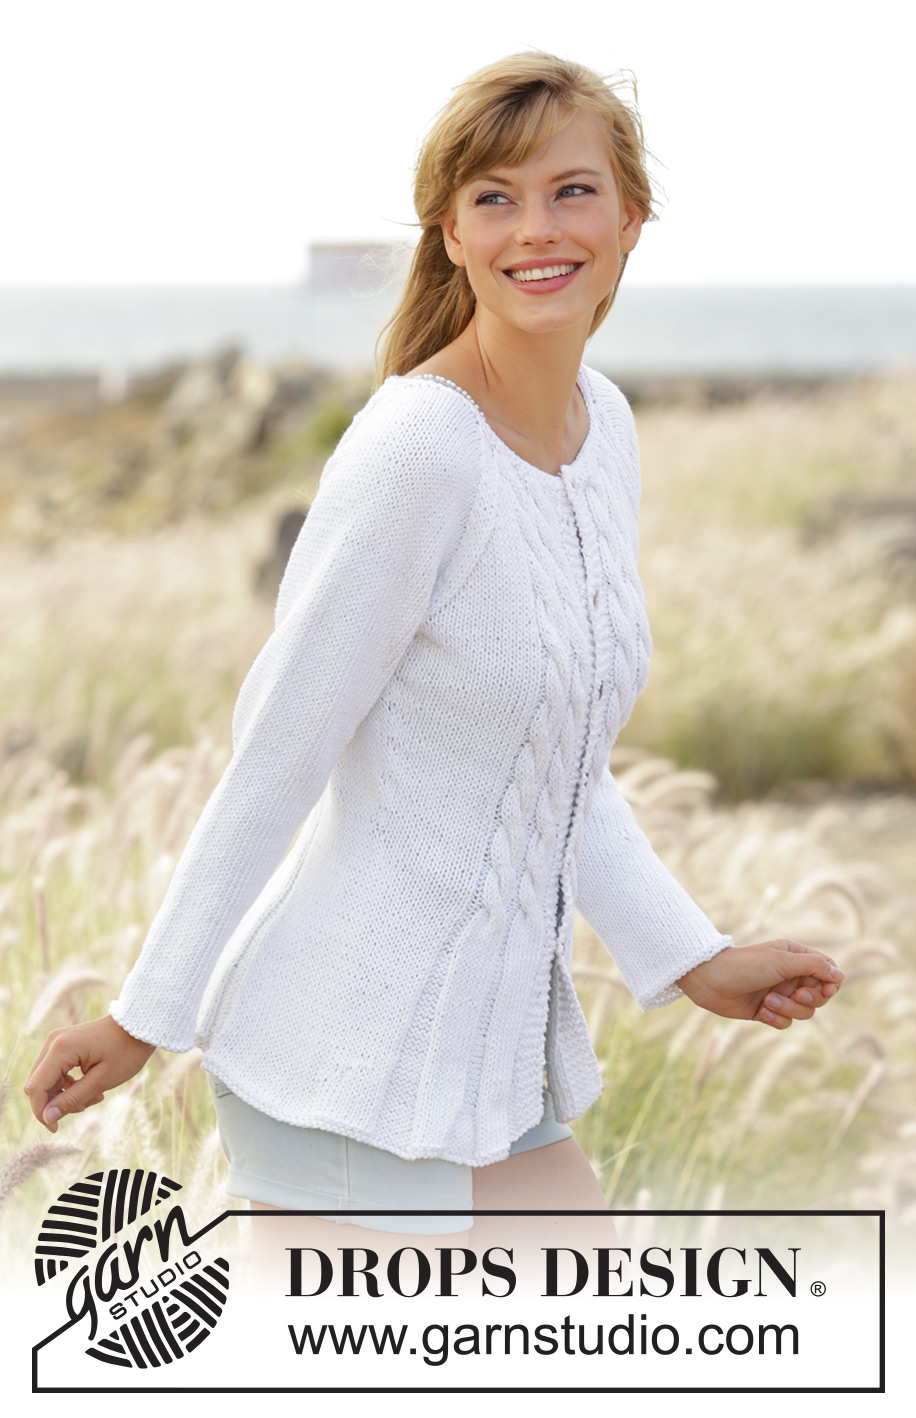
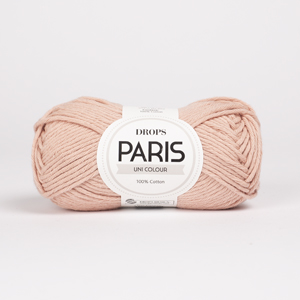
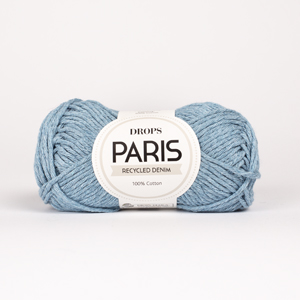
Cardigan aderente DROPS lavorato ai ferri con trecce e raglan in ”Paris”. Taglie: S - XXXL.
DROPS 169-1 |
||||||||||
|
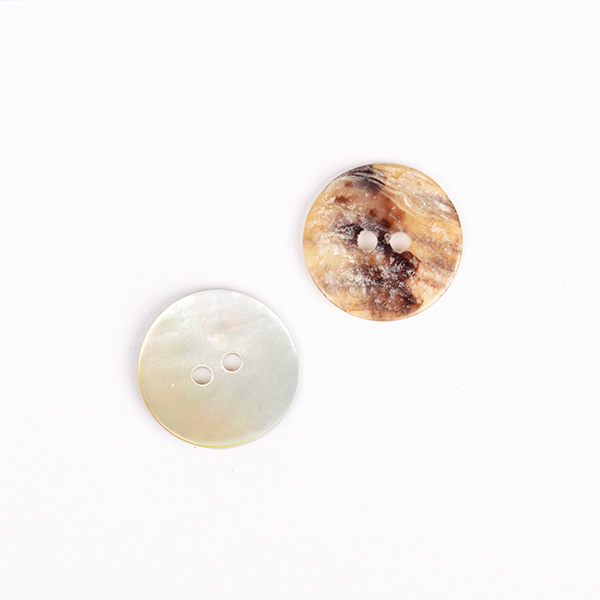
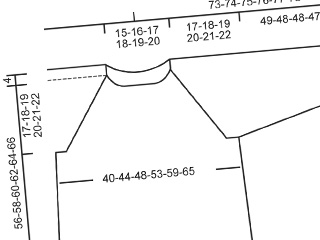
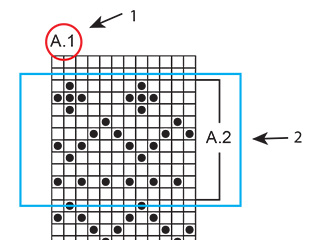
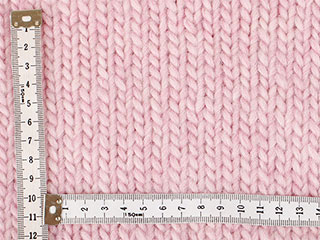
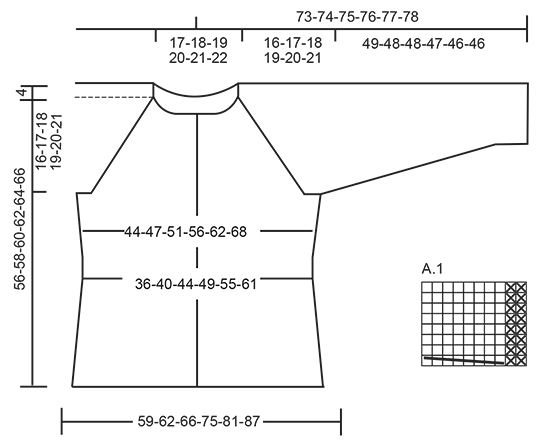
M LEGACCIO (avanti e indietro): Lavorare tutti i f a dir. 1 “costa” a m legaccio = 2 f dir. M LEGACCIO (lavorata in tondo): 1 “costa” a m legaccio = 2 giri. * 1 giro dir e 1 giro rov *, ripetere *-*. SUGGERIMENTO PER LE DIMINUZIONI: Diminuire 1 m lavorando 2 m insieme a rov. Diminuire in modo alternato all’inizio e alla fine delle sezioni a rov. MOTIVO: Vedere il diagramma A.1. Il diagramma mostra tutti i f del motivo visti dal diritto del lavoro. RAGLAN: Diminuire 2 m in ogni punto di passaggio tra il corpo e le maniche. Diminuire come segue dal diritto del lavoro: lavorare 2 m insieme a dir, 2 m dir (il segnapunti è tra queste m), passare 1 m a dir senza lavorarla, 1 m dir, accavallare la m passata sopra quella appena lavorata. Diminuire come segue dal rovescio del lavoro: 2 m insieme a rov ritorto, 2 m rov (il segnapunti è tra queste m), 2 m insieme a rov. SUGGERIMENTO PER IL LAVORO: Se la tensione del lavoro non è corretta in altezza e il lavoro risulta troppo tirato, le diminuzioni del raglan saranno troppo corte e lo scalfo troppo piccolo. Ciò può essere aggiustato lavorando 1 ferro in più senza diminuzioni distribuito in modo uniforme tra le diminuzioni. ASOLE: Diminuire per le asole sul bordo destro. 1 asola = lavorare insieme a dir la 2° e la 3° m dal centro davanti, poi fare 1 gettato. Diminuire per le asole quando il lavoro misura: TAGLIA S: 19, 26, 33, 40, 47 e 54 cm. TAGLIA M: 19, 26, 33, 40, 48 e 56 cm. TAGLIA L: 19, 26, 34, 42, 50 e 58 cm. TAGLIA XL: 19, 28, 36, 44, 52 e 60 cm. TAGLIA XXL: 19, 26, 33, 40, 47, 54 e 62 cm TAGLIA XXXL: 19, 26, 33, 40, 48, 56 e 64 cm ---------------------------------------------------------- CORPO: Lavorato avanti e indietro sui f circolari dal centro davanti. Avviare 216-228-240-266-286-306 m (comprese 5 m per il bordo a ogni lato verso il centro davanti) con i f circolari n° 5 mm con Paris. Lavorare 1 “costa” a M LEGACCIO – leggere la spiegazione sopra, poi lavorare come segue – dal diritto del lavoro: 5 m a m legaccio, * 8 m rov, 8 m dir *, ripetere *-* 2 volte in totale, 8 m rov, 27-33-39-44-54-64 m a m rasata, * 8 m rov, 8 m dir *, ripetere *-* 4-4-4-5-5-5 volte in totale, 8 m rov, 27-33-39-44-54-64 m a m rasata, * 8 m rov, 8 m dir *, ripetere *-* 2 volte in totale, 8 m rov, 5 m a m legaccio. Ripetere questo motivo verso l’alto. FARE ATTENZIONE ALLA TENSIONE DEL LAVORO! Quando il lavoro misura 5 cm, diminuire 1 m in tutte le sezioni a rov (= 11-11-11-12-12-12 diminuzioni per giro di diminuzioni) – LEGGERE IL SUGGERIMENTO PER LE DIMINUZIONI. Ripetere le diminuzioni ogni 3 cm altre 5 volte = 150-162-174-194-214-234 m. Diminuire per le ASOLE sul bordo destro – leggere la spiegazione sopra. Quando il lavoro misura 21 cm, lavorare come segue: 5 m a m legaccio, A.1 2 volte, 2 m rov, m rasata sulle 27-33-39-44-54-64 m successive, A.1 4-4-4-5-5-5 volte, 2 m rov, m rasata sulle 27-33-39-44-54-64 m successive, A.1 2 volte, 2 m rov, 5 m a m legaccio. Inserire 2 segnapunti nel lavoro; 40-43-46-51-56-61 m all’interno di ogni lato (dietro = 70-76-82-92-102-112 m). Quando il lavoro misura 23 cm, aumentare 1 m a ogni lato di tutti i segnapunti (= 4 aumenti), ripetere gli aumenti ogni 2½-3-3-3½-3½-4 cm altre 5 volte = 174-186-198-218-238-258 m. Quando il lavoro misura 40-41-42-43-44-45 cm, lavorare il f successivo (dal diritto del lavoro) come segue: lavorare 43-46-49-54-59-64 m, intrecciare le 6 m successive, lavorare 76-82-88-98-108-118 m, intrecciare le 6 m successive e lavorare le 43-46-49-54-59-64 m rimaste. Mettere il lavoro da parte e lavorare le maniche. MANICA: Lavorata in tondo con i f a doppia punta. Avviare 32-34-36-38-40-42 m con i f a doppia punta n° 5 mm con Paris. Lavorare 1 “costa”, poi lavorare a m rasata. Inserire 1 segnapunti all’inizio del giro (= centro sotto la manica). Quando il lavoro misura 8 cm, aumentare 2 m al centro sotto la manica. Aumentare ogni 3-2½-2½-2½-2-2 cm altre 13-13-14-15-16-16 volte = 60-62-66-70-74-76 m. Quando il lavoro misura 49-48-48-47-46-46 cm (misure più corte per le taglie più grandi a causa dell’arrotondamento della manica più lungo), intrecciare 6 m al centro sotto la manica = 54-56-60-64-68-70 m. Mettere il lavoro da parte e lavorare l’altra manica. SPRONE: Trasferire le maniche sullo stesso f circolare del corpo dove sono state intrecciate le m per gli scalfi = 270-286-306-334-362-386 m. Inserire un segnapunti in tutti i punti di passaggio tra le maniche e il corpo. Continuare il motivo come prima, ALLO STESSO TEMPO diminuire per il RAGLAN – leggere la spiegazione sopra. Diminuire in modo diverso sul corpo e sulle maniche. RAGLAN SULLE MANICHE: Diminuire a f alterni 16-17-17-18-18-19 volte, poi su ogni f 4-4-6-7-9-9 volte (= 20-21-23-25-27-28 volte in totale). RAGLAN SUL CORPO: Diminuire ogni 4 f 4-2-0-0-0-0 volte, a f alterni 11-16-19-21-19-16 volte, poi su ogni f 0-0-2-0-7-15 volte (= 15-18-21-21-26-31 volte in totale). Alla fine di tutte le diminuzioni, rimangono 130-130-130-150-150-150 m sul f. Sul f successivo diminuire 2 m su ogni treccia in A.1 = 114-114-114-132-132-132 m. Lavorare 2 “coste” su tutte le m, sul 1° f distribuire 20-16-12-26-22-18 diminuzioni in modo uniforme = 94-98-102-106-110-114 m. Intrecciare. CONFEZIONE: Cucire le aperture al centro sotto le maniche. Attaccare i bottoni sul bordo sinistro. |
||||||||||
Spiegazioni del diagramma |
||||||||||
|
||||||||||
 |
||||||||||
Avete terminato questo modello?Allora taggate le vostre foto con #dropspattern #romantictwistcardigan o inviatele alla #dropsfan gallery. Avete bisogno di aiuto con questo modello?Troverete 21 video tutorial, una sezione per i commenti/domande e molto altro guardando il modello su www.garnstudio.com © 1982-2026 DROPS Design A/S. Ci riserviamo tutti i diritti. Questo documento, compreso tutte le sue sotto-sezioni, è protetto dalle leggi sul copyright. Potete leggere quello che potete fare con i nostri modelli alla fine di ogni modello sul nostro sito. |
||||||||||
Con oltre 40 anni di esperienza nel design di modelli di maglia e uncinetto, DROPS Design offre la più estesa collezione di modelli gratuiti su internet - tradotti in 17 lingue. Ad oggi vi possiamo fornire 333 cataloghi e 12551 modelli - 9825 dei quali sono tradotti in Italiano.
Ci stiamo impegnando molto per darvi il meglio che vi possiamo offrire in termini di maglia e uncinetto, ispirazioni e consigli così come filati di grande qualità ad un prezzo incredibile! Volete utilizzare i nostri modelli per qualcosa d'altro oltre al vostro uso personale? Potete leggere tutto ciò che è consentito nel testo sul Copyright in basso su tutte le pagine dei nostri modelli. Buon lavoro!
Lasciare un commento sul modello DROPS 169-1
Noi saremmo felici di ricevere i tuoi commenti e opinioni su questo modello!
Se vuoi fare una domanda, fai per favore attenzione a selezionare la categoria corretta nella casella qui sotto per velocizzare il processo di risposta. I campi richiesti sono indicati da *.