
Categorie popolari
State cercando un filato?





























Commenti / Domande (57)
 Marlene ha scritto:
Hi, where can I find size measurements chart for this gorgeous pattern? Please advise. Thank you. (Asking as beginner knitter)
18.10.2026 - 07:44DROPS Design ha risposto:
Hi Marlene, There is a size chart at the bottom of the page, with all the measurements for the different sizes. Regards, Drops Team.
18.10.2026 - 10:49
 Ellen ha scritto:
Thank you for answering my earlier question. I’m now up to the armhole and I’m very excited with how it’s turning out. Could you please help with what happens next? Once I knit across following the armhole instructions, how do I get the yarn back to where I need to be able to knit the back piece? Do I slip the side front stitches onto spare yarn? Or do I cut the yarn and then attach it to the back piece? Thank you
03.10.2026 - 22:04DROPS Design ha risposto:
Dear Ellen, you can cut the thread and rejoin it in the back piece, while slipping the front stitches onto an extra cable or a thread, without working them. Happy knitting!
04.10.2026 - 20:25
Ellen ha scritto:
Hi, I’m about to start the first row of the A.2 diagrams. I’m ending up with the wrong number of stitches. I think I’m messing up the YO. In the first row of A.2A, is this how it goes?: K3 K2tog YO K1 YO Slip 1 PSSO K2 I’m ending up with 11 instead of 10. I’m just not sure where I’m making the mistake. Thanks! once I k2tog, I then do a YO, but DO I then K1 and then do another YO
25.09.2026 - 05:19DROPS Design ha risposto:
Hi Ellen, The decreases and increases should cancel each other out so the number of stitches remains the same: From right to left, K3, K2 together, make 1 yarn over, knit 1, make 1 yarn over, PSSO, K2 = 3 + 1 + 1 + 1 + 1 + 1 + 2 = 10 stitches. Regards, Drops Team.
25.09.2026 - 07:49
 Stephanie ha scritto:
Hi thanks for your reply I am up to a1a but my 2cm of band stitches look like moss stitch when working the 2cm is it 1row of purl then row of rib and back to row of purl and continue working till the 2cm are finished thank you
08.06.2026 - 09:50DROPS Design ha risposto:
Dear Stephanie, from RS you should P over P and K over K so that you get (2 garter st, K1, P1, K1, P2 = 7 front band sts from RS (= K2, P1, K1, P1, 2 garter sts from WS) and P2, K1, P1, K1, 2 garter sts = 7 front band sts from RS (= 2 garter sts, P1, K1, P1, K2 from WS). Inbetween these 7 sts you work rib K2, P2, from WS work K over K and P over P. After 2 cm you work A.1A instead of K2/P2, so that there is now a small cable in every K2-section from rib below (and you still have P2 in between). Can this help?
08.06.2026 - 16:09
Stephanie ha scritto:
Hi was just wondering when working diagram a1a do you start the 2nd row from the left or just continue working from right to left thank you
07.06.2026 - 12:57DROPS Design ha risposto:
Dear Stephanie, when working back and forth the charts are read from right to left on right side rows and from left to right on wrong side rows. So you start working from the left and knit stitches over the purl stitches of the previous row and purl stitches over the cable stitches of the previous row. Happy knitting!
08.06.2026 - 01:12
 Josephine ha scritto:
Hallo. Werden die Abnahmen für die Ärmel in Hin- oder in Rückreihen gemacht? Ich verstehe auch die Beschreibung der Abnahmen am Rückenteil nicht (für Größe S): 3 M je 0x, 2 M je 1x und 1 M je 1x. Wie ist das gemeint?
30.05.2026 - 16:21DROPS Design ha risposto:
Liebe Josephine, für die Armkugel soll man beidseitig abketten, so am Anfang einer Hin- sowie einer Rückreihe, dh man wird 2 Maschen am Anfang der 6 nächsten Reihe abketten (= 2 Maschen 3 Mal beidseitig), dann 1 Masche am Anfang der 12 nächsten Reihe abketten (1 Masche 6 Mal beidseitig), dan 2 M am Anfang der 2 nächsten Reihe abketten bis die Arbeit 12 cm misst dann 3 Maschen am Anfang der 2 nächsten Reihe abketten. Die restlichen Maschen abketten. Viel Spaß beim Stricken!
01.06.2026 - 08:11
 Sylvi Lian ha scritto:
Strikker en også fletter på vrangsida, eller bare vrangt og rett
15.04.2026 - 12:19DROPS Design ha risposto:
Hej Sylvi, du starter nederst i diagrammet og strikker fletterne på første pind fra retsiden, strikker tilbage med vrang ifølge 2.pind i diagrammet osv :)
15.04.2026 - 13:54
 Elene ha scritto:
Tusind tak for hurtigt svar. Men det var en bøn om hjælp til at omregne opskriften ! : ( ; ( ; ) V.h. E. B.
05.02.2026 - 11:40DROPS Design ha risposto:
Hej Elene, det kan vi desværre ikke :)
05.02.2026 - 11:42
Elene ha scritto:
TAK, men Str. XXXL med 108 masker giver en omkreds på 48 cm, når mønsterstrikning begynder. Min overarm er 35 cm i omkreds. På fotoet ser vi, at ærmet slutter tæt til armen. Hvordan kan jeg tilpasse ærmegabet, hvis jeg slår 80 masker op.+ 80 masker passer nemlig i omkreds til min arm, og aflukning til ærmegab Må vel kunne ændres, så ærmet sidder tæt til arm OG passer til ærmegabet på blusen ? v.h. E. B.
04.02.2026 - 16:37DROPS Design ha risposto:
Hej Elene, 108/24=45 cm i glatstrik - ribstrik trækker arbejdet sammen. Strikker du i DROPS Alpaca og er du sikker på at du har en strikkefasthed på 24 m =10 cm? .... men selvfølgelig må du ændre opskriften hvis det passer dig :)
05.02.2026 - 11:28
Elene ha scritto:
Hvordan får jeg ærmet til at passe til ærmegabet ? 108 masker giver et alt, alt for stort ærme, grimt !
03.02.2026 - 01:30DROPS Design ha risposto:
Hej Elene, det er ikke de 108 masker i ribstrik som bliver til ærmegabet. Bare følg opskriften så passer det sammen (hvis du følger strikkefastheden i højde og bredde) :)
04.02.2026 - 13:39
|
|||||||||||||||||||
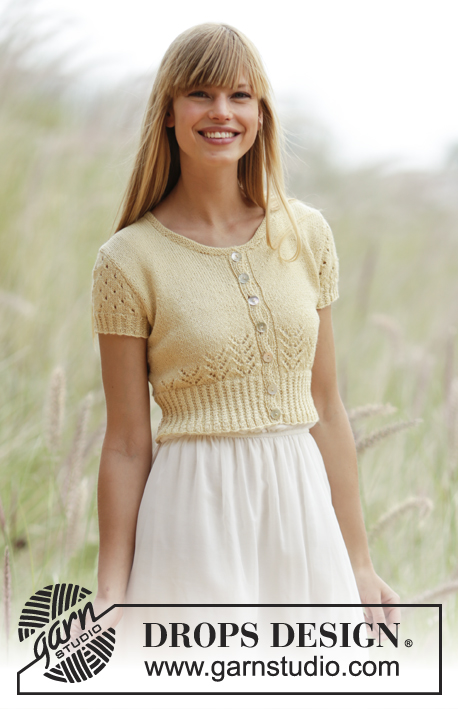
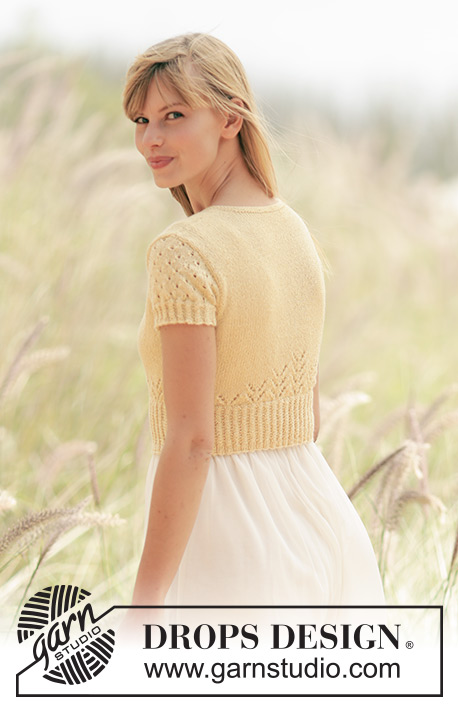
Spring Fling#springflingbolero |
|||||||||||||||||||
 |
 |
||||||||||||||||||
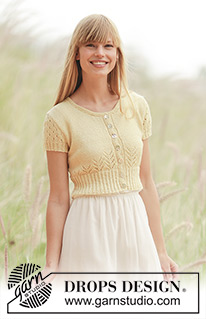
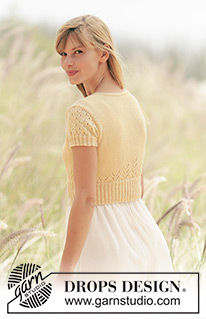
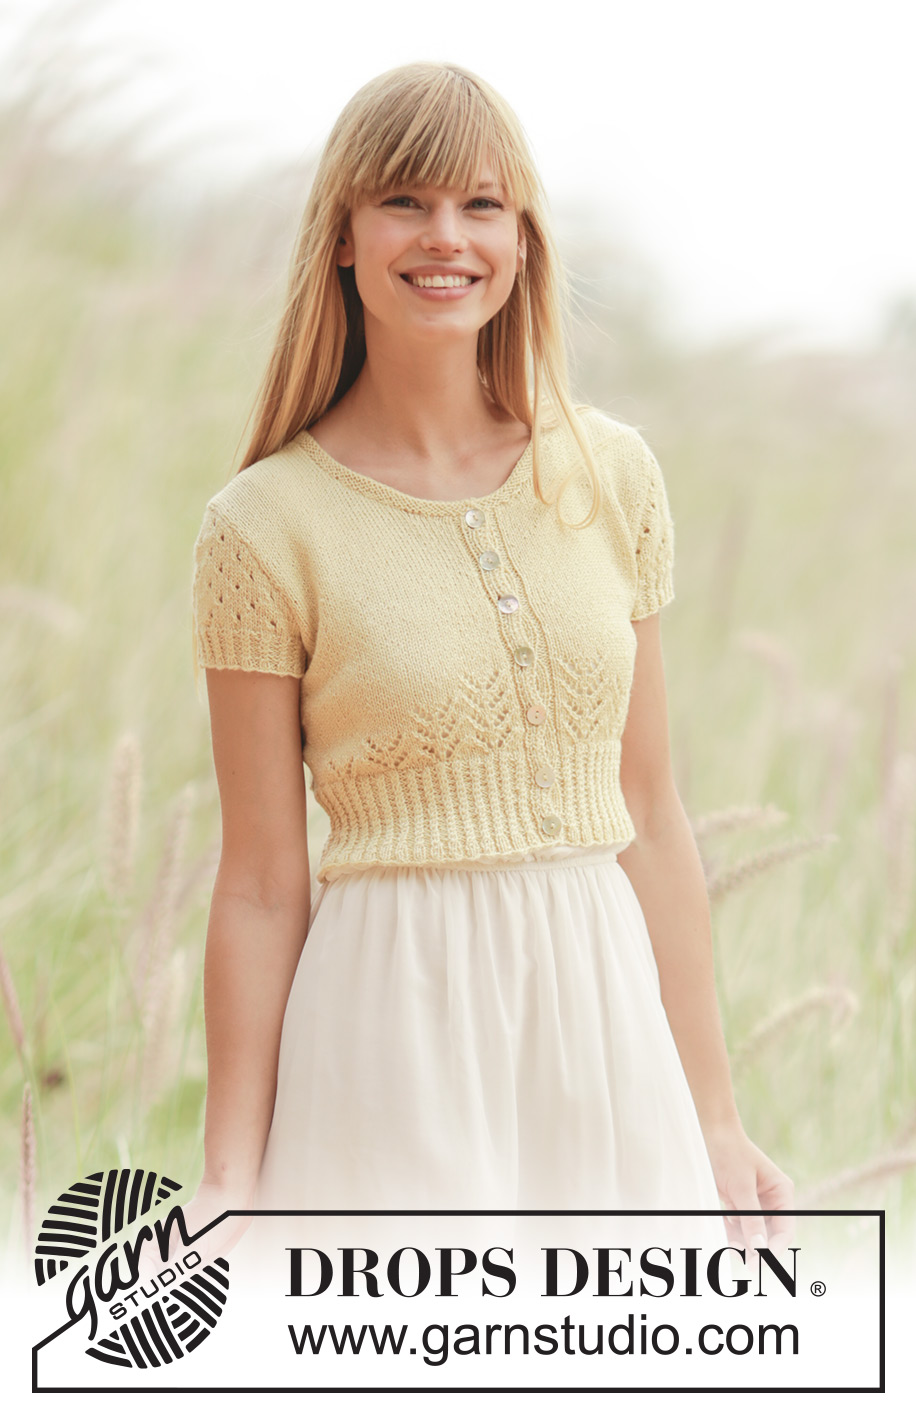
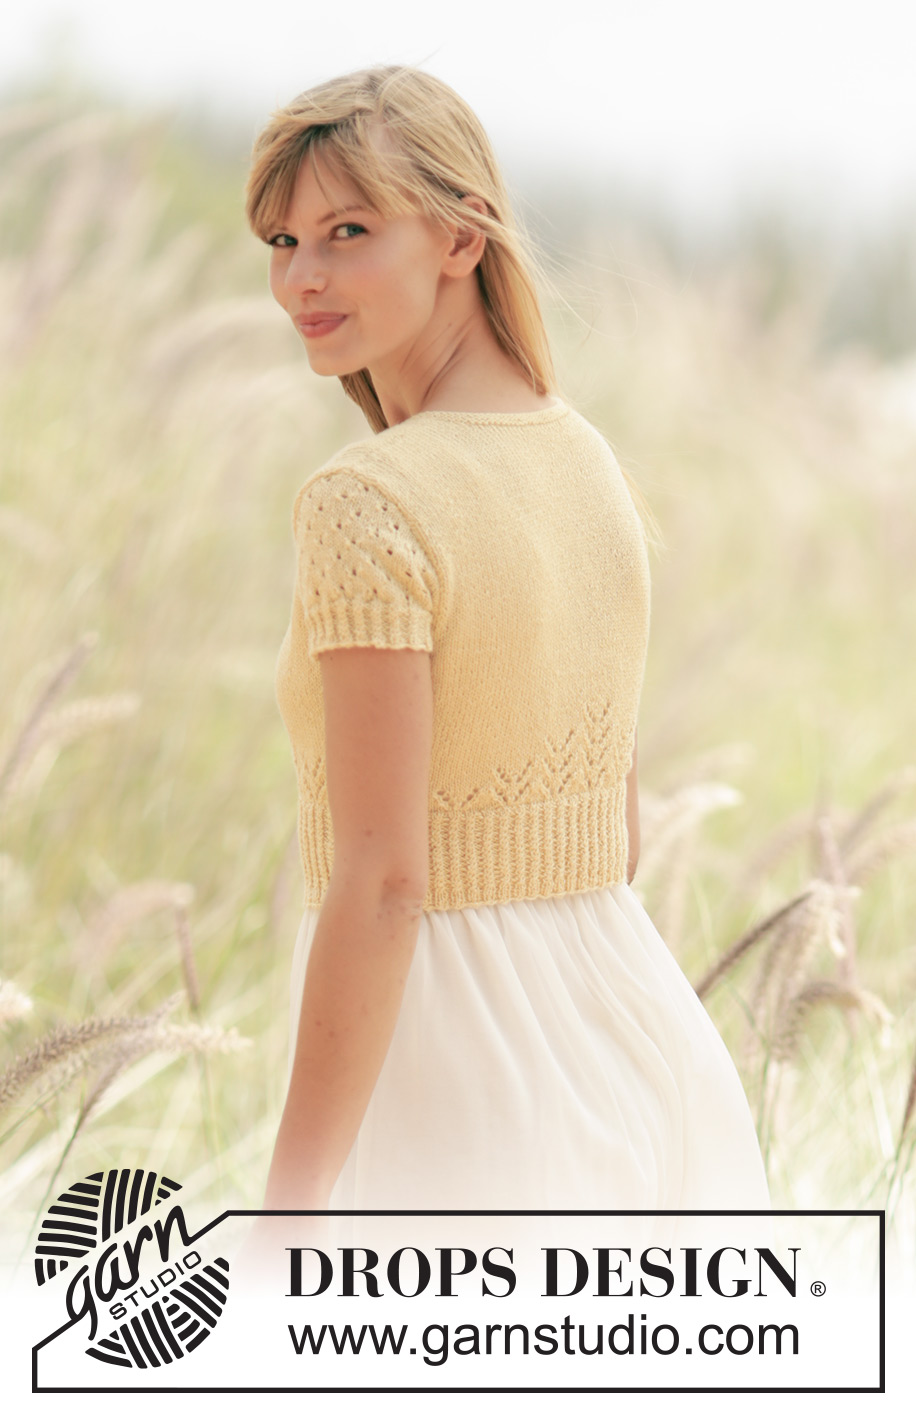
Bolero DROPS ai ferri, con motivo traforato e trecce, in "Alpaca". Taglie: Dalla S alla XXXL.
DROPS 169-11 |
|||||||||||||||||||
|
PUNTO LEGACCIO (avanti e indietro sui ferri): Lavorare tutti i ferri a dir. 1 “costa” a legaccio = 2 ferri a dir. MOTIVO: Vedere i diagrammi da A.1 a A.3. I diagrammi mostrano tutti i ferri del motivo, visti sul diritto del lavoro. SUGGERIMENTO PER GLI AUMENTI: Aumentare sempre sul diritto del lavoro, come segue: lavorare finché non rimangono 2 m prima del segno, 1 m gettata, 4 m a dir (il segno si trova al centro di queste 4 m), 1 m gettata (= 2 m aumentate). Nel corso del ferro successivo (= sul rovescio del lavoro), lavorare le m gettate a rov ritorto per evitare che si formino dei buchi. SUGGERIMENTO PER LE DIMINUZIONI: Per calcolare ogni quante m diminuire, sottrarre dal numero complessivo di m sui ferri (p.es: 232 m) le m dei bordi davanti (p.es 14 m) e dividere il risultato per il numero di diminuzioni da fare (p.es 47) = 4.6. Quindi, in questo caso, lavorare insieme alternativamente ogni 3a e 4a m e ogni 4a e 5a m (la prima volta lavorare insieme la 3a e la 4a m; la seconda volta lavorare insieme la 4a e la 5a m; la terza volta la 3a e la 4a m e così via). Non diminuire sulle m dei bordi davanti. ASOLE: Intrecciare le m per le asole sul bordo davanti destro. 1 asola = lavorare insieme a dir ritorto la 3a e la 4a m dal bordo e fare 1 m gettata. Nel corso del ferro successivo, lavorare la m gettata seguendo le coste. Intrecciare le m per le asole quando il lavoro misura: TAGLIA S: 2, 7, 11, 15, 19, 23 e 27 cm TAGLIA M: 2, 7, 12, 17, 21, 25 e 29 cm TAGLIA L: 2, 7, 12, 17, 21, 25 e 29 cm TAGLIA XL: 2, 7, 12, 17, 22, 27 e 31 cm TAGLIA XXL: 2, 7, 12, 17, 22, 27 e 31 cm TAGLIA XXXL: 2, 8, 13, 18, 23, 28 e 33 cm ---------------------------------------------------------- DAVANTI e DIETRO: Si lavorano avanti e indietro sui ferri circolari a partire dal centro, davanti. Avviare 232-256-280-312-356-392 m (comprese 7 m per il bordo davanti da ciascun lato) sui ferri circolari n° 2,5 con il filato Alpaca. Lavorare 1 ferro a rov sul rovescio del lavoro. Lavorare il ferro successivo come segue, sul diritto del lavoro: 2 m vivagno a punto legaccio, 1 m dir, 1 m rov, 1 m dir, 2 m rov (= 7 m per il bordo davanti), * 2 m dir, 2 m rov * ripetere da *-* finché sui ferri non rimangono 9 m, finire con 2 m dir e 7 m per il bordo davanti lavorate come segue: 2 m rov, 1 m dir, 1 m rov, 1 m dir, 2 m vivagno a punto legaccio. Proseguire a coste in questo modo per 2 cm – Ricordarsi di intrecciare le m per le asole sul bordo davanti destro – vedere le spiegazioni sopra. Lavorare il ferro successivo come segue, sul diritto del lavoro: 7 m per il bordo davanti come prima, lavorare il diagramma A.1A finché non rimangono 9 m, diagramma A.1B (= 2 m) e finire con 7 m per il bordo davanti come prima. Proseguire seguendo il motivo in questo modo finché il lavoro non misura 8-8-8-10-10-10 cm. Lavorare ora 1 ferro a dir sul diritto del lavoro e, allo stesso tempo, diminuire 47-55-59-67-79-83 m a intervalli regolari - VEDERE IL SUGGERIMENTO PER LE DIMINUZIONI = 185-201-221-245-277-309 m. Passare ai ferri circolari n° 3 e lavorare 1 ferro a rov (continuare a lavorare le m del bordo davanti come prima). Inserire 1 segno dopo le prime 50-54-59-65-73-81 m e un segno prima delle ultime 50-54-59-65-73-81 m (= tra i due segni ci sono 85-93-103-115-131-147 m per il dietro). Lavorare il ferro successivo come segue, sul diritto del lavoro: 7 m per il bordo davanti come prima, lavorare il diagramma A.2A sulle 40-40-50-50-60-70 m successive (= 4-4-5-5-6-7 ripetizioni di 10 m), lavorare 3-7-2-8-6-4 m a maglia rasata, segno, lavorare 8-2-7-3-1-9 m a maglia rasata, lavorare il diagramma A.2C sulle 60-80-80-100-120-120 m successive (= 6-8-8-10-12-12 ripetizioni di 10 m), lavorare il diagramma A.2B 1 volta (= 9 m), 8-2-7-3-1-9 m a maglia rasata, segno, 3-7-2-8-6-4 m a maglia rasata, lavorare il diagramma A.2C sulle 40-40-50-50-60-70 m successive e finire con 7 m per il bordo davanti come prima. LEGGERE TUTTE LE INDICAZIONI SUCCESSIVE PRIMA DI PROSEGUIRE e RICORDARSI LA TENSIONE DEL LAVORO! MOTIVO: proseguire seguendo il motivo e a maglia rasata finché non è stata completata una intera ripetizione del motivo in verticale. Lavorare ora il motivo in modo uguale ma lavorare una ripetizione in meno del motivo ai lati, quindi lavorare il diagramma A.2A 3-3-4-4-5-6 volte in tutto, lavorare 13-17-12-18-16-14 m a maglia rasata, segno, 18-12-17-13-11-19 m a maglia rasata, diagramma A.2C 4-6-6-8-10-10 volte in tutto, diagramma A.2B 1 volta, 18-12-17-13-11-19 m a maglia rasata, segno, 13-17-12-18-16-14 m a maglia rasata, diagramma A.2C 3-3-4-4-5-6 volte in tutto. Proseguire seguendo il motivo in questo modo lavorando 1 ripetizione in meno del motivo ai lati finché non è stata lavorata 1 ripetizione intera sopra l’ultima ripetizione del motivo al centro sul davanti e al centro, sul dietro. Proseguire lavorando tutte le m a maglia rasata fino alla fine del lavoro. AUMENTI AI LATI: ALLO STESSO TEMPO, quando il lavoro misura 10-10-10-12-12-12 cm, aumentare 1 m prima/dopo ognuno dei 2 segni ai lati (= 4 m aumentate). Ripetere questi aumenti ogni 1½-1½-2-2-2½-2½ cm 6-6-6-6-5-5 volte in tutto = 209-225-245-269-297-329 m. SCALFI: Quando il lavoro misura 20-21-22-23-24-25 cm, lavorare il ferro successivo come segue: Lavorare 53-57-61-67-73-81 m come prima (= davanti), intrecciare 6-6-8-8-10-10 m per lo scalfo, lavorare 91-99-107-119-131-147 m come prima (= dietro), intrecciare 6-6-8-8-10-10 m per lo scalfo, lavorare le rimanenti 53-57-61-67-73-81 m come prima (= davanti). Finire i davanti e il dietro separatamente. DIETRO: = 91-99-107-119-131-147 m. Lavorare a maglia rasata avanti e indietro e intrecciare per gli scalfi all’inizio di ogni ferro da ciascun lato, come segue: Intrecciare 3 m 0-0-0-1-1-2 volte, 2 m 1-2-3-4-5-6 volte e 1 m 1-2-3-3-6-7 volte = sui ferri rimangono 85-87-89-91-93-97 m. Quando il lavoro misura 36-38-40-42-44-46 cm, intrecciare le 33-33-35-35-37-37 m centrali per lo scollo e finire ogni spalla separatamente. All’inizio dei 2 ferri successivi, intrecciare 1 m per lo scollo = per la spalla rimangono 24-25-25-26-26-28 m. Proseguire finché il lavoro non misura 38-40-42-44-46-48 cm; intrecciare le m senza stringere troppo il filo. DAVANTI DESTRO: = 53-57-61-67-73-81 m. Lavorare a maglia rasata avanti e indietro sui ferri circolari con 7 m per il bordo davanti come prima e intrecciare per lo scalfo all’inizio di ogni ferro sul lato come indicato per il dietro. ALLO STESSO TEMPO, quando il lavoro misura 28-30-30-32-32-34 cm, mettere in attesa su 1 ferma maglie le prime 12-12-13-13-14-14 m del ferro per lo scollo (lavorare le m prima di trasferirle sul ferma maglie per evitare di dover tagliare e fermare il filo). Intrecciare per lo scollo, all’inizio di ogni ferro dal centro davanti, come segue: Intrecciare 3 m 1 volta, 2 m 4 volte, e 1 m 3 volte. Dopo aver intrecciato tutte le m per lo scalfo e per lo scollo, per la spalla rimangono 24-25-25-26-26-28 m. Proseguire finché il lavoro non misura 38-40-42-44-46-48 cm; intrecciare le m senza stringere troppo il filo. DAVANTI SINISTRO: Lavorare come indicato per il DAVANTI DESTRO ma a specchio - ATTENZIONE: Non intrecciare le m per le asole sul davanti sinistro. MANICHE: Si lavorano in tondo sui ferri a doppia punta; passare ai ferri circolari quando inizia l’arrotondamento della manica. Avviare 76-80-88-92-100-108 m sui ferri a doppia punta n° 2,5 con il filato Alpaca. Lavorare 1 giro a dir. Proseguire a coste = 2 m dir / 2 m rov. Quando il lavoro misura 1 cm, lavorare il diagramma A.1A. Quando il lavoro misura 3-3-3-4-4-4 cm, lavorare il giro successivo come segue: Intrecciare le prime 3-3-4-4-5-5 m, 70-74-80-84-90-98 m dir e intrecciare le ultime 3-3-4-4-5-5 m. Passare ai ferri circolari n° 3 e lavorare avanti e indietro sui ferri circolari seguendo il diagramma A.3. ALLO STESSO TEMPO, intrecciare per l’arrotondamento della manica, all’inizio di ogni ferro da ciascun lato, come segue: Intrecciare 2 m 3-4-4-4-4-5 volte e 1 m 6-7-9-9-12-12 volte. Poi intrecciare 2 m all’inizio di ogni ferro da ciascun lato finché il lavoro non misura 11-12-13-15-17-18 cm. Intrecciare 3 m all’inizio dei 2 ferri successivi; intrecciare poi le rimanenti m senza stringere troppo il filo. La manica misura ca.12-13-14-16-18-19 cm. Lavorare la seconda manica in modo uguale. CONFEZIONE: Cucire le spalle. Montare le maniche. COLLO: Con i ferri circolari n° 2,5, riprendere sul diritto del lavoro, ca.da 118 a 138 m intorno allo scollo (comprese le maglie del davanti messe in attesa sui ferma maglie). Lavorare 5 ferri a dir; intrecciare le m senza stringere troppo il filo lavorando le m a dir sul diritto del lavoro. Attaccare i bottoni sul davanti sinistro. |
|||||||||||||||||||
Spiegazioni del diagramma |
|||||||||||||||||||
|
|||||||||||||||||||
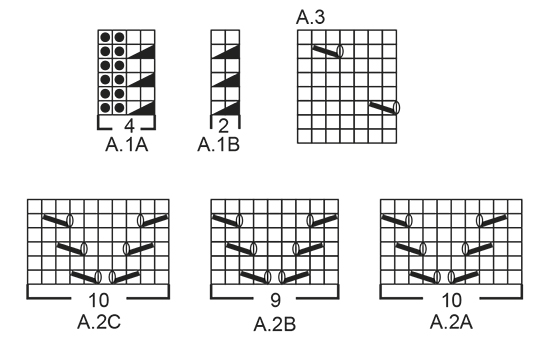 |
|||||||||||||||||||
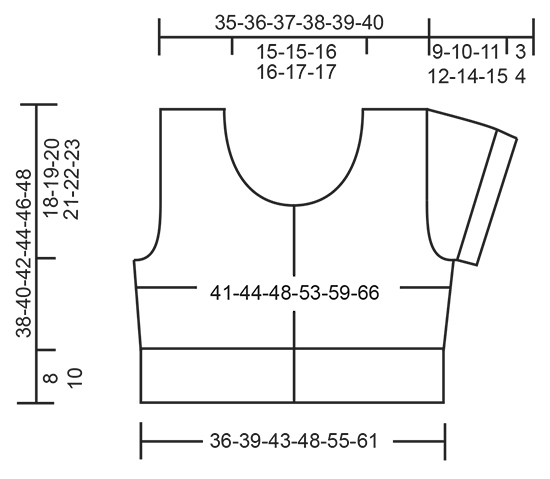 |
|||||||||||||||||||
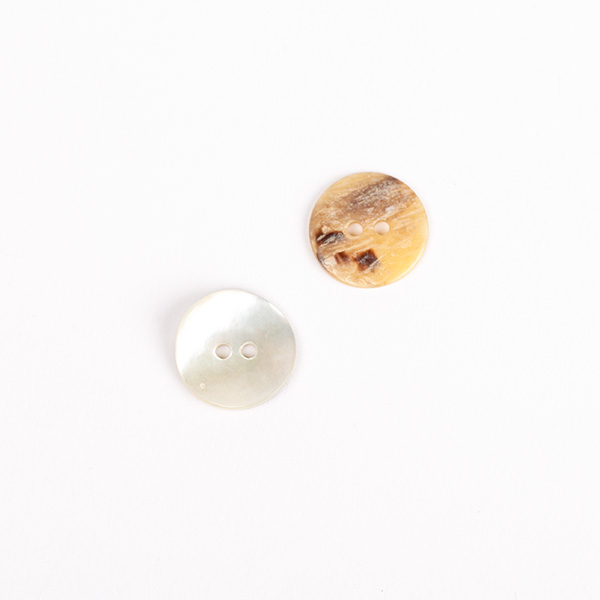
Avete terminato questo modello?Allora taggate le vostre foto con #dropspattern #springflingbolero o inviatele alla #dropsfan gallery. Avete bisogno di aiuto con questo modello?Troverete 18 video tutorial, una sezione per i commenti/domande e molto altro guardando il modello su www.garnstudio.com © 1982-2026 DROPS Design A/S. Ci riserviamo tutti i diritti. Questo documento, compreso tutte le sue sotto-sezioni, è protetto dalle leggi sul copyright. Potete leggere quello che potete fare con i nostri modelli alla fine di ogni modello sul nostro sito. |
|||||||||||||||||||



Con oltre 40 anni di esperienza nel design di modelli di maglia e uncinetto, DROPS Design offre la più estesa collezione di modelli gratuiti su internet - tradotti in 17 lingue. Ad oggi vi possiamo fornire 333 cataloghi e 12536 modelli - 9810 dei quali sono tradotti in Italiano.
Ci stiamo impegnando molto per darvi il meglio che vi possiamo offrire in termini di maglia e uncinetto, ispirazioni e consigli così come filati di grande qualità ad un prezzo incredibile! Volete utilizzare i nostri modelli per qualcosa d'altro oltre al vostro uso personale? Potete leggere tutto ciò che è consentito nel testo sul Copyright in basso su tutte le pagine dei nostri modelli. Buon lavoro!
Lasciare un commento sul modello DROPS 169-11
Noi saremmo felici di ricevere i tuoi commenti e opinioni su questo modello!
Se vuoi fare una domanda, fai per favore attenzione a selezionare la categoria corretta nella casella qui sotto per velocizzare il processo di risposta. I campi richiesti sono indicati da *.