Commenti / Domande (46)
![]() Sarah LEBIGOT ha scritto:
Sarah LEBIGOT ha scritto:
Bonjour, Pour la seconde partie, il est indiqué de la faire en sens inverse et je ne comprend pas comment lire les diagrammes en sens inverse? Merci pour vos explications.
10.01.2017 - 00:11DROPS Design ha risposto:
Bonjour Mme Lebigot, la 2ème partie doit se faire en miroir, c'est-à-dire tricotez les diagrammes comme la 1ère partie, mais montez la maille de la fente de l'autre côté pour avoir 2 m point mousse en fin de rang sur l'endroit et plus en début de rang sur l'endroit. Bon tricot!
10.01.2017 - 09:47
![]() LeeAnn ha scritto:
LeeAnn ha scritto:
Ok this still did not help me please type out how to start the second piece where in the pattern chart is it started ????? Sorry to be such a pain but I have already ripped out second piece 3 times and am frustrated.
15.09.2016 - 16:43DROPS Design ha risposto:
Dear LeeAnn, work A.1,A.2, A.3 as on 1st piece, but after they have been worked 1 time in height, work A.4 and A.5 reversed, ie instead of working A.4, stocking st, A.5, work from RS on 2nd piece: A.5, stocking st and A.4. When piece measures 30 cm, cast on 1 st at the end of next row from RS (instead of from WS) an work this st in garter st. Hope this will help. Remember you can also get further individual assistance from the store where you bought your yarn. Happy knitting!
15.09.2016 - 17:25
![]() LeeAnn ha scritto:
LeeAnn ha scritto:
I am even more confused regarding so classy please read all my questions which basically the same except the last one being is the second piece starting with RS or WS. the answer I got was not answering my question but rather telling me how to do the second piece . there were 2 answers telling me how to do the second piece both different , so which one is correct lPease advise how to correctly do second piece and if I am starting the chart on the RS or the WS Thank you
15.09.2016 - 15:14DROPS Design ha risposto:
Dear LeeAnn, you are right, sorry for very first answer, at the beg of 2nd piece, work as first piece, but then work reversed all inc/moss sts so that both pieces will be mirrored. Read diagram from the bottom corner on the right side towards the left from RS and from the left towards the right from WS, ie as on 1st piece. Happy knitting!
15.09.2016 - 16:12
![]() LeeAnn ha scritto:
LeeAnn ha scritto:
I am making the So classy poncho, and I know the second piece is worked in reverse, does that also mean I will be starting the chart with the wrong side of the garment?
15.09.2016 - 03:19DROPS Design ha risposto:
Dear LeeAnn, on 2nd piece work diagrams A.1-A.3 as for 1st piece, but when you work A.4 and A.5, work A.5 over the first 10 sts, stocking st and finish with A.4. Then cast on 1 st at the end of row from RS (instead of at the end of row from WS). Then work A.1,A.2 and A.3 with 1 st in garter st at the beg of row and 2 sts in garter st at the end of row. Happy knitting!
15.09.2016 - 08:59
![]() LeeAnn ha scritto:
LeeAnn ha scritto:
I am confused for the second piece of the poncho, the pattern says Cast on and work the same way but reversed. So where am I starting and what is meant by reversed? Thank You.
01.09.2016 - 04:38DROPS Design ha risposto:
Dear LeeAnn, when working reversed you will work 2nd piece as follows from RS: 1 edge st, A.3, repeat A.2, A.1 and 1 edge st - then when casting on 1 st when piece measures 30, cast on at the end of a row from RS (instead of from WS). Happy knitting!
01.09.2016 - 10:01
![]() Yuliya ha scritto:
Yuliya ha scritto:
Thank you so much for the wonderful pattern!! The yarn was so light with heavenly texture. When ordering yarn from you for size in S-M to be on the safe side I ordered 50 gr more than you recommended. But actually used only 250gr for the whole Poncho, 50gr less was suggested. Yay!!!! It's so-so soft and Weat - such a lovely natural color. Love it!
20.06.2016 - 05:29
![]() Claudia ha scritto:
Claudia ha scritto:
I am a bit confused about beginning this pattern, is row 1 and 2 knitted to make the edge or does it start with the A1 and A2 combination. Also A1 =5 stitch and A2 is 8 therefore if cast on 107 I cannot have 12 times A1 and A2 in the width since (5+8) x 12 =156. Is that correct?
30.05.2016 - 03:02DROPS Design ha risposto:
Dear Claudia, you work on 1st round diagrams A.1, A.2 and A.3 with 1 edge st in garter st, ie in size M: 1 edge st, A.1 1 time in width (= 5 sts), repeat A.2 a total of 12 times in width (= 12 x 8 sts), A.3 1 time in width (= 4 sts) and 1 edge st in garter st = 107 sts. Happy knitting!
30.05.2016 - 10:32
![]() Tonje ha scritto:
Tonje ha scritto:
Da forstår jeg ikke når A2 og A3 skal strikkes?
14.03.2016 - 15:20DROPS Design ha risposto:
Hej Tonje, jo du strikker A1 en gang i bredden, A2 11-12-13-14 ganger i bredden og sidst A3 en gang i bredden. Spørg gerne hos din lokale DROPS forhandler hvis du har købt garnet der. God fornøjelse!
15.03.2016 - 15:52
![]() Tora ha scritto:
Tora ha scritto:
1+5+(11x8)+4+1=99.
14.03.2016 - 13:14
![]() Tonje ha scritto:
Tonje ha scritto:
Jeg får ikke mønsteret til å stemme med forklaring. A1 og A2 er til sammen 13 masker. Det står at dette skal strikkes 11 ganger i bredden, men det går altså ikke opp når man i utgangspunktet har 99 masker. Hva er det jeg gjør feil her eller ikke forstår?
14.03.2016 - 12:24DROPS Design ha risposto:
Hej. Det är kun A.2 som du stickar 11 gånger på bredden (A.1 stickas 1 gång). Lycka till!
14.03.2016 - 13:44
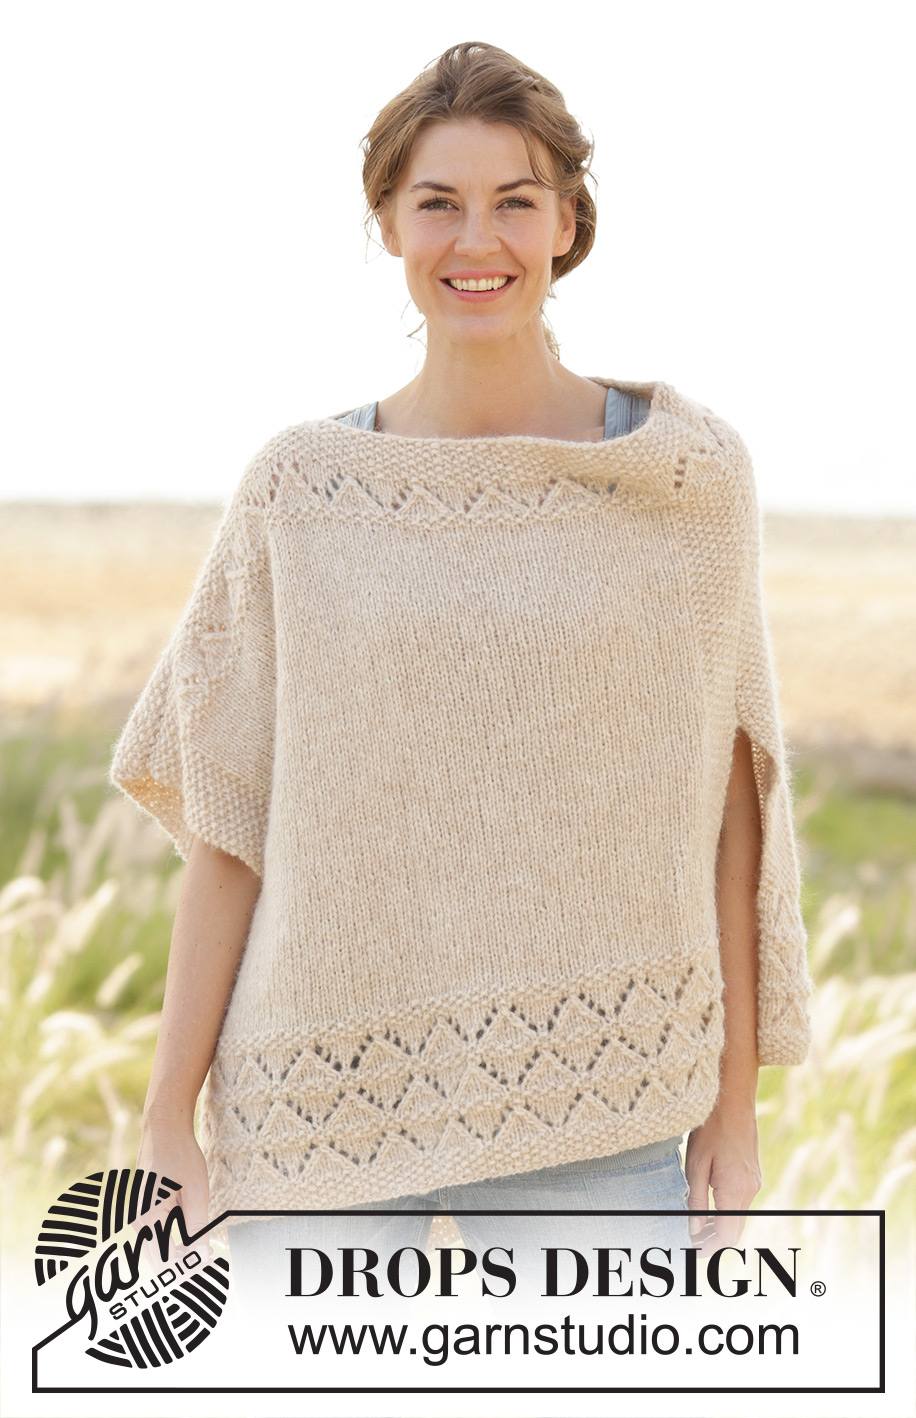
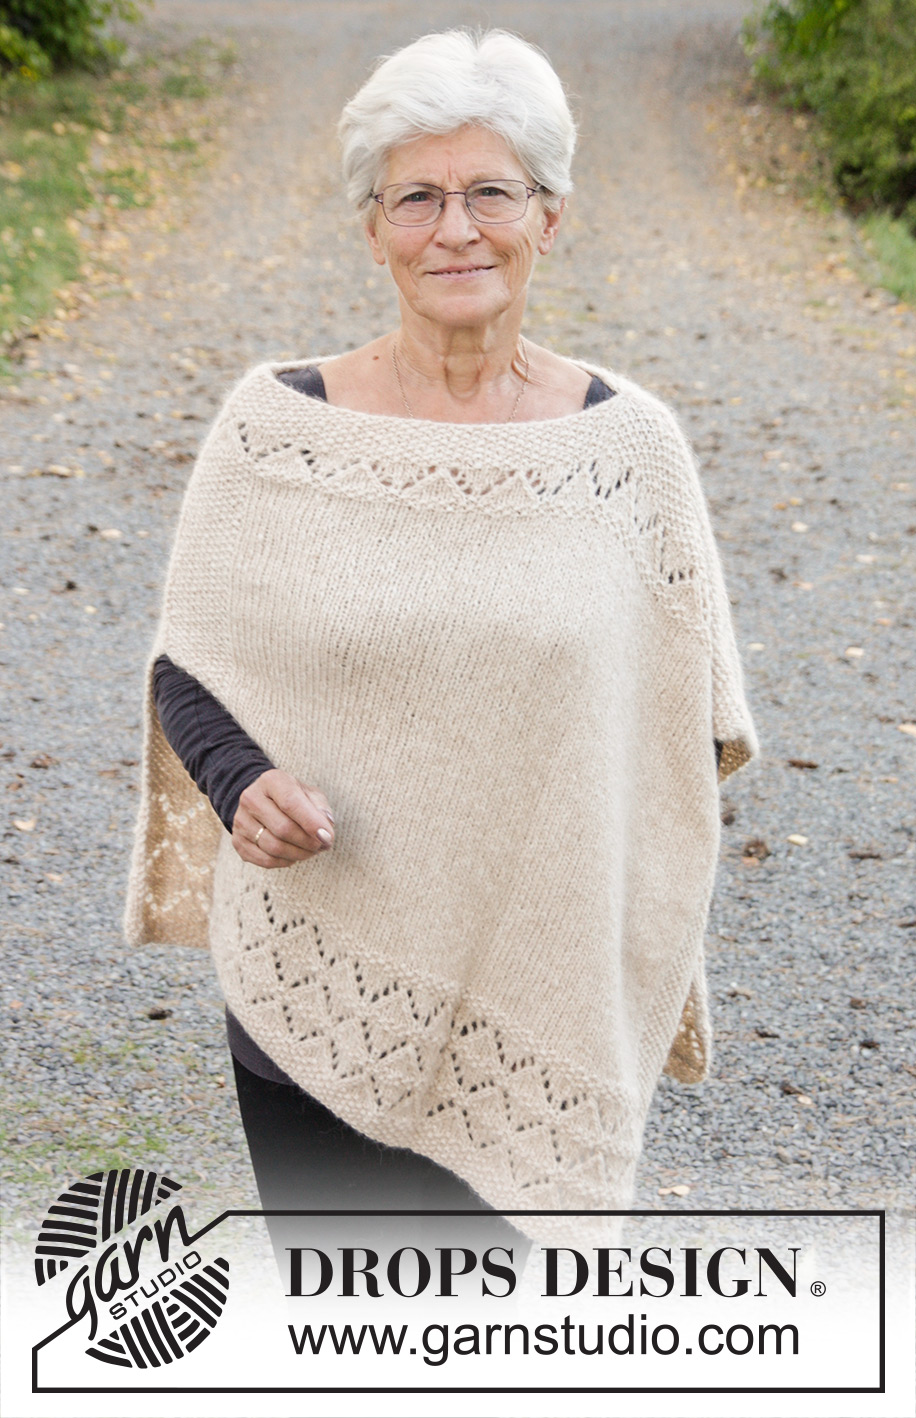
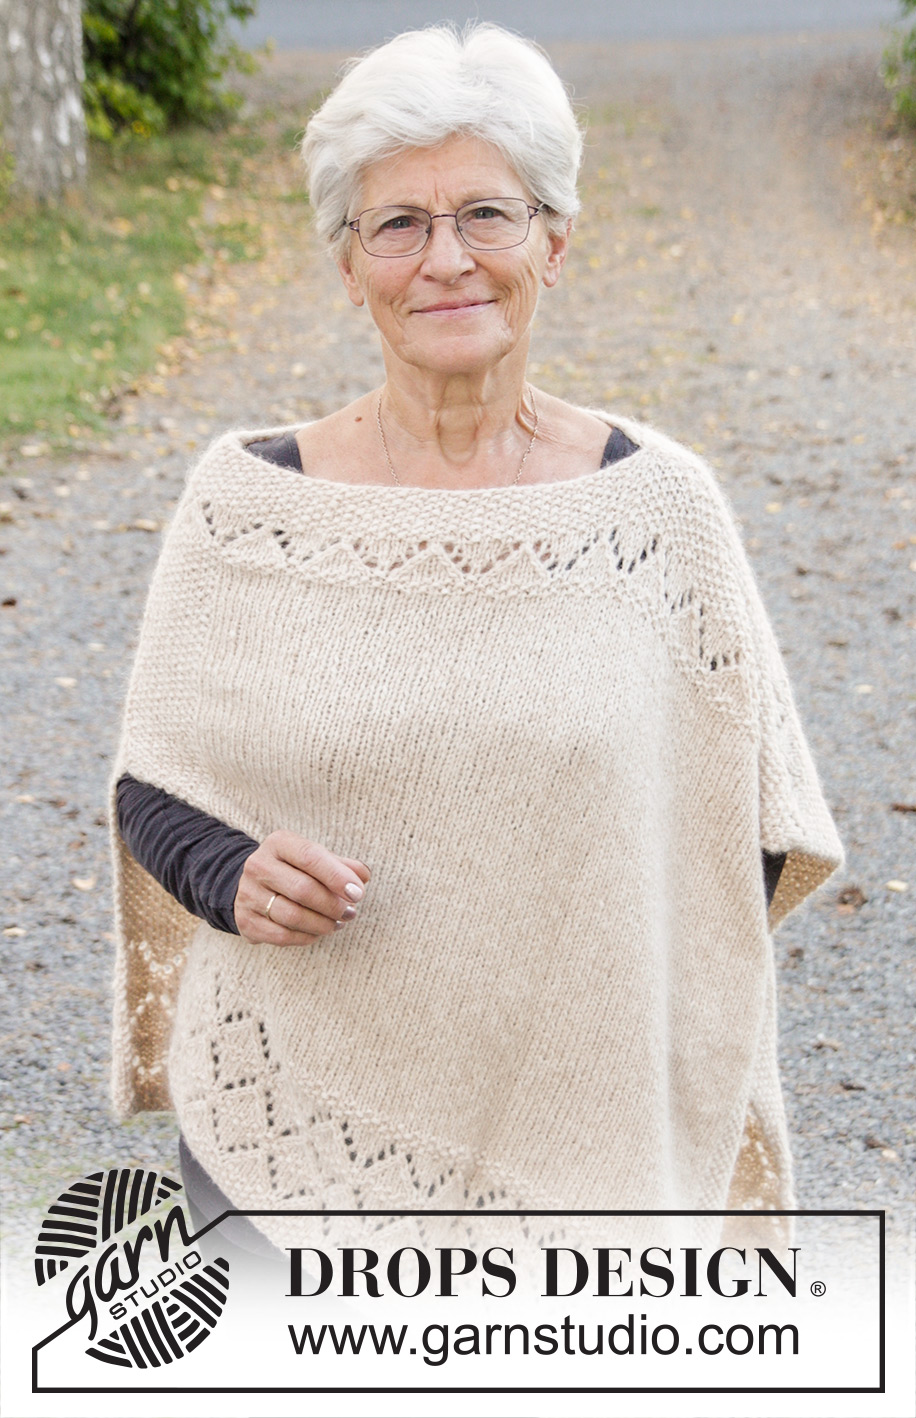
So Classy!#soclassyponcho |
||||||||||||||||||||||
 |
 |
|||||||||||||||||||||
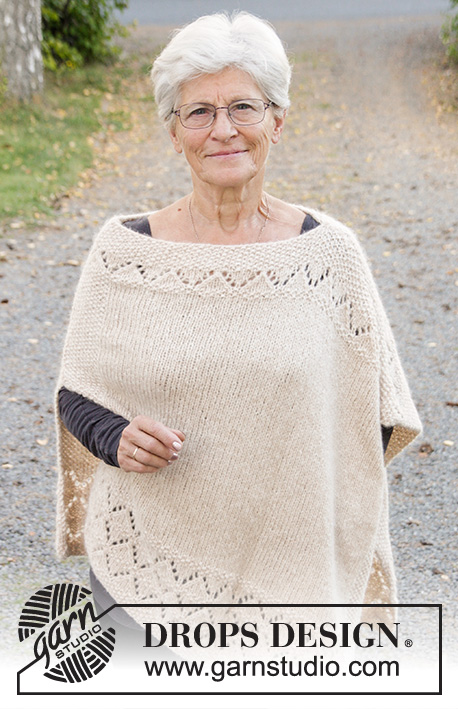
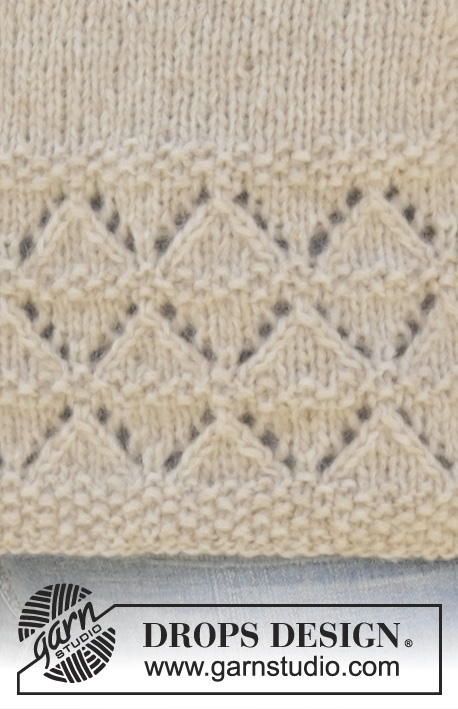
Poncho DROPS ai ferri, a grana di riso e con motivo traforato, in "Air". Taglie: Dalla S alla XXXL.
DROPS 170-28 |
||||||||||||||||||||||
|
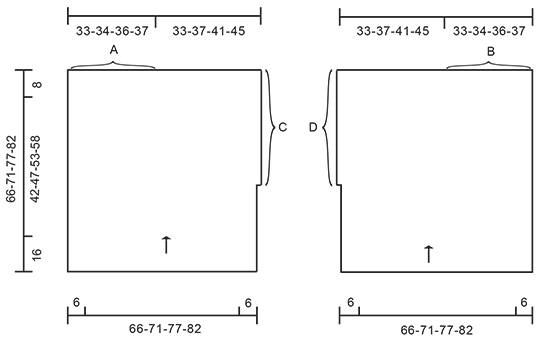
PUNTO LEGACCIO (avanti e indietro sui ferri): Lavorare tutti i ferri a dir. 1 “costa” a legaccio = 2 ferri a dir. MOTIVO: Vedere i diagrammi da A.1 a A.5. I diagrammi mostrano tutti i ferri del motivo, visti sul diritto del lavoro. ---------------------------------------------------------- PONCHO: Si lavora avanti e indietro sui ferri circolari in 2 parti, cucite tra loro alla fine. Avviare 99-107-115-123 m (compresa 1 m vivagno a punto legaccio da ciascun lato) sui ferri circolari n° 6 con il filato Air. Lavorare il motivo, come segue: 1 m vivagno a PUNTO LEGACCIO – vedere le spiegazioni sopra, diagramma A.1 (= 5 m), ripetere il diagramma A.2 (= 8 m) 11-12-13-14 volte in larghezza, diagramma A.3 (= 4 m), 1 m vivagno a punto legaccio. ATTENZIONE: lavorare sempre le m vivagno a punto legaccio fino alla fine del lavoro; fanno parte della grana di riso. RICORDARSI LA TENSIONE DEL LAVORO ! Dopo aver completato i diagrammi da A.1 a A.3 1 volta in verticale, proseguire come segue, sul diritto del lavoro: Lavorare il diagramma A.4 (ATTENZIONE: la 1a m del diagramma = m vivagno), 79-87-95-103 m a maglia rasata, diagramma A.5 sulle ultime 10 m sui ferri (ATTENZIONE: l’ultima m del diagramma = m vivagno). Proseguire in questo modo finché il lavoro non misura 30 cm dal ferro di avvio delle m. Alla fine del ferro successivo sul rovescio del lavoro, avviare 1 nuova m (indica lo spacco laterale) = 100-108-116-124 m. Lavorare questa nuova m a punto legaccio. Quindi ci sono ora 2 m vivagno a punto legaccio all’inizio del ferro sul diritto del lavoro. Quando il lavoro misura 58-63-69-74 cm, lavorare come segue, iniziando dal ferro indicato nel diagramma dalla stella: lavorare 2 m vivagno a punto legaccio, diagramma A.1, ripetere il diagramma A.2 11-12-13-14 volte in larghezza, diagramma A.3, 1 m vivagno a punto legaccio. Dopo aver lavorato il diagramma una volta in verticale, ripetere gli ultimi 2 ferri del diagramma finché il lavoro non misura 66-71-77-82 cm. Intrecciare le m lavorando a dir le m rov e a rov le m dir. Avviare le m e lavorare un’altra parta uguale ma a specchio. CONFEZIONE: Vedere il grafico. Cucire A e B a punto maglia. Poi cucire C e D nel filo esterno delle m vivagno. C’è ora uno spacco lungo 30 cm su un lato e uno spacco lungo l’intero altro lato. Tagliare il filo. |
||||||||||||||||||||||
Spiegazioni del diagramma |
||||||||||||||||||||||
|
||||||||||||||||||||||
 |
||||||||||||||||||||||
 |
||||||||||||||||||||||
Avete terminato questo modello?Allora taggate le vostre foto con #dropspattern #soclassyponcho o inviatele alla #dropsfan gallery. Avete bisogno di aiuto con questo modello?Troverete 20 video tutorial, una sezione per i commenti/domande e molto altro guardando il modello su www.garnstudio.com © 1982-2026 DROPS Design A/S. Ci riserviamo tutti i diritti. Questo documento, compreso tutte le sue sotto-sezioni, è protetto dalle leggi sul copyright. Potete leggere quello che potete fare con i nostri modelli alla fine di ogni modello sul nostro sito. |
||||||||||||||||||||||







Lasciare un commento sul modello DROPS 170-28
Noi saremmo felici di ricevere i tuoi commenti e opinioni su questo modello!
Se vuoi fare una domanda, fai per favore attenzione a selezionare la categoria corretta nella casella qui sotto per velocizzare il processo di risposta. I campi richiesti sono indicati da *.