
Categorie popolari
State cercando un filato?


Commenti / Domande (148)
![]() Marie ha scritto:
Marie ha scritto:
Guten Tag, ich bin jetzt nahezu fertig, verstehe aber den letzten Schritt beim Stricken nicht: ich habe die Maschenzahl passend reduziert und links und rechts die Hilfsnadeln. Wie fasse ich nun die Maschen auf? Müsste ich dazu nicht zunächst abketten? Oder fasse ich direkt von den jetzigen Maschen auf? Die Videos zum auffassen von Maschen zeigen es nur bei abgeketteten Stücken. Wenn ich erst abkette, welchen Sinn hatten dann die Hilfsnadeln? Vielen Dank!
03.12.2023 - 12:15DROPS Design ha risposto:
Liebe Marie, nach der letzten Reihe der Passe, schneiden Sie den Faden und jetzt stricken Sie/fassen Sie die Maschen auf: stricken Sie die stillgelegten Maschen, fassen Sie Maschen bis die übrigen Maschen nach der Passen auf, stricken Sie die übrigen Maschen der Passe, fassen Sie Maschen bis die übrigen Maschen nach der Passen auf und stricken Sie die stillgelegten Maschen vom 2. Vorderteil. Viel Spaß beim stricken!
04.12.2023 - 08:16
![]() Beatrix Knafla-Pape ha scritto:
Beatrix Knafla-Pape ha scritto:
Häkelkante auch um Ärmelende?
31.08.2023 - 14:27DROPS Design ha risposto:
Liebe Frau Knafla-Pape, so eine Kante haben wir nicht um Ärmelende gehäkelt, aber gerne können Sie es machen. Viel Spaß beim stricken & häkeln!
01.09.2023 - 08:34
![]() Isabelle Brouwers ha scritto:
Isabelle Brouwers ha scritto:
Je tricote la taille 9 à 18 mois. Je m’étonne que pour les manches les augmentaions terminent 6 cm avant la hauteur de 21 cm. Merci
26.05.2023 - 15:51DROPS Design ha risposto:
Bonjour Mme Brouwers, est-ce que votre tension en hauteur est juste? Vous devez avoir 48 rangs = 10 cm; ainsi, en 5ème taille (12/18 mois), les augmentations se terminent à 16,5 cm, il reste encore 4,5 cm avant de mettre les mailles en attente. Bon tricot!
26.05.2023 - 16:26
![]() Mireille ha scritto:
Mireille ha scritto:
Bonsoir Je suis arrivée à l’encolure. Pouvez-vous m’expliquer comment se tricote 4 cotes mousse ?
16.02.2023 - 23:25DROPS Design ha risposto:
Bonjour Mireille, pour tricoter 1 côte mousse, on doit tricoter 2 rangs endroit, ainsi, pour tricoter les 4 côtes mousse du col, on va tricoter 8 rangs endroit (en ouvrant la dernière boutonnière au 3ème de ces 8 rangs = après la 1ère côte mousse). Bon tricot!
17.02.2023 - 11:51
![]() Franzi ha scritto:
Franzi ha scritto:
Ich verstehe das Einsetzen der Ärmel nicht. Das Abketten erfolgt in einer Hinreihe. Danach soll ich zwei Reihen stricken, bevor ich mit den Ärmel-Abnahmen beginne, die ebenfalls in einer Hinreihe erfolgen. Habe ich dann am Übergang zwei Hinreihen hintereinander oder kann ich die Ärmel auch in einer Rückreihe einsetzen und drei Reihen vor der ersten Abnahme stricken?
09.01.2023 - 07:29DROPS Design ha risposto:
Liebe Franzi, dann stricken Sie die 1. Reihe der Passe als eine Rückreihe, und dann stricken Sie noch 2 Reihen, dann bei der nächsten Hin-Reihe beginnen Sie die Raglanabnahmen. Viel Spaß beim stricken!
09.01.2023 - 10:48
![]() Heidi ha scritto:
Heidi ha scritto:
Ich finde eure Seite Klasse und die Hilfe von euch auch. Nur ein kleiner Vorschlag: Vielleicht wäre es möglich, Fotos von den einzelnen fertigen Teilstücken zu zeigen?! So könnte man sehen, ob man die Anleitung richtig versteht. Danke für die Hilfe!
03.11.2022 - 15:50
![]() Heidi ha scritto:
Heidi ha scritto:
Hi, Ich verstehe die Anleitung für die Ärmel nicht ganz. Speziell diesen Teil: Gleichzeitig nach 4 cm auf jeder Seite wie folgt aufn: in jeder (10.) 8.-8.-6.-6. (8.-8.) R insgesamt (3) 5-7-10-11 (12-14) x 1 M = (42) 48-52-58-62 (66-72) M.. Nach (10) 14-17-18-21 (24-29) cm auf jeder Seite 5 M abk = (32) 38-42-48-52 (56-62) M übrig. Gibt es dazu irgendwo ein Video o. ein Bild? Wenn ich zB für die 2. Größe nach jeder 8. Runde Maschen aufnehme, werden es dann evtl mehr als 38 Maschen?!
28.10.2022 - 21:10DROPS Design ha risposto:
Liebe Heidi, in dei 2. Größe stricken Sie so: *1 Reihe mit 1 Zunahme am Anfang + 1 Zunahme am Ende der Reihe, 7 Reihe ohne Zunahmen*, diese 8 Reihen stricken Sie noch 4 Mal (= 5 Mal insgesamt) - so werden 2 Maschen x 5 Mal zugenommen = 38 + 10 = 48 Maschen ; dann stricken Sie bis die Ärmel 14 cm misst, dann ketten Sie 5 Maschen am anfang der 2 nächsten Reihen ab (= 5 Maschen beidseitig). Es sind nur noch 38 Maschen übrig. Viel Spaß beim stricken!
31.10.2022 - 08:15
![]() Katja ha scritto:
Katja ha scritto:
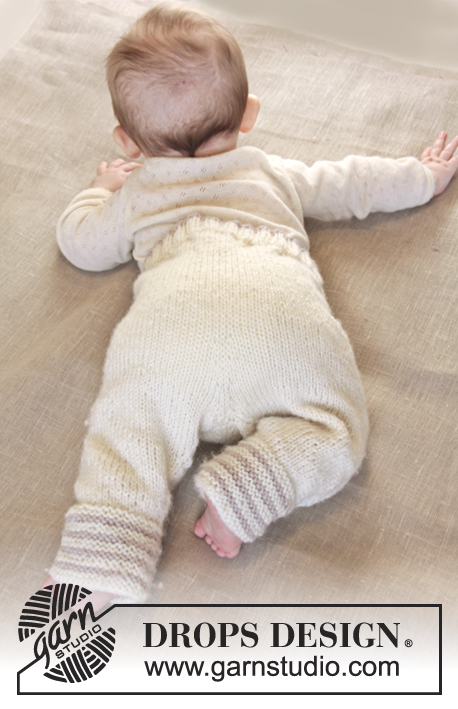
Hallo. Gibt es auch eine Anleitung für die Hose auf dem Bild?
15.01.2022 - 16:14DROPS Design ha risposto:
Liebe Katja, selbstverständlich - die Anleitung für die Hose finden Sie unter diesem Link. Viel Spaß beim Stricken!
15.01.2022 - 16:33
![]() Christine Paterson ha scritto:
Christine Paterson ha scritto:
I note that you give the pattern for the matching baby hat in German above. Do you have the same pattern in English? I would love to make the whole set from my soon-to-be born granddaughter.
30.12.2021 - 07:00
![]() Joke Deutz ha scritto:
Joke Deutz ha scritto:
Kan ik dit patroon ook gebruiken met een dikkere soort garen eentje in de categorie C? Mijn 10 cm proeflapje heeft nl 14 steken met 20 toeren. Hoe moet ik dan de minderingen/meerderingen berekenen? Hoop dat u me een beetje op weg kunt helpen..
29.12.2021 - 00:06DROPS Design ha risposto:
Dag Joke,
Op basis van de stekenverhouding zou je dan uit kunnen rekenen hoeveel steken je op moet zetten. In het patroon moet je per 10 cm 24 steken opzetten, met een stekenverhouding van 14 steken moet je 14 steken opzetten voor 10 cm. Het aantal te maken meerderingen kan ook omgerekend worden door eerst te delen door 24 en dan keer 14 te doen.
29.12.2021 - 12:35
|
|
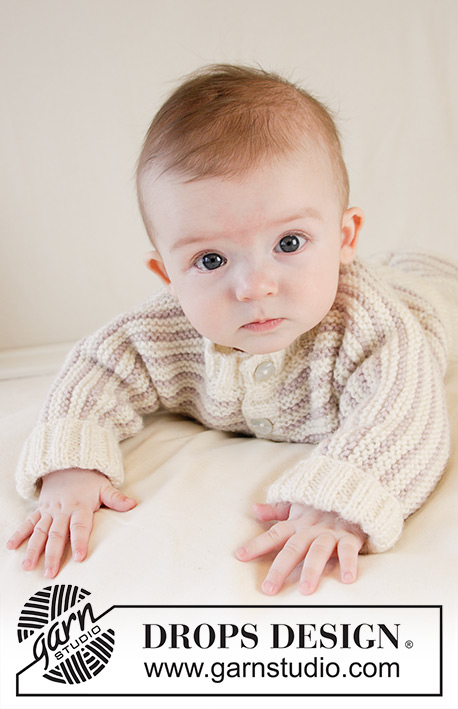
Sleep Tight#sleeptightcardigan |
|
|
|
|
Cardigan lavorato ai ferri a maglia legaccio per neonati con raglan in DROPS BabyMerino. Taglie: (prematuri) - 4 anni.
DROPS Baby 25-33 |
|
|
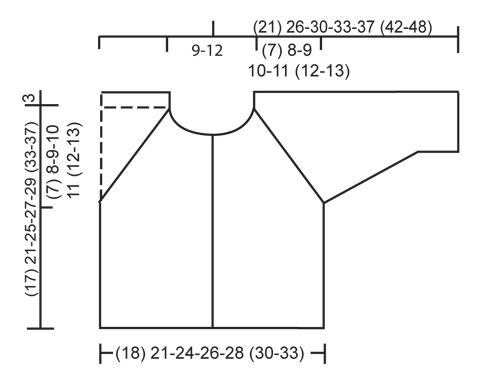
M LEGACCIO (avanti e indietro sui f): Lavorare tutti i f a dir. 1 “costa” a m legaccio = 2 f dir. ASOLE: Diminuire per le asole sul bordo destro. 1 asola = lavorare insieme a dir la 2° e la 3° m dal bordo e fare 1 gettato. Iniziare le asole quando tutte le parti sono state messe sullo stesso f circolare. Diminuire per le asole quando il lavoro misura: Taglia prematuri: 11 e 14 cm Taglia 0/1 mesi: 14 e 18 cm. Taglia 1/3 mesi: 17 e 21 cm Taglia 6/9 mesi: 18 e 24 cm Taglia 12/18 mesi: 19, 23 e 27 cm Taglia 2 anni: 22, 26 e 30 cm Taglia 3/4 anni: 25, 29 e 33 cm Inoltre diminuire per un’asola dopo la 1° “costa” sul bordo del collo. SUGGERIMENTO PER LE DIMINUZIONI (applicato al raglan): Tutte le diminuzioni vengono fatte dal diritto del lavoro con 4 m a m legaccio tra ogni diminuzione Diminuire come segue prima delle 4 m a m legaccio: 2 m insieme a dir. Diminuire dopo le 4 m a m legaccio come segue: passare 1 m a dir, 1 m dir, accavallare la m passata sopra quella appena lavorata ---------------------------------------------------------- GIACCA: Lavorata avanti e indietro sui f circolari dal centro davanti. Avviare (96) 108-124-132-144 (152-168) m (comprese 4 m per il bordo a ogni lato verso il centro davanti) con i f circolari n° 3 mm con il beige chiaro. Lavorare a M LEGACCIO – leggere la spiegazione sopra. FARE ATTENZIONE ALLA TENSIONE DEL LAVORO! Quando il lavoro misura (10) 13-16-17-18 (21-24) cm, lavorare come segue dal diritto del lavoro: (22) 25-29-31-34 (36-40) m = davanti destro, intrecciare le 8 m successive, (36) 42-50-54-60 (64-72) m = dietro, intrecciare le 8 m successive, (22) 25-29-31-34 (36-40) m (= davanti sinistro). Mettere il lavoro da parte e lavorare le maniche. MANICHE: La manica è lavorata avanti e indietro sui f circolari. Avviare (36) 38-38-38-40 (42-44) m (compresa 1 m di vivagno a ogni lato per la cucitura) con i f n° 3 mm con il beige chiaro e lavorare a m legaccio. ALLO STESSO TEMPO quando il lavoro misura 4 cm, aumentare a ogni lato come segue: aumentare 1 m ogni (10) 8-8-6-6 (8-8) f (3) 5-7-10-11 (12-14) volte in totale = (42) 48-52-58-62 (66-72) m. Quando il lavoro misura (10) 14-17-18-21 (24-29) cm, intrecciare 5 m a ogni lato = (32) 38-42-48-52 (56-62) m. Mettere il lavoro da parte e lavorare l’altra manica. SPRONE: Trasferire le maniche sullo stesso f circolare del corpo dove sono state intrecciate le m per gli scalfi = (144) 168-192-212-232 (248-276) m. Inserire 1 segnapunti in tutti i punti di passaggio tra le maniche e il corpo (= 4 segnapunti). Diminuire per le ASOLE sul bordo destro – leggere la spiegazione sopra. Dopo 2 f diminuire per il raglan – LEGGERE IL SUGGERIMENTO PER LE DIMINUZIONI, con 4 m a m legaccio tra le diminuzioni, diminuire 8 m per f. Diminuire prima e dopo i segnapunti come segue: Diminuire ogni 4 f (9) 8-9-8-8 (9-8) volte in totale, poi a f alterni (0) 4-5-9-11 (12-16) volte – cioè (9) 12-14-17-19 (21-24) diminuzioni in totale. ALLO STESSO TEMPO quando rimangono 2 diminuzioni, trasferire le (8) 8-10-9-10 (10-11) m più esterne a ogni lato su un fermamaglie per il collo. Poi diminuire 1 m verso il collo a f alterni 2 volte in totale a ogni lato. Alla fine di tutte le diminuzioni per il raglan e il collo, rimangono (52) 52-56-54-56 (56-58) m sul f. CONFEZIONE: Riprendere circa 68-86 m attorno al collo (comprese le m sul f e i fermamaglie sul davanti) con i f n° 3 mm con il beige chiaro. Lavorare 4 “coste” – ALLO STESSO TEMPO dopo 1 “costa” diminuire per 1 asola sopra le altre sul bordo. Intrecciare. Cucire i margini delle maniche all’interno della m di vivagno. Cucire le aperture sotto le maniche. Attaccare i bottoni al davanti sinistro. BORDO ALL’UNCINETTO: Lavorare un bordo attorno all’apertura della giacca con l’uncinetto n° 3 mm come segue: * 1 m.b, 1 cat, saltare circa 0,5 cm *, ripetere *-* e finire con 1 m.bss nella 1° m.b. |
|
 |
|
Avete terminato questo modello?Allora taggate le vostre foto con #dropspattern #sleeptightcardigan o inviatele alla #dropsfan gallery. Avete bisogno di aiuto con questo modello?Troverete 24 video tutorial, una sezione per i commenti/domande e molto altro guardando il modello su www.garnstudio.com © 1982-2026 DROPS Design A/S. Ci riserviamo tutti i diritti. Questo documento, compreso tutte le sue sotto-sezioni, è protetto dalle leggi sul copyright. Potete leggere quello che potete fare con i nostri modelli alla fine di ogni modello sul nostro sito. |


Con oltre 40 anni di esperienza nel design di modelli di maglia e uncinetto, DROPS Design offre la più estesa collezione di modelli gratuiti su internet - tradotti in 17 lingue. Ad oggi vi possiamo fornire 325 cataloghi e 12298 modelli - 9569 dei quali sono tradotti in Italiano.
Ci stiamo impegnando molto per darvi il meglio che vi possiamo offrire in termini di maglia e uncinetto, ispirazioni e consigli così come filati di grande qualità ad un prezzo incredibile! Volete utilizzare i nostri modelli per qualcosa d'altro oltre al vostro uso personale? Potete leggere tutto ciò che è consentito nel testo sul Copyright in basso su tutte le pagine dei nostri modelli. Buon lavoro!
Lasciare un commento sul modello DROPS Baby 25-33
Noi saremmo felici di ricevere i tuoi commenti e opinioni su questo modello!
Se vuoi fare una domanda, fai per favore attenzione a selezionare la categoria corretta nella casella qui sotto per velocizzare il processo di risposta. I campi richiesti sono indicati da *.