
Categorie popolari
State cercando un filato?

























Commenti / Domande (165)
 Ashley Robinette ha scritto:
Can you please tell me how many stitches I should at the end of row 3 of the first A.z on the yoke? Also what number of stitches do I need to divide by 40 for row 4? I am sorry this is so difficult for me but this is probably the most technical pattern I have worked on. Thank you
07.03.2018 - 19:44DROPS Design ha risposto:
Dear Mrs Robinette, on row 3 in A.z you will have the same number of sts as in row 1. You will only increase on the last 2 rows in A.z ie row 4 and 5 (= both sc rows), so 149 + 40 sc = 189 sc at the end of row 4 in first A.z and 189-40= 229 sc at the end of row 5 in first A.z. Work then one more repeat of A.z in height inc 38 sts on row 4 (= 229+38= 267 sc) and 38 sts on row 5 (267+38=305 sc). Happy crocheting!
08.03.2018 - 11:00
Ashley Robinette ha scritto:
Ok, I had done the increase on every 4th and 5th stitch and I only got 30 extra stitches giving me a total of 179. If I got 149/40 = 3.425 would I round down to 3 or up to 3.5? When I did an increase on every 3rd and 4th stitch, I got 39 increases for a total of 188. That is close but I am having so much trouble with this. I am even using Excel to figure it out and no matter what I do, I cannot get 40 stitches evenly. Thank you for your help.
07.03.2018 - 18:13DROPS Design ha risposto:
Dear Mrs Robinette, you will have to increase sometimes with 3 sts and sometimes with 4 sts between the increases until you have increased total of 40 sts. Happy crocheting!
08.03.2018 - 10:56
Ashley Robinette ha scritto:
Can you please clarify the first increase for the largest size? I had 149 stitches, need to increase by 40 evenly but not over the beginning and ending 6 stitches. So I did 137÷40 and got 3.425. I took that to mean 3.5 which is 3 sts then inc then 4 sts and inc then 3 again. Every time I do that I end up with 179 stitches. Please help.
07.03.2018 - 02:56DROPS Design ha risposto:
Dear Mrs Robinette, make sure you are increasing 40 sts in this row, you should have then: 6 front band sts, 177 sts, 6 front band sts = 189 sts - you should increase alternately in every 4th st and 5th st so that you work (3 sts, 2 sts in next st) and (4 sts, 2 sts in next st) evenly spaced to get the 40 increases (read more about increasing evenly here. Happy crocheting!
07.03.2018 - 09:04
 Tineke Vroegop ha scritto:
Ik heb de eerste toer van de ouw met vasten gehaakt. Klopt het dat in de tweede toer je de 8 vasten aan het begin over moet slaan?
13.05.2017 - 23:43DROPS Design ha risposto:
Hallo Tineke, In de eerste toer haak je onder de mouw in de eerste losse 2 vasten en dan in de andere 7 lossen, elk een vaste. Dus dan heb je in totaal 9 vasten onder de mouw gehaakt op de ketting met 8 vasten. Dan, in de volgende toer haak je eerst 4 lossen en dan begin je met A.1
15.05.2017 - 20:04
Catherine Murphy ha scritto:
Sorry for the inconvenience. After studying the pattern further, I have figured out that it is my mistake. I misinterpreted the pattern in the photo.
24.08.2016 - 00:58
Catherine Murphy ha scritto:
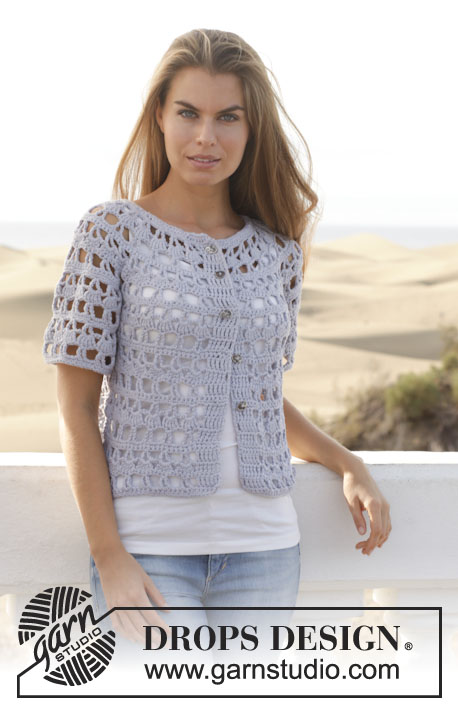
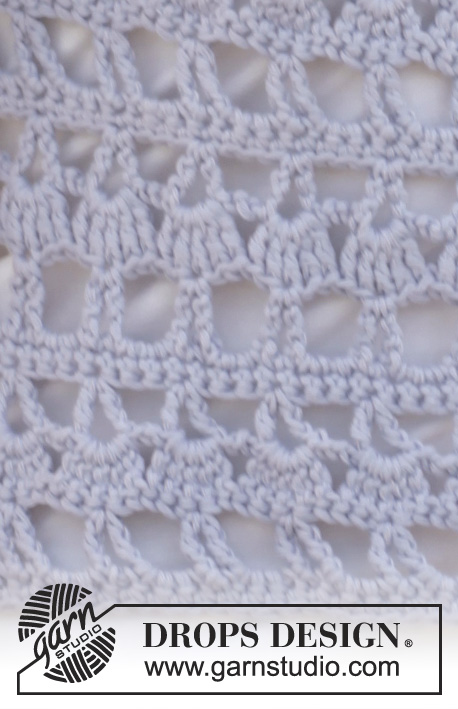
I am,a little bit confused, looking at the jacket on the model in the photo, it looks like there are two rows of tr V stitch, before the 5 tr in chain space, On the diagram I see 1 row of tr V stitch before the 5 tr in chain space. Should the V its line up vertically after the increases. Thank you for any information you may send me .CGM
24.08.2016 - 00:36DROPS Design ha risposto:
Dear Mrs Murphy, there is only 1 row of V st with 5 tr in the ch-space as in diagram - since you are inc evenly on yoke, the V won't line up after the inc. Happy crocheting!
24.08.2016 - 09:09Ino Cohen ha scritto:
I've finished the 3rd row of diagram AZ and I have 165 sts. You say that I will have to add 24 sts in each of the last 2 rows. That means that I will end up with 165+48 sts when I finish the diagram. Is this right? Thank you!
18.07.2016 - 13:30DROPS Design ha risposto:
Dear Mrs Cohen, work now one more repeat of A.Z in height, and when crocheting row 4, inc 22 sts evenly (not 24 sts) = 165+22= 187 sts - and when crocheting row 5, inc 22 sts evenly: 187+22= 209 sts. Read here how to inc evenly. Remember to not inc over A.4 (band sts). Happy crocheting!
18.07.2016 - 16:17
Diane Chicklo ha scritto:
I love absolutely love your pattern. Have a teenage grandchild and some young friends who I share with no selling. I just look at a pattern and can see it on my grandchildren or friends.
28.06.2016 - 21:47
 Katrina Jones ha scritto:
Hi, Working first body row. When it says 8 chain for armhole is that 8 plus 3 from previous pattern rep? Also do I join off yarn or carry straight on? Many thanks.
10.06.2016 - 13:39DROPS Design ha risposto:
Dear Mrs Jones, you crochet 8 ch for armhole and skip the sts from previous row for sleeve - then on next row, skip the 8 ch and continue in pattern as stated. Happy crocheting!
10.06.2016 - 15:25Simone Baker ha scritto:
Hello, I just love the pictures of your garments, but I am having so much trouble understanding the pattern after the yoke start chain and first row of sc, Is there anyone that can help me understand better please, I really would like to make this cardigan and other items, Please help I'm confused
17.05.2016 - 14:55DROPS Design ha risposto:
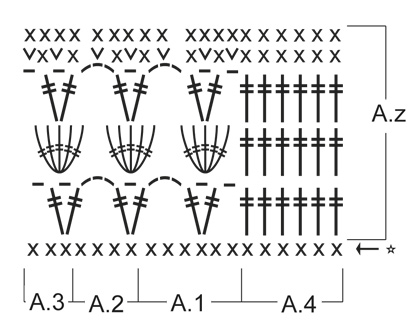
Dear Mrs Baker, you have then to work following diagrams: start reading from the bottom corner on the right side towards the left: A.4 (= 6 sts = front band sts), A.1 (= 6 sts), repeat A.2 (= 4 sts repeat these 4 sts a total of 24-32 times in width, see size),then work A.3 1 time (= 3 sts) and finish with A.4 (= 6 sts = front band sts). Happy crocheting!
17.05.2016 - 16:12
|
|||||||||||||||||||
Nevertheless#neverthelesscardigan |
|||||||||||||||||||
|
|
|||||||||||||||||||
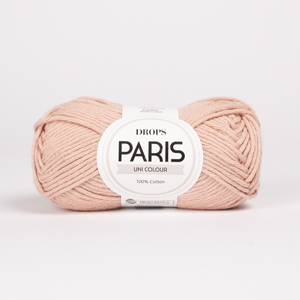
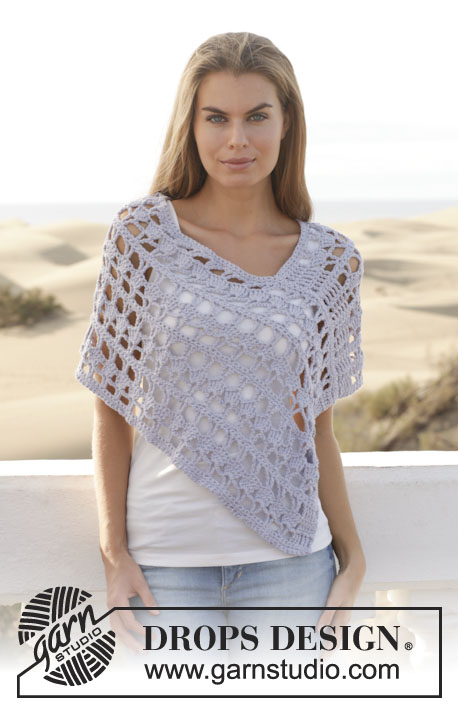
Cardigan DROPS lavorata all’uncinetto in "Paris". Taglie: S - XXXL.
DROPS 153-10 |
|||||||||||||||||||
|
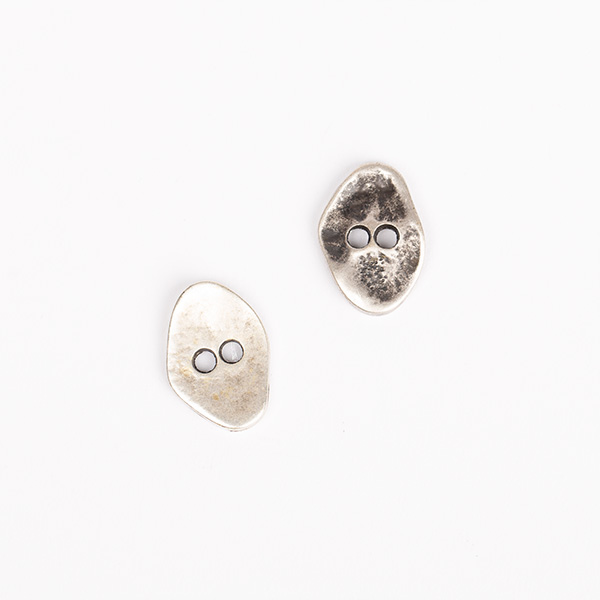
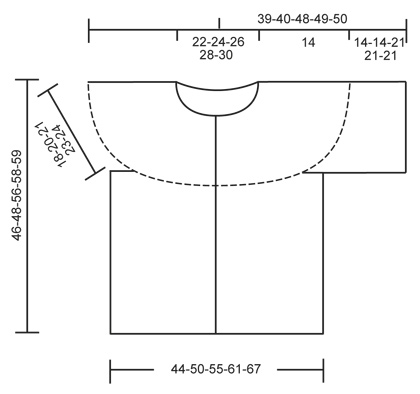
MOTIVO: Vedere i diagrammi A.1-A.4. INFORMAZIONI PER IL LAVORO: Sostituire la 1° m.b su ogni riga a m.b con 1 cat. Sostituire la 1° m.a.d su ogni riga a m.a.d con 4 cat. SUGGERIMENTO PER GLI AUMENTI: Aumentare lavorando 2 m.b in 1 m.b. ---------------------------------------------------------- CARDIGAN: Lavorata dall’alto in basso, avanti e indietro dal centro davanti. SPRONE: Avviare 156-166-177-188-198 cat lasse (compresa 1 cat con cui girare) con l’uncinetto n° 5 mm con Paris. Lavorare la 1° riga come segue: lavorare 1 m.b nella 2° cat dall’uncinetto, * 1 m.b in ognuna delle 3 cat successive, saltare 1 cat *, ripetere *-*, e finire con 1 m.b in ognuna delle ultime 2-4-3-2-4 cat = 117-125-133-141-149 m.b (= la 1° riga del diagramma) – LEGGERE LE INFORMAZIONI PER IL LAVORO. Continuare a lavorare come segue: A.4 (= bordo), A.1, A.2 sulle 96-104-112-120-128 m.b successive (= 24-26-28-30-32 volte in larghezza), finire con A.3 e A.4 (= bordo). Lavorare il diagramma A.z 1 volta in verticale, ALLO STESSO TEMPO sulle ultime 2 righe distribuire 24-28-32-36-40 aumenti in modo uniforme su ognuna delle righe (= 48-56-64-72-80 aumenti in totale) – LEGGERE IL SUGGERIMENTO PER GLI AUMENTI sopra. NOTA: non aumentare su A.4 = 165-181-197-213-229 m. Poi lavorare il diagramma A.z 1 volta in verticale (A.2 è ora lavorato 36-40-44-48-52 volte in larghezza), ALLO STESSO TEMPO sulle ultime 2 righe aumentare 22-26-30-34-38 m in modo uniforme su ognuna delle righe (= 44-52-60-68-76 aumenti in totale). NOTA: non aumentare su A.4 = 209-233-257-281-305 m. CORPO: ORA MISURARE IL LAVORO DA QUI. Continuare come segue: A.4, A.1, A.2 sulle 24-28-32-36-40 m.b successive (= 6-7-8-9-10 volte in larghezza) (davanti), 8 cat (sotto manica), saltare 40-44-48-52-56 m.b dalla riga precedente (scalfo, m usate per la manica in seguito), A.2 sulle 60-68-76-84-92 m.b successive (dietro), 8 cat (sotto manica), saltare 40-44-48-52-56 m.b dalla riga precedente (scalfo, m usate per la manica in seguito), A.2 sulle 24-28-32-36-40 m.b successive (davanti) e finire con A.3 e A.4. Continuare a lavorare come segue: lavorare A.4, A.1, A.2 sulle 24-28-32-36-40 m.b successive (= 6-7-8-9-10 volte in larghezza) (davanti), saltare 8 cat (sotto manica), A.2 sulle 60-68-76-84-92 m.b successive (dietro), saltare 8 cat (sotto manica), A.2 sulle 24-28-32-36-40 m.b successive (davanti) e finire con A.3 e A.4. Ripetere A.z fino a quando il lavoro misura circa 28-28-35-35-35 cm, finire dopo un’intera ripetizione di A.z. Chiudere e affrancare. Il lavoro misura circa 46-48-56-58-59 cm dalla spalla. MANICA: Lavorata in tondo. ORA MISURARE IL LAVORO DA QUI. Lavorata dall’alto in basso. Iniziare lavorando al centro sotto la manica come segue: lavorare 2 m.b nella 1° cat (delle 8 cat), 1 m.b in ognuna delle 7 cat successive e 1 m.b in ognuna delle 40-44-48-52-56 m.b dallo sprone = 49-53-57-61-65 m.b. Continuare a lavorare come segue: 4 cat, A.1, A.2 sulle 40-44-48-52-56 m successive (= 10-11-12-13-14 volte in larghezza), finire con A.3 e 1 m.bss nella 4° cat. Continuare in questo modo fino a quando il lavoro misura circa 14-14-21-21-21 cm, finire dopo un’intera ripetizione di A.z. Chiudere e affrancare. CONFEZIONE: Lavorare un bordo a m.b attorno al collo per ottenere una bella rifinitura come segue: lavorare * 1 m.b in ognuna delle 3 cat successive, saltare 1 cat *, ripetere *-*, e finire con 1 m.b in ognuna delle ultime 4-6-5-4-6 cat = 118-126-134-142-150 m.b. Attaccare i bottoni sul bordo sinistro, a distanza di circa 7 cm. |
|||||||||||||||||||
Spiegazioni del diagramma |
|||||||||||||||||||
|
|||||||||||||||||||
 |
|||||||||||||||||||
 |
|||||||||||||||||||
Avete terminato questo modello?Allora taggate le vostre foto con #dropspattern #neverthelesscardigan o inviatele alla #dropsfan gallery. Avete bisogno di aiuto con questo modello?Troverete 7 video tutorial, una sezione per i commenti/domande e molto altro guardando il modello su www.garnstudio.com © 1982-2026 DROPS Design A/S. Ci riserviamo tutti i diritti. Questo documento, compreso tutte le sue sotto-sezioni, è protetto dalle leggi sul copyright. Potete leggere quello che potete fare con i nostri modelli alla fine di ogni modello sul nostro sito. |
|||||||||||||||||||






Con oltre 40 anni di esperienza nel design di modelli di maglia e uncinetto, DROPS Design offre la più estesa collezione di modelli gratuiti su internet - tradotti in 17 lingue. Ad oggi vi possiamo fornire 333 cataloghi e 12525 modelli - 9799 dei quali sono tradotti in Italiano.
Ci stiamo impegnando molto per darvi il meglio che vi possiamo offrire in termini di maglia e uncinetto, ispirazioni e consigli così come filati di grande qualità ad un prezzo incredibile! Volete utilizzare i nostri modelli per qualcosa d'altro oltre al vostro uso personale? Potete leggere tutto ciò che è consentito nel testo sul Copyright in basso su tutte le pagine dei nostri modelli. Buon lavoro!
Lasciare un commento sul modello DROPS 153-10
Noi saremmo felici di ricevere i tuoi commenti e opinioni su questo modello!
Se vuoi fare una domanda, fai per favore attenzione a selezionare la categoria corretta nella casella qui sotto per velocizzare il processo di risposta. I campi richiesti sono indicati da *.