
Categorie popolari
State cercando un filato?

























Commenti / Domande (165)
 Petra Reider ha scritto:
Hallo liebes Team, Wie "überspringe: ich Maschen? Ist es richtig, dass ich 56 Maschen "überspringen" soll? Ich bin verwirrt. LG Petra
07.03.2024 - 18:33DROPS Design ha risposto:
Liebe Frau Reider, um eine Masche zu überspringen wird diese Masche einfach nicht gearbeitet. Ganz am Anfang werden mehr Luftmaschen gehäkelt, als man Maschen braucht, denn die Luftmaschenkette ist oft fester als die nächsten Reihe danach, deshalb beginnt man hier mit mehr Luftmaschen als man feste Maschen braucht. Viel Spaß beim häkeln!
08.03.2024 - 08:18
 Karin ha scritto:
I've crocheted the yoke and row with 2 sets of 8 chains in it. Measuring the piece it's 22 across neck, 14 for shoulder/yoke depth, and 44 body width. However, sleeve depth is 14, not 18, and armhole is way too tight. How can this happen if everything else measures correctly? How best to fix this, please - very loose chaining for the 8, or chain 12 and add extra A2's to body, or skip 44 or 48 for sleeve instead of 40? Or something else? Thanks in advance
06.03.2024 - 22:34DROPS Design ha risposto:
Dear Karin, if your tension is correct you might just have to crochet these 8 chains loosely to avoid losing tension and let you keep the correct finished measurements. Happy crocheting!
07.03.2024 - 08:11
Karin ha scritto:
Thanks. Sorry, another query, I'm new to crocheting garments. I've chained 156 loose chains for size small, and done the double crochet row, skipping every 4th chain as instructed. If tension is 14 stitches to 10cm, should the resulting 117 stitches measure 84cm? This seems big for the neckline, and mine is even bigger. Before I undo, and just do normal (rather than loose) chains, it would help to know what length I'm aiming for, please.
17.02.2024 - 15:09DROPS Design ha risposto:
Dear Karin, the gauge is 14 dtr, that is, double treble crochets. These are worked very differently from double crochets, so you can't apply the gauge of the pattern to the neckline. You can see the necessary length for the neck in the size chart: approx. 44cm (22 cm is half the neck in the size chart). Your gauge when working the neckline should be very different from the 14 stitches to 10cm of the dtr; the 117 stitches should be approx. 44cm. Happy crochetting!
18.02.2024 - 22:41
Karin ha scritto:
I've crocheted my tension square, and it's the correct tension, but I've then crocheted a whole A.Z section, with A4, A1, A2 and A3, and the tension has come out looser in height - the 3 rows of double treble in the lacework measure 6.1cm instead of the 5.5cm it measured when I was just doing standard rows of double trebles. Is this normal, or are the lace rows meant to come out the same height as double treble rows do?
13.02.2024 - 19:08DROPS Design ha risposto:
Dear Karin, lace is generally softer, and looser, but you can compensate for that, by changing to a smaller hook. Make sure, that your finished piece is blocjed to the size of the schematic drawing found at the bottom of the pattern. Happy Crafting!
14.02.2024 - 02:47
 Ana ha scritto:
Creo que la sisa sería así: sólo hacer 3 cadenas si no quieres aumentar más "V" bajo la manga, y si quieres aumentar, tendrían que ser un nº de cadenas múltiplo de 4 +3, o sea, 7, 11, etc. y en la siguiente fila sería así: 5 puntos altos dobles en cada "V" y al llegar a las cadenas: *saltar 3 cadenas, y hacer 5 puntos altos dobles en la siguiente cadena*, las veces que necesites y después saltar 3 cadenas y hacer 5 puntos altos dobles en la siguiente "V"
27.12.2022 - 18:56
Pilar ha scritto:
Hola,estoy completamente liada no entiendo bien el gráfico. En la segunda hilera de a-z según entiendo hay que hacer: en A2 1pad,1cad,1pad y 3cad= 6 puntos q sacamos de 4 ( si lo multiplicamos por 24 veces salen 144)+ los 7 q salen de A1+ 4 q salen de A3+ 12 de borde= 167 puntos
28.09.2021 - 21:17DROPS Design ha risposto:
Hola Pilar, A.2 (= 4 puntos), 4x24 son 96 puntos. A.1 (=6 puntos) + A.3 (= 3 puntos) y A.4/ los bordes son 12 puntos (6 a cada lado). Por lo que se tienen 117 puntos para la talla S. Tienes que contar el número de puntos según el número de puntos bajos debajo; las cadenetas no cuentan como puntos, solo se utilizan para formar el dibujo de calados.
06.10.2021 - 23:07
 Carina Britt Sofia Bäcklund ha scritto:
Hej! Jag håller på att virka koftan w-524. Allt har gått bra, men när jag ska börja virka fortsättningen efter mönstret där arbetet ska mätas vet inte jag om jag fortfarande ska öka på fm-varven eller inte t ex öka 26 fm jämt fördelade på båda fm-varven? Det syns ju inte på diagrammet.? Tack! /Carina
03.07.2021 - 20:56DROPS Design ha risposto:
Hej Carina, når du fortsætter med fram- och bakst skal du ikke øke mere :)
14.07.2021 - 11:09
Marlies Lindemann ha scritto:
Liebes DROPS-Team , ich fange gerade mit dem Armloch an. Sehe ich das richtig: A2 endet jeweils mit 3 Luftmaschen, dann 8 Luftmaschen , also insgesamt 11 LM, bevor die Maschen für das Armloch übersprungen werden?
27.02.2021 - 14:36DROPS Design ha risposto:
Liebe Frau Lindemann, ja genau, Sie sollen A.2 in der Breite wiederholen, so brauchen Sie diese 3 Luftmaschen vor den 8 Lm - wenn Sie dann die Ärmel häkeln, nicht vergessen, daß 3 von den 8 sind die von Rumfpteil. Viel Spaß beim häkeln!
01.03.2021 - 08:16
 Liliia ha scritto:
Dear Drops Design, After work first 3raws (for the yoke part, size L) the lenght is 117 cm, it is super big for the neck. I checked it's 10 cm for 14 tr and the tension looks similar to photo. Could you tell me tge approximate length of first 166 loose ch?
23.11.2020 - 09:53DROPS Design ha risposto:
Dear Lillia, at the very beginning you are casting on much more chains (177 in size L) than you will have double crochets on the first row (= 133 dc on first row) - since the chains are more often quite tight, you cast on more chains and skip chains evenly on first row, this means you should have 133 dc at the end of first row = approx. 95 cm width. Happy crocheting!
23.11.2020 - 10:39
 Frances Slade ha scritto:
I’m amateur & trying to follow a diagram pattern for 1st time. I’m doing small size. I have 165 st @ end of working 1st Az BUT each time I do 2nd Az I have 243 st BEFORE doing 2 x22 inc rows. I have 36 A2’s, then 38 x 5dtr’s (worked over 36 A2’s +an A1 @ each end) and 38 A2’s. I have 37 x 3ch between each A2. Please can you spot where I’m going wrong?
03.10.2020 - 12:39DROPS Design ha risposto:
Dear Mrs Slade, you have to work the 165 sts as follows: A.4 (= 6 sts), A.1 (=6 sts), repeat A.2 (= 4 sts) a total of 36 times (= 4sts x 36 = 144sts), A.3 (=3 sts), A.4 (= 6 sts)= 6+6+144+3+6=165. As long as you are repeating the correct number of repeats, your number of sts will be right. (= you should have on each row: 6 sts + A.1 x1, A.2x36, A.3x1 and 6 sts). Happy crocheting!
05.10.2020 - 09:19
|
|||||||||||||||||||
Nevertheless#neverthelesscardigan |
|||||||||||||||||||
|
|
|||||||||||||||||||
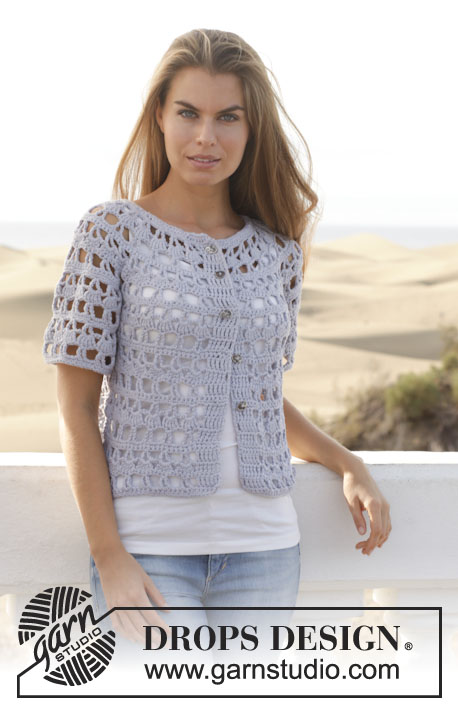
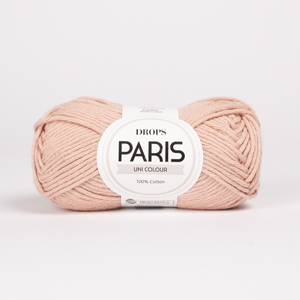
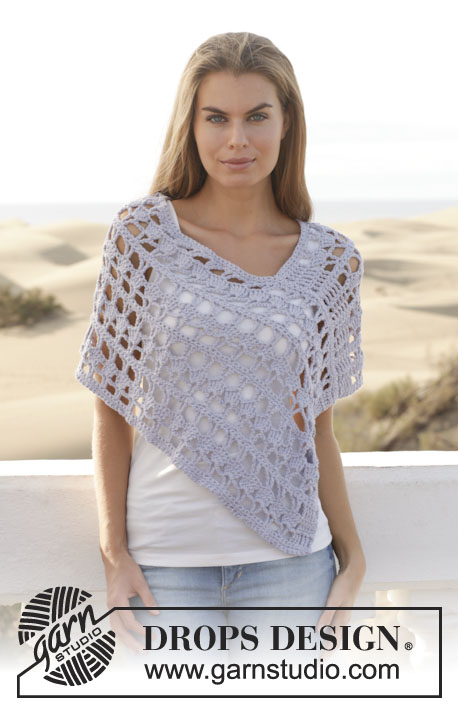
Cardigan DROPS lavorata all’uncinetto in "Paris". Taglie: S - XXXL.
DROPS 153-10 |
|||||||||||||||||||
|
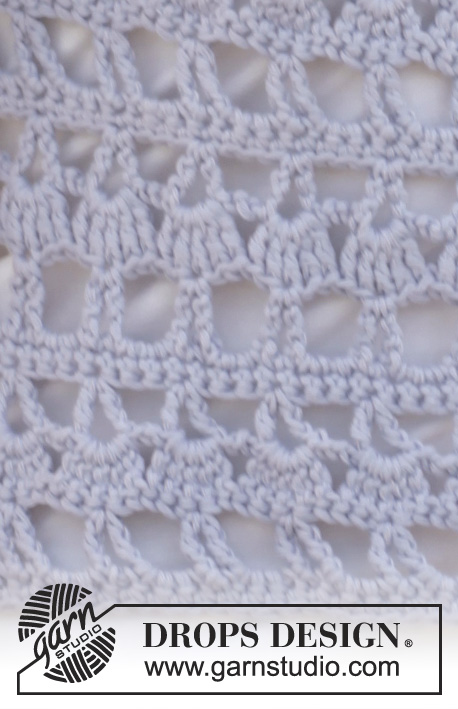
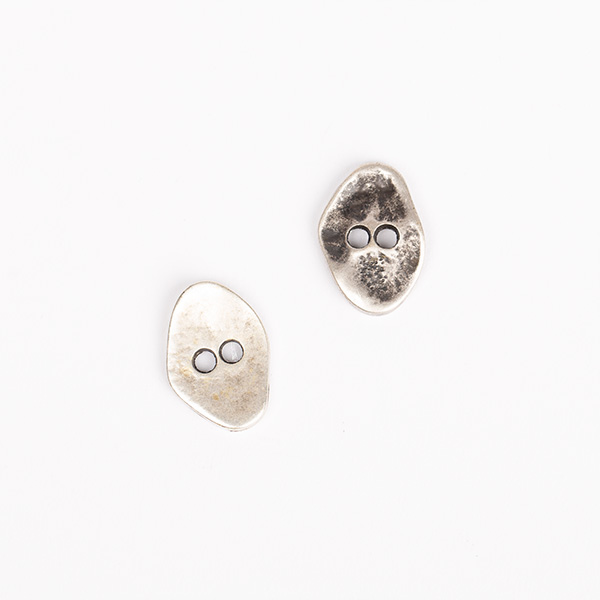
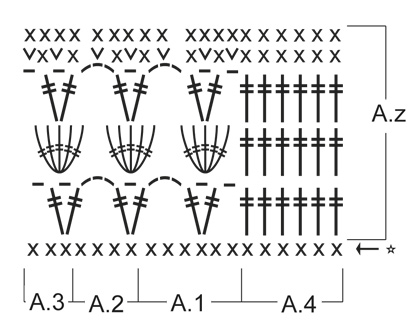
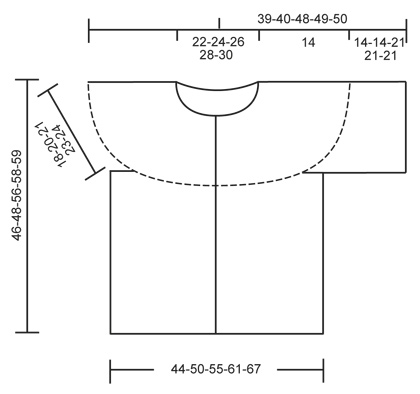
MOTIVO: Vedere i diagrammi A.1-A.4. INFORMAZIONI PER IL LAVORO: Sostituire la 1° m.b su ogni riga a m.b con 1 cat. Sostituire la 1° m.a.d su ogni riga a m.a.d con 4 cat. SUGGERIMENTO PER GLI AUMENTI: Aumentare lavorando 2 m.b in 1 m.b. ---------------------------------------------------------- CARDIGAN: Lavorata dall’alto in basso, avanti e indietro dal centro davanti. SPRONE: Avviare 156-166-177-188-198 cat lasse (compresa 1 cat con cui girare) con l’uncinetto n° 5 mm con Paris. Lavorare la 1° riga come segue: lavorare 1 m.b nella 2° cat dall’uncinetto, * 1 m.b in ognuna delle 3 cat successive, saltare 1 cat *, ripetere *-*, e finire con 1 m.b in ognuna delle ultime 2-4-3-2-4 cat = 117-125-133-141-149 m.b (= la 1° riga del diagramma) – LEGGERE LE INFORMAZIONI PER IL LAVORO. Continuare a lavorare come segue: A.4 (= bordo), A.1, A.2 sulle 96-104-112-120-128 m.b successive (= 24-26-28-30-32 volte in larghezza), finire con A.3 e A.4 (= bordo). Lavorare il diagramma A.z 1 volta in verticale, ALLO STESSO TEMPO sulle ultime 2 righe distribuire 24-28-32-36-40 aumenti in modo uniforme su ognuna delle righe (= 48-56-64-72-80 aumenti in totale) – LEGGERE IL SUGGERIMENTO PER GLI AUMENTI sopra. NOTA: non aumentare su A.4 = 165-181-197-213-229 m. Poi lavorare il diagramma A.z 1 volta in verticale (A.2 è ora lavorato 36-40-44-48-52 volte in larghezza), ALLO STESSO TEMPO sulle ultime 2 righe aumentare 22-26-30-34-38 m in modo uniforme su ognuna delle righe (= 44-52-60-68-76 aumenti in totale). NOTA: non aumentare su A.4 = 209-233-257-281-305 m. CORPO: ORA MISURARE IL LAVORO DA QUI. Continuare come segue: A.4, A.1, A.2 sulle 24-28-32-36-40 m.b successive (= 6-7-8-9-10 volte in larghezza) (davanti), 8 cat (sotto manica), saltare 40-44-48-52-56 m.b dalla riga precedente (scalfo, m usate per la manica in seguito), A.2 sulle 60-68-76-84-92 m.b successive (dietro), 8 cat (sotto manica), saltare 40-44-48-52-56 m.b dalla riga precedente (scalfo, m usate per la manica in seguito), A.2 sulle 24-28-32-36-40 m.b successive (davanti) e finire con A.3 e A.4. Continuare a lavorare come segue: lavorare A.4, A.1, A.2 sulle 24-28-32-36-40 m.b successive (= 6-7-8-9-10 volte in larghezza) (davanti), saltare 8 cat (sotto manica), A.2 sulle 60-68-76-84-92 m.b successive (dietro), saltare 8 cat (sotto manica), A.2 sulle 24-28-32-36-40 m.b successive (davanti) e finire con A.3 e A.4. Ripetere A.z fino a quando il lavoro misura circa 28-28-35-35-35 cm, finire dopo un’intera ripetizione di A.z. Chiudere e affrancare. Il lavoro misura circa 46-48-56-58-59 cm dalla spalla. MANICA: Lavorata in tondo. ORA MISURARE IL LAVORO DA QUI. Lavorata dall’alto in basso. Iniziare lavorando al centro sotto la manica come segue: lavorare 2 m.b nella 1° cat (delle 8 cat), 1 m.b in ognuna delle 7 cat successive e 1 m.b in ognuna delle 40-44-48-52-56 m.b dallo sprone = 49-53-57-61-65 m.b. Continuare a lavorare come segue: 4 cat, A.1, A.2 sulle 40-44-48-52-56 m successive (= 10-11-12-13-14 volte in larghezza), finire con A.3 e 1 m.bss nella 4° cat. Continuare in questo modo fino a quando il lavoro misura circa 14-14-21-21-21 cm, finire dopo un’intera ripetizione di A.z. Chiudere e affrancare. CONFEZIONE: Lavorare un bordo a m.b attorno al collo per ottenere una bella rifinitura come segue: lavorare * 1 m.b in ognuna delle 3 cat successive, saltare 1 cat *, ripetere *-*, e finire con 1 m.b in ognuna delle ultime 4-6-5-4-6 cat = 118-126-134-142-150 m.b. Attaccare i bottoni sul bordo sinistro, a distanza di circa 7 cm. |
|||||||||||||||||||
Spiegazioni del diagramma |
|||||||||||||||||||
|
|||||||||||||||||||
 |
|||||||||||||||||||
 |
|||||||||||||||||||
Avete terminato questo modello?Allora taggate le vostre foto con #dropspattern #neverthelesscardigan o inviatele alla #dropsfan gallery. Avete bisogno di aiuto con questo modello?Troverete 7 video tutorial, una sezione per i commenti/domande e molto altro guardando il modello su www.garnstudio.com © 1982-2026 DROPS Design A/S. Ci riserviamo tutti i diritti. Questo documento, compreso tutte le sue sotto-sezioni, è protetto dalle leggi sul copyright. Potete leggere quello che potete fare con i nostri modelli alla fine di ogni modello sul nostro sito. |
|||||||||||||||||||






Con oltre 40 anni di esperienza nel design di modelli di maglia e uncinetto, DROPS Design offre la più estesa collezione di modelli gratuiti su internet - tradotti in 17 lingue. Ad oggi vi possiamo fornire 333 cataloghi e 12525 modelli - 9799 dei quali sono tradotti in Italiano.
Ci stiamo impegnando molto per darvi il meglio che vi possiamo offrire in termini di maglia e uncinetto, ispirazioni e consigli così come filati di grande qualità ad un prezzo incredibile! Volete utilizzare i nostri modelli per qualcosa d'altro oltre al vostro uso personale? Potete leggere tutto ciò che è consentito nel testo sul Copyright in basso su tutte le pagine dei nostri modelli. Buon lavoro!
Lasciare un commento sul modello DROPS 153-10
Noi saremmo felici di ricevere i tuoi commenti e opinioni su questo modello!
Se vuoi fare una domanda, fai per favore attenzione a selezionare la categoria corretta nella casella qui sotto per velocizzare il processo di risposta. I campi richiesti sono indicati da *.