
Categorie popolari
State cercando un filato?


Commenti / Domande (61)
![]() Barbara ha scritto:
Barbara ha scritto:
Pattern number 141-40 Sarah's delight vest The decrease for armhole on the back is causing some problems for me. The pattern says to decrease 3sts on the next two rows=6sts. 2sts six times=12 and 1sts x7 =7sts. A total of 25 stitches are decreased. I am doing the XXL and need to end up 84 its. Please help.
05.07.2022 - 22:13DROPS Design ha risposto:
Hi Barbara, You have 110 stitches before starting the armholes. You cast off on both sides: 3 stitches x 1 = 6, 2 sts x 4 = 16 and 1 st x 4 = 8. You have then cast off a total of 30 sts which leaves you with 80 sts. Happy knitting!
06.07.2022 - 06:57
![]() Barbara ha scritto:
Barbara ha scritto:
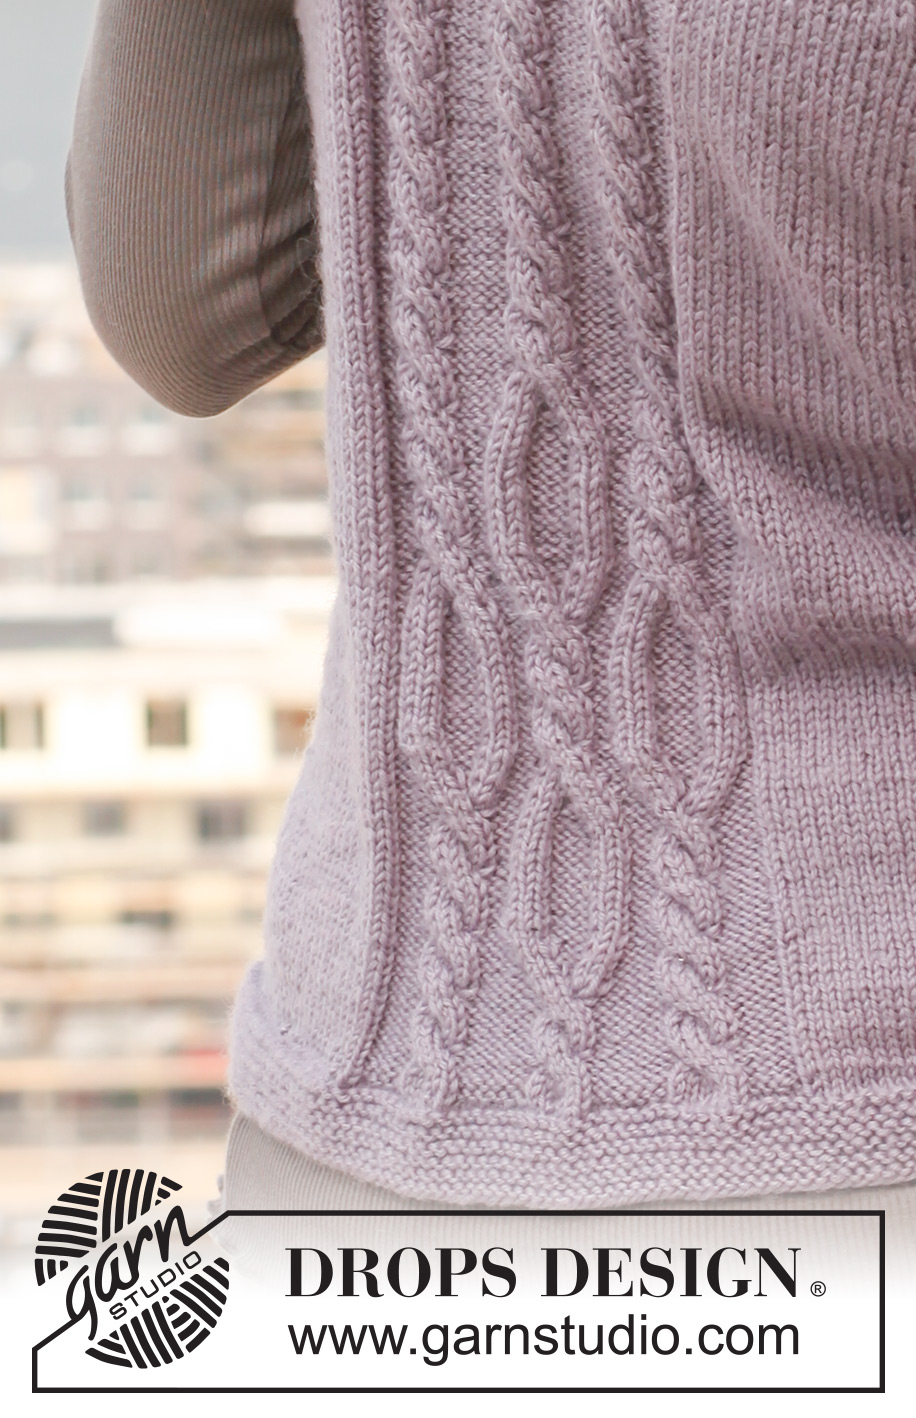
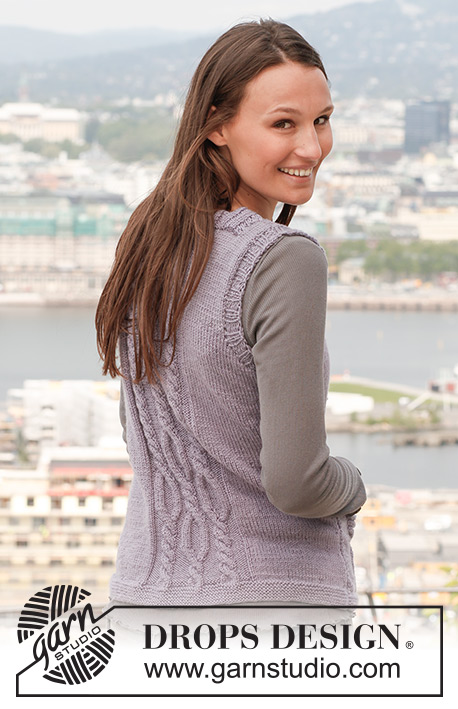
I have completed the back of pattern u-671 up to row 79. My question is do I now complete A3 It is hard to see from the photograph as the model has long hair which obscures the view of the upper back. I am anxious to complete this project so an early replay would be appreciated.
04.07.2022 - 09:04DROPS Design ha risposto:
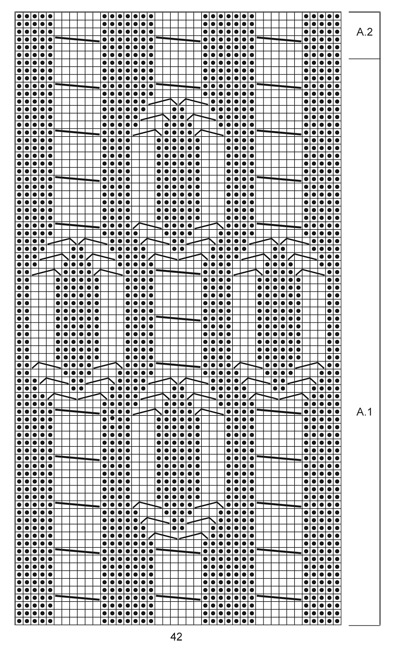
Dear Barbara, when you have worked the whole diagram A.1, work now A.2 and repeat A.2 over A.1 (as shown in diagram = the 3 cables over 6 sts). Happy knitting!
04.07.2022 - 16:22
![]() Monica Ahlin ha scritto:
Monica Ahlin ha scritto:
När man stickat bakstycket med diagram A1s alla varv, skall man sedan sticka diagram A2 6 varv och sedan upprepa dessa 6 varv hela vägen upp?
30.03.2022 - 21:37DROPS Design ha risposto:
Hej Monica. Ja det stämmer. Mvh DROPS Design
31.03.2022 - 08:09
![]() Brandi ha scritto:
Brandi ha scritto:
Hello again. Earlier I had asked for help on the back piece for size xl. This was your answer: Dear Brandi, for size XL, you should cast off on BOTH SIDES 3 stitches 2 times = 6, 2 stitches 5 times = 10, and 1 stitch 4 times = 4, 6+10+4 = 10 stitches x 2 = so you cast off 20 stitch all together. 122-20= 82 stitch is the number of stitches you should end up with. Happy Stitching! The problem here is that 122-20 does not equal 82 it equals 102. Still needing help with the numbers. Thanks
04.08.2021 - 07:15DROPS Design ha risposto:
Dear Brandi, it looks like there was a small mistake in the previous answer, you will decrease 20 sts on each side (= 3 sts 2 times, 2 sts 5 times and 1 st 4 times), ie 40 sts in total = 102-40=82 sts remain. Happy knitting!
04.08.2021 - 07:59
![]() Brandi ha scritto:
Brandi ha scritto:
Currently working the back piece decreases for the armholes. When looking at the stitch counts for size xl it says I will start with 122 sts and end with 82 sts. When I counted the decreases it didn’t add up correctly. I’m sure I’m missing something. Please advise. Thank you
03.08.2021 - 16:57DROPS Design ha risposto:
Dear Brandi, for size XL, you should cast off on BOTH SIDES 3 stitches 2 times = 6, 2 stitches 5 times = 10, and 1 stitch 4 times = 4, 6+10+4 = 10 stitches x 2 = so you cast off 20 stitch all together. 122-20= 82 stitch is the number of stitches you should end up with. Happy Stitching!
04.08.2021 - 04:44
![]() Becky Eisen ha scritto:
Becky Eisen ha scritto:
I’m am working on the Right Front Piece and question is about the buttonhole. The patter says to k2tog in 3 and 4 stitch, then YO. The 3rd and 4th stitch are purl, so I P2tog. The button that is supposed to fit this tiny little hole is 20 mm. I could only get a 2.5 mm to fit. How to make a bigger hole, or am I missing something?
25.06.2021 - 19:55DROPS Design ha risposto:
Dear Becky, K2Tog and a yarnover should be anough for that size of button (on the next ro, take care that do not twist the stitch you knit into the yarnover. If it is still too small, try to do a double yarnover, and in the next row knit into the first and drop the second. Happy Stitching!
26.06.2021 - 01:10
![]() Keri Clark ha scritto:
Keri Clark ha scritto:
I am working on the right front piece and am at the direction in the pattern that says "AT THE SAME TIME when piece measures 12 1/4 (my size), dec 1 st towards mid front." I want to clarify what "towards mid front" means. Would I be decreasing in the stockinette section of the front, and doing so close to the patterned section of the front?
04.06.2021 - 06:43DROPS Design ha risposto:
Dear Mrs Clark, the decreases worked mid front are for the V-Neck, ie decrease as explained under DECRASE TIP = after A.4 on right front piece, ie at the beginning of the stocking section after the cable. Happy knitting!
04.06.2021 - 07:14
![]() Anna Ramadori ha scritto:
Anna Ramadori ha scritto:
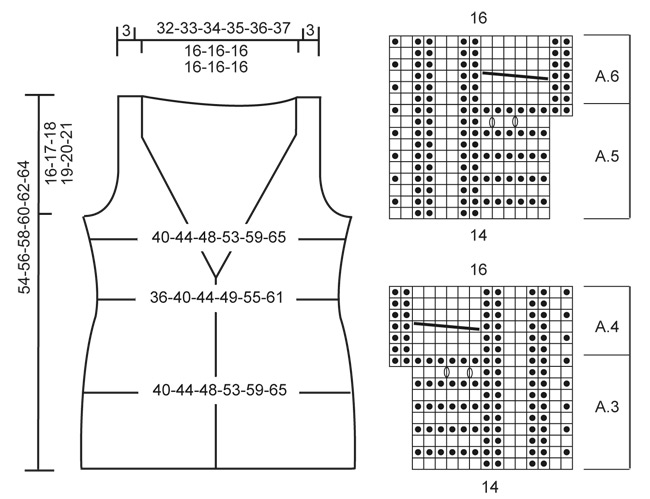
Salve! Volevo avvisare che c'è un errore nella spiegazione del diagramma. Nella quinta riga dove dice. Trasferire 1 m sul f. ausiliario sul dietro del lavoro, 3 m dir (voi indicate 2) poi il resto è giusto.
15.05.2021 - 07:44DROPS Design ha risposto:
Buonasera Anna, grazie per la segnalazione, abbiamo corretto la legenda. Buon lavoro!
15.05.2021 - 22:21
![]() Keri Clark ha scritto:
Keri Clark ha scritto:
Does the front pieces require the 10 rows of garter stitch ribbing as required for the back before starting with the A.3 pattern?
07.05.2021 - 01:28DROPS Design ha risposto:
Dear Keri, The cable pattern at the back starts after the garter stitch, but on the front edge starts right after the cast on, because this cable is going allon all the front edge. There is a number of stitches on which a garter stitch edge still knitted, next to the cabled stitch at the edge. So no extra garter stitch needed on the front, just follow the pattern. Happy Knitting!
07.05.2021 - 01:37
![]() Melody ha scritto:
Melody ha scritto:
I’m currently on the back piece and wondering for the armhole decrease and it’s says “cast off for armholes at the beg of every row in each side as follows”, does that mean cast of (x) number of stitches at the BEG and END of row? Or does it mean ONLY beg of every row, so a 1 RS and 1 WS (or vice versa) = 1 set which = 1 times?
25.03.2021 - 00:17DROPS Design ha risposto:
Dear Melody, it means, the beginning of EVERY row, so there are cast off on both sides. happy Knitting!
25.03.2021 - 01:51
|
|||||||||||||||||||
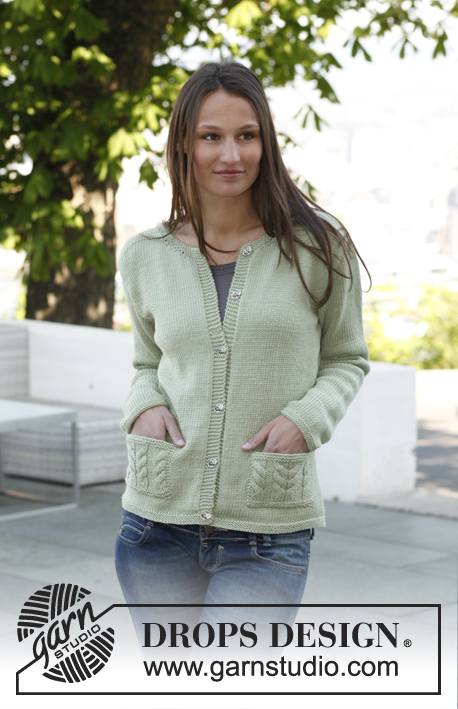
Sarah's Delight#sarahsdelightvest |
|||||||||||||||||||
 |
 |
||||||||||||||||||
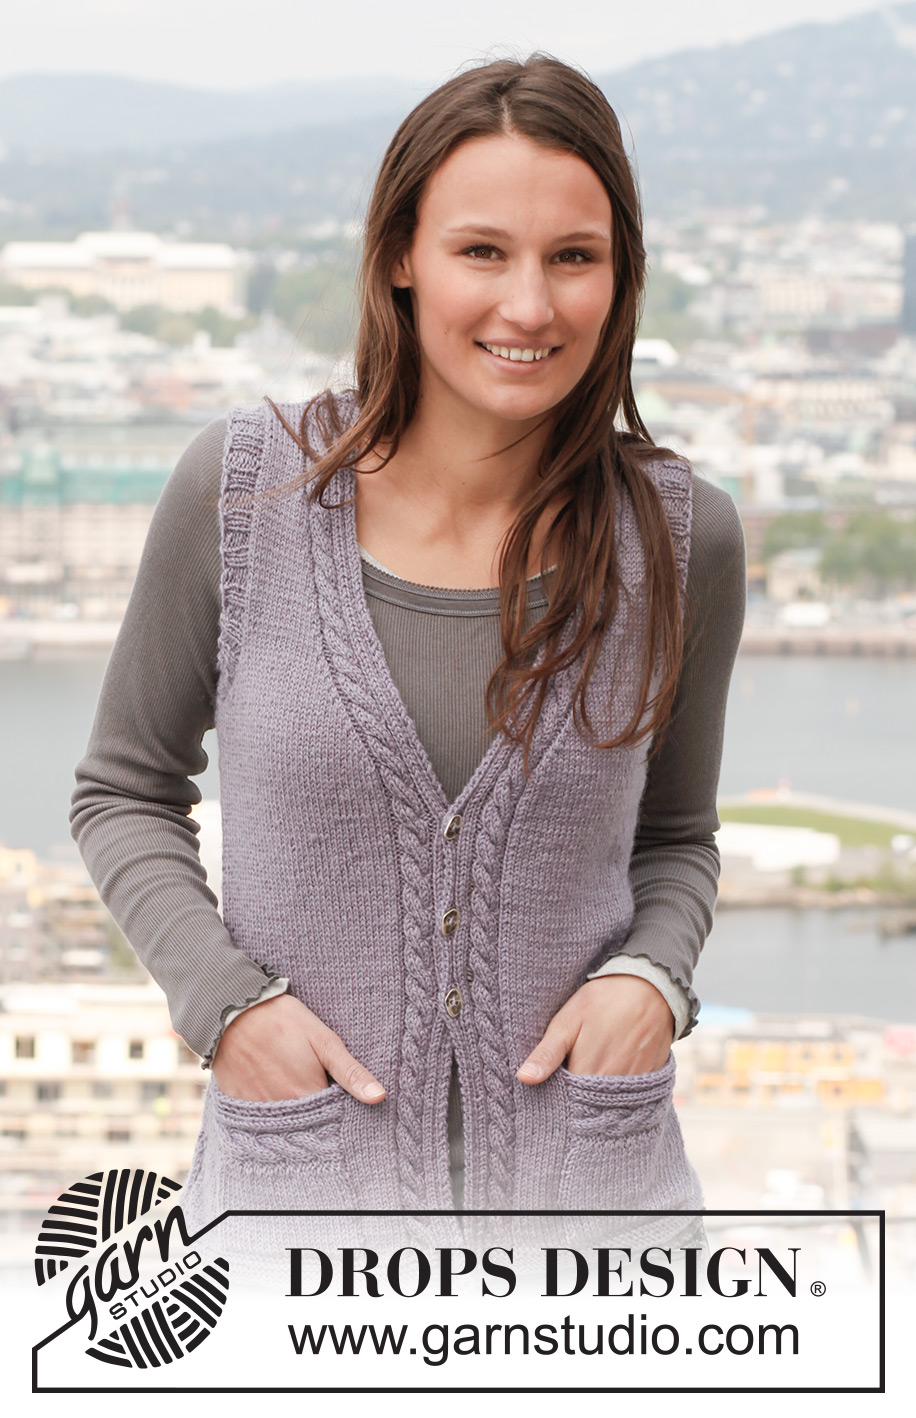
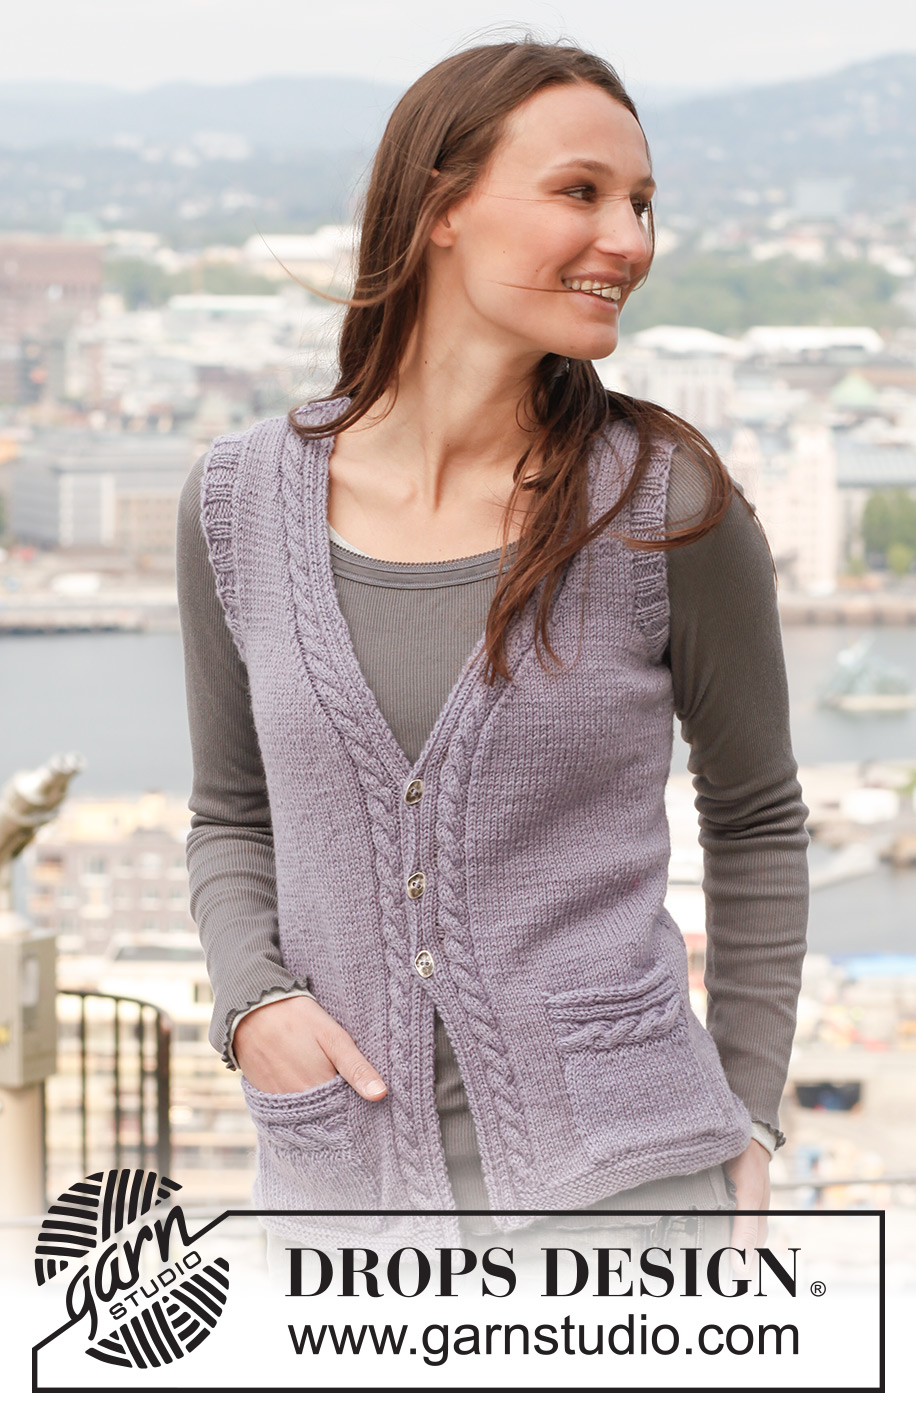
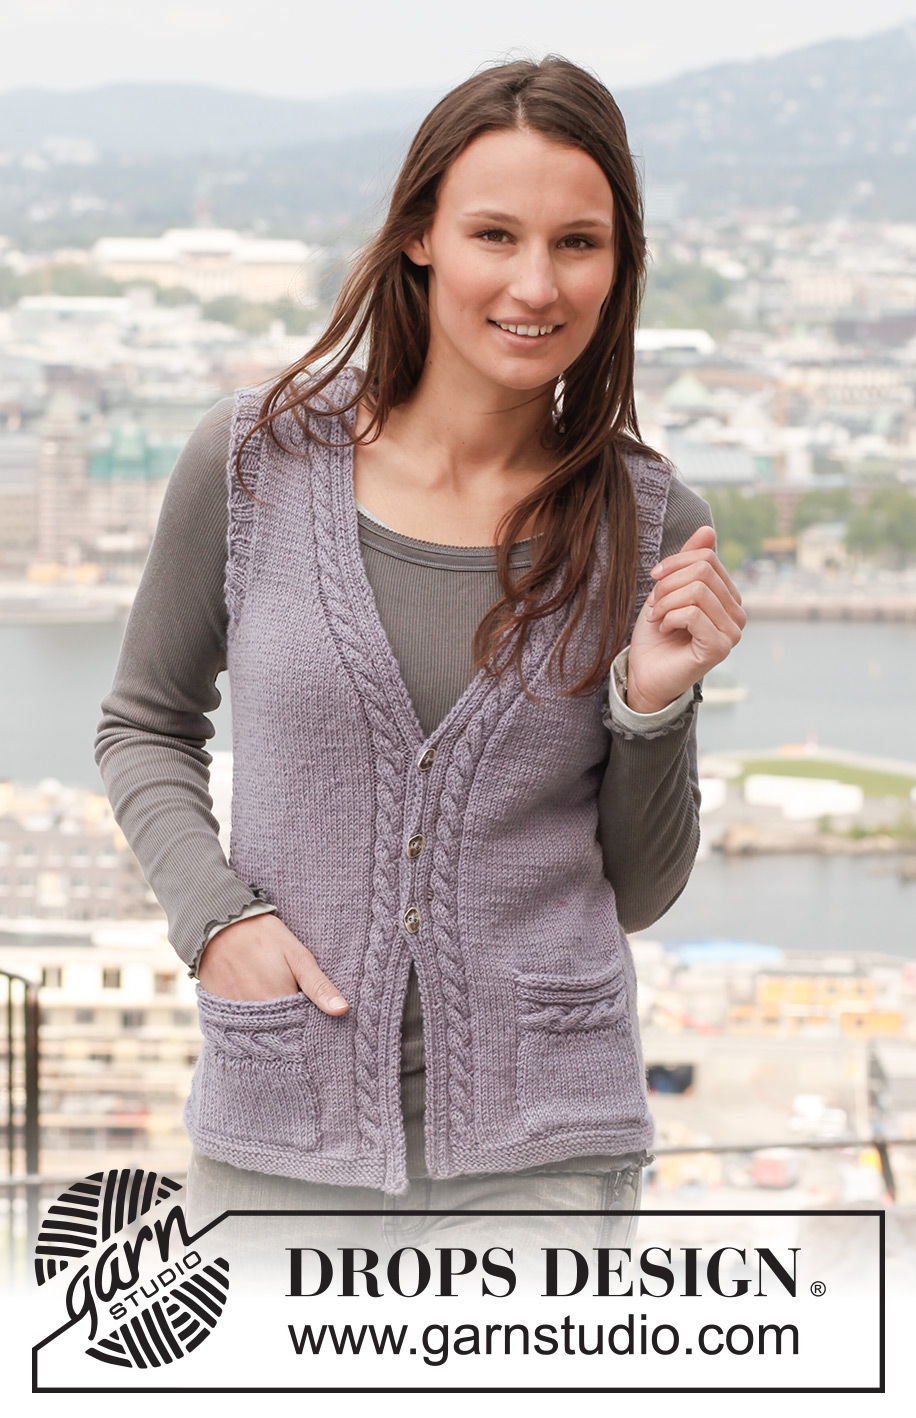
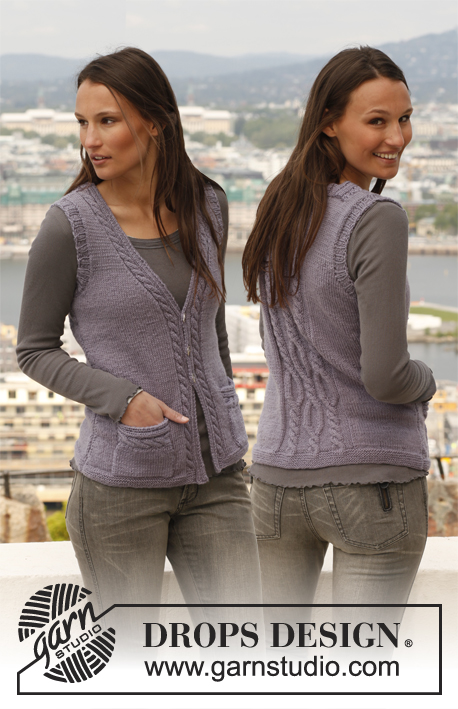
Gilet DROPS lavorato ai ferri con trecce in "Karisma". Taglie: dalla S alla XXXL.
DROPS 141-40 |
|||||||||||||||||||
|
M. LEGACCIO (avanti e indietro sui f.): lavorare tutti i f. a dir. 1 "costa" a legaccio = 2 f. a dir. MOTIVO: Vedere i diagrammi A.1-A.6. I diagrammi mostrano tutti i f. del motivo visti sul diritto del lavoro. SUGGERIMENTO PER LE DIMINUZIONI: Diminuire all’interno di A.4/A.6. Tutte le diminuzioni sono fatte sul diritto del lavoro! Diminuire come segue prima di A.6: lavorare 2 m. insieme a dir. Diminuire come segue dopo A.4: passare 1 m. a dir. senza lavorarla, 1 m. dir., accavallare la m. passata sopra quella appena lavorata. ASOLE: Intrecciare per le asole sul bordo destro. 1 asola = lavorare insieme la 3° e 4° m. dal centro davanti e fare 1 gettato. Intrecciare per le asole quando il lavoro misura: TAGLIA S: 16, 22 e 28 cm TAGLIA M: 16, 23 e 29 cm TAGLIA L: 17, 23 e 30 cm TAGLIA XL: 18, 24 e 31 cm TAGLIA XXL: 18, 25 e 32 cm TAGLIA XXXL: 19, 26 e 33 cm -------------------------------------------------------- DIETRO: Lavorato avanti e indietro sul f. Avviare 86-94-102-114-126-138 m. (compresa 1 m. di vivagno da ogni lato) con i ferri n° 3 mm con il filato Karisma. Lavorare 5 "coste" a M. LEGACCIO – leggere la spiegazione sopra. Lavorare il f. successivo (sul diritto del lavoro): 1 m. di vivagno a m. legaccio, 25-29-33-39-45-51 m. dir., 34 m. dir. e ALLO STESSO TEMPO distribuire 8 aumenti in modo uniforme su queste m., 25-29-33-39-45-51 m. dir. e 1 m. di vivagno a m. legaccio = 94-102-110-122-134-146 m. Passare ai ferri n° 4 mm, lavorare il f. successivo come segue sul rovescio del lavoro: 1 m. di vivagno a m. legaccio, 25-29-33-39-45-51 m. rov., A.1 (= 42 m.), 25-29-33-39-45-51 m. rov. e 1 m. di vivagno a m. legaccio. Continuare con A.1 e a m. rasata su 25-29-33-39-45-51 m. e 1 m. di vivagno a m. legaccio da ogni lato. ALLO STESSO TEMPO quando il lavoro misura 5 cm, diminuire 1 m. da ogni lato, ripetere le diminuzioni ogni 3 cm altre 3 volte = 86-94-102-114-126-138 m. Quando A.1 è stato lavorato 1 volta in verticale, continuare con A.2 sulle m. in A.1. ALLO STESSO TEMPO quando il lavoro misura 20 cm, aumentare 1 m. da ogni lato, ripetere gli aumenti ogni 5-5½-5½-6-6½-6½ cm altre 3 volte = 94-102-110-122-134-146 m. Quando il lavoro misura 38-39-40-41-42-43 cm, intrecciare per gli scalfi all’inizio di ogni f. da ogni lato come segue: 3 m. 1-1-1-2-2-2 volta, 2 m. 2-3-4-5-6-8 volte e 1 m. 2-3-4-4-7-8 volta = 76-78-80-82-84-86 m. Quando il lavoro misura 50-52-54-56-58-60 cm, distribuire 8 diminuzioni in modo uniforme sulle 42 m. centrali = 68-70-72-74-76-78 m. Sul f. successivo sul diritto del lavoro lavorare come segue: 9-10-11-12-13-14 m. a m. rasata, * 2 m. rov., 2 m. dir. *, ripetere *-* sulle 48 m. successive, 2 m. rov., 9-10-11-12-13-14 m. a m. rasata. Quando il lavoro misura 52-54-56-58-60-62 cm, intrecciare le 34 m. centrali = 17-18-19-20-21-22 m. rimaste su ogni spalla. Finire ogni spalla in modo separato. Continuare con 9-10-11-12-13-14 m. a m. rasata, 2 m. rov., 2 m. dir., 2 m. rov., 1 m. dir. e 1 m. a m. legaccio verso il collo, intrecciare con dir. su dir. e rov. su rov. quando il lavoro misura 54-56-58-60-62-64 cm. DAVANTI DESTRO: Avviare 49-53-57-63-69-75 m. (compresa 1 m. di vivagno a lato) con i ferri n° 3 mm con il filato Karisma. Lavorare come segue – sul diritto del lavoro: A.3 (= 14 m.), lavorare a m. legaccio sulle ultime 35-39-43-49-55-61 m. Continuare questo motivo fino a quando A.3 è stato lavorato 1 volta in verticale = 51-55-59-65-71-77 m. Cambiare e continuare con i ferri n° 4 mm. Ora lavorare come segue sul diritto del lavoro: A.4 (= 16 m.), m. rasata sulle ultime 34-38-42-48-54-60 m., 1 m. di vivagno a m. legaccio. Continuare questo motivo verso l’alto, quando il lavoro misura 5 cm, diminuire a lato come per il dietro = 47-51-55-61-67-73 m. Quando il lavoro misura 16-16-17-18-18-19 cm, iniziare ad intrecciare per le ASOLE – leggere la spiegazione sopra. Quando il lavoro misura 20 cm, aumentare a lato come per il dietro. ALLO STESSO TEMPO quando il lavoro misura 29-30-31-32-33-34 cm, diminuire 1 m. verso il centro davanti – LEGGERE IL SUGGERIMENTO PER LE DIMINUZIONI, ripetere le diminuzioni ogni cm altre 22 volte. ALLO STESSO TEMPO quando il lavoro misura 38-39-40-41-42-43 cm, intrecciare e diminuire per lo scalfo a lato come per il dietro. Alla fine di tutti gli intrecci e le diminuzioni per lo scalfo e il collo, ci sono 19-20-21-22-23-24 m. sul f. Quando il lavoro misura circa 53-55-57-59-61-63 cm, distribuire 2 diminuzioni in modo uniforme sulla treccia in A.4 = 17-18-19-20-21-22 m. rimaste sul f. Sul f. successivo intrecciare con dir. su dir. e rov. su rov. DAVANTI SINISTRO: Lavorare come per il davanti destro ma a specchio. Invece di A.3 e A.4 lavorare A.5 e A.6. Non intrecciare per le asole. CONFEZIONE: Cucire i margini delle spalle. BORDO DELLA MANICA: Riprendere 90-94-98-102-106-110 m. con i ferri n° 3 mm lungo lo scalfo. Lavorare 1 f. sul diritto del lavoro, quindi lavorare a coste 2 m. dir./2 m. rov. con 1 m. di vivagno da ogni lato. Continuare fino a quando il bordo della manica misura 3 cm, intrecciare con dir. su dir. e rov. su rov. CONFEZIONE: Cucire i lati all’interno della m. di vivagno. Attaccare i bottoni. TASCA: Avviare 16 m. con i ferri n° 4 mm con il filato Karisma. Lavorare secondo A.6, intrecciare quando il lavoro misura 11 cm. Riprendere circa 23 m. all’interno dell’ultima m. rov. di A.6. Lavorare a m. rasata con 1 m. di vivagno a m. legaccio da ogni lato. Intrecciare quando il lavoro misura 12 cm in totale. Lavorare l’altra tasca. Attaccare le tasche al centro dei davanti, direttamente sopra le "coste" a m. legaccio. |
|||||||||||||||||||
Spiegazioni del diagramma |
|||||||||||||||||||
|
|||||||||||||||||||
 |
|||||||||||||||||||
 |
|||||||||||||||||||
Avete terminato questo modello?Allora taggate le vostre foto con #dropspattern #sarahsdelightvest o inviatele alla #dropsfan gallery. Avete bisogno di aiuto con questo modello?Troverete 11 video tutorial, una sezione per i commenti/domande e molto altro guardando il modello su www.garnstudio.com © 1982-2026 DROPS Design A/S. Ci riserviamo tutti i diritti. Questo documento, compreso tutte le sue sotto-sezioni, è protetto dalle leggi sul copyright. Potete leggere quello che potete fare con i nostri modelli alla fine di ogni modello sul nostro sito. |
|||||||||||||||||||


Con oltre 40 anni di esperienza nel design di modelli di maglia e uncinetto, DROPS Design offre la più estesa collezione di modelli gratuiti su internet - tradotti in 17 lingue. Ad oggi vi possiamo fornire 324 cataloghi e 12290 modelli - 9561 dei quali sono tradotti in Italiano.
Ci stiamo impegnando molto per darvi il meglio che vi possiamo offrire in termini di maglia e uncinetto, ispirazioni e consigli così come filati di grande qualità ad un prezzo incredibile! Volete utilizzare i nostri modelli per qualcosa d'altro oltre al vostro uso personale? Potete leggere tutto ciò che è consentito nel testo sul Copyright in basso su tutte le pagine dei nostri modelli. Buon lavoro!
Lasciare un commento sul modello DROPS 141-40
Noi saremmo felici di ricevere i tuoi commenti e opinioni su questo modello!
Se vuoi fare una domanda, fai per favore attenzione a selezionare la categoria corretta nella casella qui sotto per velocizzare il processo di risposta. I campi richiesti sono indicati da *.