
Categorie popolari
State cercando un filato?


Commenti / Domande (39)
![]() Monique ha scritto:
Monique ha scritto:
Hi ik heb het werk verdeeld in voor- en achterpand en brei verder op 2 losse rechte pennen. Is het telpatroon dan zo dat ik de goede kant patroon recht brei en averechtse kant de volgende regel van het patroon averechts terug brei?
25.01.2026 - 19:37DROPS Design ha risposto:
Dag Monique,
Je breit de teruggaande naald inderdaad averecht en je leest daarbij het telpatroon van links naar rechts. In het telpatroon worden alle naalden weergegeven, dus zowel de goede kant als de verkeerde kant.
25.01.2026 - 20:10
![]() Anita Gavelin ha scritto:
Anita Gavelin ha scritto:
Jag stickar tröjan i stl 12/18månader. Bottenfärgen står angiven till 100g DET RÄCKER INTE! Behöver vara 150g.
27.12.2025 - 17:11
![]() Nancy ha scritto:
Nancy ha scritto:
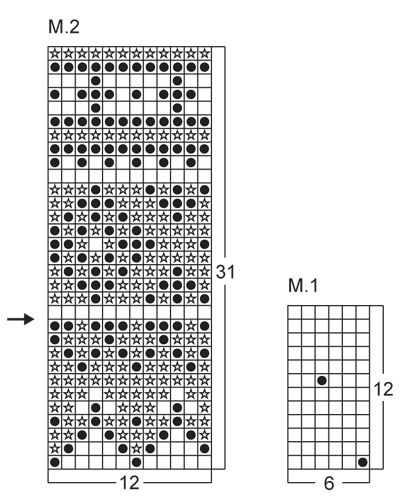
What is the meaning if the arrow at row 12 on Chart M2 ?
28.10.2025 - 01:47DROPS Design ha risposto:
Hi, Nancy, the arrow indicates how much of M.2 you knit on the sleeves. Happy knitting!
28.10.2025 - 09:00
![]() Truus ha scritto:
Truus ha scritto:
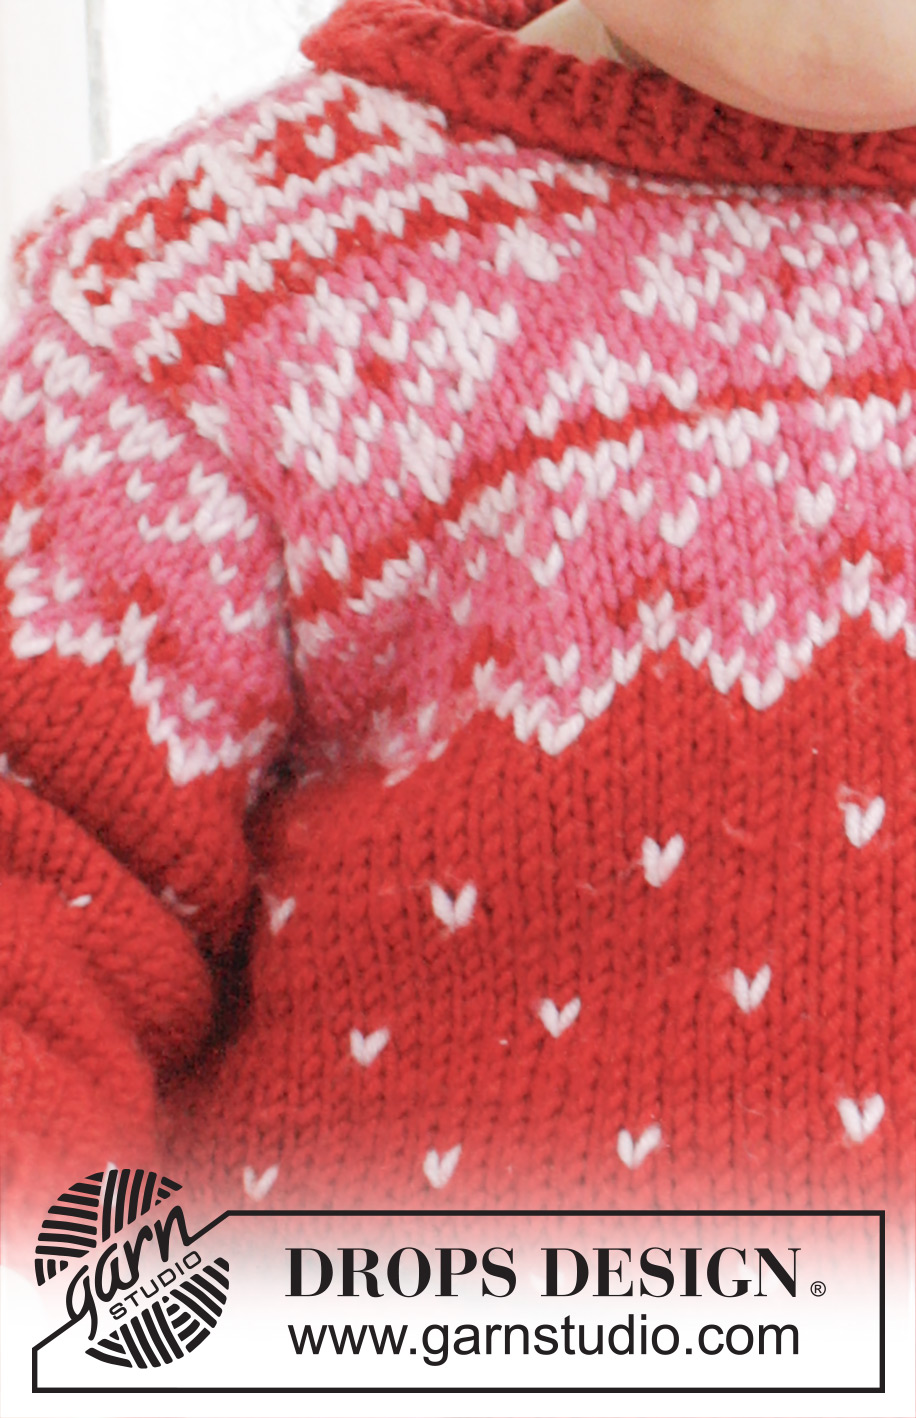
Patroon M1: de sneeuwvlokken verdwijnen onder de rest van de breitoer. Hoe houd ik ze zichtbaar?
02.10.2025 - 13:46DROPS Design ha risposto:
Dag Truus,
Dat kan inderdaad snel gebeuren bij het breien van 1 steek in een andere kleur. Al je de witte steek breit zorg er dan voor dat je de rode draad wat meer aantrekt en de witte steek wat losser breit, zodat hij erop komt te liggen.
05.10.2025 - 18:50
![]() Maj Åberg ha scritto:
Maj Åberg ha scritto:
Skall v1 i M1 överensstämma med V1 i M2 alltså prickarna i m1 o m 2. Följer man mönstret så blir inte prickarna ovanför varandra. Tycker det gör så på bilderna.
08.01.2025 - 22:00DROPS Design ha risposto:
Hei Maj. Det kommer ann på hvilken str. du strikker. På noen str. vil det nok bli en liten forskyvning. mvh DROPS Design
13.01.2025 - 13:16
![]() Ana Robertson ha scritto:
Ana Robertson ha scritto:
I am knitting the size 2 but I am using size 4mm needles which, for me, gives the exact measurements. FYI, I need more than 3 balls of the main colour. So if anyone else is using smaller needles, buy an extra ball of the main colour.
23.11.2024 - 20:05
![]() Jeanette Oberg ha scritto:
Jeanette Oberg ha scritto:
Firstly thank you for sharing your beautiful free patterns. I am knitting size 2 and have a probem with the sleeve. With the back I made the armhole 12cm per the pattern. When I knitted the sleeve I worked up to row 11 of the pattern but the length of the sleeve from when its worked back and forth is only 5cm. I just can't figure out where I have gone wrong. Any assistance would be really appreciated. Regards Jeanette
21.04.2024 - 06:24DROPS Design ha risposto:
Dear Jeanette, if you work according to the pattern it should all be correct. The part of the sleeve worked back and forth is sewn over the 10 sts cast off in the body in each side. The width of the top of the sleeve should have a circunference of 24cm to join it to the 12 cm armhole. Happy knitting!
22.04.2024 - 01:08
![]() Kjerstin ha scritto:
Kjerstin ha scritto:
Hva mener dere med går over 6 masker i M2… synes det er ufattelig dårlig forklart i både oppskrift og kommentarfeltet… Strikker 12/18 mnd . Og er i M2 bakstykket med 66 masker .. kan dere forklare med teskje ? 😅 Og hvilken farge skal kantmaskene i rille strikkes i?
23.01.2024 - 00:45DROPS Design ha risposto:
Hej Kjerstin, vi kan slet ikke finde hvor du er i opskriften, hvor skriver vi går over 6 masker?
02.02.2024 - 13:37
![]() Gun ha scritto:
Gun ha scritto:
Stickarbaby21-18 får inte mönstret att stämma efter 12 varv varvar från höger o vanster sida vartannat varv men får inte mönstret att stämma har stickat om så många gångerär ingen nybörjare på att sticka men....snart ger jag upp
16.09.2023 - 11:56DROPS Design ha risposto:
Hei Gun. Når du har felt til ermhull og har xx antall masker i den str du strikker, så pass på at mønstret stemmer overens og at det strikkes 1 masker i riller i hver side. I f.eks 1/3 mnd har du felt de første 5 maskene og starter da med 1 maske rille i 6. maske i diagram M.2. Så strikker du de neste 6 maskene i M.1 + M.1+M.1+M.1 + 1 maske i rille = 44 masker. mvh DROPS Design
26.09.2023 - 11:35
![]() Annica Baggman ha scritto:
Annica Baggman ha scritto:
Hej! Jag stickar tröjan i storlek 12/18 månader. Enligt mönstret ska det räcka med 100 g i det röda, men för mig gick det garnet åt till fram- och bakstycke. Mvh Annica
24.02.2023 - 11:18
|
|||||||||||||
Rubin#rubinsweater |
|||||||||||||
 |
 |
||||||||||||
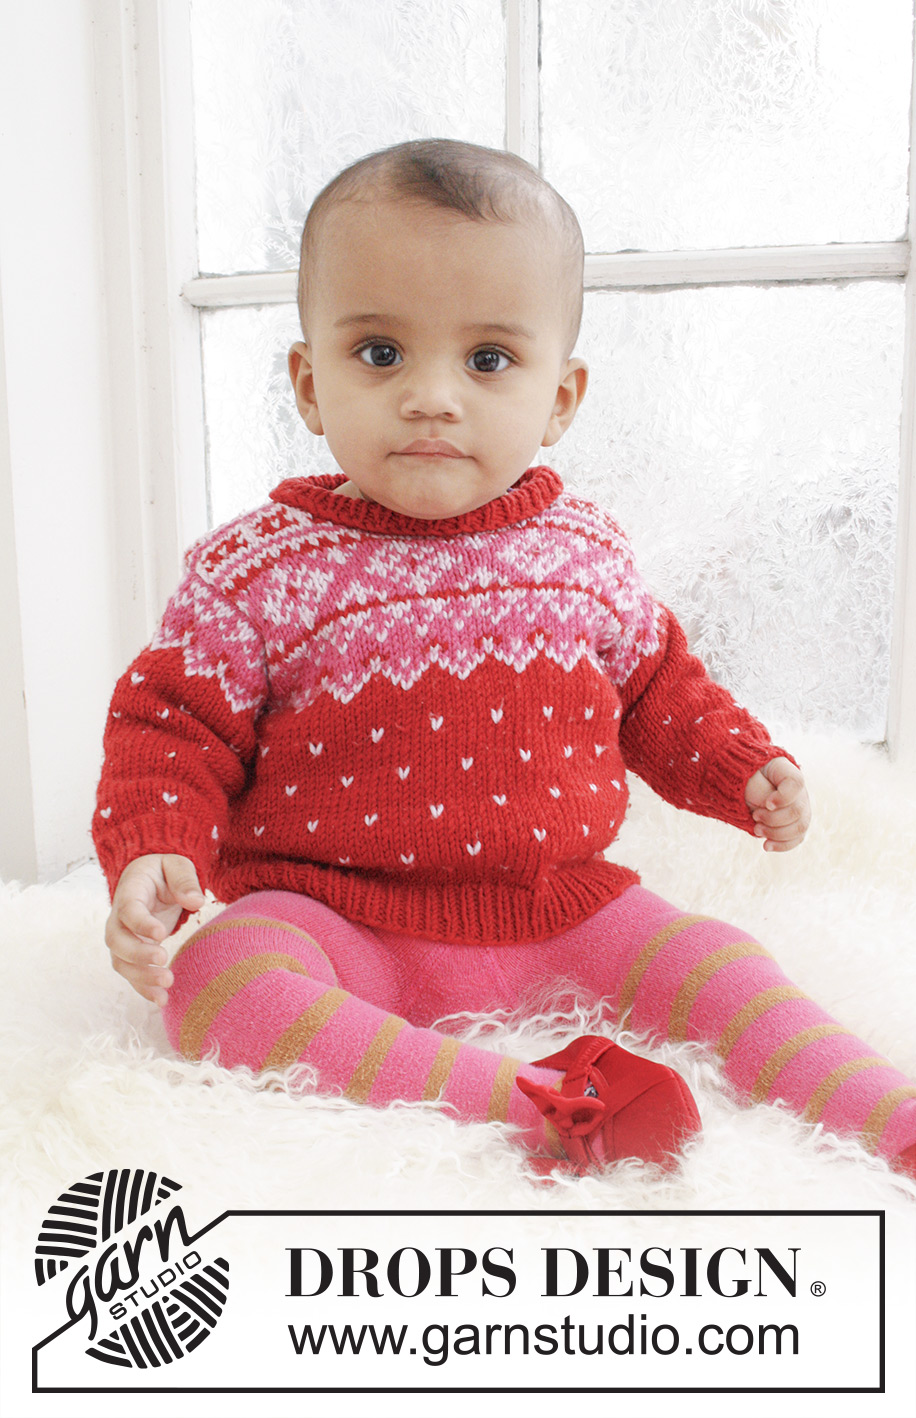
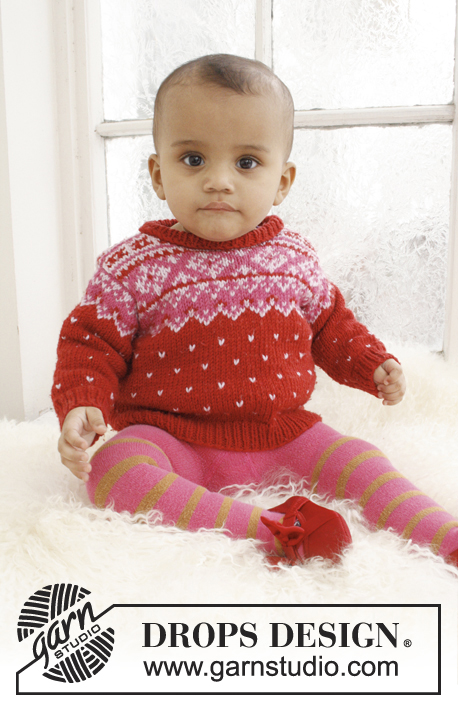
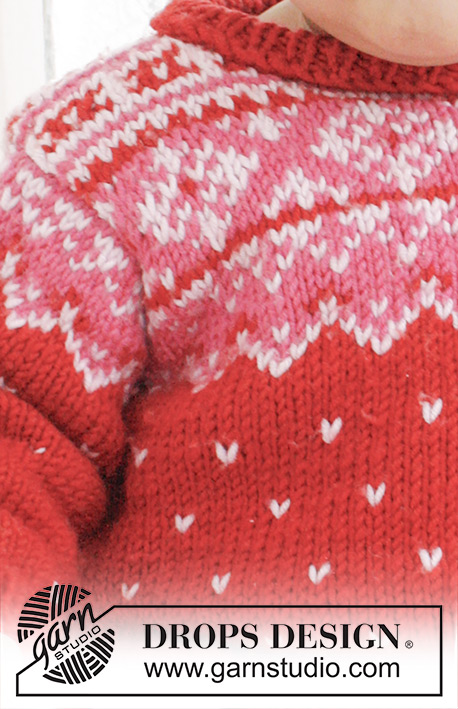
Maglione lavorato ai ferri con motivo nordico per neonati e bambini in DROPS Merino Extra Fine.
DROPS Baby 21-18 |
|||||||||||||
|
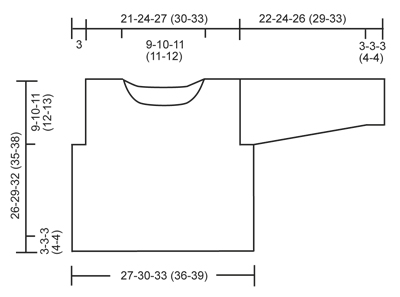
MOTIVO: Vedere i diagrammi M.1 e M.2. M. A LEGACCIO (avanti e indietro sul ferro): lavorare a dir. tutti i f. SUGGERIMENTO PER GLI AUMENTI: Aumentare facendo un gettato, sul f. successivo lavorare il gettato a dir. ritorto (cioè lavorarlo nel filo dietro anziché in quello davanti) per evitare buchi. ---------------------------------------------------------- CORPO: Lavorato in tondo con i ferri circolari. Con i ferri circolari misura 4 mm e il filato rosso avviare 108-120-132 (144-156) m. Continuare a lavorare a coste come segue: * 1 dir., 1 rov. *, ripetere da *-* per 3-3-3 (4-4) cm. Poi passare ai ferri circolari misura 4,5 mm e continuare a m. rasata fino alla lunghezza finale. Quando il lavoro misura 4-6-4 (6-6) cm, inserire un segnapunti all’inizio del giro e un segnapunti dopo 54-60-66 (72-78) m. (= lati), e spostare i segnapunti verso l’alto. FARE ATTENZIONE ALLA TENSIONE DEL LAVORO! Quindi lavorare il diagramma M.1 per un totale di 2-2-3 (3-4) volte in verticale. Poi lavorare i giri 1-6 secondo il diagramma M.1 1-1-1 (1-0) volte, e i giri 1-3 secondo il diagramma M.2 (il lavoro misura circa 17-19-21 (23-25) cm). Sul f. successivo (= quarto giro nel diagramma M.2), intrecciare 10 m. per ogni lato (cioè 5 m. su ogni lato di ogni segnapunti), ora dividere il lavoro e finire ogni parte in modo separato. DIETRO: = 44-50-56 (62-68) m. Ora misurare il lavoro da qui. Lavorare il f. successivo (= diritto del lavoro) come segue: lavorare 1 m. a m. legaccio (= m. di vivagno), lavorare il 5° f. secondo il diagramma M.2 fino a quando rimane 1 m., finire con 1 m. a m. legaccio. Continuare con il diagramma M.2 con 1 m. a m. legaccio a ogni lato fino a quando il lavoro misura 7-8-9 (10-11) cm (NOTA: Continuare a m. rasata con il rosso ciliegia dopo l’ultimo f. del diagramma M.2 fino alla lunghezza finale). Intrecciare le 16-18-20 (20-22) m. centrali per il collo e finire ogni parte in modo separato. Intrecciare 1 m. sul f. successivo dal collo = 13-15-17 (20-22) m. rimaste sulla spalla. Quando il lavoro misura 9-10-11 (12-13) cm, intrecciare tutte le m. (il dietro misura circa 26-29-32 (35-38) cm in lunghezza). DAVANTI: = 44-50-56 (62-68) m. Ora misurare il lavoro da qui. Poi continuare secondo il diagramma M.2 con 1 m. a m. legaccio per ogni lato come per il dietro. Quando il lavoro misura 5-6-7 (7-8) cm, intrecciare le 14-14-16 (16-18) m. centrali per il collo e finire ogni parte in modo separato. Quindi intrecciare sul f. successivo dal dir. dal collo come segue: intrecciare 1 m. 2-3-3 (3-3) volte = 13-15-17 (20-22) m. rimaste sulle spalle. Quando il lavoro 9-10-11 (12-13) cm, intrecciare tutte le m. MANICHE: Lavorata in tondo sui ferri a doppia punta. Con i ferri a doppia punta misura 4 mm e il filato rosso avviare 28-30-32 (34-36) m. Continuare a lavorare a coste come segue: * 1 dir., 1 rov. *, ripetere da *-* per 3-3-3 (4-4) cm. Ora passare ai ferri a doppia punta misura 4,5 mm. Lavorare a dir. il f. successivo e allo stesso tempo distribuire 2-0-4 (2-0) aumenti in modo uniforme = 30-30-36 (36-36) m. LEGGERE TUTTA LA SEZIONE SEGUENTE PRIMA DI CONTINUARE! Continuare a m. rasata fino a quando il lavoro misura 4-4-6 (7-6) cm. Inserire un segnapunti all’inizio del giro (= centro sotto manica) e spostare il segnapunti verso l’alto. Quindi lavorare il diagramma M.1 verso l’alto. Quando il lavoro misura 5-5-7 (8-7) cm, aumentare 1 m. a ogni lato del segnapunti – leggere il SUGGERIMENTO PER GLI AUMENTI sopra = 2 nuove m. lavorate in modo graduale nello schema. Ripetere gli aumenti ogni 8½-5-6½ (4-3½) cm per un totale di 2-4-3 (5-7) volte = 34-38-42 (46-50) m. Lavorare il diagramma M.1 per un totale di 3-3-3 (4-5) volte in verticale. Poi lavorare i giri 1-6 secondo il diagramma M.1 0-1-1 (0-0) volte, e i giri 1-3 secondo il diagramma M.2. Ora passare ai ferri circolari misura 4,5 mm e allo stesso tempo lavorare il 4° f. nel diagramma M.2, poi dividere il lavoro a livello del segnapunti e continuare a lavorare avanti e indietro sui ferri. Sul f. successivo, aumentare 1 m. a ogni lato del lavoro (= 1 m. di vivagno a m. legaccio), continuare con il diagramma M.2 tra le m. di vivagno fino all’11° f. del diagramma M.2 compreso (indicato con una freccia sullo schema). Con il filato rosso ciliegia intrecciare tutte le m. sul f. successivo (il lavoro misura circa 22-24-26 (29-33) cm). CONFEZIONE: Cucire i margini delle spalle e attaccare le maniche. Riprendere lungo il bordo del collo circa 60-70 m. con il filato rosso con i ferri a doppia punta misura 4 mm. Lavorare il giro successivo a dir. e allo stesso tempo aggiustare il n° di m. a 60-62-66 (70-74). Continuare a lavorare a coste come segue: * 1 dir., 1 rov. *, ripetere da *-* per 3-3-3 (4-4) cm, poi intrecciare tutte le m. con dir. su dir. e rov. su rov. Piegare le coste a metà con il margine verso il rovescio del lavoro e affrancarle sul dietro. |
|||||||||||||
Spiegazioni del diagramma |
|||||||||||||
|
|||||||||||||
 |
|||||||||||||
 |
|||||||||||||
Avete terminato questo modello?Allora taggate le vostre foto con #dropspattern #rubinsweater o inviatele alla #dropsfan gallery. Avete bisogno di aiuto con questo modello?Troverete 15 video tutorial, una sezione per i commenti/domande e molto altro guardando il modello su www.garnstudio.com © 1982-2026 DROPS Design A/S. Ci riserviamo tutti i diritti. Questo documento, compreso tutte le sue sotto-sezioni, è protetto dalle leggi sul copyright. Potete leggere quello che potete fare con i nostri modelli alla fine di ogni modello sul nostro sito. |
|||||||||||||


Con oltre 40 anni di esperienza nel design di modelli di maglia e uncinetto, DROPS Design offre la più estesa collezione di modelli gratuiti su internet - tradotti in 17 lingue. Ad oggi vi possiamo fornire 325 cataloghi e 12298 modelli - 9569 dei quali sono tradotti in Italiano.
Ci stiamo impegnando molto per darvi il meglio che vi possiamo offrire in termini di maglia e uncinetto, ispirazioni e consigli così come filati di grande qualità ad un prezzo incredibile! Volete utilizzare i nostri modelli per qualcosa d'altro oltre al vostro uso personale? Potete leggere tutto ciò che è consentito nel testo sul Copyright in basso su tutte le pagine dei nostri modelli. Buon lavoro!
Lasciare un commento sul modello DROPS Baby 21-18
Noi saremmo felici di ricevere i tuoi commenti e opinioni su questo modello!
Se vuoi fare una domanda, fai per favore attenzione a selezionare la categoria corretta nella casella qui sotto per velocizzare il processo di risposta. I campi richiesti sono indicati da *.