
Categorie popolari
State cercando un filato?


Commenti / Domande (22)
Renée ha scritto:
Hi Thanks for your response, but I figured it out myself, I was just a bit confused by the mid front and mid back. I am very pleased with the result. It looks really lovely. Thanks for all your help!
13.12.2013 - 11:48Renée ha scritto:
Hi Could you please explain the assembly instructions as they are rather confusing.
10.12.2013 - 10:44DROPS Design ha risposto:
Dear Renée, on both pieces, you increased on one side and not on the other one. Put both pieces tog so that edge without inc are on mid back. Sew cast off rows together starting from mid front, and continue along edges on back side, this seam should measure approx. 30 cm (back of head). Happy knitting!
10.12.2013 - 13:41
![]() Renée ha scritto:
Renée ha scritto:
Thank you for clarifying.
08.12.2013 - 11:21René ha scritto:
Just to clarify; for part 1 you do the increase at the beginning of the row after the edge stitch. And for Part 2, you do the increase before the final stitch at the end of the row. You wrote in your previous post that you do the increase every other row, but you meant every 4th row as stated in the pattern.
02.12.2013 - 09:31DROPS Design ha risposto:
Dear Renée, you are correct, I mistyped last answer, you inc approx. every 2 cm, ie every 4 th row (= every 2nd row from RS). Inc will be done at beg of row from RS for 1st part and at the end of row from RS for 2nd part. Happy knitting!
02.12.2013 - 13:57Renée ha scritto:
The pattern states that the part 1 increase,should be done on the RS. I assumed this was the right side of the work, i.e. the side worn outwards. But, as this is garter stitch there is no right/outer side or wrong/inner side, as both sides look the same. The part 2 increase is done on the left side. I am a little puzzled. Surely, it does not matter which side you do the increase on, as you would merely join the 2 sides that have been increased? Or I am missing something?
29.11.2013 - 15:44DROPS Design ha risposto:
Dear Renée, you will inc here at the right side of piece, seen from RS, ie at beg of row every other row. And for 2nd part you will inc at the end of row every other row (=every row from WS). Happy knitting!
29.11.2013 - 16:46Renee ha scritto:
Thank you!
21.11.2013 - 13:02Renée ha scritto:
Hi I am confused by the increase. I realise a YO is needed, but do not know what is meant by "inc 1 st from RS inside 1 st on the right side of the piece". I understand that the increase is done with the Right Side (RS) of the knitting facing you. However, I am not sure what is meant by "inside 1 st on the right side of the piece" Do you mean you knit the first stitch in the row and then do the YO? Can you please explain.
20.11.2013 - 10:06DROPS Design ha risposto:
Dear Renée, it means you will inc after the edge st, at the beg of row, seen from RS: K1 (edge st), YO (inc) and continue until end of RS row. Happy knitting!
20.11.2013 - 11:13
![]() Siv Aarflot ha scritto:
Siv Aarflot ha scritto:
Denne kunne vært morsom og prøve seg på.
01.02.2012 - 15:27
![]() Faultier ha scritto:
Faultier ha scritto:
Sehr leicht zu stricken, wunderschön und hält warm.
23.01.2011 - 19:31
![]() Karen Sanborn ha scritto:
Karen Sanborn ha scritto:
This one is very nice to wear with a coat during winter
30.06.2010 - 18:29
|
|
Sandy Wind |
|
 |
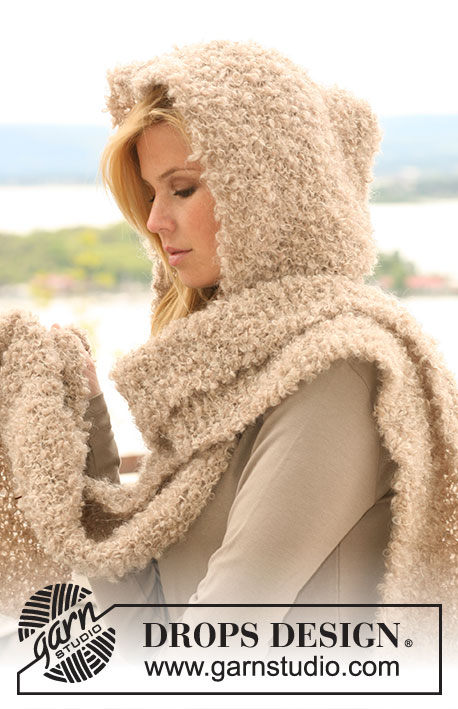 |
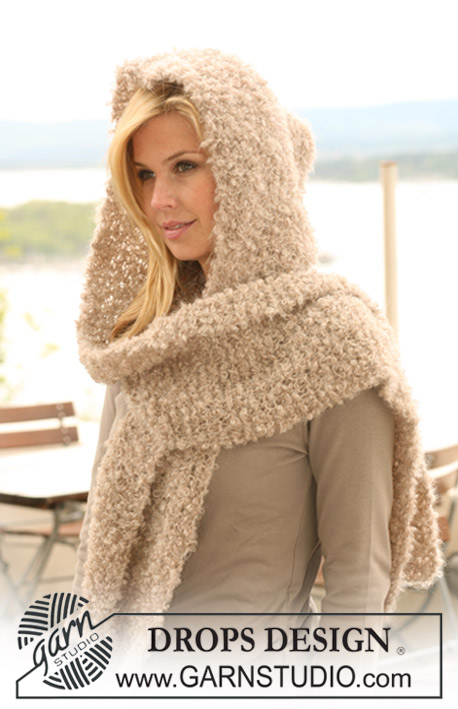
Sciarpa DROPS con cappuccio, a punto legaccio, in "Puddel".
DROPS 123-36 |
|
|
PUNTO LEGACCIO (avanti e indietro sui ferri): Lavorare tutti i ferri a dir. SUGGERIMENTO PER GLI AUMENTI: Per aumentare fare 1 m gettata; al ferro successivo, lavorare la m gettata a dir ritorto (quindi lavorarla nel filo posteriore e non in quello anteriore) per evitare che si formi un buco. -------------------------------------------------------- SCIARPA CON CAPPUCCIO: Si lavora in 2 parti cucite insieme alla fine. PARTE 1: Si lavora avanti e indietro sui ferri. Avviare 25 m sui ferri n° 7. Lavorare a PUNTO LEGACCIO – vedere sopra ! RICORDARSI LA TENSIONE DEL LAVORO! Quando il lavoro misura 106 cm, aumentare 1 m sul diritto del lavoro, a 1 m dal bordo, sul lato destro del lavoro – Vedere il SUGGERIMENTO PER GLI AUMENTI ! Ripetere questi aumenti ogni 4 ferri (ca. ogni 2 cm) per un totale di 8 volte = 33 m. Proseguire a punto legaccio. Intrecciare le m, SENZA STRINGERE TROPPO IL FILO, quando il lavoro misura 130 cm. PARTE 2: Lavorare come indicato per la parte 1, ma aumentare le m sul lato sinistro del lavoro. CONFEZIONE: I lati senza aumenti corrispondono al centro, sul dietro. Cucire le 2 parti insieme nella parte superiore, bordo contro bordo, iniziando dal centro sul davanti. Continuare a cucire per ca. 30 cm, lungo la parte posteriore della sciarpa con cappuccio, procedendo verso il basso. Fermare i fili. |
|
Avete terminato questo modello?Allora taggate le vostre foto con #dropspattern o inviatele alla #dropsfan gallery. Avete bisogno di aiuto con questo modello?Troverete 8 video tutorial, una sezione per i commenti/domande e molto altro guardando il modello su www.garnstudio.com © 1982-2026 DROPS Design A/S. Ci riserviamo tutti i diritti. Questo documento, compreso tutte le sue sotto-sezioni, è protetto dalle leggi sul copyright. Potete leggere quello che potete fare con i nostri modelli alla fine di ogni modello sul nostro sito. |
|


Con oltre 40 anni di esperienza nel design di modelli di maglia e uncinetto, DROPS Design offre la più estesa collezione di modelli gratuiti su internet - tradotti in 17 lingue. Ad oggi vi possiamo fornire 324 cataloghi e 12245 modelli - 9515 dei quali sono tradotti in Italiano.
Ci stiamo impegnando molto per darvi il meglio che vi possiamo offrire in termini di maglia e uncinetto, ispirazioni e consigli così come filati di grande qualità ad un prezzo incredibile! Volete utilizzare i nostri modelli per qualcosa d'altro oltre al vostro uso personale? Potete leggere tutto ciò che è consentito nel testo sul Copyright in basso su tutte le pagine dei nostri modelli. Buon lavoro!
Lasciare un commento sul modello DROPS 123-36
Noi saremmo felici di ricevere i tuoi commenti e opinioni su questo modello!
Se vuoi fare una domanda, fai per favore attenzione a selezionare la categoria corretta nella casella qui sotto per velocizzare il processo di risposta. I campi richiesti sono indicati da *.