
Categorie popolari
State cercando un filato?


Commenti / Domande (209)
![]() Carmen ha scritto:
Carmen ha scritto:
Dankeschön für die schnelle Antwort, ich habe es nun verstanden. Ich bin begeistert über eueren Service. Herzliche Grüße Carmen
01.07.2025 - 09:19
![]() Carmen ha scritto:
Carmen ha scritto:
Bitte um Erklärung, nach 29cm 1Masche im M1in den Kragen einstricken, Maschenzahl bleibt konstant. 14 mal wiederholen gleich 20 Krausrippen.
30.06.2025 - 19:44DROPS Design ha risposto:
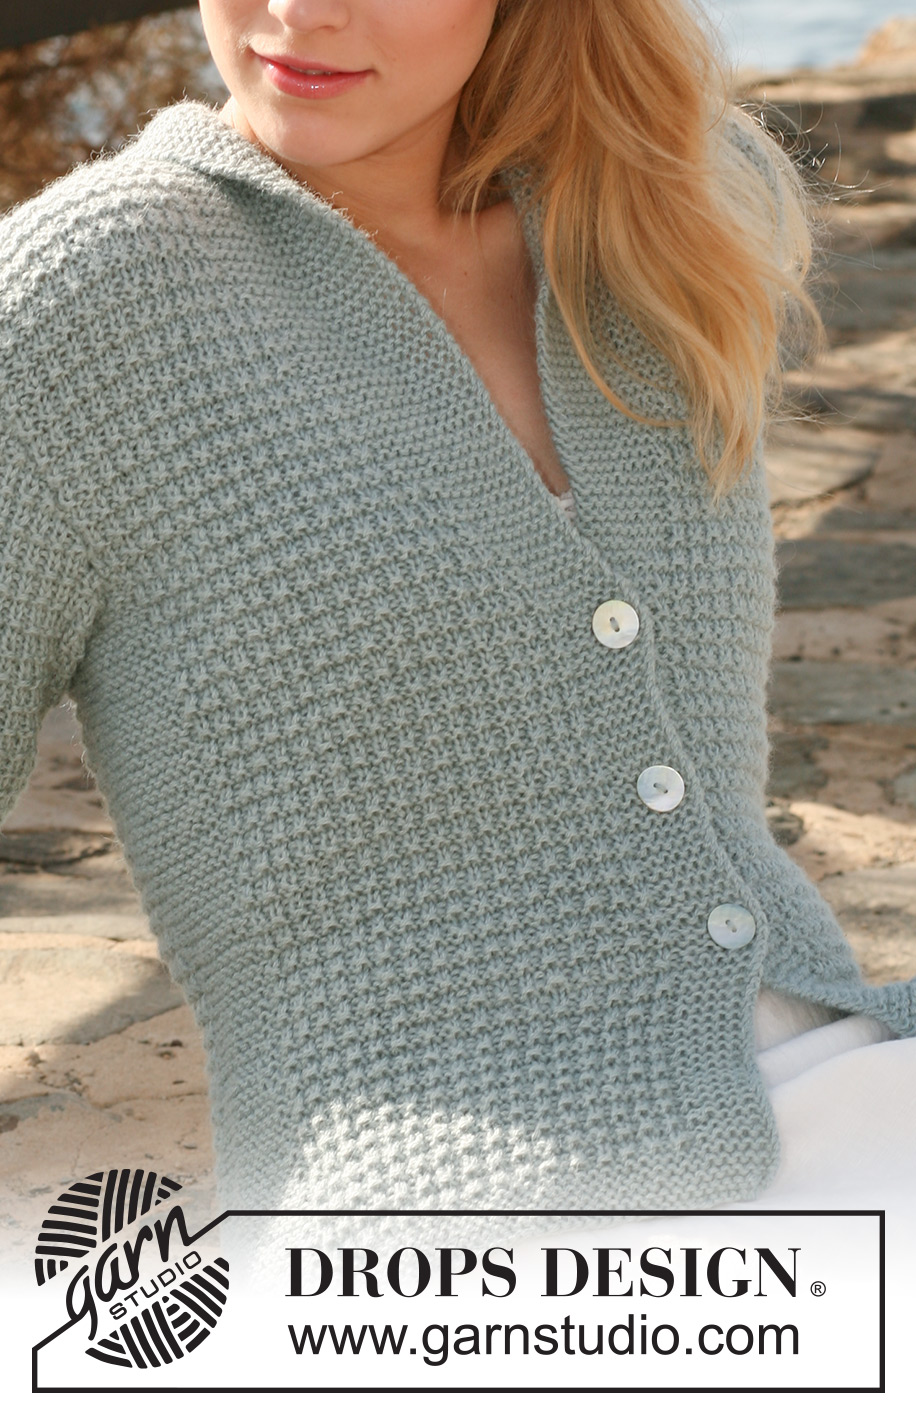
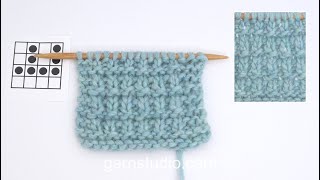
Liebe Carmen, man soll hier nur die Maschenanzahl von Maschen krausrechts zunehmen, so wird man in jeder 2 cm 1 Masche krausrechts mehr stricken und so wird 1 Masche weniger in M.1 gestrickt werden, bis es 16 bis 21 M krausrechts für die Blende ist (einschl. die 6 Blenden-Maschen vom Anfang). Schauen Sie mal das 3. Foto, es kann Ihnen helfen, man kan sehen daß das Teil krausrechts grösser wird, und das Teil im Muster kleiner wird. Viel Spaß beim Stricken!
01.07.2025 - 08:12
![]() Cinzia ha scritto:
Cinzia ha scritto:
Molto bello
26.06.2025 - 19:23
![]() Christine ha scritto:
Christine ha scritto:
I beskrivningen står det strumpstickor. Går det med rundstickor. Står inget om rundstickor i beskrivningen. Tacksam för svar på svenska
12.06.2025 - 15:11
![]() Christine ha scritto:
Christine ha scritto:
Kan jag sticka ärmar på rundstickor?
09.06.2025 - 12:51DROPS Design ha risposto:
Hej Christine, ja ærmerne er beskrevet på rundpinde :)
12.06.2025 - 09:33
![]() Christine ha scritto:
Christine ha scritto:
Jag har kommit till bakstycket o ska maska av 6 maskor i var sida om markören. Jag förstår inte den här beskrivningen. tacksam för snabbt svar.
04.06.2025 - 20:11DROPS Design ha risposto:
Hej Christine, jo du maskar av 6 m för ärmhål i varje sida såhär. Sticka framstycket, maska av de sista 3 m innan markören och de första 3 m efter markören = 6 m, stickar bakst, maska av de sista 3 m innan markören och de första 3 m efter markören = 6 m, stickar framstykcet :)
11.06.2025 - 12:03
![]() Christine Olander ha scritto:
Christine Olander ha scritto:
Hej Beträffande resåren står det att sticka 1 avig o en rät. Då blir det slätstickning på avigsidan ska det se ut så? Tacksam för snabbt svar. Vänligen Christin
28.05.2025 - 10:15DROPS Design ha risposto:
Hei Christine. Fint om du skal skrive nøyaktig hvor i oppskriften du er. Om du mener resåren nederst på plagget skal du strikke 8 varv med RÄTST. Husk å lese RÄTST (på rundst) øverst i oppskriften. (skal ikke bli slätstickning). mvh DROPS Design
02.06.2025 - 08:19
![]() Christine Olander ha scritto:
Christine Olander ha scritto:
Hej Stickar på rundstickor. Resåren ser ut som slätstickning på avigsidan, skall det vara så? Tacksam för snabbt svar. Vänligen Christin
28.05.2025 - 07:37DROPS Design ha risposto:
Hej Christine. Menar du diagrammet? Sett från rätsidan är första varvet räta maskor, andra aviga maskor, 3:e och 4:e varvet varannan maska rät och varannan avig. Mvh DROPS Design
28.05.2025 - 08:37
![]() Christine Olander ha scritto:
Christine Olander ha scritto:
Hur får jag kanterna på resåren lika på framstyckena? Tacksam för support. Vänligen Christin
25.05.2025 - 14:58
![]() Christine Olander ha scritto:
Christine Olander ha scritto:
Hur fungerar diagrammet till Model Marit jag får inte till det Behöver verkligen support. Christin
24.05.2025 - 21:14DROPS Design ha risposto:
Hei Christine. Klikk på Videor til høyre / under bildet, og deretter klikk på videoen: Hur man stickar ett enkelt strukturmönster med räta och aviga maskor Der viser vi hvordan vi strikker etter diagramet. mvh DROPS Design
26.05.2025 - 13:14
|
|||||||
Marit#maritcardigan |
|||||||
 |
 |
||||||
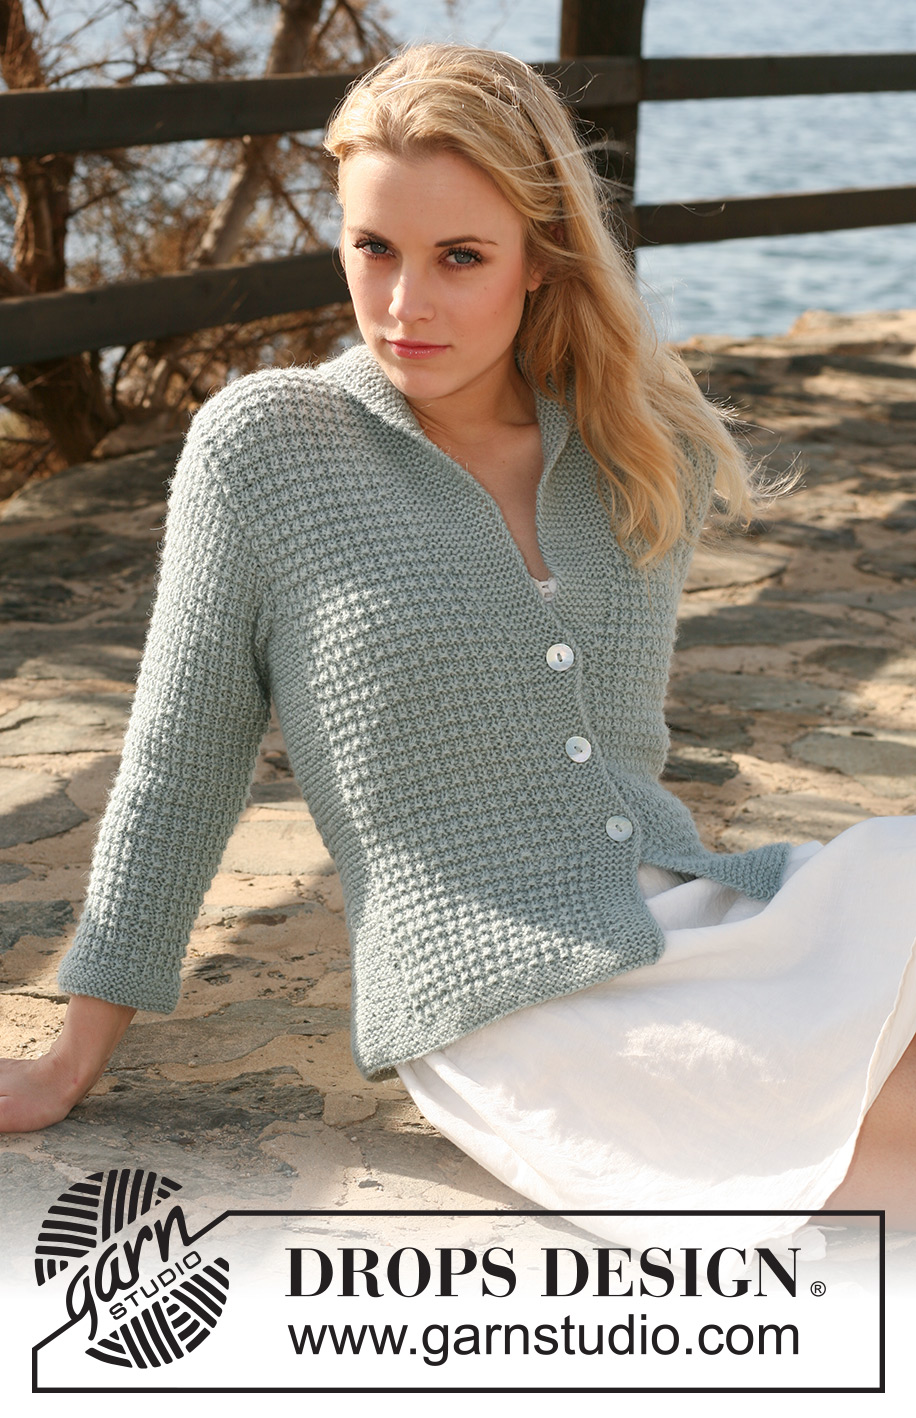
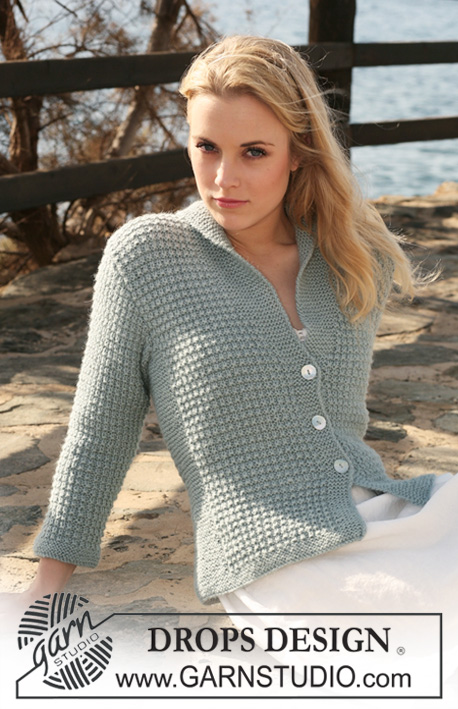
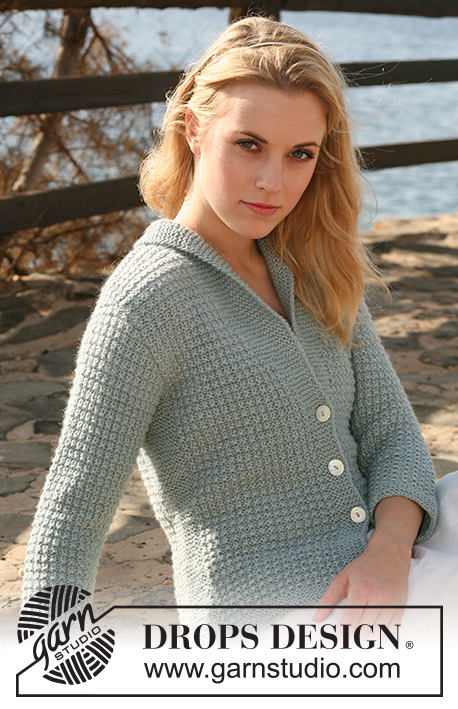
Giacca DROPS lavorata ai ferri con motivo a punto fantasia e colletto in 2 capi di "Alpaca". Taglie: S - XXXL.
DROPS 119-6 |
|||||||
|
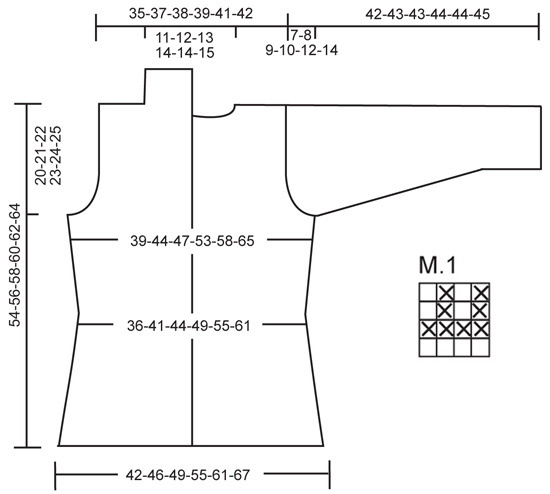
M LEGACCIO (avanti e indietro sui f): Lavorare tutti i f a dir. M LEGACCIO (in tondo): 1 giro dir, 1 giro rov. MOTIVO: Vedere il diagramma M.1. Il diagramma mostra il motivo dal diritto del lavoro. ASOLE: Fare le asole sul bordo davanti destro. 1 asola = intrecciare la 3° m del bordo davanti destro dal centro davanti e avviare 1 nuova m sul f di ritorno. Fare le asole quando il lavoro misura: TAGLIA S: 14, 21 e 28 cm. TAGLIA M: 14, 21 e 28 cm. TAGLIA L: 14, 21 e 28 cm. TAGLIA XL: 15, 22 e 29 cm. TAGLIA XXL: 15, 22 e 29 cm. TAGLIA XXXL: 15, 22 e 29 cm. ------------------------------------------------------- CORPO: Lavorato avanti e indietro sui f circolari dal centro davanti. Avviare 163-179-193-211-233-257 m con i f circolari n° 4,5 mm con 2 capi di Alpaca. Inserire un segnapunti all'interno di 44-48-52-56-62-68 m da ogni lato (dietro = 75-83-89-99-109-121 m). Lavorare 8 f a M LEGACCIO – LEGGERE SOPRA, e continuare come segue dal diritto del lavoro: 6 m a m legaccio, M.1 sulle 29-33-37-41-47-53 m successive, 18 m a m legaccio (il segnapunti è al centro di queste m), M.1 sulle 57-65-71-81-91-103 m successive, 18 m a m legaccio (il segnapunti è al centro di queste m), M.1 sulle 29-33-37-41-47-53 m successive, e finire con 6 m a m legaccio. FARE ATTENZIONE ALLA TENSIONE DEL LAVORO! Continuare con il motivo in questo modo, ALLO STESSO TEMPO quando il lavoro misura 5 cm diminuire 1 m a ogni lato delle m a m legaccio a ogni lato lavorando 2 m insieme a dir, ripetere le diminuzioni ogni 2,5 cm per un totale di 5 volte = 143-159-173-191-213-237 m. Ricordarsi delle ASOLE sul bordo davanti destro – LEGGERE SOPRA!! Quando il lavoro misura 20 cm aumentare 1 m a ogni lato delle m a m legaccio a ogni lato, e ripetere gli aumenti ogni 6-6-6-7-7-7 cm per un totale di 3 volte = 155-171-185-203-225-249 m. ALLO STESSO TEMPO quando il lavoro misura 28-28-28-29-29-29 cm lavorare 1 m di M.1 nel bordo davanti (cioè il n° di m rimane lo stesso ma il n° di m a m legaccio sul bordo davanti aumenta e il n° di m in M.1 diminuisce), e ripeterlo ogni 2 cm per un totale di 10-11-13-13-14-15 volte (= 16-17-19-19-20-21 m legaccio sul bordo davanti). Continuare con M.1 e la m legaccio fino a quando il lavoro misura 34-35-36-37-38-39 cm. Ora intrecciare 6 m a ogni lato per lo scalfo (= 3 m a ogni lato del segnapunti) e finire ogni parte in modo separato. DIETRO: = 65-73-79-89-99-111 m. Continuare con M.1 su tutte le m. Intrecciare per lo scalfo a ogni lato all'inizio di ogni f: 2 m 0-1-2-3-4-6 volte e 1 m 0-1-1-3-5-6 volte = 65-67-69-71-73-75 m. Quando il lavoro misura 52-54-56-58-60-62 cm intrecciare le 17-19-21-23-23-25 m centrali per il collo e finire ogni spalla in modo separato. Intrecciare 1 m sulla scollatura sul f successivo = 23-23-23-23-24-24 m rimaste sulla spalla. Intrecciare quando il lavoro misura 54-56-58-60-62-64 cm. DAVANTI SINISTRO: Continuare con la m legaccio sul bordo davanti e M.1 sulle m rimaste. Intrecciare per lo scalfo a lato come descritto per il dietro = 39-40-42-42-44-45 m. Quando il lavoro misura 54-56-58-60-62-64 cm intrecciare le prime 23-23-23-23-24-24 m dal diritto del lavoro per la spalla = 16-17-19-19-20-21 m rimaste sul colletto. Lavorare le m rimaste sul f. Ora lavorare a f accorciati sul colletto (iniziando dal rovescio del lavoro) come segue: * 2 f solo sulle prime 8-8-8-9-9-10 m, 2 f su tutte le m *, ripetere *-* fino a quando il collo misura circa 6-6-7-7-8-8 cm sul lato più corto (misurato dalla spalla). Intrecciare. DAVANTI DESTRO: Come il davanti sinistro, ma specchio. MANICA: Lavorata in tondo con i f a doppia punta. Avviare 44-46-48-50-52-54 m con i f a doppia punta n° 4,5 mm con 2 capi di Alpaca. Inserire un segnapunti all'inizio del giro = centro sotto la manica. Lavorare 8 f a M LEGACCIO – LEGGERE SOPRA, e continuare con M.1 su tutte le m. Quando il lavoro misura 5 cm aumentare 1 m a ogni lato del segnapunti, e ripetere gli aumenti ogni 3-2,5-2-2-1,5-1,5 cm per un totale di 9-11-12-14-15-16 volte = 62-68-72-78-82-86 m. Incorporare le m aumentate in M.1 durante il lavoro. Quando il lavoro misura 35-35-34-34-32-31 cm - NOTA! Meno per le taglie più grandi a causa dell'arrotondamento della manica più lungo e della maggiore ampiezza delle spalle – intrecciare per l'arrotondamento della manica a ogni lato all'inizio di ogni f: 3 m 1 volta, 2 m 3 volte, 1 m 0-1-2-4-5-7 volte, poi 2 m a ogni lato fino a quando il lavoro misura 41-42-42-43-43-44 cm, ora intrecciare 3 m 1 volta a ogni lato e intrecciare le m rimaste. Il lavoro misura circa 42-43-43-44-44-45 cm. CONFEZIONE: Cucire i margini delle spalle. Attaccare le maniche. Cucire il colletto al centro dietro e attaccarlo alla scollatura sul dietro. Attaccare i bottoni. |
|||||||
Spiegazioni del diagramma |
|||||||
|
|||||||
 |
|||||||
Avete terminato questo modello?Allora taggate le vostre foto con #dropspattern #maritcardigan o inviatele alla #dropsfan gallery. Avete bisogno di aiuto con questo modello?Troverete 18 video tutorial, una sezione per i commenti/domande e molto altro guardando il modello su www.garnstudio.com © 1982-2026 DROPS Design A/S. Ci riserviamo tutti i diritti. Questo documento, compreso tutte le sue sotto-sezioni, è protetto dalle leggi sul copyright. Potete leggere quello che potete fare con i nostri modelli alla fine di ogni modello sul nostro sito. |
|||||||


Con oltre 40 anni di esperienza nel design di modelli di maglia e uncinetto, DROPS Design offre la più estesa collezione di modelli gratuiti su internet - tradotti in 17 lingue. Ad oggi vi possiamo fornire 324 cataloghi e 12290 modelli - 9561 dei quali sono tradotti in Italiano.
Ci stiamo impegnando molto per darvi il meglio che vi possiamo offrire in termini di maglia e uncinetto, ispirazioni e consigli così come filati di grande qualità ad un prezzo incredibile! Volete utilizzare i nostri modelli per qualcosa d'altro oltre al vostro uso personale? Potete leggere tutto ciò che è consentito nel testo sul Copyright in basso su tutte le pagine dei nostri modelli. Buon lavoro!
Lasciare un commento sul modello DROPS 119-6
Noi saremmo felici di ricevere i tuoi commenti e opinioni su questo modello!
Se vuoi fare una domanda, fai per favore attenzione a selezionare la categoria corretta nella casella qui sotto per velocizzare il processo di risposta. I campi richiesti sono indicati da *.