
Categorie popolari
State cercando un filato?


Commenti / Domande (89)
![]() Sybille ha scritto:
Sybille ha scritto:
Bei dem Stück, wo immer 10 Maschen mehr gestrickt werden, damit die Hose hinten höher wird als vorn, sind Löcher entstanden. Sie sind dort, wo jeweils gewendet wurde. Was habe ich hier denn falsch gemacht?
29.05.2022 - 16:29DROPS Design ha risposto:
Liebe Sybille, wenn Sie die nächste Runde über alle Maschen stricken, dann können Sie den Faden zwischen 2 verkürzten Reihen auffassen, und diesen Faden verschränkt mit der nächsten Masche stricken - wie bei diesem Video (Timecode 4:00 z.B.) gezeigt wird. Viel Spaß beim stricken!
30.05.2022 - 08:08
![]() Sybille ha scritto:
Sybille ha scritto:
Wie verhält sich die Wolle/das Material nach dem Waschen? Ist die Hose dann noch genauso in Form?
21.04.2022 - 12:04DROPS Design ha risposto:
Liebe Sybille, ja sicher, folgen Sie einfach die Pfelgehinweise - beachten Sie nur, daß Alpaca nicht Superwash (wie Fabel) ist, dh die Hose soll dann gewaschen werden, wie unter Alpaca beschrieben wird. Viel Spaß beim stricken!
21.04.2022 - 13:29
![]() Katrine ha scritto:
Katrine ha scritto:
Hei! Er det slik at de to garnene i ullbuksrmønsteret skal strikkes samtidig på pinne nr 4?
10.02.2022 - 22:04
![]() Ingunn Kjørholt Wolline ha scritto:
Ingunn Kjørholt Wolline ha scritto:
See previous post, answer was not helpful. I have tried binding of according to the pattern, but the finish looks sloppy with 2/3 of the leg being stockinette stitch which will naturally roll up. Would have been nice to see in the pictures how it is supposed to look. Any suggestions, other than rib finish?
03.02.2022 - 22:52DROPS Design ha risposto:
Dear Mrs Kjørholt Wolline, sorry that the previous answer didn't help, the tights on the pictures have been worked/cast off as explained, ie with stitches in stocking stitch and rib as worked before. Make sure to avoid casting off too loosely to avoid a wavy edge and not too tight neither. You can then block bottom of tights/legs if necessary. Some knitters have worked ribbing edge at the bottom of leg, you can see their projects on Ravelry - if it can help. Happy knitting!
04.02.2022 - 09:00
![]() Ingunn Kjørholt Wolline ha scritto:
Ingunn Kjørholt Wolline ha scritto:
I am about to cast off first leg and it says to bind off in pattern, but I worry about it being too roomy at the ankles. I could of course finish in rib, but that is not the look I'm going for. The pictures are no help since the model are wearing boots, so what type of fit is this?
01.02.2022 - 18:33DROPS Design ha risposto:
Dear Mrs Kjørholt Wolline, the tights on the picture ends at the bottom of leg with pattern as before, ie stocking stitch with the rib on the outer side of leg. Feel free to add some cm ribbing edge at the very bottom if you feel it necessary. Happy knitting!
02.02.2022 - 07:42
![]() Darren Paterson ha scritto:
Darren Paterson ha scritto:
Thank you for the previous answers. I have another question (sorry!): I seem to be doing something wrong in the transition from the initial ribbing to the stockinette + rib where the ribbing doesn't line up. I'm doing size S, and I'm starting the 19 stockinette stitches at the cast on stitch (1 before the MT). Am I starting this in the wrong place? Also: when knitting to make it longer in the back, do I knit in pattern the whole time? I.e., stockinette + sections of K2, P5?
26.01.2022 - 00:10DROPS Design ha risposto:
Dear Mrs Paterson, start with the stitch with the marker: P3, K2, P5, K2, P5, K2 = 19 sts worked in stocking stitch, 33 sts in rib as before (= (P5, K2)*4 (= 28 sts) + P5, then work 37 sts in stocking st (= previously (K2,P5)x5 (= 35 sts) + K2), then work the next 33 sts in rib as before (= (P5, K2)*4 (= 28 sts) and work stocking stitch to the end of the round. Happy knitting!
26.01.2022 - 09:03
![]() Arabella ha scritto:
Arabella ha scritto:
Hi! I have made the tights following your pattern and they turned out great. However, as my waist is considerably smaller than my hips, they are not staying put. Any tips on how to put an inconspicuous elastic so they don't gap/fall down. Thank you!
23.01.2022 - 01:40DROPS Design ha risposto:
Dear Arabella, You could try to turn the top 2 cm down sew it and add the elastic there, but if you want to keel the waistline, try sewing the elastic to the line between the ribbed and the knit part at the waist. Also, you might try to thread elastic thread into the top few rows of ribbing. Happy Stitching!
24.01.2022 - 00:46
![]() Darren Paterson ha scritto:
Darren Paterson ha scritto:
Another question: the first row calls for P3, *K2, P5*, repeat from *, finish with P2, but that leaves me with 2 extra stitches at the end. Is it actually P3, *K2, P5*, repeat from *, finish with K2, P2?
21.01.2022 - 19:59DROPS Design ha risposto:
Correct, see also below. Happy knitting!
24.01.2022 - 08:20
![]() Darren Paterson ha scritto:
Darren Paterson ha scritto:
I'm really excited about trying this pattern, but I just don't understand how to get started with the placement of the marking threads. I'm doing size Small. Do I P3 before placing the first MT? Or do I place a MT and then Purl? And do I do 70 or 71 stitches before placing another MT? (Does the MT go between stitches 70 & 71, or after stitch 71?) And does "finish with P2" mean that on the last repeat of *K2, P5* I'm actually doing K2, P7? I'm hopelessly confused by that first row... :(
21.01.2022 - 19:45DROPS Design ha risposto:
Dear Mrs Paterson, set the first marker in the first stitch of the round (the first of the P3), and insert the 2nd marker in the 71st stitch of the round. You work in rib starting with P3, then repeat (K2, P5) until 4 sts remain, work K2 and end with P5 (you will then have P5 all the round). Happy knitting!
24.01.2022 - 08:20
![]() Maria ha scritto:
Maria ha scritto:
Not really find your comment useful (see below). I want to make these specific leggings but would need some advise as per below. Many thanks.
11.01.2022 - 11:51DROPS Design ha risposto:
Dear Maria, you can use both Nepal or Big Merino - calculate new amount of yarn here - Using Big Merino (Superwash yarn), you don't need to go one size down, but make sure in both cases that tension will match (and read extra tips for washing superwash yarn linked below). Happy knitting!
12.01.2022 - 09:12
|
|
Rhoda |
|
 |
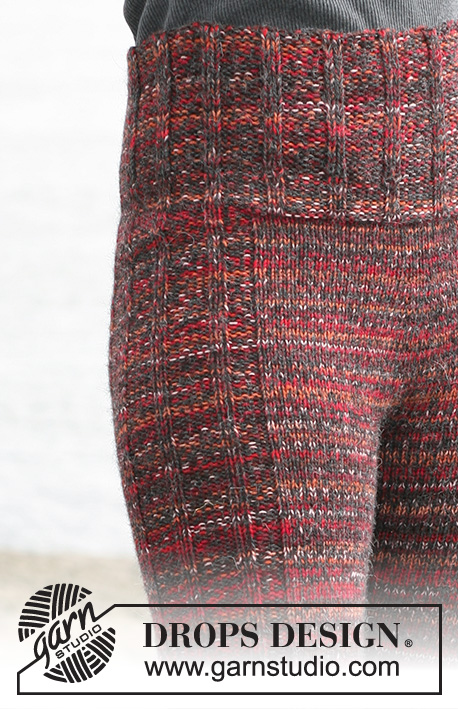 |
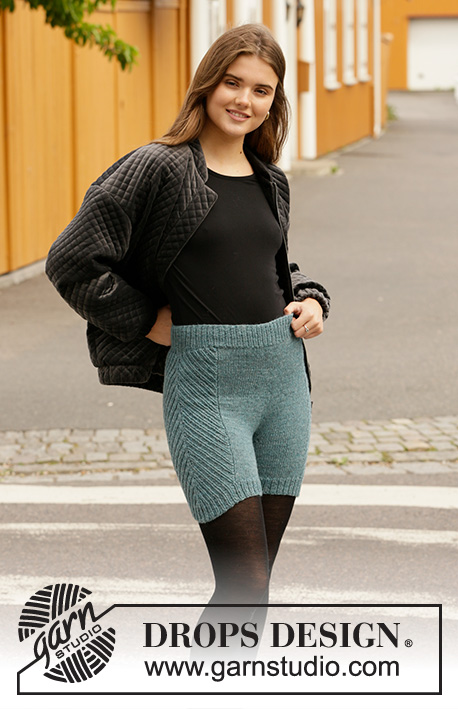
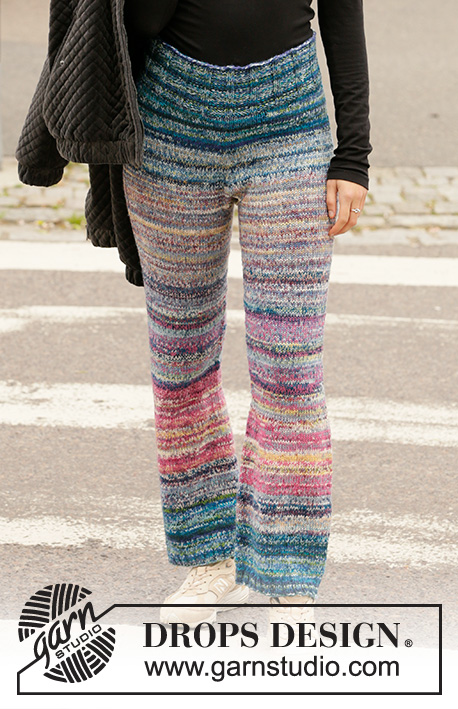
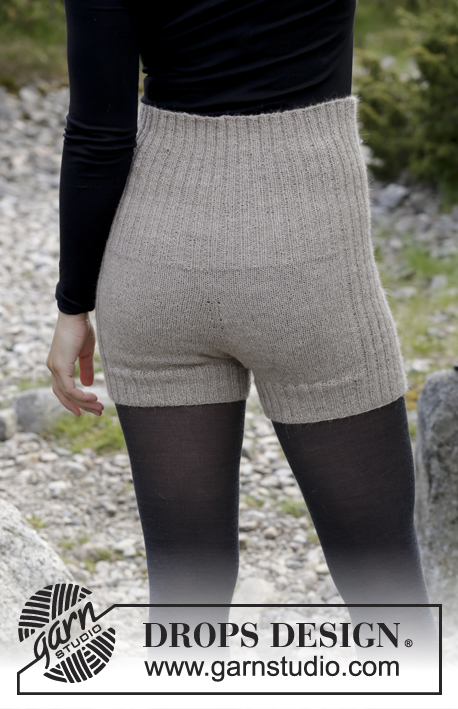
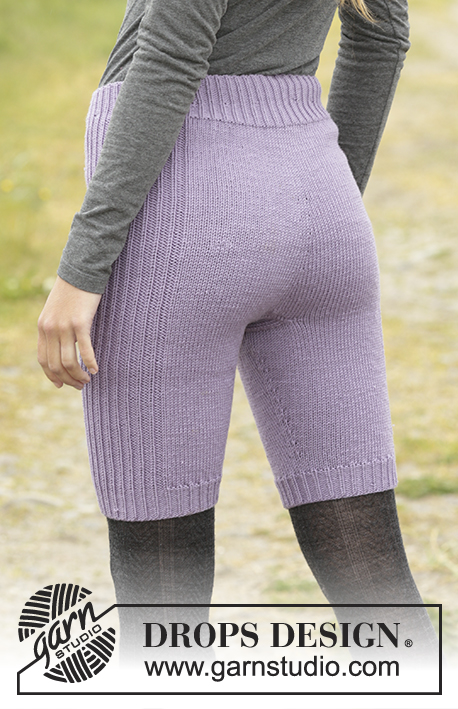
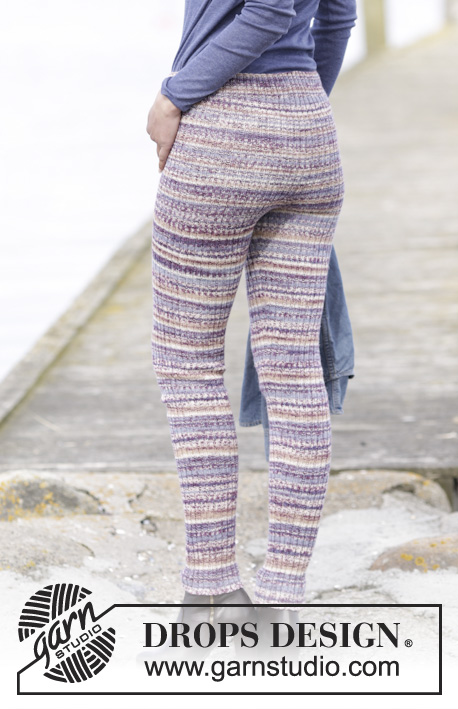
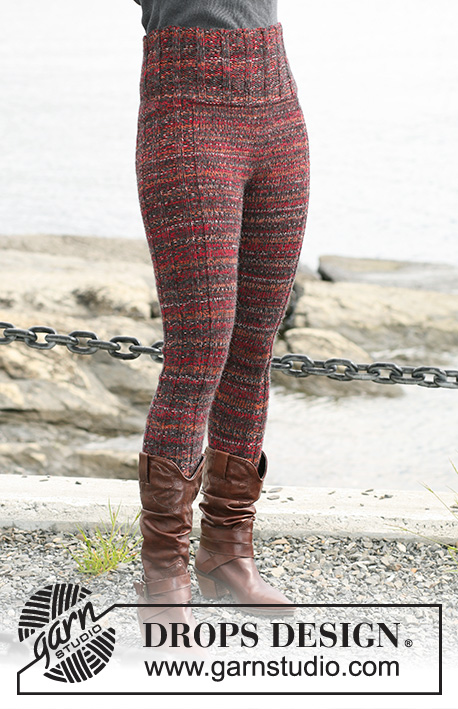
Leggings DROPS in ”Fabel” e ”Alpaca”.
DROPS 103-23 |
|
|
CAMPIONE: 19 m x 25 f con 1 capo di ogni qualità lavorati a m rasata = 10 x 10 cm. SUGGERIMENTO PER LE DIMINUZIONI (applicato alle gambe): Diminuire a ogni lato dei segnapunti. Diminuire come segue prima del segnapunti: lavorare 2 m insieme a dir. Diminuire come segue dopo il segnapunti: passare 1 m a dir senza lavorarla, 1 m dir, accavallare la m passata sopra quella appena lavorata. SUGGERIMENTO PER GLI AUMENTI: Taglie S, L e XXL: aumentare a ogni lato delle 3 m dir al centro davanti e al centro dietro. Taglie M e XL: Aumentare a ogni lato delle 2 m dir al centro davanti e al centro dietro. Aumentare le m come segue: Riprendere 1 m dal giro precedente. Lavorarla a dir. ----------------------------------- LEGGINGS: Lavorare in tondo con i f circolari dall'alto in basso. Avviare 140-154-168-182-196 m con i f circolari n° 4 mm con 1 capo di ogni qualità. Lavorare a coste per 10 cm come segue: Taglie S, L e XXL: 3 m rov – inserire 1 segnapunti nella 1° m = centro dietro, *2 m dir, 5 m rov*, ripetere *-* e finire con 2 m rov – inserire 1 segnapunti nella 71°-85°-99° m sul giro (centro delle 5 m rov) = centro davanti. Taglie M e XL: Inserire 1 segnapunti all'inizio del giro = centro dietro, 1 m dir, *5 m rov, 2 m dir*, ripetere *-*, finire con 5 m rov e 1 m dir – inserire 1 segnapunti dopo 77-91 m (al centro di 2 m dir) = centro davanti. Continuare come segue: 19-22-26-29-33 m a m rasata, 33 m a coste come prima, 37-44-51-58-65 m a m rasata, 33 m a coste come prima e 18-22-25-29-32 m a m rasata. Quando il lavoro misura 11 cm lavorare i pantaloni in modo che siano più lunghi sul dietro rispetto al davanti. Questo viene ottenuto come segue: Lavorare 10 m dopo il segnapunti sul dietro, girare e lavorare come segue: passare la 1° m senza lavorarla (per evitare un buco) e lavorare 10 m dopo l'altro lato del segnapunti, girare *passare la 1° m senza lavorarla, passare il segnapunti e lavorare 10 m in più rispetto al giro precedente+*, ripetere *-* fino a quando rimangono 20-14-28-22-16 m al centro davanti. Girare un'ultima volta in modo che il lavoro inizi dal diritto del lavoro. Continuare a lavorare su tutte le m. Quando il lavoro misura 13-14-14-15-15 cm dal centro davanti (circa 18-20-20-21-22 cm al centro dietro) aumentare sul davanti e sul dietro – leggere il SUGGERIMENTO PER GLI AUMENTI sopra: aumentare 2 m sul davanti e sul dietro ogni 5-5-6-6-7 giri per un totale di 7 volte = 168-182-196-210-224 m. Quando il lavoro misura 27-29-31-33-35 cm al centro davanti intrecciare le prime 6-6-7-7-8 m, mettere 73-79-85-91-97 su un fermamaglie (= 1 gamba). Lasciare le 11-12-13-14-15 m seguenti sul f (cavallo), mettere le 73-79-85-91-97 m successive su un fermamaglie (= 1 gamba) e intrecciare le 5-6-6-7-7 m rimaste. Poi lavorare 9 cm a m rasata sulle 11-12-13-14-15 m per il cavallo. Intrecciare e cucire il cavallo alle 11-12-13-14-15 m intrecciate al centro dietro. GAMBA: Riportare 73-79-85-91-97 m di una gamba dal fermamaglie sui f circolari corti (lunghi 40 cm), e inoltre riprendere 18-20-20-22-24 m lungo un lato del cavallo = 91-99-105-113-121 m. Continuare a coste sulle 33 m a lato e a m rasata sulle 58-66-72-80-88 m rimaste. Inserire un segnapunti nel lato più interno della gamba (nelle m riprese lungo il cavallo). Quando la gamba misura 8 cm diminuire 1 m a ogni lato del segnapunti - leggere il SUGGERIMENTO PER LE DIMINUZIONI sopra: diminuire ogni 4-3,5-3-2,5-2,5 cm per un totale di 17-20-22-25-28 volte = 57-59-61-63-65 m – passare ai f a doppia punta quando ci sono troppe poche maglie per i f circolari. Continuare a lavorare fino a quando la gamba misura circa 78-79- 80-81-82 cm – provare i leggings per valutare la lunghezza. Intrecciare con dir su dir e rov su rov. Riportare le m dell'altro segnapunti sui f circolari n° 4 mm e lavorare l'altra gamba. |
|
Avete terminato questo modello?Allora taggate le vostre foto con #dropspattern o inviatele alla #dropsfan gallery. Avete bisogno di aiuto con questo modello?Troverete 17 video tutorial, una sezione per i commenti/domande e molto altro guardando il modello su www.garnstudio.com © 1982-2026 DROPS Design A/S. Ci riserviamo tutti i diritti. Questo documento, compreso tutte le sue sotto-sezioni, è protetto dalle leggi sul copyright. Potete leggere quello che potete fare con i nostri modelli alla fine di ogni modello sul nostro sito. |
|


Con oltre 40 anni di esperienza nel design di modelli di maglia e uncinetto, DROPS Design offre la più estesa collezione di modelli gratuiti su internet - tradotti in 17 lingue. Ad oggi vi possiamo fornire 324 cataloghi e 12290 modelli - 9561 dei quali sono tradotti in Italiano.
Ci stiamo impegnando molto per darvi il meglio che vi possiamo offrire in termini di maglia e uncinetto, ispirazioni e consigli così come filati di grande qualità ad un prezzo incredibile! Volete utilizzare i nostri modelli per qualcosa d'altro oltre al vostro uso personale? Potete leggere tutto ciò che è consentito nel testo sul Copyright in basso su tutte le pagine dei nostri modelli. Buon lavoro!
Lasciare un commento sul modello DROPS 103-23
Noi saremmo felici di ricevere i tuoi commenti e opinioni su questo modello!
Se vuoi fare una domanda, fai per favore attenzione a selezionare la categoria corretta nella casella qui sotto per velocizzare il processo di risposta. I campi richiesti sono indicati da *.