
Categorie popolari
State cercando un filato?


Commenti / Domande (10)
![]() Susanne ha scritto:
Susanne ha scritto:
Hallo, das Muster der Jacke wird schief, da man bei der Lochreihe immer am Anfang der Reihe zwei Maschen zusammen strickt und am Ende der Umschlag aufgenommen wird. Wie verhindere ich das? Vielen Dank
12.05.2025 - 09:22DROPS Design ha risposto:
Liebe Susanne, das Muster muss man mit je 1 Randmasche krausrechts beidseitig stricken, so strickt man: 1 Randmasche krausrechts, dann bei der 5. Reihe strickt man (2 M rechts zusammen, 1 Umschlag) bis 1 Masche übrig ist, und 1 Randmasche krausrechts stricken. Viel Spaß beim Stricken!
12.05.2025 - 10:55
![]() Angela ha scritto:
Angela ha scritto:
Thank you for your prompt responses. The finished piece has turned out beautifully. Keep up the good work.
31.08.2020 - 18:19
![]() Angela ha scritto:
Angela ha scritto:
Hello. And hopefully, finally, for the buttonhole band, should I make it exactly as directed for the button band, that is 3cm stocking stitch (with buttonholes after 1cm), purl 1 round, then 3cm, stocking stitch (and another row of buttonholes to match the first set), or do I just knit 3cm stocking stitch (with buttonholes after 1cm, then bind off at 3cm?
28.08.2020 - 20:50DROPS Design ha risposto:
Dear Angela, if you like to make the button bands as in the pattern, you will work the hem lilke this along the right front piece (= 3 cm stocking stitch with 5 buttonholes evenly spaced after 1 cm, then purl 1 row (seen from RS = folding edge), 3 cm stocking stitch with buttonholes facing the first part of button band (= after 2 cm approximately), then cast off and sew cast off edge folding double along folding edge. Along left front piece work only 3 cm stocking stitch, folding edge, 3 cm stocking stitch. Happy knitting!
31.08.2020 - 08:57
![]() Angela ha scritto:
Angela ha scritto:
Hello, again. In the assembly part of the pattern, for the button band, you say to "...knit 3 edge back and forth on row... " I don't understand. Does this mean to knit 3 cm, 3 ridges or what?
24.08.2020 - 19:46DROPS Design ha risposto:
Dear Angela, this looks to be only a typo, thanks for noticing, pattern will be edited. You work the edge as explained at the beginning of the pattern (= 3 cm stocking st, P1 row (seen from RS for folding edge), 3 cm stocking st). Happy knitting!
25.08.2020 - 09:11
![]() Muriel ha scritto:
Muriel ha scritto:
Quelle est la hauteur en cm (ou nombre de rangs) pour les bordures gauche et droite ? Merci beaucoup
22.08.2020 - 13:37DROPS Design ha risposto:
Bonjour Muriel, la bordure est un ourlet qui se tricote sur 3 cm jersey, 1 rang de cassure à l'envers sur l'endroit et 3 cm jersey - cf "Bordure" au début des explications. Pliez les 3 derniers cm sur l'envers et cousez-les sur l'envers. Bon tricot!
24.08.2020 - 08:11
![]() Muriel ha scritto:
Muriel ha scritto:
Bonjour, quelles sont les references Drops pour les boutons et leur taille ? MERCI et encore BRAVO pour cette très belle tricotheque .
19.08.2020 - 12:06DROPS Design ha risposto:
Bonjour Muriel et merci. Ces boutons ne sont plus disponibles (ce modèle date d'il y a quelques années déjà), toutefois, vos boutonnières doivent mesurer 1,5 cm de large (on rabat 3 m - et l'échantillon est de 20 m = 10 cm), ce qui devrait pouvoir vous aider à trouver un bouton, n'hésitez pas à demander conseil à votre magasin DROPS, même par mail ou téléphone. Bon tricot!
19.08.2020 - 15:26
![]() Angela ha scritto:
Angela ha scritto:
Hello. In the materials you talk of needle sizes 3mm and 4mm, yet you say to cast on the body of the jacket with size 5mm needles. So is it 5mm, or 3mm needles?
14.08.2020 - 21:37DROPS Design ha risposto:
Dear Angela, it's a translation mistake, you cast on with 3mm needles. Happy knitting!
16.08.2020 - 13:59
![]() Irmgard Walentin ha scritto:
Irmgard Walentin ha scritto:
Muss ich für die Knopflochkante auch nach 3 cm 1 Reihe links und dann nochmals 3 cm glatt rechts Stricken?
27.02.2020 - 17:13DROPS Design ha risposto:
Liebe Frau Walentin, ja genau, vergessen Sie auch nicht die Knopflöcher bei dem 2. Teil zu stricken, damit Löche entstehen wenn die Kante gefaltet wird. Viel Spaß beim stricken!
28.02.2020 - 07:48
![]() Hannie ha scritto:
Hannie ha scritto:
Bij het patroon 41-1 staat bij materiaal: rondbreinaalden 4 en 5. In de beschrijving staat echter beginnen met rondbreinaald nr. 3. Wat is juist?
04.06.2016 - 13:23DROPS Design ha risposto:
Hoi Hannie. Je hebt gelijk, dat was een foutje in de vertaling en moet 3 mm zijn. Het patroon is nu aangepast.
06.06.2016 - 15:15
![]() Isabelle Noonan ha scritto:
Isabelle Noonan ha scritto:
Bonjour, je ne trouve pas les explications du point fantaisie. Pourriez vous me l'indiquer? Merci beaucoup.
08.01.2016 - 23:44DROPS Design ha risposto:
Bonjour Mme Noonan, vous trouverez le diagramme du point fantaisie tout à la fin des explications, à côté du schéma des mesures, il se tricote sur 2 m et 6 rangs. Cliquez ici pour en savoir plus sur les diagrammes. Bon tricot!
11.01.2016 - 09:26
|
||||||||||
Sand Textures |
||||||||||
 |
 |
|||||||||
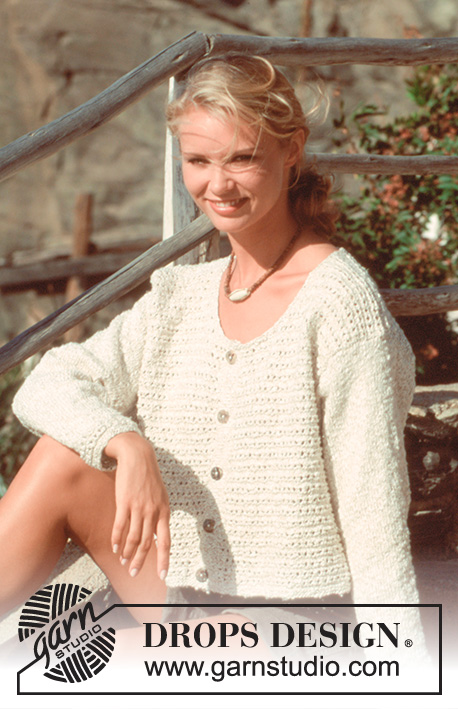
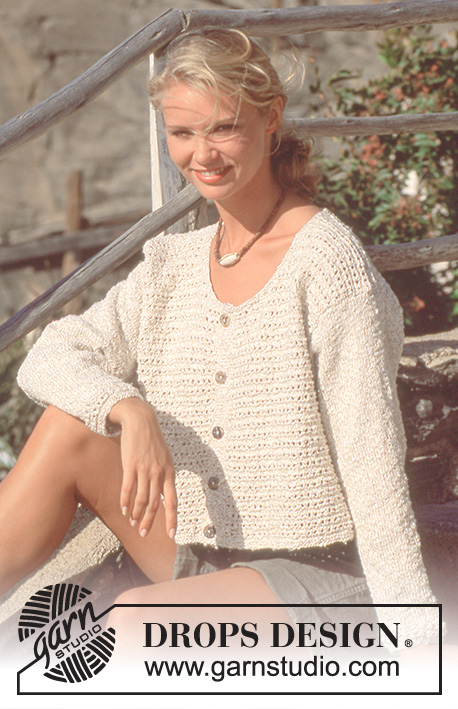
Cardigan DROPS in Bomull-Lin a punto fantasia.
DROPS 41-1 |
||||||||||
|
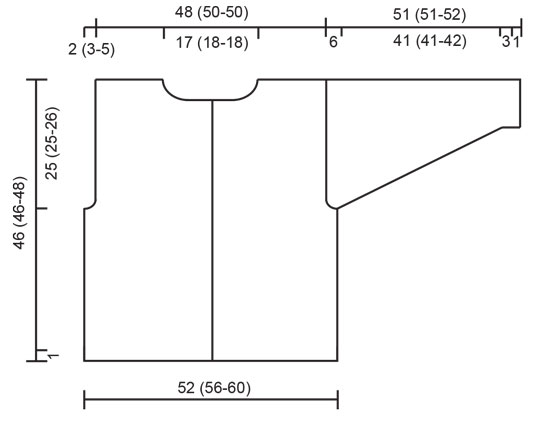
------------------------------------------------------- INIZIO DEL LAVORO: ------------------------------------------------------- CAMPIONE: 20 maglie x 26 ferri con i ferri n° 4 mm e il motivo = 10 x 10 cm. Ricordarsi che la misura dei ferri è solo indicativa! MOTIVO: Vedere il diagramma (1 diagramma = 1 ripetizione del motivo). I diagrammi sono visti dal diritto del lavoro. COSTA (in piano): 1 costa = 2 ferri. 1° ferro: diritto. 2° ferro: diritto. COSTA (in tondo): 1 costa = 2 giri. 1° giro: diritto. 2° giro: rovescio. BORDO: 3 cm a maglia rasata, 1 giro rovescio (= bordo da piegare – misurare il lavoro da questo punto), 3 cm a maglia rasata. CORPO: Lavorato in piano con i ferri circolari. Avviare 210 (226-242) maglie (compresa 1 maglia di vivagno a ogni lato al centro davanti) con i ferri circolari n° 5 mm con il colore natura mix e lavorare 2 coste. Passare ai ferri circolari n° 4 mm, continuare con il motivo 1 con 1 maglia di vivagno a ogni lato verso il centro davanti che viene lavorata a diritto nelle coste. FARE ATTENZIONE ALLA TENSIONE DEL LAVORO. Quando il lavoro misura 21 (21-22) cm lavorare il ferro successivo come segue: 51 (55-59) maglie per il davanti, intrecciare 4 maglie per lo scalfo, 100 (108-116) maglie per il dietro, intrecciare 4 maglie per lo scalfo, 51 (55-59) maglie per il davanti. Finire ogni parte in modo separato. DAVANTI: = 51 (55-59) maglie (compresa 1 maglia di vivagno). Continuare ad intrecciare per lo scalfo a ferri alterni: 2 maglie 1 (1-3) volte, 1 maglia 0(2-2) volte = 49 (51-51) maglie (compresa 1 maglia di vivagno). Quando il lavoro misura 36 (34-36) cm intrecciare verso la scollatura a ferri alterni: 4 maglie 1 volta, 3 maglie 2 volte, 2 maglie 2 volte e poi ogni 4 ferri: 2 maglie 1 volta, 1 maglia 2 (3-3) volte. Intrecciare quando il lavoro misura 46 (46-48) cm. DIETRO: = 100 (108-116) maglie. Continuare ad intrecciare per lo scalfo come per il davanti = 96 (100-100) maglie, quando il lavoro misura 44 (44-46) cm intrecciare le 30 (32-32) maglie centrali per modellare la scollatura. Poi intrecciare 2 maglie a ogni lato sul ferro successivo per modellare la scollatura. Intrecciare quando il lavoro misura 46 (46-48) cm. MANICA: Avviare 44 (44-46) maglie con i ferri a doppia punta n° 3 mm con il colore natura mix e lavorare 2 coste diritto. Passare ai ferri a doppia punta n° 4 mm, continuare a lavorare 2 ripetizioni del motivo in altezza e poi a maglia rasata. Allo stesso tempo quando il lavoro misura 4 (4-4) cm aumentare al centro sotto il braccio: 2 maglie 28 (28-29) volte in modo alternato ogni 3 e 4 giri = 100 (100-104) maglie. Quando il lavoro misura 45 (45-46) cm intrecciare 6 maglie al centro sotto il braccio e finire il lavoro in piano. Continuare ad intrecciare per modellare l’arrotondamento della manica a ferri alterni: 4 maglie 7 volte, intrecciare. Il lavoro misura circa 51 (51-52) cm. CONFEZIONE: Cucire le spalle. Riprendere circa 70-80 maglie lungo il davanti sinistro con i ferri circolari n° 3 mm con il filato natura mix e lavorare il bordo in piano sul ferro, intrecciare. Ripetere lungo il davanti destro, lavorare 5 asole dopo 1 cm distribuite in modo uniforme - 1 asola = intrecciare 3 maglie e avviare 3 nuove maglie sulle maglie intrecciate sul ferro successivo. Riprendere circa 110-116 maglie attorno alla scollatura con i ferri a doppia punta n° 3 mm con il filato natura mix e lavorare 1 costa diritto, intrecciare. Attaccare le maniche e i bottoni. |
||||||||||
Spiegazioni del diagramma |
||||||||||
|
||||||||||
 |
||||||||||
 |
||||||||||
Avete terminato questo modello?Allora taggate le vostre foto con #dropspattern o inviatele alla #dropsfan gallery. Avete bisogno di aiuto con questo modello?Troverete 21 video tutorial, una sezione per i commenti/domande e molto altro guardando il modello su www.garnstudio.com © 1982-2026 DROPS Design A/S. Ci riserviamo tutti i diritti. Questo documento, compreso tutte le sue sotto-sezioni, è protetto dalle leggi sul copyright. Potete leggere quello che potete fare con i nostri modelli alla fine di ogni modello sul nostro sito. |
||||||||||


Con oltre 40 anni di esperienza nel design di modelli di maglia e uncinetto, DROPS Design offre la più estesa collezione di modelli gratuiti su internet - tradotti in 17 lingue. Ad oggi vi possiamo fornire 324 cataloghi e 12290 modelli - 9561 dei quali sono tradotti in Italiano.
Ci stiamo impegnando molto per darvi il meglio che vi possiamo offrire in termini di maglia e uncinetto, ispirazioni e consigli così come filati di grande qualità ad un prezzo incredibile! Volete utilizzare i nostri modelli per qualcosa d'altro oltre al vostro uso personale? Potete leggere tutto ciò che è consentito nel testo sul Copyright in basso su tutte le pagine dei nostri modelli. Buon lavoro!
Lasciare un commento sul modello DROPS 41-1
Noi saremmo felici di ricevere i tuoi commenti e opinioni su questo modello!
Se vuoi fare una domanda, fai per favore attenzione a selezionare la categoria corretta nella casella qui sotto per velocizzare il processo di risposta. I campi richiesti sono indicati da *.