
Popular categories
Looking for a yarn?


Comments / Questions (21)
![]() Julia Schueler wrote:
Julia Schueler wrote:
Hallo, ich habe nicht richtig aufgepasst und den Kragenteil nicht rund sondern hin und her gestrickt. Nach 27cm aufgeteilt und eine Seite nun in Hin und Her fertig gestellt. Ich kann mir irgendwie nicht vorstellen, wie das Teil nachher aussieht oder angezogen wird. Ich werde nun den Kragen zusammen naehen, damit er rund wird. Haben Sie noch einen Tipp? Danke im Voraus, Julia
12.12.2014 - 13:42DROPS Design answered:
Antwort siehe unten! :-)
14.12.2014 - 10:24
![]() Julia Schueler wrote:
Julia Schueler wrote:
Hallo, ich habe nicht richtig aufgepasst und den Kragenteil nicht rund sondern hin und her gestrickt. Nach 27cm aufgeteilt und eine Seite nun in Hin und Her fertig gestellt. Ich kann mir irgendwie nicht vorstellen, wie das Teil nachher aussieht oder angezogen wird. Ich werde nun den Kragen zusammen naehen, damit er rund wird. Haben Sie noch einen Tipp? Danke im Voraus, Julia
12.12.2014 - 10:48DROPS Design answered:
Sie können auf dem Foto ja das Vorderteil sehen, dieser "Lappen", der sich an den Halsteil anschließt. Das sieht auf der Rückseite, im Nacken den Rücken runter, ebenso aus. Wenn Ihnen das hinten zu lang ist, können Sie den hinteren Teil auch einfach kürzer stricken. Sie können den oberen Teil des Kragens, den Halsteil, einfach zusammennähen, das ist kein Problem.
14.12.2014 - 10:01
![]() Kate wrote:
Kate wrote:
V popisu je spatna delka lanka, ma byt 60cm ne 80cm, pro zacatecnika to muze byti matouci. Diky za opravu.
08.12.2014 - 14:52DROPS Design answered:
Dobrý den, díky za upozornění - opraveno.
10.12.2014 - 00:10Diane Carlson wrote:
Hi again. I just posted a question but have found my answer in the other comments made for this pattern. Looks like I have to rip out a row and get back to 120 stitches. Oh well, live and learn!
23.11.2014 - 03:08Diane Carlson wrote:
I have started this pattern but am confused about the M1 on all stitches. Will I have 240 stitches on my needle after I M1 on all stitches? Thank you for your help.
23.11.2014 - 03:00DROPS Design answered:
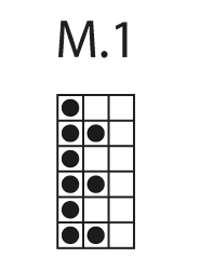
Dear Mrss Carlson, you have 120 sts for the neck warmer (ie "collar"), you work M1 on all sts, ie you repeat the 3 sts in diagram a total of 40 times around (Row 1 = *K1, P2* repeat from *-* around). When piece measures 27 cm, divide work in 2 pieces and finished each piece (front & back piece = 60 sts each) separately back and forth on needle. Happy knitting!
24.11.2014 - 11:04
![]() Carole wrote:
Carole wrote:
It did not say in the pattern to start at the bottom right square and read from right to left every round . Now I am dividing the stitches. My last right side row was K1P2 reading from right to left. Now going back on the wrong side am I going to K1P2 or am I going to P2K1? Pattern just not matching.
20.01.2014 - 01:43DROPS Design answered:
Dear Carole, look at your last st worked from RS at the end of row and mark it on the diagram, you will then know how where to start from WS. Happy knitting!
20.01.2014 - 09:24
![]() Carole wrote:
Carole wrote:
My last row on right side on 60 stitches was Purl 2 Knit 1 and then I added a stitch on the end to make 61. Please just tell me what to do going back across on the wrong side. I have worked on this all day and keep ripping out. I did not have any trouble until I divided the stitches. Thank you.
04.01.2014 - 06:14DROPS Design answered:
Dear Carole, just mark in diagram where you stopped from RS and continue following diag back and forth, reading from right to left the RS rows and from right to left the WS rows. the first 2 sts each side should be worked in garter st. Happy knitting!
04.01.2014 - 10:52
![]() Carole Lewis wrote:
Carole Lewis wrote:
After you cast on stitches, are the first 4 rows worked in the round--Rnd 1-k, Rnd-2 p, Rnd-3 k, and Rnd-4 p. Then do you start working back and forth or continue in the round. Diagram is confusing to me.
28.12.2013 - 02:03DROPS Design answered:
Dear Mrs Lewis, after cast on sts, continue in the round until work measures 27 cm, then divide in 2 pieces and work each part separately. In the diagram, 1 square = 1st x 1row, in the round, start on the bottom corner on the right side towards the left every round. When working in rows, read WS rows from left towards the right. Happy knitting!
30.12.2013 - 15:21
![]() Colleen wrote:
Colleen wrote:
Confused when switching from knitting in the round to knitting back and forth. Cannot get the pattern to match. Last row worked (RS) was P1K2 across. What would be the pattern going from row 2 (WS)? Thanks.
09.02.2013 - 14:44DROPS Design answered:
Dear Colleen, it seems last round you work was a row 2 in the diagram, so that you have to continue with row 3 in the diagram, seen from WS. Happy knitting!
11.02.2013 - 09:19Maria Del Consuelo Hernandez wrote:
Hola me gustaria que me dijeran como terminar mi prenda gracias
30.11.2011 - 03:13
|
|||||||
Snuggles#snugglesneckwarmer |
|||||||
|
|
|||||||
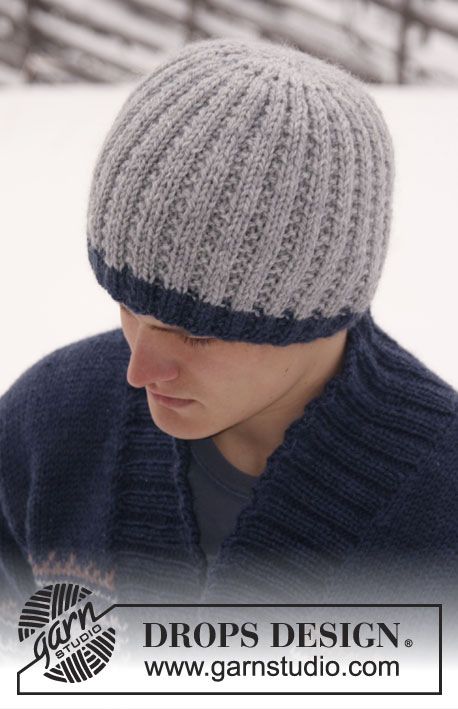
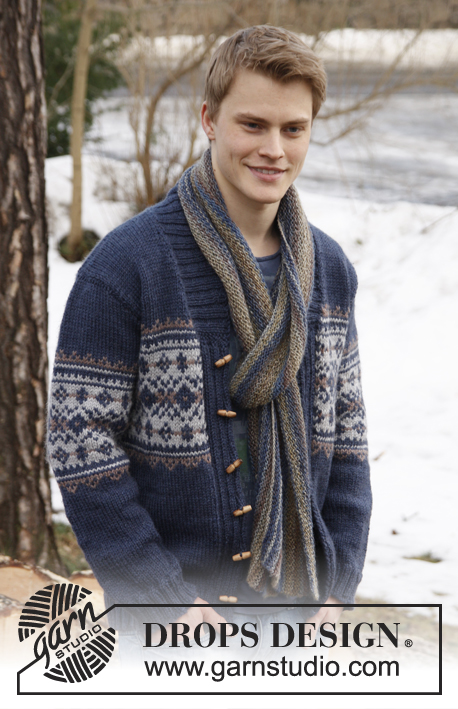
Knitted neck warmer for men in textured pattern, in DROPS Karisma.
DROPS 135-30 |
|||||||
|
GARTER ST (back and forth on needle): K all rows. GARTER ST (in the round): K 1 round, P 1 round. PATTERN: See diagram M.1. Diagram shows the pattern from RS. -------------------------------------------------------- NECK WARMER: Worked from top down. REMEMBER THE KNITTING TENSION! Cast on 120 sts on circular needle size 4 mm with Karisma. Work 4 rows GARTER ST – see above! Continue in M.1 on all sts. When piece measures 27 cm divide piece for front and back piece. Keep the first 60 sts on needle and slip the remaining 60 sts on a stitch holder. FRONT PIECE: Work back and forth on the 60 sts on needle in pattern as before. AT THE SAME TIME on row 1 cast on 1 new st at the end of row = 61 sts. Continue in M.1 as before with 2 GARTER STS - see above - each side. Continue until piece measures approx 12 cm from where it was divided. Now work 4 rows garter st on all sts and cast off loosely. Piece now measures approx 40 cm. BACK PIECE: Slip sts from stitch holder back on needle. Work like front piece. |
|||||||
Diagram explanations |
|||||||
|
|||||||
 |
|||||||
Have you finished this pattern?Tag your pictures with #dropspattern #snugglesneckwarmer or submit them to the #dropsfan gallery. Do you need help with this pattern?You'll find 11 tutorial videos, a Comments/Questions area and more by visiting the pattern on garnstudio.com. © 1982-2026 DROPS Design A/S. We reserve all rights. This document, including all its sub-sections, has copyrights. Read more about what you can do with our patterns at the bottom of each pattern on our site. |
|||||||


With over 40 years in knitting and crochet design, DROPS Design offers one of the most extensive collections of free patterns on the internet - translated to 17 languages. As of today we count 324 catalogues and 12290 patterns translated into English (UK/cm). 12290
We work hard to bring you the best knitting and crochet have to offer, inspiration and advice as well as great quality yarns at incredible prices! Would you like to use our patterns for other than personal use? You can read what you are allowed to do in the Copyright text at the bottom of all our patterns. Happy crafting!
Post a comment to pattern DROPS 135-30
We would love to hear what you have to say about this pattern!
If you want to leave a question, please make sure you select the correct category in the form below, to speed up the answering process. Required fields are marked *.