Komentáře / Otázky (423)
![]() Crystal napsala:
Crystal napsala:
I'm still working in the round, should I have switched to dpns?
20.02.2015 - 16:30Odpověď DROPS Design :
Dear Crystal, when you continue on back piece only, you work in rows (turn at the end of each row, ie alternately from RS and from WS), work underneath the stomach the same way (= in rows), you will continue in the round only after the 8 cm on each piece (= opening for legs). Happy knitting!
20.02.2015 - 17:46
![]() Crystal napsala:
Crystal napsala:
I've worked out how to get started for the leg openings, so I'm okay for now, but if I get stuck along the way, I'll be back for help. Thanks, Crystal
20.02.2015 - 16:22
![]() Crystal napsala:
Crystal napsala:
Hi Drops, I'm at the point where I'm about to attempt the leg opening. I am working on the small size (bichon). I have read the instructions, but they're not very clear. Can you possibly break them down to where they're more understandable? Any help you can provide will be greatly appreciated.
20.02.2015 - 14:51Odpověď DROPS Design :
Dear Crystal, when piece measures 16 cm, work next round as follows (make sure cable row will be on RS): knit the first 16 sts and slip them onto a st holder for underneath the stomach, bind off next st, work all remaining sts as before, turn, bind off first st from WS and continue back and forth as before for 8 cm and put aside. Slip the 16 sts back onto needle and work as before for 8 cm, then on next row from RS work the 16 sts, cast on 1 st, work the sts for back piece, cast on 1 st and join; continue in the round as before. Happy knitting!
20.02.2015 - 16:02
![]() Schatz A. napsala:
Schatz A. napsala:
Hallo, bin begeistert von diesem Pulli. Leider komme ich nicht weiter. Ich habe die Maschen geteilt u. jetzt möchte ich in Hin u. Rückreihen weiter stricken. Wenn ich in der RÜCKREIHE ein Zopfmuster stricke, muss ich den Zopf so stricken wie beschrieben, z.B. 2 M. hinter die Arbeit legen o. weil es die Rückreihe ist, genau umgekehrt, also 2 M. vor die Arbeit legen? Heisst li. abn., 2 Maschen li. zusammenstricken? Danke für ihre Hilfe
15.02.2015 - 12:37Odpověď DROPS Design :
Sie sollten die Arbeit am besten so teilen, dass Sie in Hin-R die Verzopfungen arbeiten und in Rück-R die Zwischenreihen stricken, ansonsten wird das kompliziert. Teilen Sie die Arbeit also einfach eine Runde eher oder später. 1 li abnehmen heißt, dass Sie 1 Linksmasche abnehmen, am rechten und am linken Rand haben Sie ja jeweils Linksmaschen, die erste und die letzte davon können Sie abnehmen, indem Sie jeweils 2 M li zusammenstricken.
15.02.2015 - 21:56
![]() Francine L. napsala:
Francine L. napsala:
Merci de prendre le temps de me répondre. Quand on écrit les motifs M1, M2 ou M3, doit-on reprendre les diagrammes 2 ou 3 fois durant le tricot sinon, comment les lire. Ce que je vois sur le modèle, ce sont des torsades en continue???
10.02.2015 - 12:47Odpověď DROPS Design :
Bonjour Francine L, quand vous tricotez chaque diagramme, commencez en bas à droite et lisez vers la gauche tous les tours ou tous les rangs sur l'endroit et de gauche à droite quand vous tricotez en aller-retours. Répétez ensuite les diagrammes en hauteur, ils n'ont pas le même nombre de rangs, dès que vous avez tricoté le dernier rang du diagramme, reprenez au 1er rang. Bon tricot!
10.02.2015 - 14:48
![]() Bodil napsala:
Bodil napsala:
Takk for tilbakemelding. Er litt usikker på om jeg har strikket galt. Etter å ha delt til forben og felt vrangmaskene, skal jeg da strikke frem og tilbake på pinnen. Eller kan jeg strikke rundt på rundpinnen, når de 22 maskene er satt av på en tråd. Mulig dumt spørsmål men skjønner ikke. Hvis jeg må strikke frem og tilbake må jeg rekke opp endel omganger 😏
05.02.2015 - 20:17Odpověď DROPS Design :
Fortsett mønsteret frem og tilbake over disse m i 6-8-10 cm (arb måler totalt 18-24-30 cm). Efter det strikker du mavestykket og herefter kan du sætte alle masker på samme pind igen og fortsætte med at strikke rundt. God fornøjele!
09.02.2015 - 11:04
![]() Felicia napsala:
Felicia napsala:
Ok. Thank you. That makes sense. Will keep moving forward. Thanks for putting up with my silliness.
04.02.2015 - 20:37
![]() Bodil napsala:
Bodil napsala:
Jeg har kommet til der i oppskriften hvor jeg skal dele til forben. Jeg har har satt av 22 masker på en tråd, minsket 1 vrangmaske og strikket rundt og minsket 1 vrangmaske til. Har nå 130 masker og skal strikke i 10 cm til. Får ikke da mønsteret til å stemme, mønsteret skal går opp i 132 masker og ikke 130 masker som jeg har igjen. Hva gjør jeg galt?
04.02.2015 - 16:34Odpověď DROPS Design :
Hej Bodil, du fortsætter at strikke over diagrammerne og strikker iføle den del af mønstere som går over maskerne til ryggen som du gjorde tidligere. God fornøjelse!
05.02.2015 - 13:39
![]() Felicia napsala:
Felicia napsala:
I guess I'm not making my question clear. How do I continue with the back with only 64 stitches and a 76 stitch pattern. I have another 6 cm to do down the back with only 64 stitches to work with. Do I just keep repeating P2, M3, M2, M1, M2, M3, P3 (which is 65 Stitches) leaving out the first 10 stitches of the pattern on each row for the next 6 cm?. I'm sorry. I may end up giving up if I can't figure this out. Its just not written out well enough for me to understand. Thanks
04.02.2015 - 08:04Odpověď DROPS Design :
Dear Felicia, you will work over the 64 sts (with P2 each side, remember to cast off 1 st at beg of row from WS after dividing) in pattern as before, ie seen from RS, P2, M3, M2, M1, M2, M3, P2. After 6 cm over these sts, then slip the 10 sts for mid front and work them in pattern (M2, P2, M2) for 6 cm, then work over all sts again casting on 1 new st as stated. Happy knitting!
04.02.2015 - 08:59
![]() Felicia napsala:
Felicia napsala:
Still lost. With only 64 stiches how do I continue the back when its a 76 stitch pattern? Did I miss something that tells me to just knit the back or do I still follow the diagram? So sorry. But thanks for the help.
02.02.2015 - 18:59Odpověď DROPS Design :
Dear Felicia, you are working over 76 sts: M.2 (4 sts), P2 , M.2 (= 4 sts), P3, M.3 (=14 sts), M.2, M.1 (= 24 sts), M.2 (=4sts), M.3 (=14 sts) and P3, then put on a st holder the first 10 sts (= M2, P2, M2), cast off next st, work P2, M3, M2, M1, M2, M3, P3 and cast off next first st at beg of next row = 64 sts. Happy knitting!
03.02.2015 - 09:14
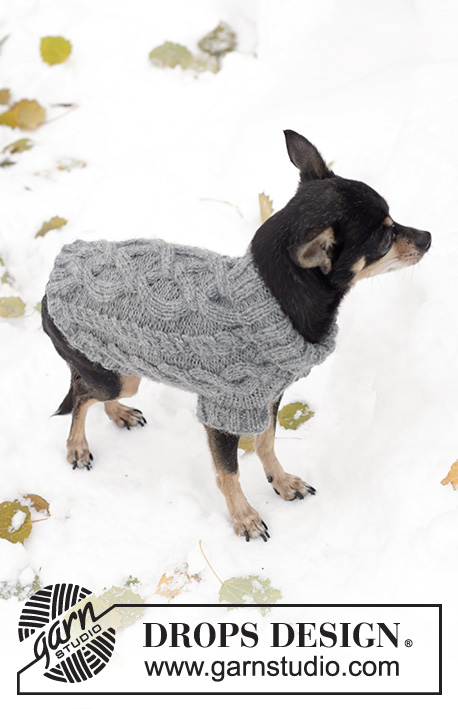
The Lookout |
|||||||||||||||||||
 |
 |
||||||||||||||||||
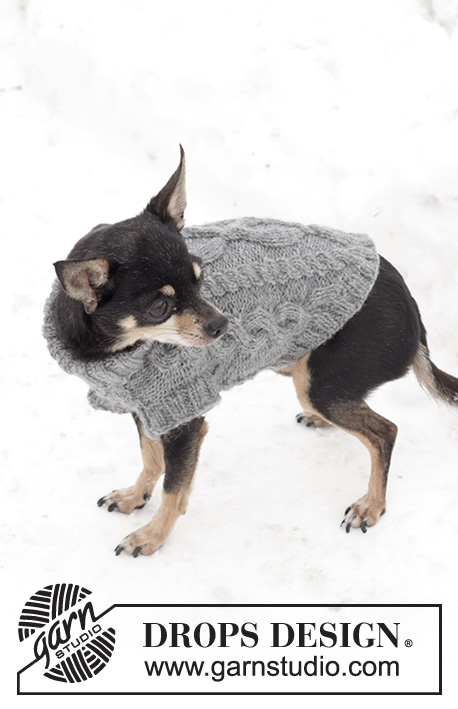
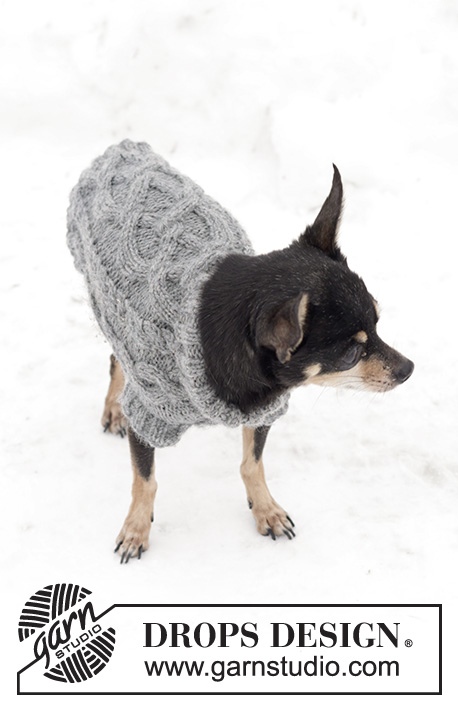
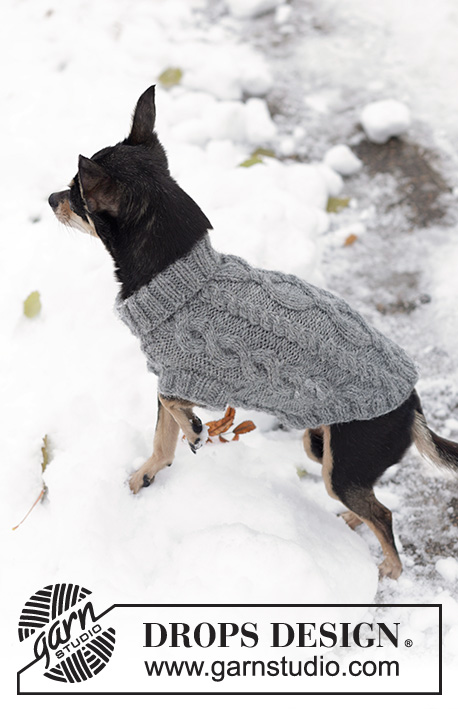
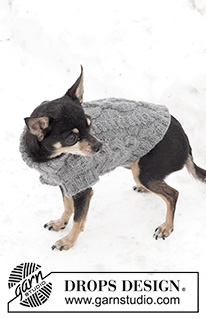
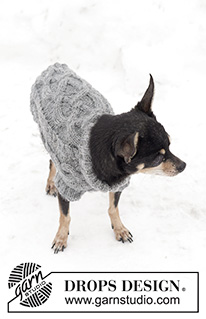
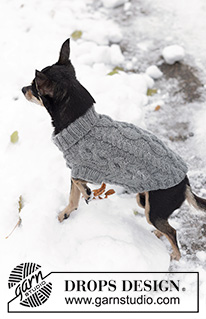
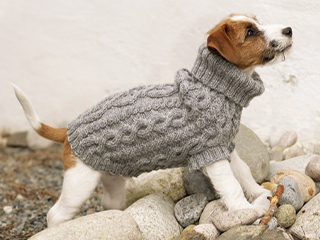
DROPS copánkový svetr pro psa z příze "Karisma".
DROPS 102-43 |
|||||||||||||||||||
|
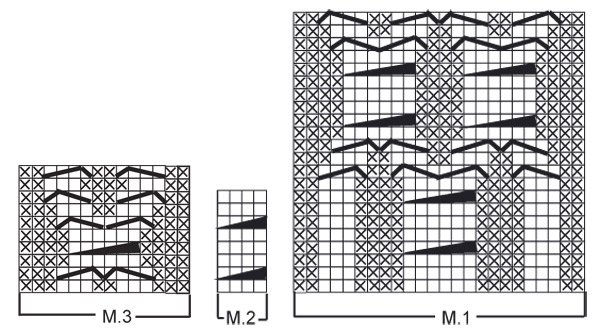
VZOR: Viz schémata M.1 – M.3. Vzor je nahlížen z lícové strany. Patent 2/2: Střídáme 2 oka hladce, 2 obrace. ---------------------------------------------------------------------- SVETR: Pleteme v kruhových řadách od roláku dolů. Na sadu ponožkových jehlic č.3 nahodíme světle šedou přízí Karisma 60-80-100 ok. Upleteme 8-10-12 cm patentem 2/2 (= rolák). Pak převedeme pleteninu na krátkou kruhovou jehlici č.4 (nebo sadu ponožkových jehlic téže velikosti). Pleteme 1 kruhovou řadu hladce, SOUČASNĚ přidáme rovnoměrně 16-32-54 ok = 76-112-154 ok. Pokračujeme copánkovým vzorem, takto: Velikost XS: vzor M.2, 2 oka obrace, vzor M.2, 3 oka obrace, vzor M.3, vzor M.2, vzor M.1 (= střed zad), vzor M.2, vzor M.3 a 3 oka obrace. Velikost S: *vzor M.2, 2 oka obrace*, *-* opakujeme 2x, vzor M.2, *vzor M.3, vzor M.2*, *-* opakujeme 2x, vzor M.1 (= střed zad), *vzor M.2, vzor M.3*, *-* opakujeme 2x. Velikost M: *vzor M.2, 2 oka obrace*, *-* opakujeme 3x, vzor M.2, *vzor M.3, vzor M.2*, *-* opakujeme 3x, vzor M.1 (= střed zad), *vzor M.2, vzor M.3*, *-* opakujeme 3x. SOUČASNĚ ve výši 12-16-20 cm rozdělíme pleteninu pro přední nohy, takto: 10-16-22 ok odložíme na pomocnou jehlici (= část pod břichem), uzavřeme 1 oko obrace, pleteme nad oky zádového dílu a uzavřeme poslední oko na druhé straně = 64-94-130 ok (= zádový díl). Upleteme v řadách nad těmito oky 6-8-10 cm výšky pleteniny (díl měří celkem 18-24-30 cm). Pak oka odložíme na pomocnou jehlici a odložená oka břišní části vrátíme zpět na jehlici. Na obou stranách nahodíme 1 nové oko = 12-18-24 ok. Pokračujeme v pletení vzoru, pleteme v řadách s 1 okem obrace na každé straně dílu. Po upletení 6-8-10 cm výšky převedeme všechna oka (stávající i odložená) na společnou kruhovou jehlici a pokračujeme v kruhových řadách = 76-112-154 ok. Ve výši 24-31-38 cm uzavřeme 12-20-28 ok uprostřed břišní části. Dále pleteme v řadách – SOUČASNĚ uzavíráme na obou stranách v každé 2. řadě: 1x 3 oka, 2-3-4x 2 oka, 2-3-4x 1 oko, 2-3-4x 2 oka a 1x 3 oka = 32-50-74 zbylých ok. Díl měří asi 30-39-48 cm. DOKONČENÍ: Zbylá oka převedeme na krátkou kruhovou jehlici č.3 a podél uzavřeného okraje nabereme celkem asi 84-108-140 ok. Pleteme patentem 2/2 do výše 2-3-4 cm, pak oka volně uzavřeme. NOHAVICE: Na sadu ponožkových jehlic č.3 nabereme kolem jednoho otvoru asi 36-44-52 ok. Pleteme patentem 2/2 do výše 2-3-4 cm, pak oka volně uzavřeme. Stejným způsobem upleteme druhou nohavici. |
|||||||||||||||||||
Vysvětlivky ke schématu |
|||||||||||||||||||
|
|||||||||||||||||||
 |
|||||||||||||||||||
Dokončili jste tento model?Pak označte své fotky tagem #dropspattern nebo je pošlete do galerie #dropsfan. Potřebujete s tímto návodem poradit?Otevřete-li si návod na stránce garnstudio.com, najdete tam 24 výukových video-ukázek, Komentáře/Dotazy a další užitečné informace. © 1982-2025 DROPS Design A/S. Vyhrazujeme si veškerá práva. Tento dokument, včetně všech jeho dílčích částí, podléhá autorským právům. Podrobnější komentář k možnostem užití našich návodů najdete dole pod každým návodem na našich stránkách. |
|||||||||||||||||||







Přidejte komentář k návodu DROPS 102-43
Rádi bychom věděli, co si o tomto modelu myslíte!
Pokud se chcete na něco zeptat, dbejte prosím na to, abyste ve formuláři níže vybrali správnou kategorii - díky tomu se dříve dozvíte, co potřebujete vědět. Povinná pole jsou označena *.