Komentáře / Otázky (423)
![]() Diana napsala:
Diana napsala:
Jag har tre Whippet-killar som jag skall göra denna tröja till och hoppas jag klarar av det då storlekarna här är mindre.
23.05.2015 - 15:46Maureen Hinton napsala:
Hi There, I would love to knit this jacket for my Daughters dog. I have been knitting for many years but I'm finding this pattern very hard to follow. I'm not very good a reading graphs. Is it possible to have the pattern written out completely row to row.. I look forward to hearing back from you. cheers Maureen Hinton
09.04.2015 - 06:31Odpověď DROPS Design :
Dear Mrs Hinton, you will find here explanations to how to read a diagram - for any individual assistance you are welcome to contact your DROPS store. Happy knitting!
09.04.2015 - 09:43
![]() Crystal napsala:
Crystal napsala:
Additional: If I can help anyone else in any way with pattern problems (small size only) I will be happy to help.
21.02.2015 - 23:21
![]() Crystal napsala:
Crystal napsala:
I have figured out what I'm supposed to do, but will probably need additional help before the project is completed. I have to admit that your explanations are somewhat confusing, but I was able to figure things out by looking at how the pattern flows. Quite a few people are having problems (including me), but once you have figured out the established pattern and diagram, it's basically a cake walk. I just wanted you to know this
21.02.2015 - 23:17
![]() Gwen napsala:
Gwen napsala:
Considering all the confusion and errors in this pattern by numerous knitters, could garn studio redo this patternwith accurate instructions please? Many knitters love the pattern, but it has so many errors in it - thanks!
21.02.2015 - 20:55Odpověď DROPS Design :
Dear Gwen, the pattern is correct and has already been knitted several times succesfully. Should you have any question, please feel free to ask here or contact your DROPS store for any help/assistance. Happy knitting!
23.02.2015 - 09:53
![]() Johanna napsala:
Johanna napsala:
Hej, tycker beskrivningen varit enkel ända fram tills jag kommit till att avmaska på slutet. I besrkivningen står det följande: Nu stickas arb färdigt fram och tillbaka på st – samtidigt avm i varje sida på vartannat v: 3 m 1 gång, 2 m 2-3-4 ggr, 1 m 2-3-4 ggr, 2 m 2-3-4 ggr och 3 m 1 gång = 32-50-74 m kvar på st. Arb mäter nu ca 30-39-48 cm. Jag förstår inte hur jag maskar av, och jag stickar enligt storlek M. Tack för återkoppling. //Johanna
21.02.2015 - 00:16Odpověď DROPS Design :
Hej Du ska avmaska i varje sida på vartannat varv så här; Första avmaskningen 3 maskor per sida (=3 m 1 gång), de nästa 3 avmaskningarna avmaskar du 2 m per gång och sida (=2 m 3 ggr), de nästa 3 avmaskningarna avmaskar du 1 m per gång och sida (= 1 m 3 ggr) osv. Lycka till!
15.05.2015 - 11:09
![]() Crystal napsala:
Crystal napsala:
Please disregard previous message. What I said didn't make sense.
20.02.2015 - 22:40
![]() Crystal napsala:
Crystal napsala:
Dear Drops, howdy I work the WS sts to ensure that the cable pattern comes out correctly? I tried working the pattern from left to right, but in reverse to accommodate for the WS, but it doesn't appear to be coming out right. What am I doing wrong? How can I fix this, what should I be doing?
20.02.2015 - 19:52Odpověď DROPS Design :
Dear Crystal, every row with a cable (= every even row in diagram) should be worked from RS (read from right towards the left every round + every row from RS) - from WS, read diagram from the left towards the right. Happy knitting!
21.02.2015 - 09:28
![]() Crystal napsala:
Crystal napsala:
Please disregard previous message. What I said didn't make sense.
20.02.2015 - 17:35
![]() Crystal napsala:
Crystal napsala:
Let me know if I have this right. When the pattern states work back and forth when working in the round, the pattern (M2, M3, etc.) Is worked from left to right until the required length is reached. Is this right?
20.02.2015 - 17:27
The Lookout |
|||||||||||||||||||
 |
 |
||||||||||||||||||
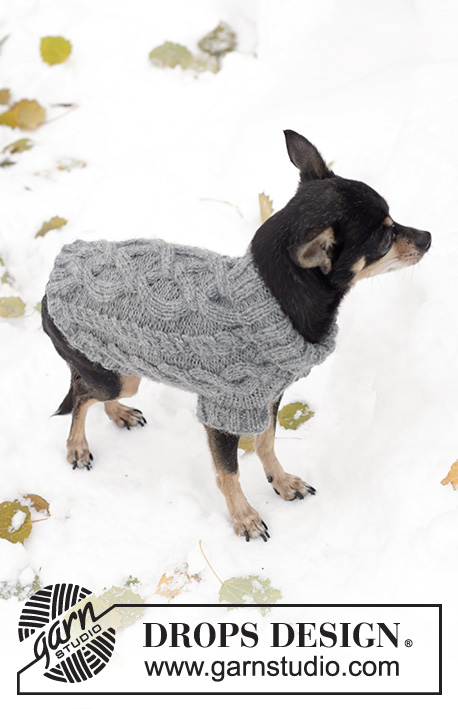
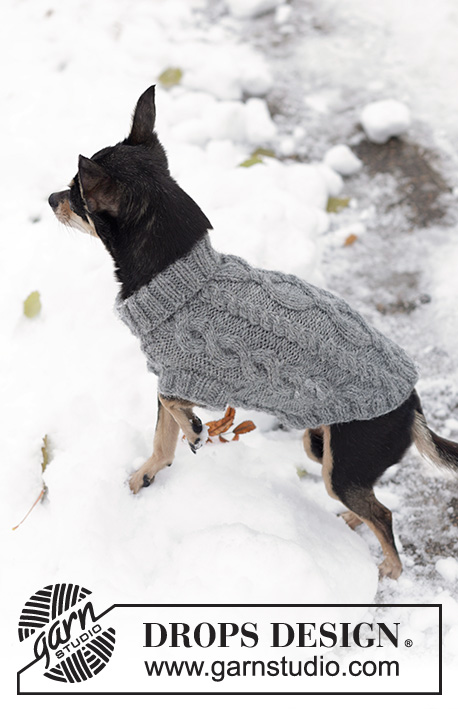
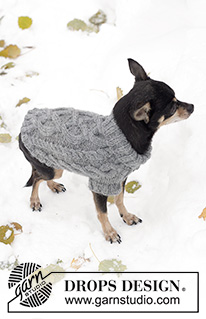
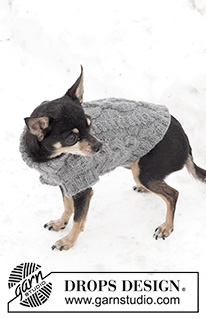
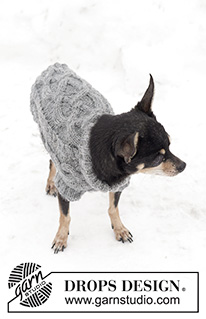
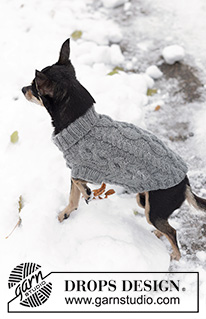
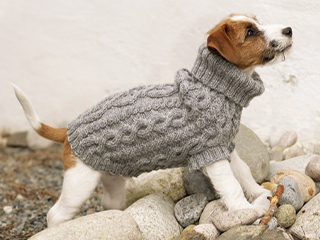
DROPS copánkový svetr pro psa z příze "Karisma".
DROPS 102-43 |
|||||||||||||||||||
|
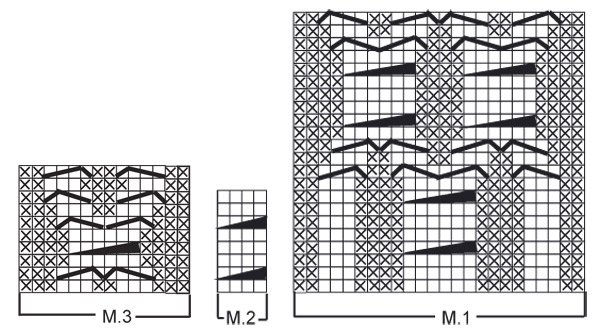
VZOR: Viz schémata M.1 – M.3. Vzor je nahlížen z lícové strany. Patent 2/2: Střídáme 2 oka hladce, 2 obrace. ---------------------------------------------------------------------- SVETR: Pleteme v kruhových řadách od roláku dolů. Na sadu ponožkových jehlic č.3 nahodíme světle šedou přízí Karisma 60-80-100 ok. Upleteme 8-10-12 cm patentem 2/2 (= rolák). Pak převedeme pleteninu na krátkou kruhovou jehlici č.4 (nebo sadu ponožkových jehlic téže velikosti). Pleteme 1 kruhovou řadu hladce, SOUČASNĚ přidáme rovnoměrně 16-32-54 ok = 76-112-154 ok. Pokračujeme copánkovým vzorem, takto: Velikost XS: vzor M.2, 2 oka obrace, vzor M.2, 3 oka obrace, vzor M.3, vzor M.2, vzor M.1 (= střed zad), vzor M.2, vzor M.3 a 3 oka obrace. Velikost S: *vzor M.2, 2 oka obrace*, *-* opakujeme 2x, vzor M.2, *vzor M.3, vzor M.2*, *-* opakujeme 2x, vzor M.1 (= střed zad), *vzor M.2, vzor M.3*, *-* opakujeme 2x. Velikost M: *vzor M.2, 2 oka obrace*, *-* opakujeme 3x, vzor M.2, *vzor M.3, vzor M.2*, *-* opakujeme 3x, vzor M.1 (= střed zad), *vzor M.2, vzor M.3*, *-* opakujeme 3x. SOUČASNĚ ve výši 12-16-20 cm rozdělíme pleteninu pro přední nohy, takto: 10-16-22 ok odložíme na pomocnou jehlici (= část pod břichem), uzavřeme 1 oko obrace, pleteme nad oky zádového dílu a uzavřeme poslední oko na druhé straně = 64-94-130 ok (= zádový díl). Upleteme v řadách nad těmito oky 6-8-10 cm výšky pleteniny (díl měří celkem 18-24-30 cm). Pak oka odložíme na pomocnou jehlici a odložená oka břišní části vrátíme zpět na jehlici. Na obou stranách nahodíme 1 nové oko = 12-18-24 ok. Pokračujeme v pletení vzoru, pleteme v řadách s 1 okem obrace na každé straně dílu. Po upletení 6-8-10 cm výšky převedeme všechna oka (stávající i odložená) na společnou kruhovou jehlici a pokračujeme v kruhových řadách = 76-112-154 ok. Ve výši 24-31-38 cm uzavřeme 12-20-28 ok uprostřed břišní části. Dále pleteme v řadách – SOUČASNĚ uzavíráme na obou stranách v každé 2. řadě: 1x 3 oka, 2-3-4x 2 oka, 2-3-4x 1 oko, 2-3-4x 2 oka a 1x 3 oka = 32-50-74 zbylých ok. Díl měří asi 30-39-48 cm. DOKONČENÍ: Zbylá oka převedeme na krátkou kruhovou jehlici č.3 a podél uzavřeného okraje nabereme celkem asi 84-108-140 ok. Pleteme patentem 2/2 do výše 2-3-4 cm, pak oka volně uzavřeme. NOHAVICE: Na sadu ponožkových jehlic č.3 nabereme kolem jednoho otvoru asi 36-44-52 ok. Pleteme patentem 2/2 do výše 2-3-4 cm, pak oka volně uzavřeme. Stejným způsobem upleteme druhou nohavici. |
|||||||||||||||||||
Vysvětlivky ke schématu |
|||||||||||||||||||
|
|||||||||||||||||||
 |
|||||||||||||||||||
Dokončili jste tento model?Pak označte své fotky tagem #dropspattern nebo je pošlete do galerie #dropsfan. Potřebujete s tímto návodem poradit?Otevřete-li si návod na stránce garnstudio.com, najdete tam 24 výukových video-ukázek, Komentáře/Dotazy a další užitečné informace. © 1982-2025 DROPS Design A/S. Vyhrazujeme si veškerá práva. Tento dokument, včetně všech jeho dílčích částí, podléhá autorským právům. Podrobnější komentář k možnostem užití našich návodů najdete dole pod každým návodem na našich stránkách. |
|||||||||||||||||||







Přidejte komentář k návodu DROPS 102-43
Rádi bychom věděli, co si o tomto modelu myslíte!
Pokud se chcete na něco zeptat, dbejte prosím na to, abyste ve formuláři níže vybrali správnou kategorii - díky tomu se dříve dozvíte, co potřebujete vědět. Povinná pole jsou označena *.