
Popular categories
Looking for a yarn?


Comments / Questions (31)
![]() Carine Bastarache wrote:
Carine Bastarache wrote:
Bonjour , Je n'arrive pas à comprendre cette phrase : c'est-à-dire sauter la première bride du tour précédent. ?? Je reste toujours avec une branche de plus sur A2 à cause des 3m en l'air. Merci !!
14.01.2022 - 14:31
![]() Christina wrote:
Christina wrote:
Forstår jeg oppskriften som riktig hvis jeg leser det sånn at tykkelsen på det første bladet blir litt bredere enn de andre pga. de tre første luftmaskene som starter med eller skal man da hoppe over noe for at de alle skal bli like?
28.12.2021 - 07:13DROPS Design answered:
Hei Christina. Ja, du kan tenkte deg at det liksom blir en "søm" pga de 3 luftmaskene+1kjedemaske hver omgang starter og slutter med. mvh DROPS Design
04.01.2022 - 13:31
![]() Agneta Nordmark wrote:
Agneta Nordmark wrote:
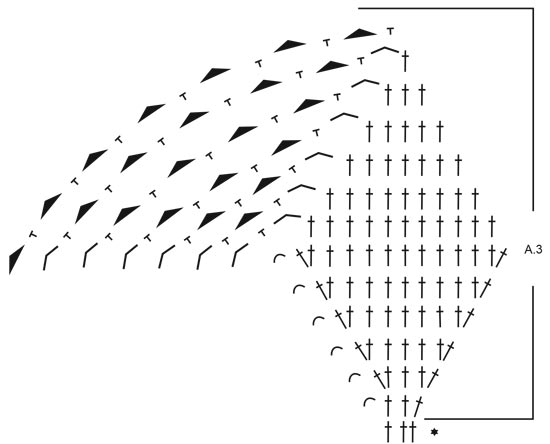
Hej, jag har lite svårt att förstå diagrammen. A.2: I första varvet på "bladet", ska ovaltecknet/3 lm räknas som 1 stolpe + 3 st till, alltså 4? Eller ska det vara 3 lm + 2 stolpar = 3 st. I de följande bladen på varvet är det 3 stolpar x 5. I nästa varv, ska det vara 3 lm + 5 stolpar, eller 3 lm + 4 stolpar = 5 på första bladet? osv Tacksam för klarläggande!
19.10.2021 - 19:59DROPS Design answered:
Hej Agneta, varje maska finns med i diagrammet, så första varvet i A.2 = 4 maskor och A.3 = 3 maskor :)
21.10.2021 - 09:37
![]() Margherita wrote:
Margherita wrote:
Forse ho capito. si lega con A3 vero?
01.06.2021 - 17:48DROPS Design answered:
Buonasera Margherita, dopo aver lavorato A.2 deve passare ad A.3. Buon lavoro!
01.06.2021 - 22:50
![]() Margherita wrote:
Margherita wrote:
Nel diagramma A2 dopo il 6^ giro , non mi è chiaro come si lega la fine della serie/giro con l'inizio della serie/giro successivo, Ho capito che finisce con 4 catenelle ed inizia con 3 catenelle. Dove sbaglio? grazie
01.06.2021 - 17:44DROPS Design answered:
Buonasera Margherita, dopo aver lavorato A.2 deve passare ad A.3. Buon lavoro!
01.06.2021 - 22:50
![]() Denève wrote:
Denève wrote:
Bonjour, je ne sais pas comment procéder pour crocheter le sac DROPS 211-26, les explications concernant ce modèle donnent 3 diagrammes, le diagramme n° 1 je comprends, par contre les diagrammes n°2 et 3, je ne comprends pas, d’après le modèle, je ne vois qu’un diagramme de crocheter, est ce que les explications que vous fournissez est pour un autre sac. Merci pour votre réponse, ce sac je le crochète avec du fil drops PARIS. Cordialement Marie-Ange DENÈVE
29.04.2021 - 15:56DROPS Design answered:
Bonjour Mme Denève, le diagramme A.2 montre le 1er motif du tour, vous répétez ensuite A.3, autrement dit, crochetez le 1er rang de A.2, puis 5 fois le 1er rang de A.3; puis crochetez le 2ème rang de A.2 puis 5 fois le 2ème rang de A.3 et ainsi de suite, vous crochetez les deux diagrammes simultanément en commençant par A.2 au début du rang car A.2 montre comment commencer/terminer les rangs. Bon crochet!
29.04.2021 - 16:10
![]() Inger wrote:
Inger wrote:
Ang nätkasse med stjärnbotten. får det till 49 luftmaskbågar o inte till 42 som det står i mönstret. Vad gör jag för fel? Tacksam för svar.
25.03.2021 - 12:17DROPS Design answered:
Hej Inger du har 7 luftmaskebuer i hver rapport som skal hækles 6 gange = totalt 42 God fornøjelse!
26.03.2021 - 14:11
![]() Raquel wrote:
Raquel wrote:
Buenos días. Estoy haciendo está bolsa pero tengo problemas al pasar del cuerpo del bolso a la orilla con las asas. Al finalizar la primera parte (estrella) hay 42 arcos por vuelta. A partir de ahí ¿se mantienen esos 42 arcos o van aumentando? Sí se aumentan ¿cómo puede haber 168 puntos en la primera vuelta de la orilla? Interpreto q la pieza es totalmente circular y coge forma al tejer la orilla pero entonces me salen más de 168 puntos. Muchas gracias!
05.03.2021 - 08:22DROPS Design answered:
Hola Raquel. Si, el bolso se trabaja en redondo. Hay 42 arcos de cadenetas y en la primer fila se trabajan 4 puntos altos en cada arco = 42x4 = 168 puntos altos.
16.05.2021 - 18:54
![]() Monica Tallada wrote:
Monica Tallada wrote:
Hola, no comprendo la diferencia entre A2 yA3, uno comienza con 3 cadenas y el otro no siendo los mismos gráficos. Gracias
21.10.2020 - 14:01DROPS Design answered:
Hola Monica. El diagrama A.2 muestra el inicio de la vuelta con la primera repetición del dibujo ( puedes ver las cadeneta del inicio de la vuelta), A.3 muestra las siguientes repeticiones de patrón.
25.10.2020 - 15:44
![]() Beeckman Veerle wrote:
Beeckman Veerle wrote:
Beste, Waar vind ik de moeilijkheidsgraad terug op jullie patronen. Ik ben nog niet vertrouwd met telpatronen en wil met iets makkelijk beginnen. Vele Grtjs Veerle
29.09.2020 - 00:31DROPS Design answered:
Dag Veerle,
Onze patronen hebben geen moeilijkheidsgraad, omdat per individu heel verschillend is welke technieken je goed beheerst. We proberen de patronen zo duidelijk mogelijk uit te leggen te voorzien van video's. Wel hebben we een algemene categorie met 21.10.2020 - 12:23
|
||||||||||||||||||||||||||||||||||
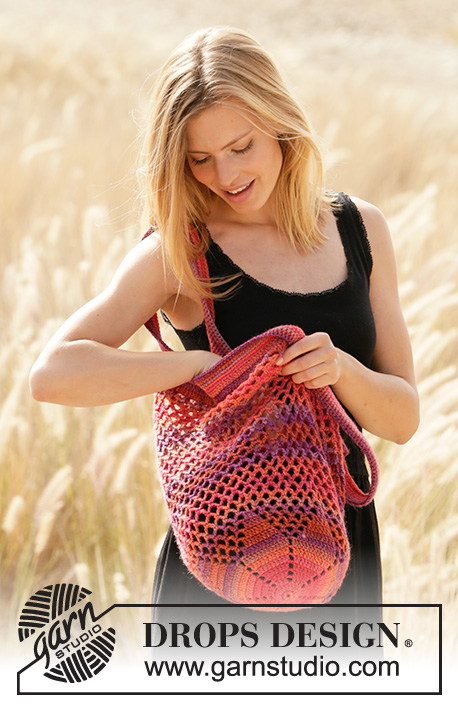
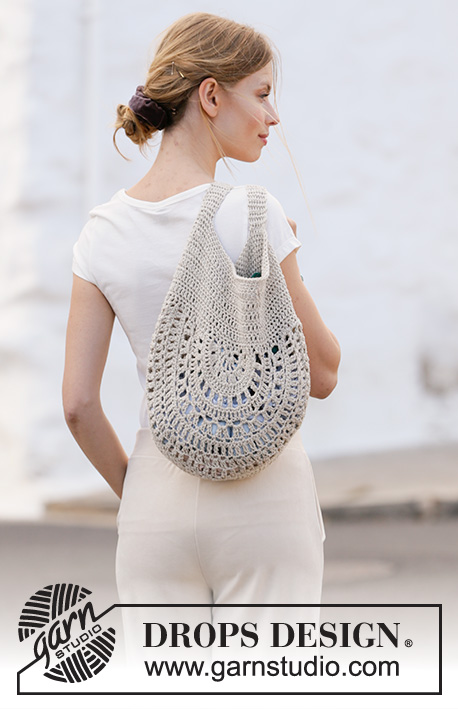
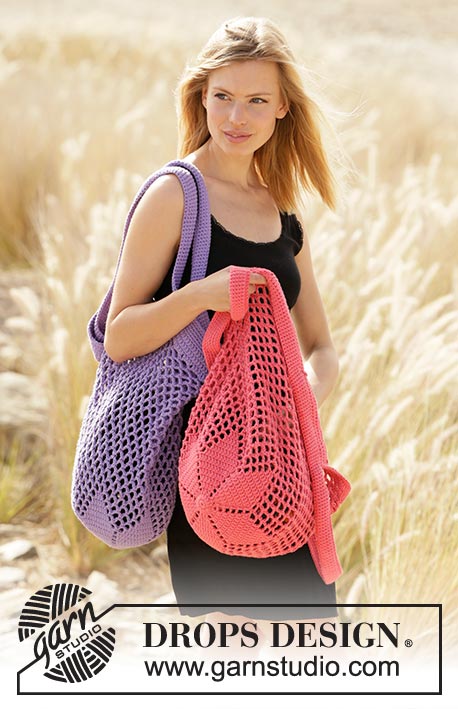
Sunset Shopper#sunsetshopperbag |
||||||||||||||||||||||||||||||||||
 |
 |
|||||||||||||||||||||||||||||||||
Crocheted bag in DROPS Paris. The piece is worked bottom up with star pattern on the bottom.
DROPS 211-26 |
||||||||||||||||||||||||||||||||||
|
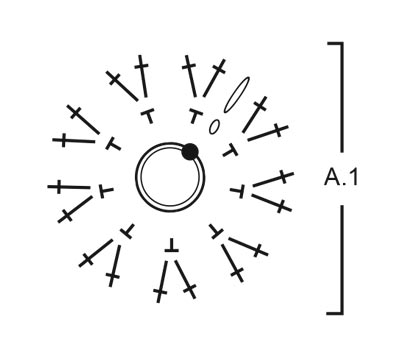
------------------------------------------------------- EXPLANATIONS FOR THE PATTERN: ------------------------------------------------------- PATTERN: See diagrams A.1 to A.3. CROCHET TIP (for chain stitches): 1 chain stitch should equal 1 double crochet in width. Make sure the loop made is pulled up the hook so it is not too tight. If the chain stitch is too tight the pattern will be too tight in the sections with a lot of chain stitches. ------------------------------------------------------- START THE PIECE IS HERE: ------------------------------------------------------- BAG – SHORT OVERVIEW OF THE PIECE: Piece is worked in the round, bottom up. BAG: Work 4 chain stitches with hook size 3.5 mm and Paris and form them into a ring with 1 slip stitch in the first chain stitch worked. Work A.1 in the round. When A.1 has been completed there are 3 chain stitches and 18 treble crochets on the round. The next round is worked as follows: Work A.2 one time (= first repeat also shows the beginning and end of the round), then work A.3 a total of 5 times = 6 leaves on the round. Continue this pattern. REMEMBER THE CROCHET TENSION! When A.2 and A.3 have been completed there are 42 chain-spaces on the round. Insert 1 marker in the last round. The piece will be measured from this marker. Continue working chain-spaces in the round without further increases as follows: Work slip stitches to the middle of the first chain-space, * work 5 chain stitches, 1 double crochet around the next chain-space *, work from *-* round and round without finishing each round. Work until the bag measures 38 cm from the marker and finish approx. above the start of the round at the bottom of the bag. Work slip stitches as far as the beginning of the next chain-space. Then work the edge with straps as described below. EDGE WITH STRAPS: ROUND 1: Work 3 chain stitches (equivalent to 1 treble crochet), 3 treble crochets around the same chain-space, then 4 treble crochets around each chain-space to end of round. Finish with 1 slip stitch in the 3rd chain stitch at the beginning of the round – read CROCHET INFORMATION = 168 treble crochets on the round. ROUND 2: Work 1 treble crochet in each treble crochet. ROUND 3: Work 1 treble crochet in each of the first 28 treble crochets, then 75 loose chain stitches – remember CROCHET TIP, skip the next 28 treble crochets, work 1 treble crochet in each of the next 56 treble crochets, 75 loose chain stitches, skip the next 28 treble crochets and work 1 treble crochet in each of the last 28 treble crochets. ROUND 4: Work 1 double crochet in each of the first 28 treble crochets, 1 double crochet in each of the 75 chain stitches, 1 double crochet in each of the next 56 treble crochets, 1 double crochet in each of the 75 chain stitches and 1 double crochet in each of the last 28 treble crochets. ROUNDS 5-8: Work 1 double crochet in each stitch. Cut and fasten the strand after the last round. To finish, work 1 round on the inside of the bag by starting in the middle of the 28 stitches at the bottom of the strap, work 1 double crochet in each of the 14 double crochets, 1 double crochet in each of the 75 stitches on the strap and 1 double crochet in each of the 14 stitches to the middle. Finish with 1 slip stitch in the first double crochet. Cut and fasten the strand. Repeat on the other strap. |
||||||||||||||||||||||||||||||||||
Diagram explanations |
||||||||||||||||||||||||||||||||||
|
||||||||||||||||||||||||||||||||||
|
||||||||||||||||||||||||||||||||||

|
||||||||||||||||||||||||||||||||||
|
||||||||||||||||||||||||||||||||||
Have you finished this pattern?Tag your pictures with #dropspattern #sunsetshopperbag or submit them to the #dropsfan gallery. Do you need help with this pattern?You'll find 7 tutorial videos, a Comments/Questions area and more by visiting the pattern on garnstudio.com. © 1982-2025 DROPS Design A/S. We reserve all rights. This document, including all its sub-sections, has copyrights. Read more about what you can do with our patterns at the bottom of each pattern on our site. |
||||||||||||||||||||||||||||||||||


With over 40 years in knitting and crochet design, DROPS Design offers one of the most extensive collections of free patterns on the internet - translated to 17 languages. As of today we count 314 catalogues and 11821 patterns translated into English (UK/cm). 11821
We work hard to bring you the best knitting and crochet have to offer, inspiration and advice as well as great quality yarns at incredible prices! Would you like to use our patterns for other than personal use? You can read what you are allowed to do in the Copyright text at the bottom of all our patterns. Happy crafting!
Post a comment to pattern DROPS 211-26
We would love to hear what you have to say about this pattern!
If you want to leave a question, please make sure you select the correct category in the form below, to speed up the answering process. Required fields are marked *.