
Popular categories
Looking for a yarn?


Comments / Questions (19)
![]() Fabiola Romero wrote:
Fabiola Romero wrote:
Hola he usado sus patrones y son muy explícitos pero no encuentro donde adquirir sus lanas y no sé si las puedan mandar por paquetería me gustaría hacer la prenda con el material que recomiendas gracias
02.09.2021 - 02:08
![]() Cecilie wrote:
Cecilie wrote:
Skal ikke forstykket være noe lavere enn bakstykket?
08.08.2021 - 23:11DROPS Design answered:
Hei Cecilie, For- og bakstykket er like høye, men skulderflappen er montert over forstykket. God fornøyelse!
09.08.2021 - 09:54
![]() Sara wrote:
Sara wrote:
Hallo! Ich habe eine Frage zum Rumpfteil: "Bei einer Länge von 17 cm je 2 Maschen für die Armausschnitte...abketten." Ist mit 17 cm die Gesamtlänge gemeint oder nach 17 cm glatt rechts gestrickt? Danke für eine kurze Antwort und Grüße, Sara
23.11.2020 - 18:27DROPS Design answered:
Liebe Sara, es ist die Gesamtlänge gemeint. Weiterhin viel Spaß beim Stricken!
24.11.2020 - 08:55
![]() Hanna wrote:
Hanna wrote:
Hallo, ich habe den Rumpfteil fertig gestrickt und habe aber jetzt Probleme mit den Armausschnitten, bevor ich Vorder-Und Rückenteil separat stricke: Wieso muss ich die erste und die letzte Reihe abketten und nicht z.Bsp. die ersten 2 Maschen? Die letzte funktioniert doch nicht so einfach? Wie kette ich die ab? Bitte um Rat. Danke
09.11.2020 - 22:03DROPS Design answered:
Liebe Frau Wallburg, so wird die Anleitung geschrieben: die 1. Masche der Runde abketten, die 2 Maschen für das 2. Armloch abketten und die letzte Masche der Runde abketten (also wie üblich - siehe Video), Faden abschneiden und Rückenteil stricken. Viel Spaß beim stricken!
10.11.2020 - 09:42
![]() Janin wrote:
Janin wrote:
Guten Morgen! Das ist eine wunderschöne Weste! Meine Wolle ist leider für 4er/5er Nadeln geeignet. Könnte ich einfach entsprechende Maschenzahlen halbieren und sie trotzdem nutzen?
22.10.2020 - 07:09DROPS Design answered:
Liebe Janin, die Anleitung sollten Sie dann komplett umrechnen, denn Ihre Maschenprobe nicht stimmen wird - hier lesen Sie mehr über Maschenprobe - wenn Sie Hilfe mit Umrechnen brauchen, wenden Sie sich bitte an dem Laden, wo Sie die Wolle gekauft haben. Viel Spaß beim stricken!
22.10.2020 - 10:31
![]() Inge Holm wrote:
Inge Holm wrote:
FORSTYKKE: Slå op og strik som bagstykket. Hvad betyder det?
23.09.2020 - 17:53DROPS Design answered:
Hej Inge. Du stickar som förklarat under BAKSTYKKE i oppskriften. Mvh DROPS Design
24.09.2020 - 11:33
![]() Clare Leavold wrote:
Clare Leavold wrote:
Thank you for this wonderful site! Really enjoyed knitting this and used the very helpful videos. Will try and download my pictures..
16.07.2020 - 00:54
![]() Tanja wrote:
Tanja wrote:
Hallo Drops Design, Wo steht denn die Blende für das Vorderteil?
13.07.2020 - 16:46DROPS Design answered:
Liebe Tanja, linke + rechte Schulter sowie Halsblende werden beim Vorderteil wie beim Rückenteil gestrickt. Viel Spaß beim stricken!
14.07.2020 - 08:55
![]() Evelyn Chiu wrote:
Evelyn Chiu wrote:
Hi, I’m not sure if I can use all free patterns from your Drops Design website as my samples to teach people how to read English knitting patterns in Chinese in my YouTube videos. I’m looking forward to hearing from you.
16.06.2020 - 19:43DROPS Design answered:
Dear Mrs Chiu, please write us media at garnstudio.com thank you!
17.06.2020 - 07:59
|
|||||||
Baby Pockets#babypocketsvest |
|||||||
 |
 |
||||||
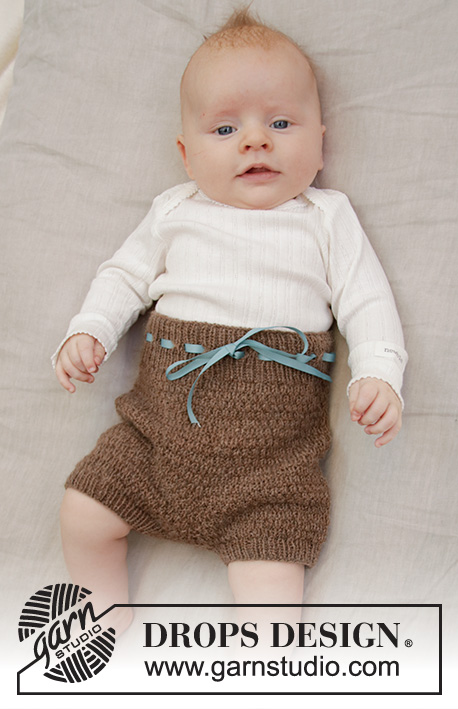
Knitted vest / slipover for babies in DROPS Flora. Sizes 0 – 6 years.
DROPS Baby 33-22 |
|||||||
|
------------------------------------------------------- EXPLANATIONS FOR THE PATTERN: ------------------------------------------------------- PATTERN: See diagram A.1. DECREASE TIP (evenly spaced): To work out how to decrease evenly, count the total number of stitches on needle (e.g. 100 stitches) and divide by the number of decreases to be made (e.g. 8) = 12.5. In this example decrease by knitting alternately each 11th and 12th stitch and each 12th and 13th stitch together. ------------------------------------------------------- START THE PIECE HERE: ------------------------------------------------------- VEST – SHORT OVERVIEW OF THE PIECE: The piece is worked in the round with circular needle as far as the armholes, then the front and back pieces are continued separately back and forth. An edge is worked around each armhole. Finally a pocket is worked and sewn onto the front piece. BODY: Cast on 100-114-128-136 (150-158-172) stitches with circular needle size 2 mm and Flora. Knit 1 round. Then work rib (= knit 1 / purl 1) for 3 cm. Change to circular needle size 2.5 mm and knit 1 round where you decrease 8-10-12-12 (14-14-16) stitches evenly spaced - read DECREASE TIP = 92-104-116-124 (136-144-156) stitches. Continue with stocking stitch. When the piece measures 14-17-19-20 (22-24-26) cm, cast off 2 stitches for each armhole as follows: Cast off the first stitch on the round, work the next 44-50-56-60 (66-70-76) stitches, cast off 2 stitches, work the next 44-50-56-60 (66-70-76) stitches, cast off the last stitch on the round. Front and back pieces are now finished separately. BACK PIECE: = 44-50-56-60 (66-70-76) stitches. Continue working back and forth until the piece measures 18-21-23-24 (26-29-31) cm, insert 1 marker in each side. These mark where the shoulder flaps from the front piece will be attached (see ARMHOLE EDGE). Continue with stocking stitch until the piece measures 20-24-25-27 (30-32-35) cm. Place the middle 24-26-28-28 (32-34-34) stitches on a thread = 10-12-14-16 (17-18-21) stitches left on each shoulder. LEFT SHOULDER: Continue with stocking stitch, AT THE SAME TIME decrease 1 stitch every 2nd row (= each row from the right side) towards the neck. Decrease by knitting 2 stitches together, 10-12-14-16 (17-18-21) times; now all stitches have now been cast off. RIGHT SHOULDER: Work as for the left shoulder. NECK: Using circular needle size 2 mm and working from the right side, knit up 14-18-20-22 (24-26-30) stitches along the side where stitches were decreased on the left shoulder, place the 24-26-28-28 (32-34-34) stitches from the thread back onto the needle, knit up 14-18-20-22 (24-26-30) stitches along the side where stitches were decreased on the right shoulder = 52-62-68-72 (80-86-94) stitches. Work 4 rows of rib, knit 1 / purl 1 (first row = wrong side). AT THE SAME TIME on each row work 2 stitches in the first stitch; the new stitches are worked into the rib as you go = 56-66-72-76 (84-90-98) stitches. Cast off with knit over knit and purl over purl. FRONT PIECE: Cast on and work as for the back piece. ARMHOLE EDGE: Lay the shoulder flaps from the back piece over the shoulder flaps from the front piece. Pin the tips of the shoulder flaps from the back piece to the edges of the front piece, where the markers are. Pin the tips of the shoulder flaps from the front piece to the edges of the back pieces, where the markers are. Knit up approx. 50 to 80 stitches with double pointed needles size 2 mm around the armhole; make sure you knit through both layers where the shoulder flaps overlap. Work 4 rounds of rib, knit 1 / purl 1, then cast off with knit over knit and purl over purl. Work around the other armhole in the same way. POCKET: The piece is worked back and forth with circular needle. Cast on 16-16-18-18 (20-20-20) stitches with circular needle size 2.5 mm. Work A.1 over all stitches. Continue until the piece measures 4-4-4-4 (5-5-5) cm, change to circular needle size 2 mm. Work 4 rows rib, knit 1 / purl 1, over all stitches, then cast off with knit over knit and purl over purl. Sew the pocket to the vest – see photo. |
|||||||
Diagram explanations |
|||||||
|
|||||||

|
|||||||
Have you finished this pattern?Tag your pictures with #dropspattern #babypocketsvest or submit them to the #dropsfan gallery. Do you need help with this pattern?You'll find 22 tutorial videos, a Comments/Questions area and more by visiting the pattern on garnstudio.com. © 1982-2025 DROPS Design A/S. We reserve all rights. This document, including all its sub-sections, has copyrights. Read more about what you can do with our patterns at the bottom of each pattern on our site. |
|||||||


With over 40 years in knitting and crochet design, DROPS Design offers one of the most extensive collections of free patterns on the internet - translated to 17 languages. As of today we count 314 catalogues and 11820 patterns translated into English (UK/cm). 11820
We work hard to bring you the best knitting and crochet have to offer, inspiration and advice as well as great quality yarns at incredible prices! Would you like to use our patterns for other than personal use? You can read what you are allowed to do in the Copyright text at the bottom of all our patterns. Happy crafting!
Post a comment to pattern DROPS Baby 33-22
We would love to hear what you have to say about this pattern!
If you want to leave a question, please make sure you select the correct category in the form below, to speed up the answering process. Required fields are marked *.