
Popular categories
Looking for a yarn?


Comments / Questions (28)
![]() Tonje wrote:
Tonje wrote:
Mot slutten av skjerfet står det: «Strikk 8-10 pinner som før. Fell av samtidig som de første 2 og de siste 2 maskene strikkes 2 rett sammen.» Betyr dette at det først skal strikkes 8-10 pinner og deretter felles? Eller skal det felles samtidig som de 8-10 pinnene?
13.03.2026 - 19:38DROPS Design answered:
Hei Tonje. Strikk 8-10 pinner som før og deretter skal det felles av. Og når det felles av skal de første 2 og de siste 2 maskene strikkes 2 rett sammen. mvh DROPS Design
16.03.2026 - 13:25
![]() Maria wrote:
Maria wrote:
I do not understand after the 18 cm is knitted in step 1 and I cut the yarn -am I not supposed to close off the stiches? Otherwise they will fall out when I pick up stitches from the edge of the cast-on??? I må også gerne svare på dansk :-)
24.02.2026 - 18:47DROPS Design answered:
Hi Maria, The stitches are placed on a thread/stitch holder while you work onwards (as described in the Overview). Regards, Drops Team.
25.02.2026 - 06:54
![]() Susan wrote:
Susan wrote:
Hi, I’m trying to knit the Misty Fjord hood, but struggling to understand the instructions for the i cord. I have found a YouTube video that you’ve made of a similar hooded scarf, but don’t know if this pattern can use those instructions? Any help gratefully received please Thank you Susan
23.02.2026 - 13:58DROPS Design answered:
Hi Susan, to make an I-cord around the hood edge you can use the video HERE. Happy knitting!
16.04.2026 - 09:22
![]() Anne-Marie wrote:
Anne-Marie wrote:
Undrar lite öve hur vänster halsduk stickas, står att den ska stickas på samma sätt som höger men här från varv 2 ska man plocka upp 2 maskor från huvan till vänster sticka och sticka 3 maskor tillsammans. Får inte riktigt detta att hå ihop, har rundsticka.
05.02.2026 - 20:47DROPS Design answered:
Hej Anne-Marie. Du stickar först ett varv från avigsidan och sedan på nästa varv (som är från rätsidan) så flyttar du 2 maskor från hjälpstickan från luvan över på vänster sticka, sticka 3 räta tillsammans (dvs 2 maskor från luvan och 1 maska från halsduken stickas räta tillsammans). Så här stickas luvan ihop med halsduken i början på varvet. Mvh DROPS Design
06.02.2026 - 12:02
![]() Maud wrote:
Maud wrote:
Ik hoor geen stem/geluid bij de video's. Klopt dit of ben ik iets vergeten ?
05.02.2026 - 20:41DROPS Design answered:
Dag Maud,
Ja, dat klopt. De video's hebben geen geluid, op die manier zijn ze in alle talen te volgen 😊
08.02.2026 - 18:50
![]() Elyse wrote:
Elyse wrote:
Hello! I want to knit this pattern with a chunky yarn (Group D). I'm having trouble determining how much I'll need for a S/M. Can you help? Thank you!
31.01.2026 - 18:51DROPS Design answered:
Dear Elyse, you will find all our patterns for balaclacas here>/a>, you might find one of them matching the requested tension. Happy knitting!
27.02.2026 - 14:48
![]() Hanneke wrote:
Hanneke wrote:
De punnikrand voordat de sjaal eraan wordt gemaakt is aan een kant mooi glad ( rechts) maar aan de linkerkant is er een rand met rechtse steken zichtbaar. Wat heb ik fout gedaan. Ik heb van rechts naar links opgenomen aan de goede zijde met een hulp draad.
24.01.2026 - 11:16
![]() Michèle Duhamel wrote:
Michèle Duhamel wrote:
Est-il obligatoire d'utiliser des aiguilles circulaires ? Peut-on tricoter ce modèle avec des aiguilles droites ?
10.01.2026 - 08:11DROPS Design answered:
Bonjour Mme Duhamel, même si on tricote ici en allers et retours, lorsque vous allez relever les mailles le long de chaque côté de la partie du haut de la tête/capuche, une aiguille circulaire donnera un certain confort que les aiguilles droites n'ont pas. Bon tricot!
12.01.2026 - 09:48
![]() Connie wrote:
Connie wrote:
Für dieses Modell wird Drops Air empfohlen. Maschenprobe bei Nadeln Nr. 4 gleich 19M x 38R. Wenn ich mir die Wolle anschaue gibt es dort bei Nadeln Nr. 5 eine Maschenprobe von 17M x 22R. So ein großer Unterschied in der Reihenanzahl ist doch unmöglich. Oder?
06.01.2026 - 15:36DROPS Design answered:
Liebe Connie, dieses Modell wird Fenster als normal gestrickt, deshalb wird man kleinere Nadeln benutzen und so eine festere Textur bekommen. Nadelgrösse anpassen wenn nötig, solange die Maschenprobe stimmt. Viel Spaß beim Stricken!
07.01.2026 - 07:40
![]() Ella wrote:
Ella wrote:
Thank u!!
20.12.2025 - 07:38
|
||||||||||
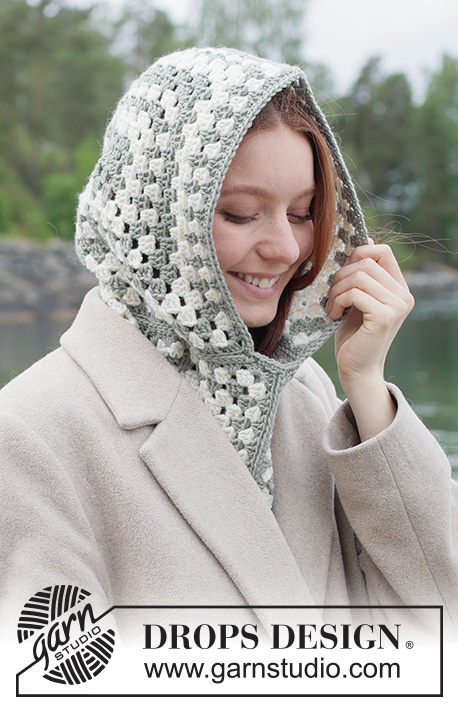
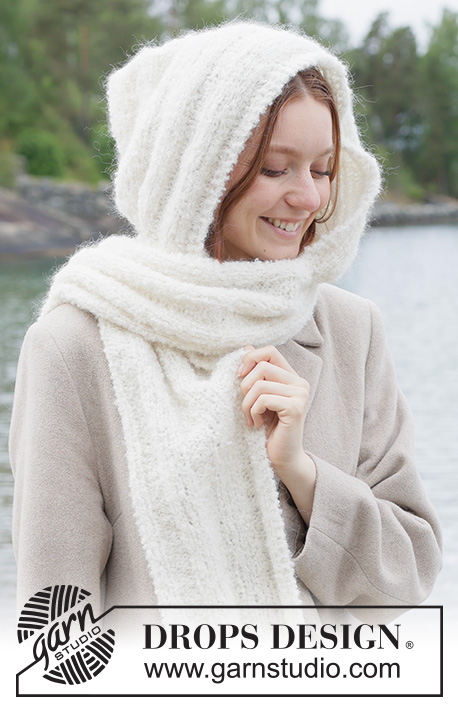
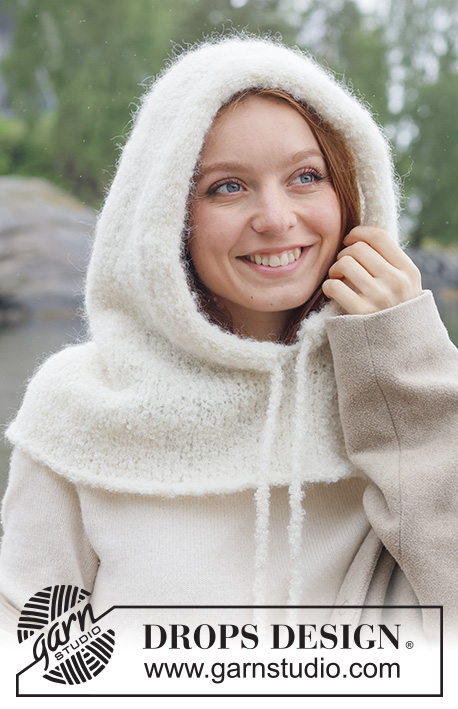
Misty Fjord Hood#mistyfjordhood |
||||||||||
 |
 |
|||||||||
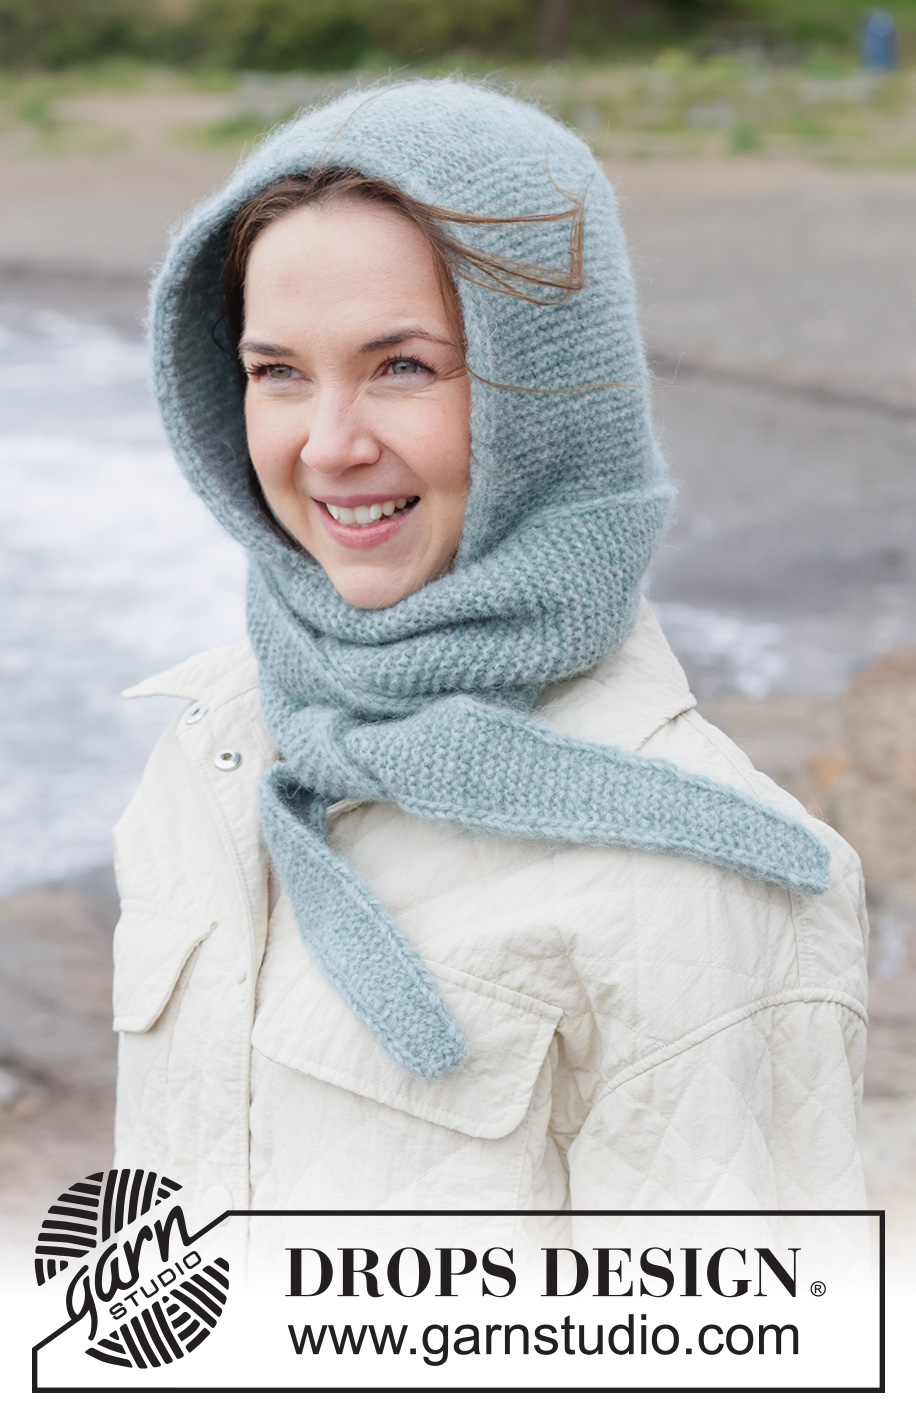
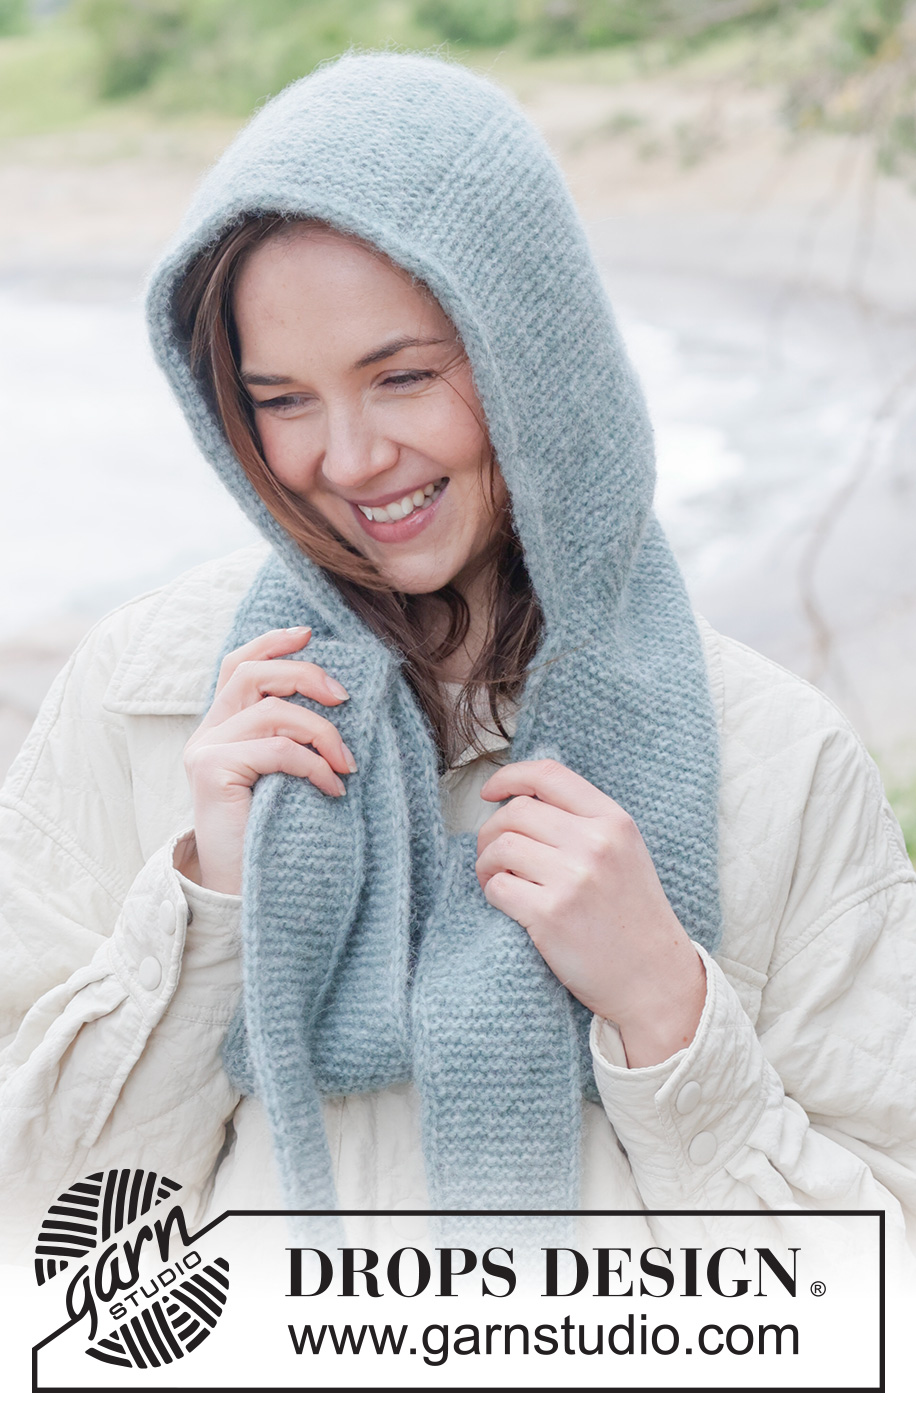
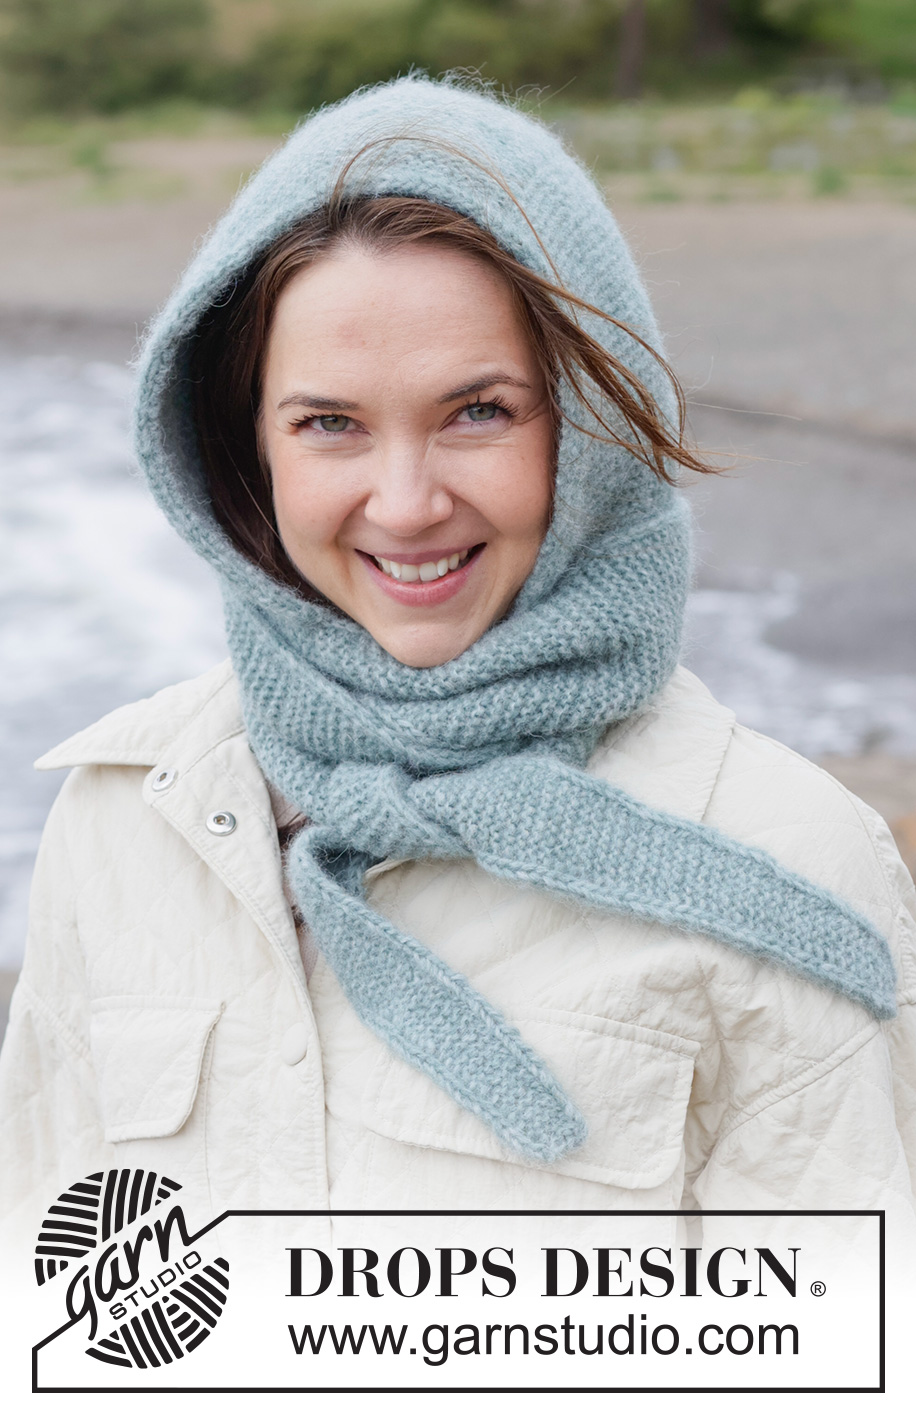
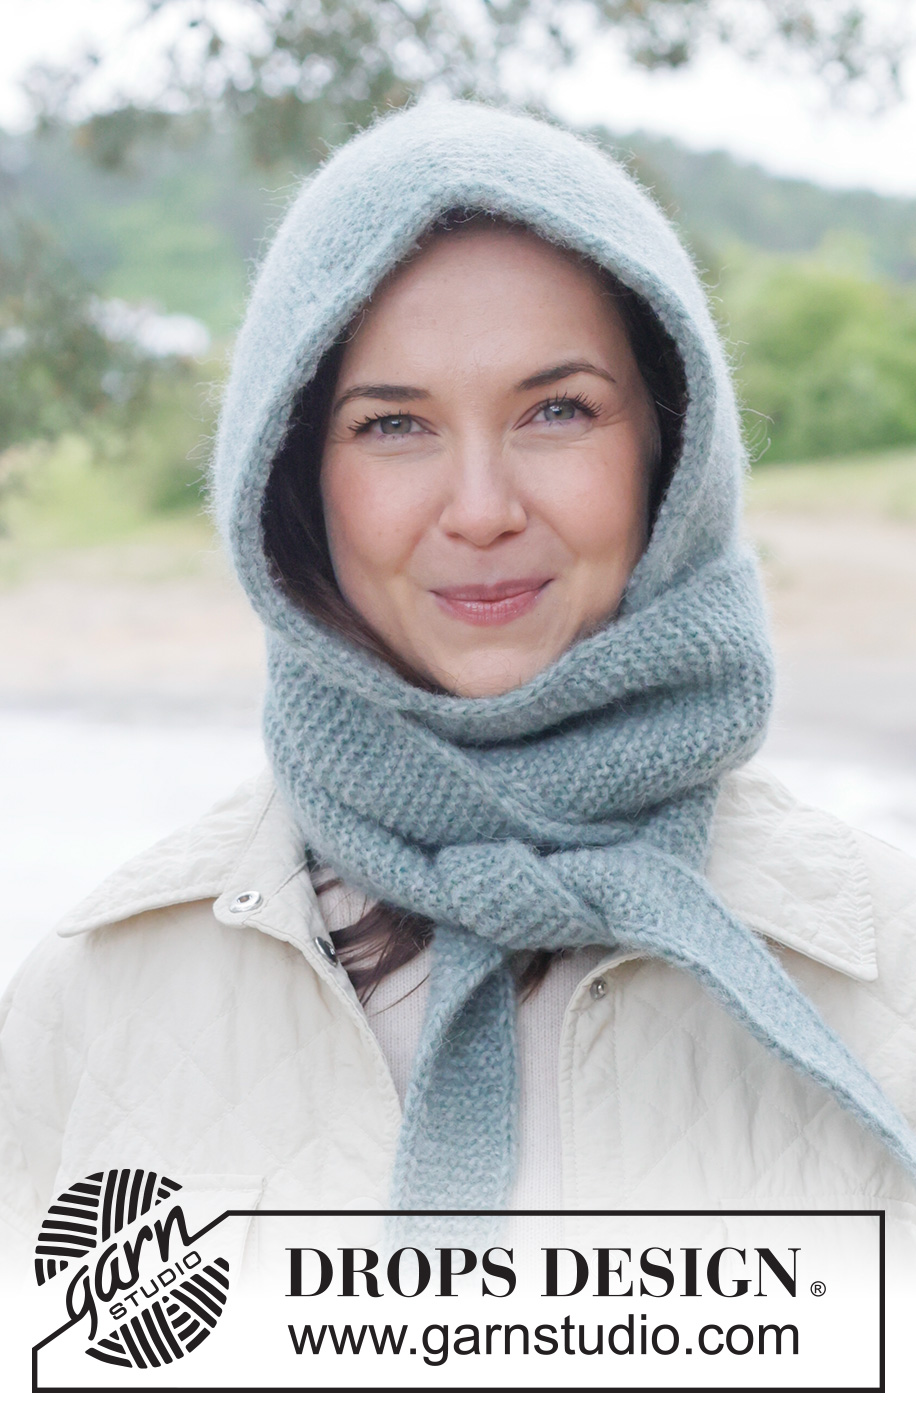
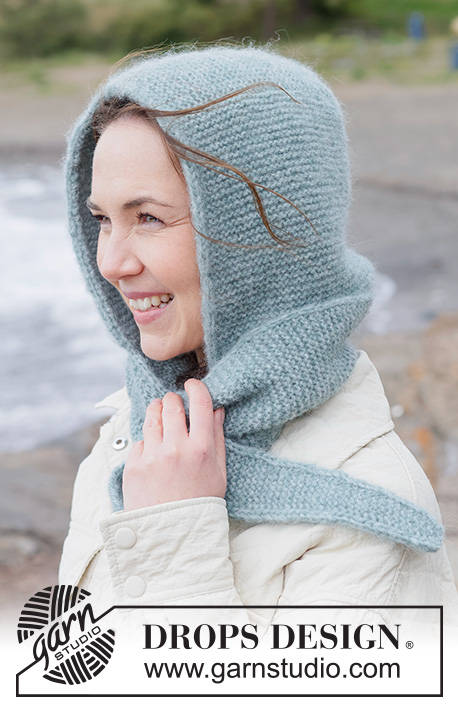
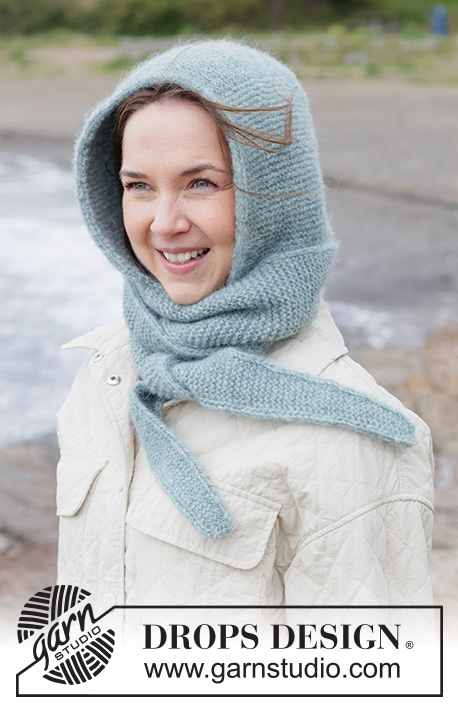
Knitted hooded scarf in DROPS Air. The piece is worked in garter stitch with I-cord. Sizes S - XL.
DROPS 261-4 |
||||||||||
|
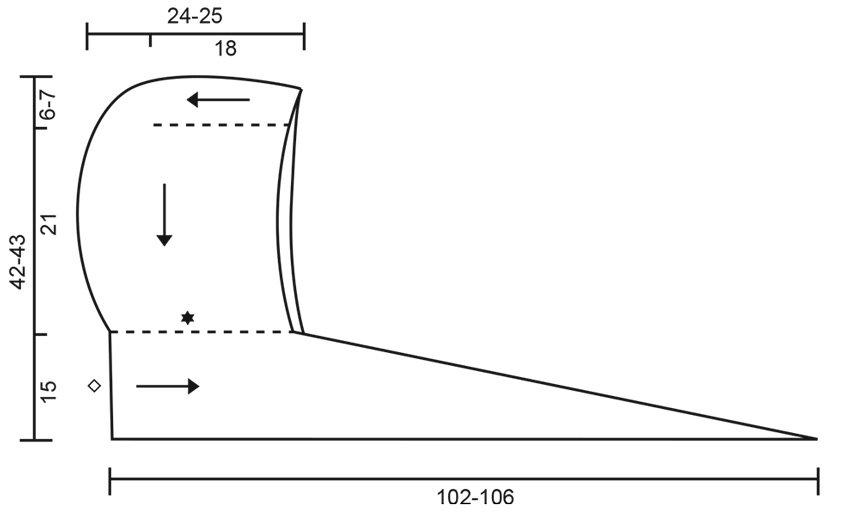
------------------------------------------------------- EXPLANATIONS FOR THE PATTERN: ------------------------------------------------------- GARTER STITCH (worked back and forth): Knit all rows, from both the right and wrong side. 1 ridge in height = knit 2 rows. I-CORD CAST OFF: Cast on 2 stitches. Slip these 2 stitches onto the left needle so the strand is 2 stitches in on the needle (the strand tightens when working to form a small tube). Do not turn but work as follows: * Knit 1, knit 2 twisted together, slip the 2 stitches on the right needle back onto the left needle *, work from *-* until there are 2 stitches left. 2 STITCHES I-CORD: BEGINNING OF ROW: Slip 1 stitch purl-wise with the strand in front of the piece, knit 1. END OF ROW: Work until there are 2 stitches left on the row, slip 1 stitch purl-wise with the strand in front, knit 1. Work like this from both the right and wrong side. ------------------------------------------------------- START THE PIECE HERE: ------------------------------------------------------- HOODED SCARF - SHORT OVERVIEW OF THE PIECE: The hood is worked back and forth from mid-front, across the forehead and backwards. Then stitches are knitted up on each side and the hood is continued back and forth, top down. When the hood is finished, the stitches are placed on a stitch holder/thread. An I-cord edge is worked around the hood opening. Stitches are cast on for the scarf, starting mid-back of neck, worked back and forth at the same time as stitches are knitted up from the hood 2 and 2. When all the hood-stitches from one side are included in the scarf, it is finished back and forth. This is repeated on the other side. The scarf is sewn together mid-back to finish. HOOD: Cast on 24-28 stitches with circular needle size 4 mm and DROPS AIR. Cast-on edge = middle of forehead. Work GARTER STITCH back and forth – read explanation above, for 18-18 cm with the last row from the wrong side. Cut the strand. This piece is the top of the hood. Now knit up stitches along both sides (inside the outermost stitch) as follows: From the right side, start from the right corner by the cast-on edge and knit up 35-35 stitches, along the side (right-hand side when the cast-on edge is towards you), work 24-28 stitches from the top of the hood, then knit up 35-35 stitches along the other side (left-hand side when the cast-on edge is towards you) = 94-98 stitches. The piece is now measured from here. Continue garter stitch back and forth for a further 21-21 cm. Cut the strand. The hood is finished. Place the first 47-49 stitches on a stitch holder and the last 47-49 stitches on a second stitch holder, dividing each side of the hood. Work an I-cord edge along the hood-opening as follows. I-CORD EDGE: From the right side, starting bottom right on the hood (right-hand side when the piece is worn), knit up 1 stitch in every second row, inside 1 stitch as far as the cast-on edge (= approx. 40-40 stitches), then knit up 1 stitch in each stitch along the cast-on edge (= 24-28 stitches) and finally 1 stitch in every second row along the left side of the hood-opening (= approx. 40-40 stitches) = approx. 104-108 stitches. Cut the strand. From the right side, begin bottom right and work I-CORD CAST-OFF – read explanation above. Place the 2 remaining stitches from the I-cord on the same stitch holder as the 47-49 stitches from the left-hand side of the hood, these stitches will later be worked into the scarf = 49-51 stitches on the left-hand side. Cut the strand. Pick up 2 stitches where stitches were cast on for the I-cord on the right-hand side and place these 2 stitches on the same stitch holder as the 47-49 stitches from the right-hand side of the hood = 49-51 stitches on the right-hand side. Stitches are now cast on for the scarf as follows. RIGHT SCARF: Stitches are cast on for the scarf, which is worked back and forth. AT THE SAME TIME, 2 and 2 stitches from the hood are knitted together with the last stitch on the row. The stitches from the hood are knitted together from mid-back and forwards on the right-hand side. Cast on 30-30 stitches with needle size 4 mm. This cast-on edge = mid-back of neck. ROW 1 (right side): Work 2 STITCHES I-CORD – read explanation above, work garter stitch until there is 1 stitch left on the row, slip 1 stitch knit-wise (last stitch on row), knit 2 hood-stitches together, pass the slipped stitch over the knitted together hood-stitches (= 2 stitches decreased from the stitch holder). ROW 2 (wrong side): Purl 1, work garter stitch until there are 2 stitches left, finish with 2 stitches I-cord. ROW 3 (right side): Work 2 stitches I-cord, work garter stitch until there is 1 stitch left, slip 1 stitch knit-wise (last stitch on row), knit 1 stitch from the hood, pass the slipped stitch over the knitted hood-stitch (= 1 stitch decreased from the stitch holder). ROW 4 (wrong side): Purl 1, work garter stitch until there are 2 stitches left, finish with 2 stitches I-cord. Repeat ROWS 1 to 4 until all the first 47-49 hood-stitches are knitted up – 2 hood-stitches left on the stitch holder (i.e., 2 stitches from the I-cord edge). Work the next row from the right side as follows: Work 2 stitches I-cord, work garter stitch to end of row, knit together the last 2 hood-stitches = 31-31 stitches. Continue back and forth as follows: Work 2 stitches I-cord, work garter stitch until there are 2 stitches left, work 2 stitches I-cord = 31-31 stitches. Work like this for a total of 12-14 rows. On the next row from the right side, begin to decrease as follows: Work as before until there are 4 stitches left, knit 2 together, finish with 2 stitches I-cord. Continue back and forth, decreasing as above every 12th row (approx. every 3 cm) until there are 7-7 stitches left. Work 8-10 rows without decreasing. Cast off at the same time as the first and last 2 stitches on the row are knitted together. The scarf measures approx. 102-106 cm from the scarf cast-on edge mid-back. LEFT SCARF: In the same way as for the right scarf, stitches are cast on and the scarf is worked back and forth. AT THE SAME TIME, 2 and 2 stitches from the hood are knitted together with the last stitch on the row. The stitches from the hood are knitted together from mid-back and forwards on the left-hand side. Cast on 30-30 stitches with needle size 4 mm. This cast-on edge = mid-back of neck. ROW 1 (wrong side): Work 2 stitches I-cord, garter stitch until there is 1 stitch left on the row, purl 1. ROW 2 (right side): Place 2 hood-stitches from the stitch holder onto the left needle, knit 3 together (i.e., 2 hood-stitches and 1 scarf-stitch), work garter stitch until there are 2 stitches left, finish with 2 stitches I-cord (= 2 stitches decreased from the stitch holder). ROW 3 (wrong side): Work 2 stitches I-cord, work garter stitch until there is 1 stitch left, purl 1. ROW 4 (right side): Place 1 hood-stitch from the stitch holder onto the left needle, knit 2 together (i.e., 1 hood-stitch and 1 scarf-stitch), work garter stitch until there are 2 stitches left, finish with 2 stitches I-cord (= 1 stitch decreased from the stitch holder). Repeat ROWS 1 to 4 until all the first 47-49 hood-stitches are knitted up – 2 hood-stitches left on the stitch holder (i.e., 2 stitches from I-cord edge). Work the next row from the wrong side as follows: 2 stitches I-cord, work garter stitch until there is 1 stitch left, purl 1, purl together the last 2 hood-stitches from the stitch holder = 31-31 stitches. Continue back and forth as follows: Work 2 stitches I-cord, work garter stitch until there are 2 stitches left, work 2 stitches I-cord = 31-31 stitches. Work like this for a total of 13-15 rows. On the next row from the right side, begin to decrease as follows: Work 2 stitches I-cord, slip 1 stitch knit-wise, knit 1, pass the slipped stitch over the knitted stitch, work garter stitch until there are 2 stitches left, 2 stitches I-cord. Continue back and forth, decreasing as above every 12th row (approx. every 3 cm) until there are 7-7 stitches left. Work 8-10 rows without decreasing. Cast off at the same time as the first and last 2 stitches on the row are knitted together. The scarf measures approx. 102-106 cm from the cast-on edge for the scarf mid-back. ASSEMBLY: Sew the 2 halves of the scarf together mid-back with grafting stitch. |
||||||||||
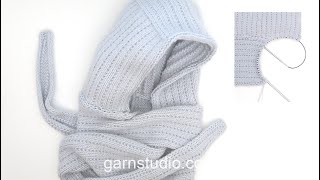
Diagram explanations |
||||||||||
|
||||||||||
 |
||||||||||
Have you finished this pattern?Tag your pictures with #dropspattern #mistyfjordhood or submit them to the #dropsfan gallery. Do you need help with this pattern?You'll find 13 tutorial videos, a Comments/Questions area and more by visiting the pattern on garnstudio.com. © 1982-2026 DROPS Design A/S. We reserve all rights. This document, including all its sub-sections, has copyrights. Read more about what you can do with our patterns at the bottom of each pattern on our site. |
||||||||||


With over 40 years in knitting and crochet design, DROPS Design offers one of the most extensive collections of free patterns on the internet - translated to 17 languages. As of today we count 324 catalogues and 12291 patterns translated into English (UK/cm). 12291
We work hard to bring you the best knitting and crochet have to offer, inspiration and advice as well as great quality yarns at incredible prices! Would you like to use our patterns for other than personal use? You can read what you are allowed to do in the Copyright text at the bottom of all our patterns. Happy crafting!
Post a comment to pattern DROPS 261-4
We would love to hear what you have to say about this pattern!
If you want to leave a question, please make sure you select the correct category in the form below, to speed up the answering process. Required fields are marked *.