
Populære kategorier
Ser du etter et garn?


Kommentarer / Spørsmål (113)
![]() Brenda skrev:
Brenda skrev:
Any chance of doing a video tutorial on you-tube. I really like this headband, but am confused with the written pattern.
01.12.2022 - 01:02DROPS Design answered:
Dear Brenda, you will find videos relative to the techniques used in that pattern at the bottom of the pattern, feel free to ask your question here so that we can help you further in the part of the pattern you don't understand. Happy knitting!
01.12.2022 - 11:46
![]() Kathy skrev:
Kathy skrev:
I am on the first increase row to 24 stitches and following the established rib pattern but there are not enough stitches to complete the rib pattern! What do I do?
11.10.2021 - 01:08DROPS Design answered:
Hi Kathy, You increase all P1 to P2 (5 stitches increased) which gives you 24 stitches. You now have 1 stitch in garter stitch, 5 x K2, P2 (20 stitches), K2 and 1 stitch in garter stitch = 24 stitches. Happy knitting!
11.10.2021 - 07:04
![]() Iris skrev:
Iris skrev:
Hallo! Ich bin ziemliche Anfängerin und komme mit der Anleitung nicht ganz zurecht. Betrifft das Fertigstellen des Stirnbands mit den Maschen auf einem Hilfsfaden. Habe leider auch kein passendes Videotutorial dazu finden können. Wie lange muß der Hilfsfaden sein? und wird er mithineingenäht? Danke im Voraus für die Hilfe!
01.01.2021 - 22:03DROPS Design answered:
Liebe Iris, die stillgelegten Maschen werden wie in diesem Video zusammen mit der Anschlagskante - wie in diesem Video zusammen genäht, dh so eine "Mischung" je nach den Maschen. Viel Spaß beim zusammennähen!
04.01.2021 - 14:43
![]() Diana Connolly skrev:
Diana Connolly skrev:
This increase is called a make 1 in English. If you’d written it like this many here wouldn’t have had so many problems, make 1 is a term used when you increase by picking up the loop between stitches. Hope this helps.
27.10.2020 - 21:20
![]() Kirsty skrev:
Kirsty skrev:
Hi, wow many thanks for your helpful video reply. I really appreciate it. Love your site. Well wishes, Kirsty
28.06.2020 - 20:24
![]() Sherie Rodrigues skrev:
Sherie Rodrigues skrev:
To all the knitters who commented and asked questions, and to all the staff who answered the questions, I say THANK YOU. Without your help I may not have worked the pattern out by myself, but I am so glad I did. It is simple, when the light bulb goes off. I would suggest you look at the questions and answers until it makes sense. I do so LOVE this pattern . Thanks again everyone. Regards and happy knitting.
10.06.2020 - 15:30
![]() Karren skrev:
Karren skrev:
Thank you so much for the guidance in my pattern. I am almost finished and think I will love it. Karren
18.04.2020 - 01:05
![]() Karren skrev:
Karren skrev:
I do not understand what I am supposed to do on the wrong side of the pattern in between the increase rows. The increases occur on the right side. Does the ribbing continue through out the whole pattern?
17.04.2020 - 00:53DROPS Design answered:
Dear Karren, you increase in the P-sections seen from RS (these sts are worked K from WS), when working from WS you will K over K and P over P, and the number of K stitches from WS will increase (then decrease on the 2nd half of piece) as the P stitches from WS increases. Happy knitting!
17.04.2020 - 09:01
![]() Judith skrev:
Judith skrev:
I was sold a yarn that gets 2 st/inch on an 8 needle and is not too stiff. will the pattern work as written? Do I knit first stitch, then do the edge stitch? hat seem strange to me, so I am asking. I thought the edge stitch would be first. Thank you
16.12.2019 - 04:45DROPS Design answered:
Dear Judith, please check your tension - read more here about tension. Pattern is worked in rib with 1 edge stitch in garter stitch on each side. Happy knitting!
16.12.2019 - 09:10
![]() Shannon skrev:
Shannon skrev:
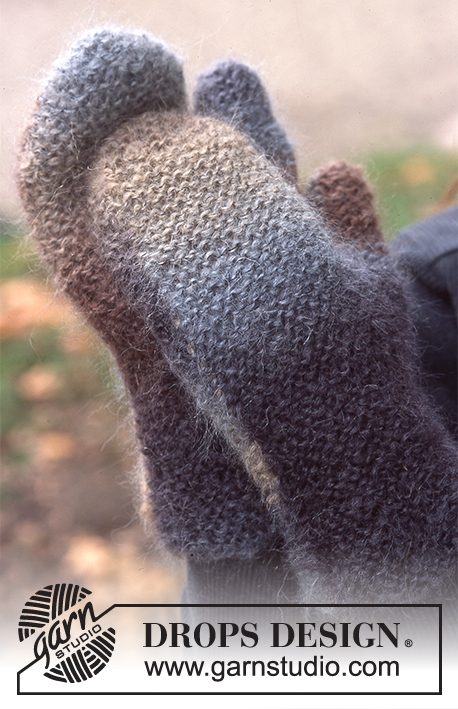
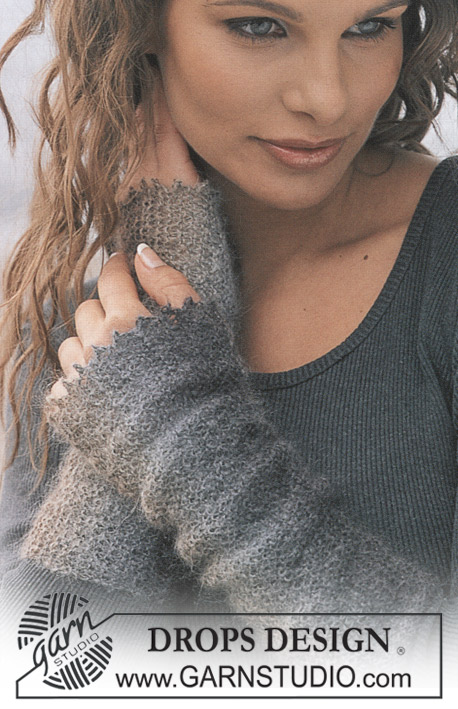
What is the multi colored yarn in the second picture?
14.12.2019 - 04:07DROPS Design answered:
Dear Shannon, in the second picture, the mittens are made with Vivaldi ( from group C) but this yarn is discontinued. Happy knitting!
15.12.2019 - 18:41
|
|
Saturn Rings |
|
|
|
|
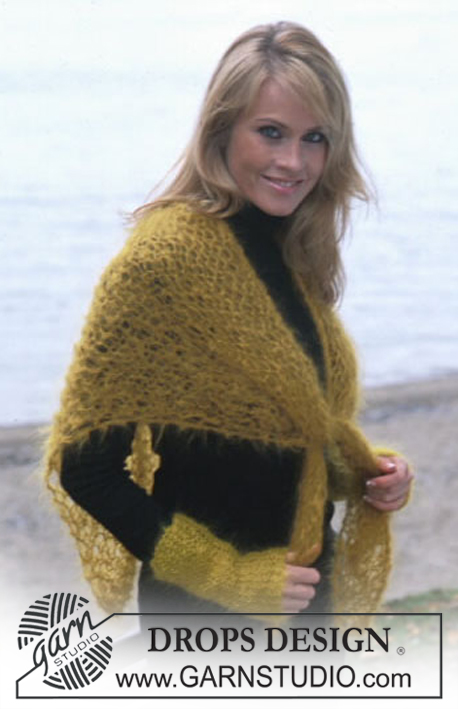
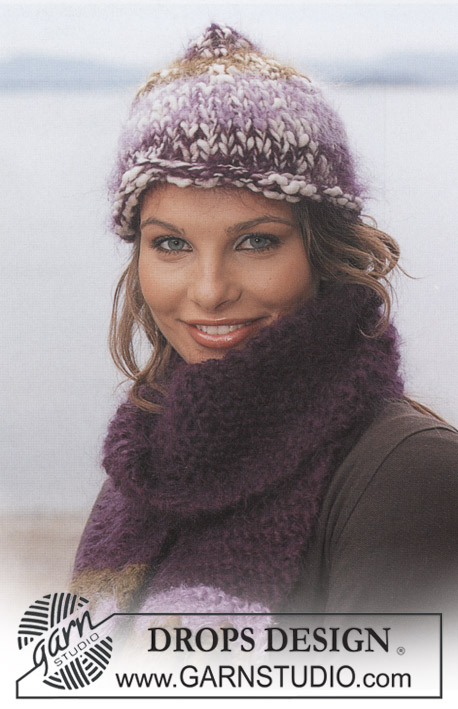
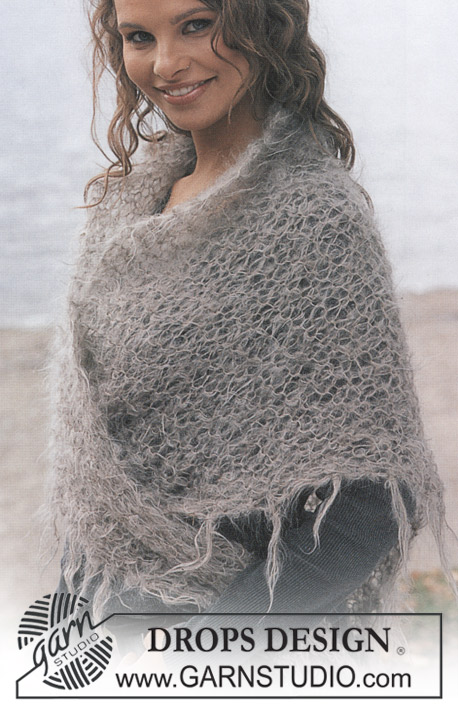
DROPS pannebånd i "Alaska" og sjal i "Vienna"
DROPS 86-10 |
|
|
Strikkefasthet: 18 m x 23 p på p 4,5 og glstrikk = 10 x 10 cm. Husk p.nr er kun veiledende! Rille: 1 rille = 2 pinner. 1.p: Rett, 2.p: Rett. Pannebånd: Start midt bak og legg opp 19 m på p 4,5 med Alaska. Strikk neste p slik: 1 m rille, * 2 r, 1 vr * gjenta totalt 5 ganger og avslutt p med 2 r og 1 rille. Når arb måler 8 cm økes alle 1 vr til 2 vr = 24 m på p. Når arb måler 14 cm økes alle 2 vr til 3 vr = 29 m på p. Når arb måler 18 cm økes alle 3 vr til 4 vr = 34 m på p. Når arb måler 21 cm økes alle 4 vr til 5 vr = 39 m på p. Når arb måler 24 cm settes en merketråd = midt oppå hodet. Herfra speilvendes arb - dvs at det felles m der det ble økt til det igjen er 19 m på p. Når arb måler 48 cm settes m på 1 tråd. Sy m fra tråden sammen med oppleggskanten med 1 sting i hver m slik at oppleggskanten blir elastisk. |
|
Har du fullført dette mønsteret?Tagg bildene dine med #dropspattern eller send dem til #dropsfan-galleriet. Trenger du hjelp med denne oppskriften?Du finner 16 instruksjonsvideoer, kommentarer/spørsmål og mer i oppskriften på www.garnstudio.com © 1982-2026 DROPS Design A/S. Alle rettigheter er reservert. Dette dokumentet med sine underdokumenter har copyright. Les mer om hva du er tillatt å gjøre med våre oppskrifter nederst i alle våre oppskrifter på vår nettside. |


Med over 40 år i strikke- og heklebransjen, tilbyr DROPS Design en av de mest omfattende samlingene av gratis oppskrifter på internett - oversatt til 17 språk. Per i dag har vi 324 kataloger og 12291 oppskrifter på Norsk.
Vi jobber hardt for å tilby det beste innen strikking og hekling, inspirasjon og gode råd, men også kvalitetsgarn til fantastiske priser! Vil du bruke våre oppskrifter til annet enn personlig bruk? Du kan lese om hvilke regler som gjelder i teksten Copyright nederst på siden i alle våre oppskrifter. God fornøyelse!
Kommenter oppskrift DROPS 86-10
Vi vil gjerne høre din mening om denne modellen!
Hvis du ønsker å stille et spørsmål, husk å velge riktig kategori i menyen under - det vil sørge for at du får svar raskere. Obligatoriske felt er markert med *.