DROPS Merino Extra Fine
100% Wool
from 3.50 £ /50g
Get the yarn to make this pattern from 10.50£.

The yarn cost is calculated from the pattern’s smallest size and the yarn’s cheapest product type. Looking for an even better price? You might find it on the DROPS Deals!

DROPS Super Sale

North Star Set

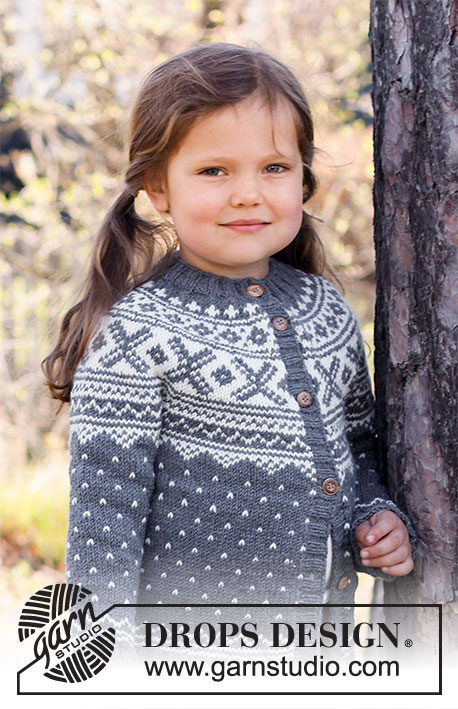
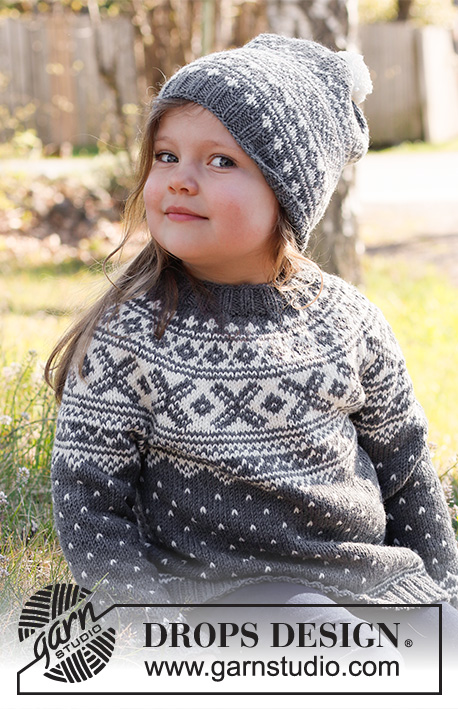
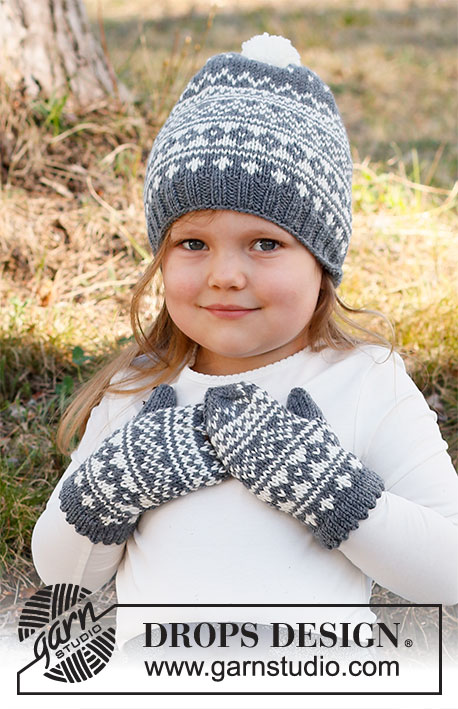
Knitted hat and mittens for children in DROPS Merino Extra Fine. The whole set is worked with Nordic pattern. Sizes 2 – 12 years.

DROPS Children 37-3
DROPS Design: Pattern no me-065-bn
Yarn group B
-------------------------------------------------------

WHOLE SET:

SIZES:
2 - 3/5 - 6/9 - 10/12 years
Fits head size: Approx. 48 - 50/52 - 53/54 - 55/56 cm
Mitten length: 14-16-18-21 cm. Circumference: 13-15-16-18 cm.

MATERIALS:
DROPS MERINO EXTRA FINE from Garnstudio (belongs to yarn group B)
100-100-100-100 g colour 04, medium grey
50-50-50-50 g colour 01, off white

HAT:

SIZES:
2 - 3/5 - 6/9 - 10/12 years
Fits head size: Approx. 48 - 50/52 - 53/54 - 55/56 cm

MATERIALS:
DROPS MERINO EXTRA FINE from Garnstudio (belongs to yarn group B)
50-50-50-100 g colour 04, medium grey
50-50-50-50 g colour 01, off white

KNITTING TENSION:
22 stitches in width and 30 rows in height with stocking stitch and Nordic pattern = 10 x 10 cm.

NEEDLES:
DROPS DOUBLE POINTED NEEDLES SIZE 3.5 MM.
DROPS CIRCULAR NEEDLE SIZE 3.5 MM: Length 40 cm for stocking stitch.
DROPS CIRCULAR NEEDLE SIZE 3 MM: Length 40 cm for rib.
Needle size is only a guide. If you get too many stitches on 10 cm, change to a larger needle size. If you get too few stitches on 10 cm, change to a smaller needle size.

MITTENS:

SIZES:
2 - 3/5 - 6/9 - 10/12 years
Mitten length: 14-16-18-21 cm. Circumference: 13-15-16-18 cm.

MATERIALS:
DROPS MERINO EXTRA FINE from Garnstudio (belongs to yarn group B)
50-50-50-50 g colour 04, medium grey
50-50-50-50 g colour 01, off white

KNITTING TENSION:
22 stitches in width and 30 rows in height with stocking stitch and Nordic pattern = 10 x 10 cm.

NEEDLES:
DROPS DOUBLE POINTED NEEDLES SIZE 3.5 MM.
Needle size is only a guide. If you get too many stitches on 10 cm, change to a larger needle size. If you get too few stitches on 10 cm, change to a smaller needle size.

-------------------------------------------------------

Alternative Yarn – See how to change yarns here
Yarn Groups A to F – Use the same pattern and change the yarn here
Yarn usage using an alternative yarn – Use our yarn converter here

-------------------------------------------------------

DROPS Merino Extra Fine
100% Wool
from 3.50 £ /50g
Get the yarn to make this pattern from 10.50£.

The yarn cost is calculated from the pattern’s smallest size and the yarn’s cheapest product type. Looking for an even better price? You might find it on the DROPS Deals!

DROPS Super Sale

SAVE 30% on 6 cotton favourites!
Valid until 12.04.2024

Pattern instructions

NOTE: This pattern is written in British English. All measurements in charts are in cm. For conversion from cm to inches - click here. There are different terms for crocheting in British and American English. If this pattern includes crochet, click for "crochet terms" here. For this pattern in American English, please click here.
-------------------------------------------------------

EXPLANATIONS FOR THE PATTERN:

-------------------------------------------------------

PATTERN:
Hat and mittens: See diagrams A.1 and A.2. The whole pattern is worked in stocking stitch.

KNITTING TIP-1:
To avoid the garment losing its elasticity when working the pattern, it is important the strands at the back are not tight. Increase a needle size when working pattern if this is a problem.

KNITTING TIP-2 (for mittens):
The length you work before the start of the thumb-opening can be adjusted by working more or fewer rounds before marking the opening.

DECREASE TIP-1 (for top of hat): 
Work until there are 2 stitches left before the marker, knit 2 together (= 1 stitch decreased).

DECREASE TIP-2 (for top of mitten):
Start 3 stitches before the marker thread, knit 2 together, knit 2 (marker thread sits between these 2 stitches), slip 1 stitch as if to knit, knit 1 and pass the slipped stitch over the knitted stitch (= 2 stitches decreased at the marker thread).

DECREASE TIP-3 (for thumb):
Start 2 stitches before the marker thread, knit 2 together, marker thread, slip 1 stitch as if to knit, knit 1 and pass the slipped stitch over the knitted stitch (= 2 stitches decreased).

-------------------------------------------------------

START THE PIECE HERE:

-------------------------------------------------------

HAT – SHORT OVERVIEW OF THE PIECE:
The piece is worked in the round with short circular needle, bottom up. Change to double pointed needles when necessary.

HAT:
Cast on 96-100-104-108 stitches with short circular needle size 3 mm and medium grey. Knit 1 round, then work rib in the round (= knit 2 / purl 2) for 3 cm. Change to short circular needle size 3.5 mm. Read KNITTING TIP-1 and work A.1 in the round (= 24-25-26-27 repeats of 4 stitches). REMEMBER THE KNITTING TENSION!
When A.1 has been completed, work A.2 (= 24-25-26-27 repeats of 4 stitches). Work until the piece measures 17-18-18-19 cm and at the same time decrease 1-0-2-0 stitches evenly on the last round = 95-100-102-108 stitches.
Insert 5-5-6-6 markers in the piece with 19-20-17-18 stitches between each marker. Work stocking stitch with medium grey.
AT THE SAME TIME on the next round decrease 1 stitch before each marker - read DECREASE TIP-1 = 5-5-6-6 stitches decreased.
Decrease like this every 2nd round a total of 3-2-5-3 times and then every round a total of 4-6-3-7 times = 60-60-54-48 stitches left. Work 3 rounds of stocking stitch where all stitches are knitted together 2 and 2 on all 3 rounds = 8-8-7-6 stitches left. Cut the strand, pull it through the remaining stitches, tighten and fasten well. The hat measures approx. 21-22-23-24 cm from the top down.

ASSEMBLY:
Make a pom pom using off-white and approx. 4 cm in diameter. Fasten to top of hat.

-------------------------------------------------------

MITTENS – SHORT OVERVIEW OF THE PIECE:
The piece is worked in the round with double pointed needles, bottom up.

LEFT MITTEN:
Cast on 28-32-36-40 stitches with double pointed needles size 3.5 mm and medium grey. Work 6 rounds of stocking stitch for the lining.
The next round is worked as follows: * Knit 2 together, 1 yarn over *, work from *-* to end of round (= folding edge). The piece is now measured from this folding edge!
Work 6 rounds of stocking stitch with medium grey. REMEMBER THE KNITTING TENSION!
Read KNITTING TIP-1 and work A.1 in the round (= 7-8-9-10 repeats of 4 stitches). When A.1 has been completed, work A.2. Then repeat A.2 in height to finished length.
AT THE SAME TIME when the piece measures approx. 6-8-9-10 cm from the folding edge, work a marker for the thumb-opening as follows – read KNITTING TIP-2:
Work 6-8-9-11 stitches in pattern as before, cut the strand. Work 6-6-7-7 stitches in stocking stitch for the thumb-opening using a colour which stands out from the rest of the piece, then work the remaining 16-18-20-22 stitches in pattern as before. Continue the pattern as before over all stitches until the piece measures 12-14-15-18 cm from the folding edge (you have worked 6-6-6-8 cm from the thumb-opening). There is now approx. 2-2-3-3 cm to finished length; try the mitten on and work to desired length.
Insert 1 marker thread at the beginning of the round and 1 marker thread after 14-16-18-20 stitches. Work stocking stitch in the round with medium grey. AT THE SAME TIME on the first round decrease on each side of the 2 marker threads – read DECREASE TIP-2 (= 4 stitches decreased). Decrease like this every round a total of 6-7-8-9 times = 4 stitches left. Cut the strand, pull it through the remaining stitches, tighten and fasten well. The mitten measures approx. 14-16-18-21 cm from the top down to the folding edge.

THUMB:
Remove the coloured strand used for the 6-6-7-7 stitches in the thumb-opening. Divide these stitches onto double pointed needles size 3.5 mm and knit up 1 stitch on each side of the thumb using medium grey = 14-14-16-16 stitches. Work stocking stitch in the round with medium grey.
When the thumb measures approx. 3-3½-4-4½ cm, insert 1 marker thread on each side of the thumb. There is now approx. 1 cm to finished length; try the mitten on and work to desired thumb-length. On the next round decrease on each side of both marker threads – read DECREASE TIP-3 (= 4 stitches decreased). Decrease like this every round a total of 2 times = 6-6-8-8 stitches left. Cut the strand, pull it through the remaining stitches, tighten and fasten well.

RIGHT MITTEN:
Cast on 28-32-36-40 stitches with double pointed needles size 3.5 mm and medium grey. Work 6 rounds of stocking stitch for the lining.
The next round is worked as follows: * Knit 2 together, 1 yarn over *, work from *-* to end of round (= folding edge). The piece is now measured from this folding edge!
Work 6 rounds of stocking stitch with medium grey. Remember KNITTING TIP-1 and work A.1 in the round (= 7-8-9-10 repeats of 4 stitches). When A.1 has been completed, work A.2. Then repeat A.2 in height to finished length.
AT THE SAME TIME when the piece measures approx. 6-8-9-10 cm from the folding edge, work a marker for the thumb-opening as follows – remember KNITTING TIP-2:
Work 16-18-20-22 stitches in pattern as before, 6-6-7-7 stitches in stocking stitch for the thumb-opening, using a colour which stands out from the rest of the piece, then work the remaining 6-8-9-11 stitches in pattern as before.
Continue the pattern as before over all stitches until the piece measures 12-14-15-18 cm from the folding edge (you have worked 6-6-6-8 cm from the thumb-opening; match the left mitten).
Insert 1 marker thread at the beginning of the round and 1 marker thread after 14-16-18-20 stitches. Work stocking stitch in the round with medium grey. AT THE SAME TIME on the first round decrease on each side of the 2 marker threads – remember DECREASE TIP-2 (= 4 stitches decreased). Decrease like this every round a total of 6-7-8-9 times = 4 stitches left. Cut the strand, pull it through the remaining stitches, tighten and fasten well. The mitten measures approx. 14-16-18-21 cm from the top down to the folding edge.

THUMB:
Work the thumb in the same way as on the left mitten.

ASSEMBLY:
Fold the lining to the wrong side and sew down with small neat stitches.

Diagram

symbols = off white
symbols = medium grey
diagram
Do you have a question? See a list of frequently asked questions (FAQ)

Knitting tension is what determines the final measurements of your work, and is usually measured per 10 x 10 cm. It is provided like so: number of stitches in width x number of rows in height - eg: 19 stitches x 26 rows = 10 x 10 cm.

The knitting tension is very individual; some people knit/crochet loosely while others work tightly. You adjust the knitting tension with the needle size, which is why the suggested needle size is only meant as a guide! You need to adjust this (up or down) to ensure that YOUR knitting tension matches the knitting tension provided in the pattern. If you work with a different knitting tension than provided you will have a different yarn consumption, and your work will have different measurements than what the pattern suggests.

The knitting tension also determines which yarns can replace each other. As long as you achieve the same knitting tension you can replace one yarn with another.

See DROPS lesson: How to measure your tension/gauge

See DROPS video: How to make a gauge tension swatch

The required amount of yarn is provided in grams, eg: 450 g. To calculate how many balls you’ll need you first need to know how many grams are in 1 ball (25g, 50g or 100g). This information is available if you click on the individual yarn quality on our pages. Divide the amount required with the amount of each ball. For example, if each ball is 50g (the most common amount), the calculation will be as follows: 450 / 50 = 9 balls.

The important thing when changing from one yarn to another is that the knitting/crochet tension remains the same. This is so that the measurements of the finished piece will be the same as on the sketch provided. It is easier to achieve the same knitting tension using yarns from the same yarn group. It is also possible to work with multiple strands of a thinner yarn to achieve the knitting tension of a thicker one. Please try our yarn converter. We recommend you to always work a test swatch.

Please NOTE: when changing yarn the garment might have a different look and feel to the garment in the photo, due to individual properties and qualities of each yarn.

See DROPS lesson: Can I use a different yarn than the one mentioned in the pattern?

All our yarns are categorised into yarn groups (from A to F) according to thickness and knitting tension – group A contains the thinnest yarns and group F the thickest. This makes it easier for you to find alternative yarns to our patterns, should you wish to switch yarn. All yarns within the same group have a similar knitting tension and can easily replace each other. However, different yarn qualities have different structures and properties which will give the finished work a unique look and feel.

Click here for an overview of the yarns in each yarn group

At the top of all our patterns you’ll find a link to our yarn calculator, which is a helpful tool should you wish to use a different yarn than suggested. By filling in the yarn quality you wish to replace, the amount (in your size) and number of strands, the calculator will present good alternative yarns with the same knitting tension. Additionally it will tell you how much you’ll require in the new qualities and whether you’ll need to work with multiple strands. Most skeins are 50g (some are 25g or 100g).

If the pattern is worked with multiple colours, every colour will have to be calculated separately. Similarly, if the pattern is worked with several strands of different yarns (for example 1 strand Alpaca and 1 strand Kid-Silk) you will have to find alternatives for each, individually.

Click here to see our yarn calculator

Since different yarns have different qualities and textures we have chosen to keep the original yarn in our patterns. However, you can easily find options among our available qualities by using our yarn calculator, or simply pick a yarn from the same yarn group.

It is possible that some retailers still have discontinued yarns in stock, or that someone has a few skeins at home that they would like to find patterns for.

The yarn calculator will provide both alternative yarn as well as required amount in the new quality.

If you think it's hard to decide what size to make, it can be a good idea to measure a garment you own already and like the size of. Then you can pick the size by comparing those measures with the ones available in the pattern's size chart.

You'll find the size chart at the bottom of the pattern.

See DROPS lesson: How to read size chart

The needle size provided in the pattern serves only as a guide, the important thing is to follow the knitting tension. And since knitting tension is very individual, you will have to adjust the needle size to ensure that YOUR tension is the same as in the pattern – maybe you’ll have to adjust 1, or even 2 needle sizes, up or down to achieve the correct tension. For this, we recommend that you work test swatches.

Should you work with a different knitting tension than the one provided, the measurements of the finished garment might deviate from the measurement sketch.

See DROPS lesson: How to measure your tension/gauge

See DROPS video: How to make a tension/gauge swatch

Working a garment top-down provides more flexibility and room for personal adjustment. For example it is easier to try the garment on while working, as well as making adjustments to length of yoke and shoulder caps.

The instructions are carefully explaining every step, in the correct order. Diagrams are adjusted to the knitting direction and are worked as usual.

The diagram depicts all rows/rounds, and every stitch seen from the right side. It is read from bottom to top, from right to left. 1 square = 1 stitch.

When working back and forth, every other row is worked from the right side and every other row is worked from the wrong side. When working from the wrong side, the diagram will have to be worked reversed: from left to right, knit stitches are purled, purl stitches are knit etc.

When working in the round every round is worked from the right side and the diagram are worked from right to left on all rounds.

See DROPS lesson: How to read knitting diagrams

The diagram depicts all rows/rounds, and every stitch seen from the right side. It is worked from bottom to top, from right to left.

When working back and forth every other row is worked from the right side: from right to left and every other row is worked from the wrong side: from left to right.

When working in the round, every row in the diagram are worked from the right side, from right to left.

When working a circular diagram you start in the middle and work your way outwards, counter clockwise, row by row.

The rows usually start with a given number of chain stitches (equivalent to the height of the following stitch), this will either be depicted in the diagram or explained in the pattern.

See DROPS lesson: How to read crochet diagrams

Instructions for working several diagrams after each other on the same row/round, will often be written like so: “work A.1, A.2, A.3 a total of 0-0-2-3-4 times". This means you work A.1 once, then A.2 is worked once, and A.3 is repeated (in width) the number of times provided for your size – in this case like so: S = 0 times, M = 0 times, L=2 times, XL= 3 times and XXL = 4 times.

The diagrams are worked as usual: begin with the first row in A.1, then work the first row in A.2 etc.

See DROPS lesson: How to read knitting diagrams

See DROPS lesson: How to read crochet diagrams

The total width of the garment (from wrist-to-wrist) will be larger in the larger sizes, despite the actual sleeves being shorter. The larger sizes have longer sleeve caps and wider shoulders, so there will be a good fit in all sizes.

The measurement sketch/schematic drawing provides information regarding the full length of the garment. If it’s a jumper or a jacket the length is measured from the highest point on the shoulder closest to the neckline, and straight down to the bottom of the garment. It is NOT measured from the tip of shoulder. Similarly, the length of yoke is measured from the highest point on the shoulder and down to where yoke is split into body and sleeves.

On a jacket measures are never taken along bands, unless specifically stated. Always measure inside band stitches when measuring the length.

See DROPS lesson: How to read a schematic drawing

Diagrams are often repeated on the round or in height. 1 repeat is the diagram the way it appears in the pattern. If it says to work 5 repeats of A.1 in the round, then you work A.1 a total of 5 times after/next to each other in the round. If it says to work 2 repeats of A.1 vertically/in height you work the entire diagram once, then begin again at the start and work the entire diagram one more time.

Chain stitches are slightly narrower than other stitches and to avoid working the cast-on edge too tight, we simply chain more stitches to begin with. The stitch count will be adjusted on the following row to fit the pattern and measurement sketch.

The rib edge is more elastic and will contract slightly compared to, for example, stocking stitch. By increasing before the rib edge, you avoid a visible difference in width between the rib edge and the rest of the body.

It’s very easy to cast off too tightly, and by making yarn overs while casting off (and simultaneously casting these off) you avoid a too tight cast off edge.

See DROPS video: How to bind off with yarn overs (yo)

To achieve an even increase (or decrease) you can increase on, for example: every 3rd and 4th row alternately, like so: work 2 rows and increase on the 3rd row, work 3 rows and increase on the 4th. Repeat this until the increase is complete.

See DROPS lesson: Increase or decrease 1 st on every 3rd and 4th row alternately

Should you prefer to work in the round instead of back and forth, you may of course adjust the pattern. You’ll need to add steeks mid-front (usually 5 stitches), and follow the instructions. When you would normally turn and work from the wrong side, simply work across the steek and continue in the round. At the end you’ll cut the piece open, pick up stitches to work bands, and cover the cut edges.

See DROPS video: How to knit steeks and cut open

Should you prefer to work back and forth instead of in the round, you may of course adjust the pattern so you work the pieces separately and then assemble them at the end. Divide the stitches for the body in 2, add 1 edge stitch in each side (for sewing) and work the front and back pieces separately.

See DROPS lesson: Can I adapt a pattern for circular needles into straight needles?

Pattern repeats can vary slightly in the different sizes, in order to get the correct proportions. If you’re not working the exact same size as the garment in the photo, yours might deviate slightly. This has been carefully developed and adjusted so that the complete impression of the garment is the same in all sizes.

Make sure to follow instructions and diagrams for your size!

If you have found a pattern you like which is available in women’s size it’s not very difficult to convert it to men’s size. The biggest difference will be the length of sleeves and body. Start working on the women size that you think would fit across the chest. The additional length will be worked right before you cast off for the armhole/sleeve cap. If the pattern is worked top-down you can add the length right after the armhole or before the first decrease on sleeve.

Regarding additional yarn amount, this will depend on how much length you add, but it is better with a skein too many than too few.

All yarns will have excess fibres (from production) that might come off as lint or shedding. Brushed yarns (ie hairier yarns) have more of these loose, excess fibres, causing more shedding.

Shedding also depends on what is worn under or over the garment, and whether this pulls at the yarn fibres. It’s therefore not possible to guarantee that there will be no shedding

Below are some tips on how to get the best result when working with hairier yarns:

1. When the garment is finished (before you wash it) shake it vigorously so the looser hairs come off. NOTE: do NOT use a lint roller, brush or any method that pulls at the yarn.

2. Place the garment in a plastic bag and put it in your freezer - the temperature will cause the fibres to become less attached to each other, and excess fibres will come off easier.

3. Leave in the freezer for a few hours before taking it out and shaking it again.

4. Wash the garment according to the instructions on the yarn label.

Pilling is a natural process that happens to even the most exclusive of fibers. It's a natural sign of wear and tear that is hard to avoid, and that is most visible in high friction areas of your garment like a sweater's arms and cuffs.

You can make your garment look as new by removing the pilling, using a fabric comb or a pill/lint remover.

Still can't find the answer you need? Then scroll down and leave your question so one of our experts can try to help you. This will be done normally within 5 to 10 working days.
In the meantime, you can read the questions and answers that others have left to this pattern or join the DROPS Workshop on Facebook to get help from fellow knitters/crocheters!

You might also like...

Post a comment to pattern DROPS Children 37-3

We would love to hear what you have to say about this pattern!

If you want to leave a question, please make sure you select the correct category in the form below, to speed up the answering process. Required fields are marked *.

Comments / Questions (15)

country flag Aleksandra wrote:

Dzień dobry nie rozumiem jak zamykać oczka w czapce - wykonuje rozmiar 3/5 lat. Mam w sumie zamknąć 40 oczek, 5 w pierwszym okrążeniu. Nie rozumiem jak ma się rozłożyć zamykanie tych kolejnych 35. Chodzi dokładnie o ten fragment: „Zamykać tak samo w sumie 3-2-5-3 razy co 2 okrążenia i 4-6-3-7 razy w każdym okrążeniu = zostaje 60-60-54-48 oczek.” Proszę o pomoc!

20.11.2023 - 13:20

DROPS Design answered:

Witaj Olu, zamykasz oczka tak samo (przerabiać aż zostaje 2 oczka przed markerem, przerobić 2 oczka razem na prawo) 2 razy co 2 okrążenia i 6 razy w każdym okrążeniu (8 okrążeń z zamykaniem oczek x 5 zamkniętych oczek w okrążeniu = 40 zamkniętych oczek) = zostaje 60 oczek w przerabianym rozmiarze. W każdym okrążeniu zamykasz 5 oczek, tylko zamykasz oczka w różnej częstotliwości (co 2 okrążenia lub w każdym okrążeniu). Pozdrawiamy!

20.11.2023 - 16:06

country flag Line Normandeau wrote:

Moufles 7e rang: *2 m ensembles, 1 jeté * 8e rang: tout à l’endroit Ça fait des grands trous. Qu’est-ce que je ne comprend pas?

30.08.2023 - 19:56

DROPS Design answered:

Bonjour Mme Normandeau, ce tour ainsi tricoté va permettre de créer une bordure picot quand on va plier le bas au niveau précisément de ce tour, tout comme nous le montrons dans cette vidéo - si vous trouvez que vos trous sont quand même trop grands, essayez de bien serrer le fil sur ce tour (ou bien utilisez des aiguilles plus fines juste pour ce tour). Bon tricot!

31.08.2023 - 09:02

country flag Kerstin Igen wrote:

Först nu tittade jag på instruktionsvideon som hör till tummarkeringen. Stickade förut vänstervanten och klippte av tråden som det stod i beskrivningen. För högervanten stod inget om att klippa av tråden. Så nu tittade jag efter vad intruktionsvideon visade: NEJ, man behöver inte alls klippa av tråden! Jag stickar just nu högervanten och gjorde som videon visade, Hur bra som helst och två lösa trådar mindre att fästa. Alltså bör texten "klipp av tråden" tas bort.

30.05.2022 - 19:01

country flag Kerstin wrote:

Ett litet påpekande: I tummarkeringen för vänster tumme står "klipp av tråden" och att sedan sticka med avvikande färg för själva markeringen. I beskrivningen för höger tumme har man missat att skriva ut "klipp av tråden". Kan kanske vara lite förvirrande för ovana stickare.

30.05.2022 - 18:35

country flag Lucia Battisti wrote:

Buongiorno vorrei realizzare il cappello per un bimbo di 6 mesi con baby alpaca silk quanti punti devo mettere? Grazie

05.12.2021 - 14:45

DROPS Design answered:

Buonasera Lucia, per un'assistenza così personalizzata può rivolgersi al suo rivenditore DROPS di fiducia. Buon lavoro!

06.12.2021 - 19:44

country flag Jane Beales wrote:

I am stuck on the thumb. I have seven stitches on my coloured thread and am asked to make one stitch each side of the thumb. 7+2 =9 but the pattern says I now have 16 stitches. Please help!

18.11.2021 - 00:11

DROPS Design answered:

Dear Mrs Beales, the 7 sts for the thumb were worked with a scrap yarn, you then pull out this scrap yarn so that you get 7 sts on each side (from the round worked with the scrap yarn + the round after) = 14 sts in total + 1 st picked up on each side of these 7 sts = 16 sts. This video shows how to work with a loose/scrap yarn and how to pick up sts afterwards and should help you to understand how to work thumb. Happy knitting!

18.11.2021 - 08:49

country flag Lilli wrote:

Måste man inte lägga upp nya maskor bakom de som man stickar upp på en hjälptråd? Låter väldigt konstigt att klippa av tråden och fortsätta sticka runt. Vilket antal maskor stickar man runt på?

28.10.2021 - 18:38

country flag Gunilla Edin wrote:

Hej. När jag stickat det antal maskor storleken visar innan jag ska sticka in den avvikande tråden för tumöppningen, ska jag då klippa av garnen jag stickar vanten med? Tack på förhand.

28.09.2021 - 19:27

DROPS Design answered:

Hej Gunilla. Ja det stämmer (för att slippa ha trådar där vid tummen på insidan av vanten). Mvh DROPS Design

29.09.2021 - 09:34

country flag Charlotte Hållén Johansson wrote:

Hej, det enklaste är nog om jag kan skicka en bild. Det syns ju först när man kommer till de vita kryssen. Men det är redan från start. Som sagt så sa "Yll och Tyll" att de får likadant, även på tröja, så det måste vara något vi inte fattar =) Det är som att när man kommer runt så är man en maska för högt upp, svårt att förklara. Jag väntar på godkännande i er Facebook-grupp, kan lägga en bild där när jag blir insläppt. Charlotte

17.09.2021 - 09:38

DROPS Design answered:

Hej Charlotte. Så bra, då kan du säkert få hjälp där. Om det är precis vid övergången till nytt varv som du får ett hack, så har vi en video som visar hur man kan undvika detta här. Mvh DROPS Design

17.09.2021 - 12:30

country flag Charlotte Hållén Johansson wrote:

Hej, jag har problem med mönstret, det blir förskjutet hela tiden. Jag har stickat om samma vante 4 gånger. När jag frågade i butiken där jag köpte mönstret så sa det att det är så med DROPS mönster. Det var samma med tröjor de stickade. Men det här låter ju väldigt konstigt? Kan jag skicka en bild till er för att få hjälp? Tack på förhand!

17.09.2021 - 07:33

DROPS Design answered:

Hej Charlotte. Mönstret ska inte bli förskjutet, så jag vet inte riktigt varför det blir så för dig. Är det redan i början av diagrammet du får problem eller när blir det så? Mvh DROPS Design

17.09.2021 - 09:24