
Popular categories
Looking for a yarn?


Comments / Questions (11)
![]() Johanna wrote:
Johanna wrote:
Hej! Varför ska resåren stickas med stickor nr 2,5 och resten med nr 3? Mvh Johanna
21.09.2023 - 15:20DROPS Design answered:
Hej Johanna, så resåren ikke bliver for løs i forhold til det andet :)
26.09.2023 - 15:28
![]() Alexa wrote:
Alexa wrote:
Hallo! Brauche Ihre Hilfe. Möchte die Mütze in Größe L/XL stricken. Finde dazu aber nicht das entsprechende Diagramm A2. LG aus Berlin!
01.07.2022 - 16:44DROPS Design answered:
Liebe Alexa. Für Größe L/XL stricken Sie Diagrama A.2 (=32 Mashen) Viel Spaß beim stricken!
02.07.2022 - 19:18
![]() Venla wrote:
Venla wrote:
Hei, neulotaanko tässä ohjeessa todella joka toinen kerros oikeaa resorin jälkeen kun kuvan pipo näyttäisi enemmän 2o 2n neulonnalta? En ole kokenut neuloja ja siksi ehkä tyhmä kysymys.
10.02.2021 - 20:28DROPS Design answered:
Kyllä, resorin jälkeen neulotaan piirroksen A.1 mukaisesti, eli vuorotellen 1 kerros oikein ja 1 kerros 2 o/2 n -joustinneuletta.
12.03.2021 - 14:00
![]() Maria Pia wrote:
Maria Pia wrote:
Salve, non capisco come procedere con il diagramma A1. sui ferri ho maglia a coste 2 diritti due rovesci: il lavoro su ferri circolari mi appare sempre sul dritto, devo dunque fare il primo ferro 2 dritti e due rov e il secondo invertire 2 rov e due dritti?
25.01.2021 - 20:58DROPS Design answered:
Buonasera Maria Pia, se sta lavorando il cappello deve lavorare il 1° giro a diritto e il 2° giro con 2 diritti e 2 rovesci. Buon lavoro!
26.01.2021 - 21:52
![]() Johanna Eliasson wrote:
Johanna Eliasson wrote:
I beskrivningen till mössan står stl 3,5 till resåren men högre upp står det 2,5. Kollade i originalet och där står det 2,5. Men kanske bra att ändra om ni har möjlighet.
28.12.2020 - 21:45DROPS Design answered:
Hej Johanna. Tack för info, detta är nu rättat! Mvh DROPS Design
04.01.2021 - 14:08
![]() Marit wrote:
Marit wrote:
Når eg har strikket hele mønsteret ,er det mange fler masker enndei 16 som skal ver Så står det Nå strikkes A2 =28-36 masker totalt 4 ganger på omgangen?
06.12.2019 - 13:20DROPS Design answered:
Hei Marit! Når luen måler 23-25cm skal A.2 strikkes, om du strikker størrelse S/M skal det felles 12 ganger. Dette utgjør 96 felte masker, det vil da være 16 masker igjen etter A.2 er strikket 1 gang i høyden. Om du strikker str. L/XL skal det felles 14 ganger, det utgjør 112 felte masker, og det er da 16 masker igjen. A.2 skal gjentas 4 ganger på hver omgang. Lykke til!
09.12.2019 - 08:21
![]() Marit wrote:
Marit wrote:
Først tar eg 2 sammen så strikker eg 24 masker bort til neste 2 sammen.Det står at det skal vere 4 ganger på omgangen ,men det stemmer ikkje.
04.12.2019 - 13:20DROPS Design answered:
Hej Marit, jo det stemmer hvis du strikker den mindste størrelse, eller så skal der være 28 masker frem til de sidste 2 sammen. God fornøjelse!
05.12.2019 - 08:16
![]() Marit Fjæreide wrote:
Marit Fjæreide wrote:
Eg forstår ikkje fellingen på luen .Får det ikkje til å stemme.
04.12.2019 - 10:53DROPS Design answered:
Hej, sæt et mærke efter hver rapport, så du har 28 masker i hver rapport. Hver gang du starter og slutter rapporten strikkes 2 m sammen ifølge diagrammet, det gør du på pind 4, 9,14,17 i diagrammet. God fornøjelse!
04.12.2019 - 11:24
![]() Rosy wrote:
Rosy wrote:
Bonjour, pour le modèle Plastron, dans les fournitures, vous indiquez "AIGUILLE CIRCULAIRE DROPS n°3,5 – en 40 ou 60 cm." mais dans les indications pour la réalisation de ce modèle, vous indiquez "Monter 64-68 mailles avec l'aiguille circulaire 3"... - Que faut il choisir en fait : aiguille 3,5 ou aiguilles 3 ? Merci !
24.11.2019 - 18:21DROPS Design answered:
Bonjour Rosy, nos stylistes vont vérifier ce point, merci pour votre retour, mais le plastron va fort probablement se tricoter avec des aiguilles 3,5 comme indiqué sous les fournitures (l'échantillon avec des aiguilles 3 pour le bonnet par ex. est différent). Bon tricot!
29.11.2019 - 13:05
![]() Rita Mogensen wrote:
Rita Mogensen wrote:
God model. Hvornår kommer opskriften?
06.08.2019 - 10:46
|
|||||||||||||
Purity#purityset |
|||||||||||||
 |
 |
||||||||||||
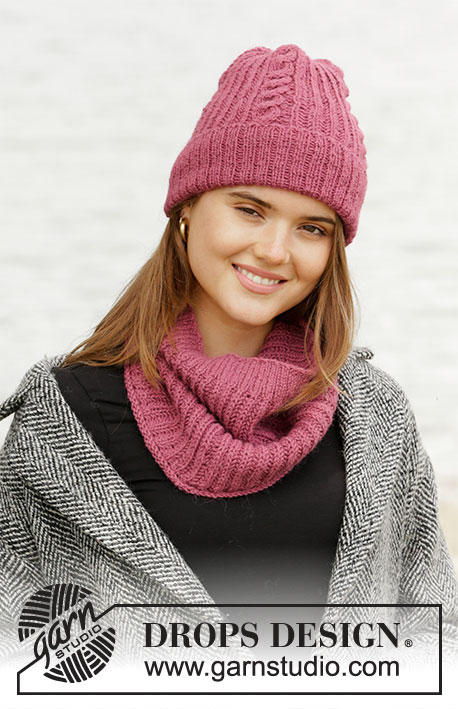
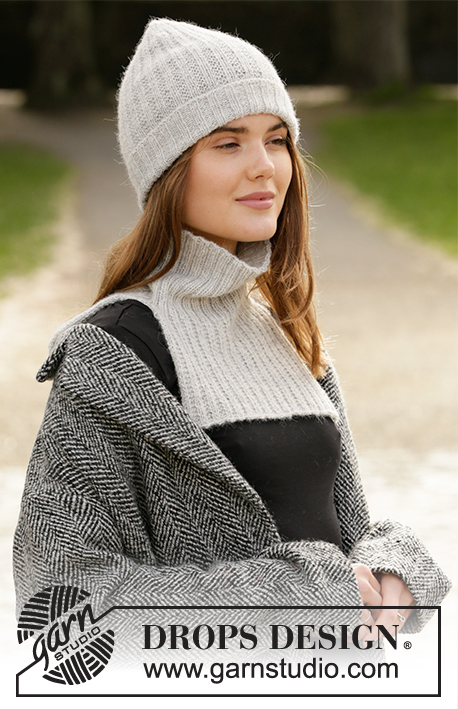
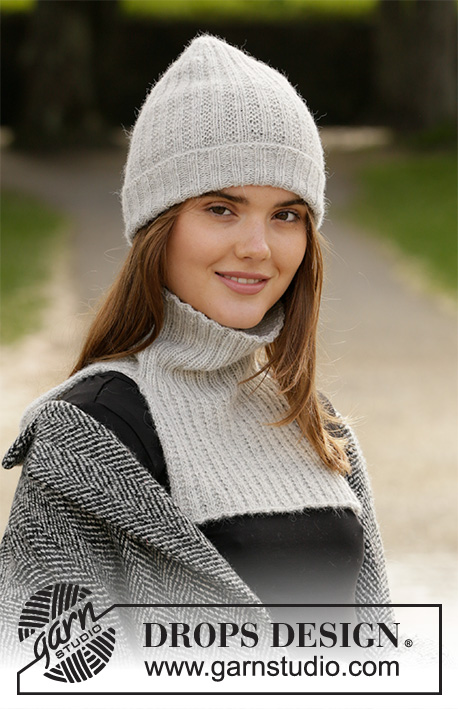
Knitted hat and neck warmer in DROPS BabyMerino. Piece is knitted with texture.
DROPS 204-47 |
|||||||||||||
|
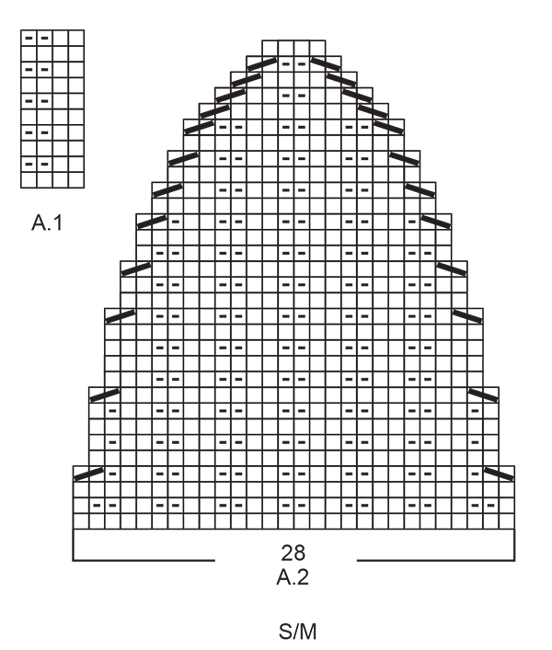
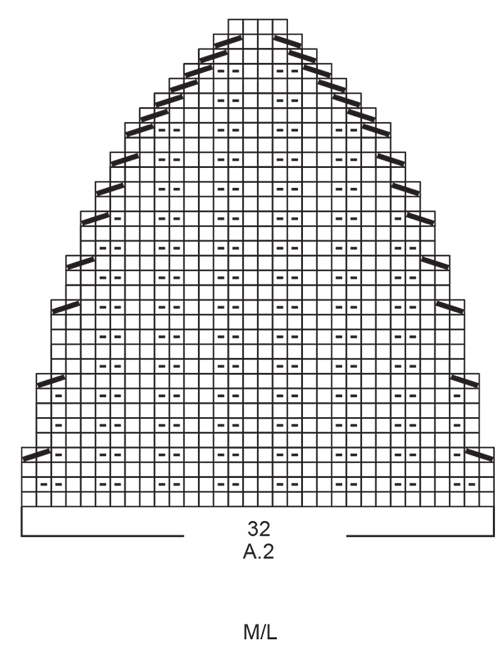
---------------------------------------------------------- EXPLANATION FOR THE PATTERN: ---------------------------------------------------------- GARTER STITCH (back and forth): Knit all rows. 1 ridge vertically = knit 2 rows. PATTERN: Hat: See diagram A.1 and A.2 - choose diagram for your size. Neck warmer: See diagram A.1. Diagrams show all rows in pattern seen from the right side. ---------------------------------------------------------- START THE PIECE HERE: ---------------------------------------------------------- HAT - SHORT OVERVIEW OF THE PIECE: Worked in the round on circular needle, bottom up. Switch to double pointed needles when needed. HAT: Cast on 112-128 stitches on circular needle size 2.5 mm with BabyMerino. Work rib (knit 2/purl 2) in the round for 10 cm. Switch to circular needle size 3 mm. Work pattern A.1 (= 4 stitches) on round. REMEMBER THE KNITTING TENSION! When piece measures 23-25 cm from cast-on edge - adjust so that next row worked is first row in A.1 (i.e. A row knitted over all stitches), work as follows: Knit 1, insert a marker thread here. This is now beginning of rounds. Now work A.2 (= 28-36 stitches) 4 times in total on round. When entire A.2 has been worked vertically, there are 16-16 stitches on round. Cut the yarn and pull it through the remaining stitches, tighten together and fasten. Hat measures approx. 32-35 cm. Fold rib at the bottom up so that fold is approx. 5 cm. Hat measures approx. 27-30 cm with approx. 5 cm fold at the bottom. ---------------------------------------------------------- NECK WARMER - SHORT SUMMARY OF PIECE: First work piece back and forth on circular needle in 2 parts. Then slip the two parts on to same circular needle and work in the round on circular needle. NECK WARMER: Cast on 64-68 stitches on circular needle size 3.5 mm with BabyMerino. Purl 1 row from wrong side, then work pattern as follows from right side: 1 edge stitch in GARTER STITCH - see explanation above, A.1 (= 4 stitches) until 3 stitches remain on needle, knit 2 and finish with 1 edge stitch in garter stitch. Continue back and forth like this. REMEMBER THE KNITTING TENSION! When piece measures 13-14 cm, adjust so that next row is from right side, put piece aside. Knit another part the same way. Now insert the 2 parts together on same circular needle = 128-136 stitches. Insert a marker thread in each side (i.e. in transition between the 2 parts put together). Begin round at one of the 2 marker threads and work as follows: ROUND 1: * Knit 2 together (= 1 stitch decreased), knit over knit and purl over purl until 2 stitches remain before next marker thread, slip 1 stitch knitwise, knit 1, pass the slipped stitch over (= 1 stitch decreased) *, work from *-* 1 more time on round = 124-132 stitches. ROUND 2: * Knit 2 together (= 1 stitch decreased), knit over knit and purl over purl until 2 stitches remain before next marker thread, slip 1 stitch knitwise, knit 1, pass the slipped stitch over (= 1 stitch decreased) *, work from *-* 1 more time on round = 120-128 stitches. Then continue in the round with knit over knit and purl over purl. When piece measures 13-14 cm from where the 2 part were put together on needle (= 26-28 cm in total), cast off with knit over knit and purl over purl. Cut and fasten the yarn. |
|||||||||||||
Diagram explanations |
|||||||||||||
|
|||||||||||||
|
|||||||||||||
|
|||||||||||||
Have you finished this pattern?Tag your pictures with #dropspattern #purityset or submit them to the #dropsfan gallery. Do you need help with this pattern?You'll find 22 tutorial videos, a Comments/Questions area and more by visiting the pattern on garnstudio.com. © 1982-2025 DROPS Design A/S. We reserve all rights. This document, including all its sub-sections, has copyrights. Read more about what you can do with our patterns at the bottom of each pattern on our site. |
|||||||||||||


With over 40 years in knitting and crochet design, DROPS Design offers one of the most extensive collections of free patterns on the internet - translated to 17 languages. As of today we count 314 catalogues and 11821 patterns translated into English (UK/cm).
We work hard to bring you the best knitting and crochet have to offer, inspiration and advice as well as great quality yarns at incredible prices! Would you like to use our patterns for other than personal use? You can read what you are allowed to do in the Copyright text at the bottom of all our patterns. Happy crafting!
Post a comment to pattern DROPS 204-47
We would love to hear what you have to say about this pattern!
If you want to leave a question, please make sure you select the correct category in the form below, to speed up the answering process. Required fields are marked *.