DROPS Cotton Merino uni colour 50% Wool, 50% Cotton |
4.45 $ /50g |
Order |
Clicking the ORDER button will redirect you to Wool Warehouse Direct Ltd website
The yarn cost is calculated from the pattern’s smallest size and the yarn’s cheapest product type. Looking for an even better price? You might find it on the DROPS Deals!
-------------------------------------------------------
Alternative Yarn – See how to change yarns here
Yarn Groups A to F – Use the same pattern and change the yarn here
Yarn usage using an alternative yarn – Use our yarn converter here
-------------------------------------------------------
DROPS Cotton Merino uni colour 50% Wool, 50% Cotton 4.45 $ /50g Order |
Clicking the ORDER button will redirect you to Wool Warehouse Direct Ltd website
The yarn cost is calculated from the pattern’s smallest size and the yarn’s cheapest product type. Looking for an even better price? You might find it on the DROPS Deals!
This pattern has been corrected. Click here to see the correction/s.
All measurements in charts are in cm.
= K from RS, P from WS | |
= P from RS, K from WS |
Each of our patterns has specific tutorial videos to help you.
These step-by-step tutorials might also help you:
Why is the knitting/crochet tension so important?
Knitting tension is what determines the final measurements of your work, and is usually measured per 10 x 10 cm. It is provided like so: number of stitches in width x number of rows in height - eg: 19 stitches x 26 rows = 10 x 10 cm.
The knitting tension is very individual; some people knit/crochet loosely while others work tightly. You adjust the knitting tension with the needle size, which is why the suggested needle size only serve as a guide! You need to adjust this (up or down) to ensure that YOUR knitting tension matches the knitting tension provided in the pattern. If you work with a different knitting tension than provided you will have a different yarn consumption, and your work will have different measurements than what the pattern suggests.
The knitting tension also determines which yarns can replace each other. As long as you achieve the same knitting tension you can replace one yarn with another.
See DROPS lesson: How to measure your tension/gauge
See DROPS video: How to make a gauge tension swatch
How do I know how many balls of yarn I need?
The required amount of yarn is provided in grams, eg: 450 g. To calculate how many balls you’ll need you first need to know how many grams are in 1 ball (25g, 50g or 100g). This information is available if you click on the individual yarn quality on our pages. Divide the amount required with the amount of each ball. For example, if each ball is 50g (the most common amount), the calculation will be as follows: 450 / 50 = 9 balls.
Can I use a different yarn than what the pattern suggests?
The important thing when changing from one yarn to another is that the knitting/crochet tension remains the same. This is so that the measurements of the finished piece will be the same as on the sketch provided. It is easier to achieve the same knitting tension using yarns from the same yarn group. It is also possible to work with multiple strands of a thinner yarn to achieve the knitting tension of a thicker one. Please try our yarn converter. We recommend you to always work a test swatch.
Please NOTE: when changing yarn the garment might have a different look and feel to the garment in the photo, due to individual properties and qualities of each yarn.
See DROPS lesson: Can I use a different yarn than the one mentioned in the pattern?
What are the yarn groups?
All our yarns are categorised into yarn groups (from A to F) according to thickness and knitting tension – group A contains the thinnest yarns and group F the thickest. This makes it easier for you to find alternative yarns to our patterns, should you wish to switch yarn. All yarns within the same group have a similar knitting tension and can easily replace each other. However, different yarn qualities have different structures and properties which will give the finished work a unique look and feel.
How do I use the yarn converter?
At the top of all our patterns you’ll find a link to our yarn converter, which is a helpful tool should you wish to use a different yarn than suggested. By filling in the yarn quality you wish to replace, the amount (in your size) and number of strands, the converter will present good alternative yarns with the same knitting tension. Additionally it will tell you how much you’ll require in the new qualities and whether you’ll need to work with multiple strands. Most skeins are 50g (some are 25g or 100g).
If the pattern is worked with multiple colours, every colour will have to be converted separately. Similarly, if the pattern is worked with several strands of different yarns (for example 1 strand Alpaca and 1 strand Kid-Silk) you will have to find alternatives for each, individually.
Why do you show discontinued yarns in the patterns?
Since different yarns have different qualities and textures we have chosen to keep the original yarn in our patterns. However, you can easily find options among our available qualities by using our yarn converter, or simply pick a yarn from the same yarn group.
It is possible that some retailers still have discontinued yarns in stock, or that someone has a few skeins at home that they would like to find patterns for.
The yarn converter will provide both alternative yarn as well as required amount in the new quality.
What size should I knit?
If you think it's hard to decide what size to make, it can be a good idea to measure a garment you own already and like the size of. Then you can pick the size by comparing those measures with the ones available in the pattern's size chart.
You'll find the size chart at the bottom of the pattern.
See DROPS lesson: How to read size chart
Why do I get the wrong knitting tension with the suggested needle size?
The needle size provided in the pattern serves only as a guide, the important thing is to follow the knitting tension. And since knitting tension is very individual, you will have to adjust the needle size to ensure that YOUR tension is the same as in the pattern – maybe you’ll have to adjust 1, or even 2 needle sizes, up or down to achieve the correct tension. For this, we recommend that you work test swatches.
Should you work with a different knitting tension than the one provided, the measurements of the finished garment might deviate from the measurement sketch.
See DROPS lesson: How to measure your tension/gauge
See DROPS video: How to make a gauge tension swatch
Why is the pattern worked top-down?
Working a garment top-down provides more flexibility and room for personal adjustment. For example it is easier to try the garment on while working, as well as making adjustments to length of yoke and shoulder caps.
The instructions are carefully explaining every step, in the correct order. Diagrams are adjusted to the knitting direction and are worked as usual.
How do I work according to a knitting diagram?
The diagram depicts all rows/rounds, and every stitch seen from the right side. It is read from bottom to top, from right to left. 1 square = 1 stitch.
When working back and forth, every other row is worked from the right side and every other row is worked from the wrong side. When working from the wrong side, the diagram will have to be worked reversed: from left to right, knit stitches are purled, purl stitches are knit etc.
When working in the round every round is worked from the right side and the diagram are worked from right to left on all rounds.
See DROPS lesson: How to read knitting diagrams
How do I work according to a crochet diagram?
The diagram depicts all rows/rounds, and every stitch seen from the right side. It is worked from bottom to top, from right to left.
When working back and forth every other row is worked from the right side: from right to left and every other row is worked from the wrong side: from left to right.
When working in the round, every row in the diagram are worked from the right side, from right to left.
When working a circular diagram you start in the middle and work your way outwards, counter clockwise, row by row.
The rows usually start with a given number of chain stitches (equivalent to the height of the following stitch), this will either be depicted in the diagram or explained in the pattern.
See DROPS lesson: How to read crochet diagrams
How do I work several diagrams simultaneously on the same row/round?
Instructions for working several diagrams after each other on the same row/round, will often be written like so: “work A.1, A.2, A.3 a total of 0-0-2-3-4 times". This means you work A.1 once, then A.2 is worked once, and A.3 is repeated (in width) the number of times provided for your size – in this case like so: S = 0 times, M = 0 times, L=2 times, XL= 3 times and XXL = 4 times.
The diagrams are worked as usual: begin with the first row in A.1, then work the first row in A.2 etc.
See DROPS lesson: How to read knitting diagrams
See DROPS lesson: How to read crochet diagrams
Why are the sleeves shorter in larger sizes?
The total width of the garment (from wrist-to-wrist) will be larger in the larger sizes, despite the actual sleeves being shorter. The larger sizes have longer sleeve caps and wider shoulders, so there will be a good fit in all sizes.
Where on the garment is the length measured?
The measurement sketch/schematic drawing provides information regarding the full length of the garment. If it’s a jumper or a jacket the length is measured from the highest point on the shoulder (usually closest to the neckline), and straight down to the bottom of the garment. It is NOT measured from the tip of shoulder. Similarly, the length of yoke is measured from the highest point on the shoulder and down to where yoke is split into body and sleeves.
See DROPS lesson: How to read a schematic drawing
What is a repeat?
Diagrams are often repeated on the round or in height. 1 repeat is the diagram the way it appears in the pattern. If it says to work 5 repeats of A.1 in the round, then you work A.1 a total of 5 times after/next to each other in the round. If it says to work 2 repeats of A.1 vertically/in height you work the entire diagram once, then begin again at the start and work the entire diagram one more time.
Why does the piece start with more chain stitches than it’s worked with?
Chain stitches are slightly narrower than other stitches and to avoid working the cast-on edge too tight, we simply chain more stitches to begin with. The stitch count will be adjusted on the following row to fit the pattern and measurement sketch.
Why increase before the rib edge when the piece is worked top-down?
The rib edge is more elastic and will contract slightly compared to, for example, stocking stitch. By increasing before the rib edge, you avoid a visible difference in width between the rib edge and the rest of the body.
Why increase in the cast-off edge?
It’s very easy to cast off too tightly, and by making yarn overs while casting off (and simultaneously casting these off) you avoid a too tight cast off edge.
See DROPS video: How to bind off with yarn overs (yo)
How do I increase/decrease on every 3rd and 4th row/round alternately?
To achieve an even increase (or decrease) you can increase on, for example: every 3rd and 4th row alternately, like so: work 2 rows and increase on the 3rd row, work 3 rows and increase on the 4th. Repeat this until the increase is complete.
See DROPS lesson: Increase or decrease 1 st on every 3rd and 4th row alternately
How can I work a jacket in the round instead of back and forth?
Should you prefer to work in the round instead of back and forth, you may of course adjust the pattern. You’ll need to add steeks mid-front (usually 5 stitches), and follow the instructions. When you would normally turn and work from the wrong side, simply work across the steek and continue in the round. At the end you’ll cut the piece open, pick up stitches to work bands, and cover the cut edges.
See DROPS video: How to knit steeks and cut open
Can I work a jumper back and forth instead of in the round?
Should you prefer to work back and forth instead of in the round, you may of course adjust the pattern so you work the pieces separately and then assemble them at the end. Divide the stitches for the body in 2, add 1 edge stitch in each side (for sewing) and work the front and back pieces separately.
See DROPS lesson: Can I adapt a pattern for circular needles into straight needles?
Why is the pattern slightly different than what I see in the photo?
Pattern repeats can vary slightly in the different sizes, in order to get the correct proportions. If you’re not working the exact same size as the garment in the photo, yours might deviate slightly. This has been carefully developed and adjusted so that the complete impression of the garment is the same in all sizes.
Make sure to follow instructions and diagrams for your size!
How do I make a women’s size garment into a men’s size one?
If you have found a pattern you like which is available in women’s size it’s not very difficult to convert it to men’s size. The biggest difference will be the length of sleeves and body. Start working on the women size that you think would fit across the chest. The additional length will be worked right before you cast off for the armhole/sleeve cap. If the pattern is worked top-down you can add the length right after the armhole or before the first decrease on sleeve.
Regarding additional yarn amount, this will depend on how much length you add, but it is better with a skein too many than too few.
How do I prevent a hairy garment from shedding?
All yarns will have excess fibres (from production) that might come off as lint or shedding. Brushed yarns (ie hairier yarns) have more of these loose, excess fibres, causing more shedding.
Shedding also depends on what is worn under or over the garment, and whether this pulls at the yarn fibres. It’s therefore not possible to guarantee that there will be no shedding
Below are some tips on how to get the best result when working with hairier yarns:
1. When the garment is finished (before you wash it) shake it vigorously so the looser hairs come off. NOTE: do NOT use a lint roller, brush or any method that pulls at the yarn.
2. Place the garment in a plastic bag and put it in your freezer - the temperature will cause the fibres to become less attached to each other, and excess fibres will come off easier.
3. Leave in the freezer for a few hours before taking it out and shaking it again.
4. Wash the garment according to the instructions on the yarn label.
Why does my garment pill?
Pilling is a natural process that happens to even the most exclusive of fibers. It's a natural sign of wear and tear that is hard to avoid, and that is most visible in high friction areas of your garment like a sweater's arms and cuffs.
You can make your garment look as new by removing the pilling, using a fabric comb or a pill/lint remover.
Riley |
|||||||
|
|
||||||
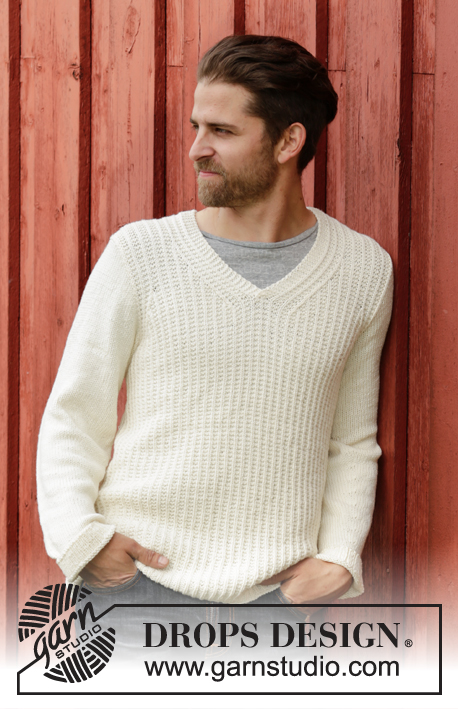
Knitted DROPS men’s jumper with textured pattern and V-neck in Cotton Merino. Size: S - XXXL.
DROPS 174-22 |
|||||||
GARTER ST (in the round on circular needle): * K 1 round and P 1 round *, repeat from *-*. 1 ridge = 2 rounds. PATTERN: See diagram A.1. DECREASE TIP ARMHOLE: Dec inside 7 sts in each side. Dec at beg of row as follows: Work 7 sts as before, slip 1 st as if to K, K next st, psso. Dec at end of row as follows: Work until 9 sts remain, K the next 2 tog, work the last 7 sts as before. DECREASE TIP NECK: All dec are done from RS. Dec inside 11 sts in each side. Dec as follows before band (left front piece). Work until 13 sts remain, K the next 2 tog, work the last 11 sts as before. Dec as follows after band (right front piece). Work 11 sts as before (= band st + 6 sts pattern), slip next st as if to K, K 1, psso. ---------------------------------------------------------- JUMPER: Worked in the round on circular needle. Cast on 198-222-234-258-282-306 sts on circular needle size 3.5 mm / US 4 with Cotton Merino. K 1 round, on next round work rib over all sts as follows: P 1, * K 1, P 2 *, repeat from *-* the entire round and finish with K 1 and P 1. Work rib for 4 cm / 1½". Switch to circular needle size 4 mm / US 6 and work A.1 over all sts. When piece measures 45-46-47-48-49-50 cm / 17¾"-18"-18½"-19"-19¼"-19¾", bind off for armholes in each side as follows: bind off the first 3-3-3-6-6-6 sts, work 93-105-111-117-129-141 sts, bind off the next 6-6-6-12-12-12 sts, work 93-105-111-117-129-141 sts, bind off the last 3-3-3-6-6-6 sts. Finish front and back piece separately. BACK PIECE: = 93-105-111-117-129-141 sts. Continue with A.1 as before. AT THE SAME TIME on next row from RS continue bind off for armholes in each side - dec 1 st in each side every other row 6-12-12-15-18-24 times in total – READ DECREASE TIP ARMHOLE! = 81-81-87-87-93-93 sts. When piece measures 62-64-66-68-70-72 cm / 24⅜"-25¼"-26"-26¾"-27½"-28⅜", work in garter st over the middle 35-35-41-41-47-47 sts, continue the remaining sts in pattern. When piece measures 64-66-68-70-72-74 cm / 25¼"-26"-26¾"-27½"-28⅜"-29⅛", bind off the middle 25-25-31-31-37-37 sts for neck = 28 sts remain on each shoulder in all sizes. Bind off when piece measures 66-68-70-72-74-76 cm / 26"-26¾"-27½"-28⅜"-29⅛"-30". FRONT PIECE: = 93-105-111-117-129-141 sts. Insert a marker in the middle st. Continue to dec for armholes as on back piece. When piece measures 54-56-55-55-57-59 cm / 21¼"-22"-21½"-21½"-22½"-23¼", keep sts until marker, st with marker and 2 sts after marker on needle, slip the remaining sts on a stitch holder. Now work in GARTER ST – see explanation above, over 5 sts towards mid front (= band), continue with A.1 over the remaining sts as before. Continue with bind off for armhole, AT THE SAME TIME dec for neck as follows - READ DECREASE TIP NECK: Dec on every other row 15-15-18-18-21-21 times in total. After all bind off for armhole and neck, 28 sts remain on shoulder in all sizes. Bind off when piece measures 66-68-70-72-74-76 cm / 26"-26¾"-27½"-28⅜"-29⅛"-30". RIGHT FRONT PIECE: Slip sts from stitch holder back on needle and pick up 5 sts in garter st at the back of band on left front piece. Work as left front piece. SLEEVE: Worked in the round on double pointed needles. Cast on 54-57-60-60-63-66 sts on double pointed needles size 3.5 mm / US 4 with Cotton Merino. Insert 1 marker at the beg of round. K 1 round, then work rib = K 1/P 2. When piece measures 4 cm / 1½", switch to double pointed needle size 4 mm / US 6, continue with stockinette st, on 1st rnd with stockinette st dec 4-5-6-4-5-6 sts evenly = 50-52-54-56-58-60 sts on round. When piece measures 8 cm / 3⅛", inc 1 st on each side of marker. Inc every 4½-3-2½-2-2-1½ cm / 1¾"-1"-⅞"-¾"-¾"-½" 8-11-12-18-20-22 times in total, then inc every 2 cm / ¾" 5-5-5-0-0-0 times = 76-84-88-92-98-104 sts. When piece measures 54-53-53-51-51-50 cm / 21¼"-21"-21"-20"-20"-19¾" (shorter measurements in the larger sizes because of longer sleeve cap and wider shoulders), bind off 6 sts mid under sleeve (= 3 sts on each side of marker) and work sleeve back and forth on circular needle until finished measurements. Bind off for sleeve cap at beg of every row in each side: bind off 2 sts 5 times and 1 st 2-3-5-6-9-10 times, then bind off 2 sts in each side until piece measures 63-63-64-64-65-65 cm / 24¾"-24¾"-25¼"-25¼"-25½"-25½", then bind off 3 sts 1 time in each side. Bind off the remaining sts, piece measures approx. 64-64-65-65-66-66 cm / 25¼"-25¼"-25½"-25½"-26"-26". Make another sleeve. ASSEMBLY: Sew the shoulder seams. Sew in sleeves. |
|||||||
Diagram explanations |
|||||||
|
|||||||
Have you made this or any other of our designs? Tag your pictures in social media with #dropsdesign so we can see them! Do you need help with this pattern?You'll find tutorial videos, a Comments/Questions area and more by visiting the pattern on garnstudio.com. © 1982-2024 DROPS Design A/S. We reserve all rights. This document, including all its sub-sections, has copyrights. Read more about what you can do with our patterns at the bottom of each pattern on our site. |
With over 40 years in knitting and crochet design, DROPS Design offers one of the most extensive collections of free patterns on the internet - translated to 17 languages. As of today we count 304 catalogs and 11422 patterns - 11417 of which are translated into English (US/in).
We work hard to bring you the best knitting and crochet have to offer, inspiration and advice as well as great quality yarns at incredible prices! Would you like to use our patterns for other than personal use? You can read what you are allowed to do in the Copyright text at the bottom of all our patterns. Happy crafting!
Comments / Questions (58)
Sylvie Allaire wrote:
Bonjour, combien de mailles restantes une fois les diminutions faites pour une grandeur large? Combien de fois on fait les diminutions de 2 m après les 5 fois 1 m?
19.04.2024 - 17:19DROPS Design answered:
Bonjour Mme Allaire, le nombre de mailles à la fin de la manche dépend de votre tension en hauteur, lorsque vous avez rabattu 5 x 1 m de chaque côté, rabattez 2 m de chaque côté jusqu'à ce que la manche mesure 64 cm, le nombre de fois dépendra de votre nombre de rangs en hauteur, ce qui importe ici c'est la hauteur finale et pas le nombre de mailles. Rabattez ensuite 1 x 3 m de chaque côté et rabattez les mailles restantes. la tête de manche doit mesurer 12 cm de hauteur totale en taille L; Bon tricot!
22.04.2024 - 07:36Vivian Jakobsen wrote:
Jeg er interesserer i at vide om det vil kunne lade sige gøre at strikke trøje i en tråd alpaca sammen med en tråd kidsilk?\r\nMvh Vivian
14.03.2024 - 12:05DROPS Design answered:
Hej Vivian, ja det kan lade sig gøre, men den vil blive lidt mere kompakt, strik en lille prøve og se om du kan holde strikkefastheden som står i opskriften :)
15.03.2024 - 09:31Claire wrote:
Bonjour, pour le dos, quand il est dit : au rang suivant sur l'endroit, diminuer pour les emmanchures: 12 fois 1 m de chaque côté tous les 2 rangs", il faut bien diminuer au début de chaque rang (donc une maille par rang sur 24 rangs) ? Ou alors il faut diminuer une maille après les 7 premières mailles et une autre avant les 9 dernières sur l'endroit ? Désolée, la taille n'allait pas alors j'ai du tout recommencer et j'ai oublié les explications précédentes...
27.03.2023 - 20:31DROPS Design answered:
Bonjour Claire, vous diminuez comme indiqué sous DIMINUTIONS EMMANCHURES:, autrement dit à 7 m du bord = après les 7 premières mailles et avant les 7 dernières mailles, autrement dit, 2 mailles tous les rangs sur l'endroit: 1 maille au début + 1 maille en fin de rang sur l'endroit; et on répète 12 fois au total tous les 2 rangs. Bon tricot!
28.03.2023 - 10:01Micheline Lebeau wrote:
Pour une taille 52 quel modèle dois-je prendre XXL ou XXXL Merci
16.02.2023 - 17:11DROPS Design answered:
Bonjour Mme Lebeau, mesurez un vêtement qui va au destinataire et qui lui plaît, et comparez ces mesures à celles du schéma, c'est la technique la plus simple pour trouver la bonne taille - retrouvez plus d'infos ici. Bon tricot!
17.02.2023 - 11:31Claire wrote:
Bonjour, quand il est dit ", puis rabattre 2 m de chaque côté jusqu'à ce que la manche mesure 63-63-64-64-65-65 cm, " pour les manches, cela signifie t-il qu'il faut rabattre 2 fois deux mailles en début et fin de tour sur l'envers et sur l'endroit ou alors 2 mailles en début ou fin de tour sur l'envers et sur l'endroit ? Merci pour vos précisions
15.01.2023 - 12:15DROPS Design answered:
Bonjour Claire, lorsque vous avez rabattu 6 mailles sous la manche, vous continuez à tricoter le haut de la manche en allers et retours en rabattant d'abord 5 x 2 mailles (= 2 mailles au début des 10 rangs suivant)s, puis 2 à 10 fois 1 m de chaque côté (1 m au début des 4 à 20 rangs suivants), puis 2 m au début des chacun des 2 rangs suivants jusqu'à ce que la manche mesure 63 à 65 cm (cf taille) - ajustez bien pour que vous ayez rabattu le même nombre de fois 2 m de chaque côté, puis 3 m au début des 2 rangs suivants. Bon tricot!
16.01.2023 - 09:06Birgit wrote:
Sehr geehrter Drops Team, ich stricke das Modell 174-22. Leider verstehe ich die Anleitung (A1) nicht. Das Model wird bis zu den Ärmeln in Runden gestrickt. Wie muss ich die Runde mit den weißen Kästchen stricken? Wenn ich in Runden stricke gibt es ja keine Rückreihen. LG Birgit
09.10.2022 - 17:54DROPS Design answered:
Liebe Birgit, wenn Sie A.1 in Runden stricken, stricken Sie so: 1. R = alle Maschen rechts; 2. Reihe: *1 Masche links, 1 Masche rechts, 2 Maschen links, 1 Masche rechts, 2 Maschen links, 1 Masche rechts, 1 Masche links* ( = 9 M), von *-* wiederholen. Viel Spaß beim stricken!
10.10.2022 - 09:25Grecourt wrote:
Bonjour ,combien doit il rester de maille à arrêter à la fin des manches ? Merci
19.04.2022 - 12:21DROPS Design answered:
Bonjour Mme Grecourt, cela va dépendre de votre taille mais aussi de votre tension en hauteur; ce qui est important ici est la longueur plus que le nombre de mailles restant. Rabattez bien le nombre de mailles indiqué, puis 2 mailles de chaque côté jusqu'à la hauteur indiquée en veillant bien à rabattre autant de fois 2 mailles en début de rang sur l'endroit qu'en début de rang sur l'envers, puis rabattez 3 mailles de chaque côté et rabattez les mailles restantes. Bon tricot!
19.04.2022 - 13:13Ivana wrote:
Buongiorno, non vedo le istruzioni per fare il bordo dello scollo. Le maglie vanno riprese? quante? diminuzioni x fare la punto dello scollo a V? Grazie mille
10.12.2021 - 11:46DROPS Design answered:
Buongiorno Ivana, i bordi del collo a V vengono lavorati contestualmente al davanti destro e sinistro. Buon lavoro!
10.12.2021 - 13:11Anne-Marie Bourgeois wrote:
Ouf ! Comment déterminer quel type de point utiliser pour les mailles qui ont été diminuées ? Est-ce que je tricote toujours les 7 premières et 7 dernières selon A1 ?
21.05.2021 - 01:51DROPS Design answered:
Bonjour Mme Bourgeois, les mailles diminuées ne sont pas à tricoter car elles ont été diminuées, les autres se tricotent comme avant: en début de rang: 7 m comme avant, point fantaisie comme avant (le motif ne tombe pas forcément juste à la transition à cause de diminutions, tricotez-ces mailles comme vous le faisiez auparavant: endroit si point mousse ou envers si jersey), 7 m comme avant. Si vous ne savez plus si votre maille est à tricoter à l'endroit ou à l'envers sur l'envers, regardez-la sur l'endroit, si c'est une maille point mousse, tricotez-la à l 'endroit sur l'envers, si c'est une m jersey, tricotez-la à l'envers sur l'envers. Bon tricot!
21.05.2021 - 07:52Anne-Marie Bourgeois wrote:
Est-ce que je commence donc mon rang envers par un point endroit, ensuite un point envers, 2 points endroit, etc. ?
19.05.2021 - 15:59DROPS Design answered:
Bonjour Mme Bourgeois, tout dépend de votre rang sur l'endroit, tricotez les mailles jersey à l'envers sur l'envers et les mailles point mousse à l'endroit sur l'endroit. Vous devez toujours avoir, vu sur l'endroit le même rythme des côtes fantaisie. Bon tricot!
19.05.2021 - 16:00