
Suositut kategoriat
Etsitkö tiettyä lankaa?


Kommentit / Kysymykset (115)
![]() Janet kirjoitti:
Janet kirjoitti:
Hello, I want to clarify that each square in the diagram represents one double crochet, not a chain, correct? \r\nThis is what I understand to work on Round 3: 1 dc, 2 dc, 1 dc, 2 dc\r\nThe 1st stitch is to chain 3 (pink)\r\nNext chain: 2 dc (pink+gray)\r\nNext chain: 1 dc (pink)\r\nNext chain: 2 dc (pink+gray)\r\nfollow the same color combination to the end. \r\n\r\nDo I understand the pattern correctly?\r\n\r\nThank you very much for your kind help!
08.06.2025 - 16:10
![]() Desiree Williams kirjoitti:
Desiree Williams kirjoitti:
I’m confused about the beginning, where it says to chain 5 to form a ring, and then you are supposed to work 12 dc in the ring. How do you go from 5 to 12? I can see if there are 6 in the ring, and then two dc per stitch to make 12. Am I missing something? Thanks!
01.02.2025 - 19:37DROPS Design vastasi:
Dear Desiree, with the 5 chain stitches you form a ring. Then, you will work 12 dc inside the hole of the ring, not in each of the chain stitches. Happy crochetting!
02.02.2025 - 23:44
![]() Lisa kirjoitti:
Lisa kirjoitti:
Hi, Working on the bag, love it! At the point round 12, After decrease to 112. Dou you do consist rounds of 112.? With no more decreases? About how many rows to gain the bucket bag? Thanks Lisa
09.06.2024 - 17:35DROPS Design vastasi:
Dear Lisa, after decreasing to 112, simply finish 1 vertical repeat of chart A.2, without increases or decreases, just the 112 stitches. So work all rows of chart A.2 once and you can fasten off. Happy crochetting!
09.06.2024 - 19:47
![]() Ruth Burton kirjoitti:
Ruth Burton kirjoitti:
Your suggested hook size to get correct tension is 5.5mm but the pattern says use 4.5mm! Obviously I'll do a tension square before starting my bag.
30.05.2024 - 08:51DROPS Design vastasi:
Dear Ruth, gauge is personal to each individual, therefore we suggest that a gauge swatch is donw ALWAYS for each project and final needle (or hook) size is selected accordingly. Happy Crafting!
04.06.2024 - 02:59
![]() Prasanthi kirjoitti:
Prasanthi kirjoitti:
Made this beautiful bag. Gifted it to my niece on her birthday and she is so thrilled to receive this. Thank you so much for the clear instructions and graph. Would love to post the picture of the bag but I don't see where to attach the pic.
18.03.2024 - 09:50
![]() Andrea kirjoitti:
Andrea kirjoitti:
On A.2 where it says (= 7 repetitions in width) does this mean “the next 7 rounds?” And when it says “AT THE SAME TIME on 1st round in A.2 dec 4 dc evenly = 112 dc.” Does this mean the last round should decrease to 112 dc?
04.01.2024 - 17:23DROPS Design vastasi:
Dear Andrea, no this means you have to repeat A.2 a total of 7 times in the round as follows: work the 16 stitches in diagram A.2 (- there are 114 sts, work the first round A.2 decreasing 4 sts evenly on this round = 112 sts remain); Work each round a total of 7 times in the round until A.2 is done. Happy crocheting!
05.01.2024 - 08:06
![]() Petra kirjoitti:
Petra kirjoitti:
Man soll die Tasche mit 2 Fäden "Paris" häkeln. Bezieht sich das auf die Tapestry Technik, die ja immer mindestens 2fädig ist? Ansonsten müsste ich ja bei 2 Farben mit 4 Fäden arbeiten. Ich verstehe es nicht.
21.10.2023 - 15:07DROPS Design vastasi:
Liebe Petra, es wird immer mit 2 Fäden also doppelfäddig gehäkelt - siehe Maschenprobe: 12 Stäbchen x 7 Reihen mit 2 Fäden = 10 x 10 cm, in diesem Video zeigen wir (für ein anderes Modell), wie das Muster gehäkelt wird - hier wird man genauso häkeln, aber mit 2 Fäden jeder Farbe anstatt nur 1 Faden jeder Farbe wie im Video. Viel Spaß beim häkeln!
23.10.2023 - 09:38
![]() Joanne Seitz kirjoitti:
Joanne Seitz kirjoitti:
At the end of Row 4, it says in bold letters, REMEMBER THE CROCHET GAUGE. How big should the circle measure at this point? I do not see that mentioned.
05.07.2023 - 01:31
![]() Joanne Seitz kirjoitti:
Joanne Seitz kirjoitti:
At the end of Row 4, it says in bold letters, REMEMBER THE CROCHET GAUGE. How big should the circle measure at this point? I do not see that mentioned.
05.07.2023 - 01:29DROPS Design vastasi:
Dear Mrs Seitz, with 7 rounds = 10 cm, the first 4 rounds should measure approx. 6 cm. Happy crocheting!
05.07.2023 - 07:51
![]() Joanne Seitz kirjoitti:
Joanne Seitz kirjoitti:
Hi, I understand now that each row should begin with 3 chains. Does that begin with Round 1 when you are working 12 dc into the chain? And then you will sl st into the third chain before moving on to Round 2?
04.07.2023 - 01:22DROPS Design vastasi:
Dear Mrs Seitz, you need to crochet 3 chains at the beginning of every round with dc (US-English), this means from the 1st round, in other words on round 1, crochet 3 chains + 11 dc in the magic round = 12 dc, slip stitch in the 3rd chain from beg of round to join then work 2nd round starting with 3 chains to replace first dc and so on. Happy crocheting!
04.07.2023 - 08:41
|
|||||||||||||||||||
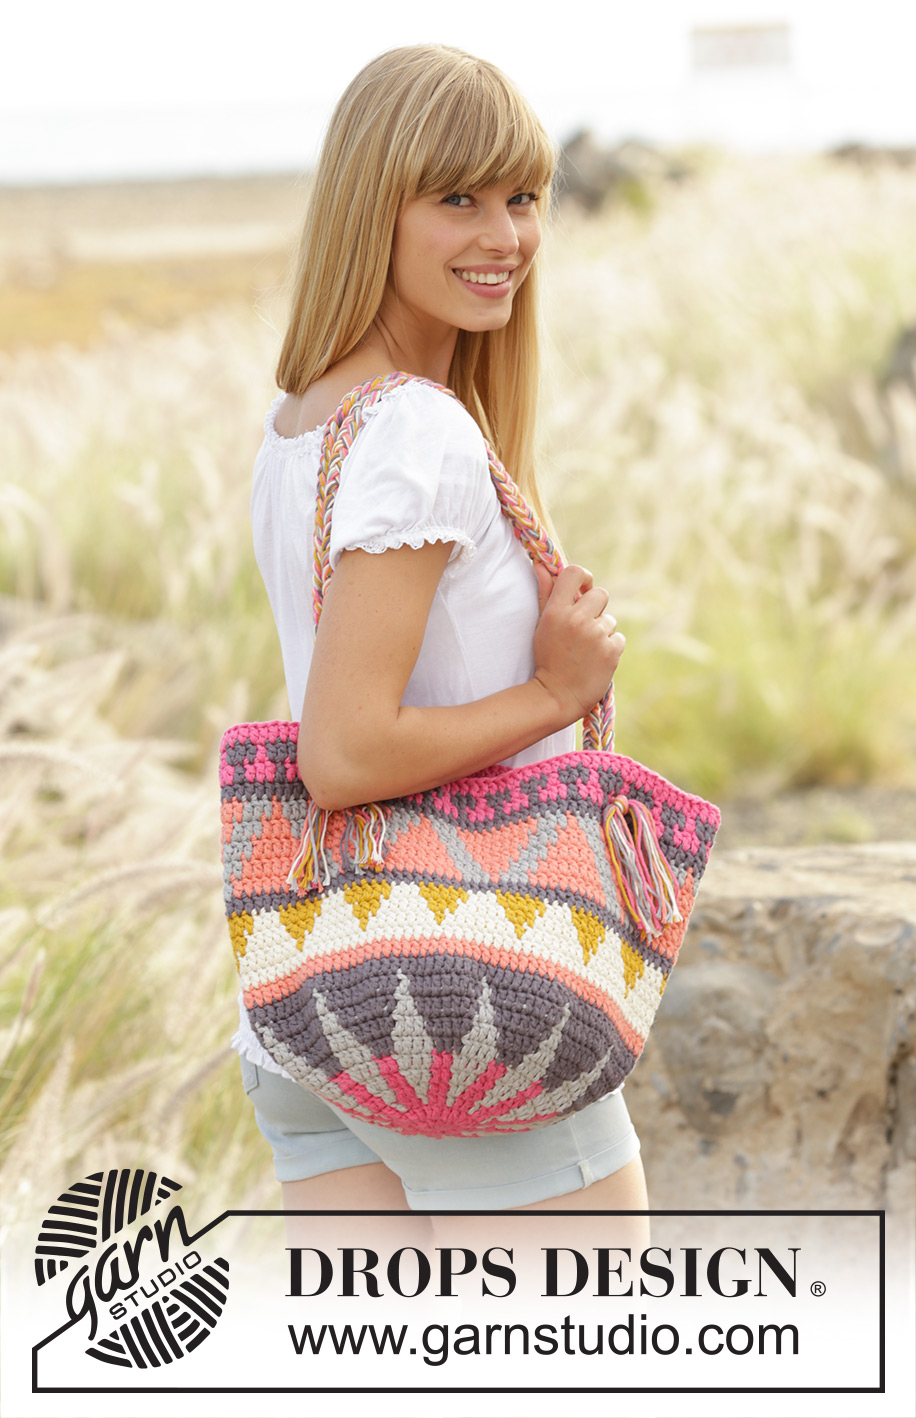
Market Day#marketdaybag |
|||||||||||||||||||
 |
 |
||||||||||||||||||
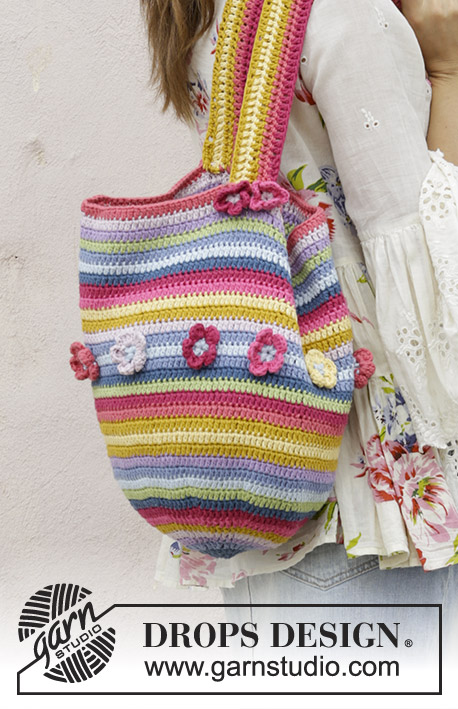
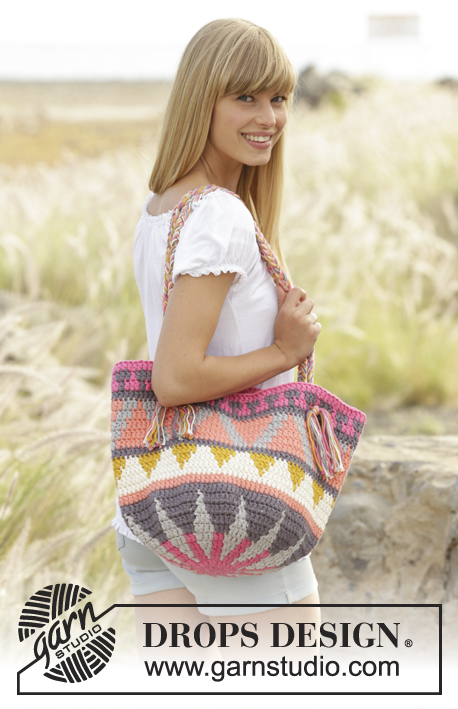
Virkattu kuviollinen DROPS laukku 2-kertaisesta ”Paris”-langasta.
DROPS 170-1 |
|||||||||||||||||||
|
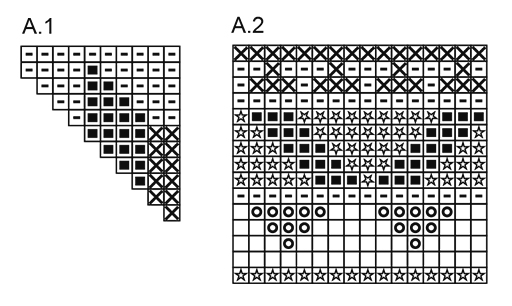
MALLIVIRKKAUS: Katso piirrokset A.1 ja A.2. Piirrokset näyttävät kuvion värejä. 1 ruutu = 1 p. LANKAVINKKI: Ota 1 lanka sekä kerän sisältä että ulkoa. Kun vaihdat uuteen lankakerään, älä vaihda molempia lankoja yhtaikaa, koska tällöin kohdasta tulee liian paksu langanpäitä pääteltäessä. VÄRIKUVIO (virkataan suljettuna virkkauksena): Kun vaihdat väriä, tee seuraavasti: Virkkaa viimeinen p ensimmäisellä värillä, mutta jätä viimeinen läpiveto vielä tekemättä, vaihda seuraavaan väriin ja tee viimeinen läpiveto, virkkaa sitten seuraava p. Kun virkkaat kahdella värillä, aseta odottamassa oleva väri edellisen krs:n silmukoiden päälle, virkkaa lankojen ympäri, jotta ne jäävät piiloon ja kulkevat työn mukana. VIRKKAUSINFO: Krs:n ensimmäinen p korvataan 3 kjs:lla, virkkaa lopuksi 1 ps kolmanteen kjs:aan. KAVENNUSVINKKI: Kavenna 1 p virkkaamalla seuraavat 2 p yhteen näin: Virkkaa 1 p, mutta jätä viimeinen läpiveto vielä tekemättä (= 2 s koukulla), virkkaa sitten seuraava p ja vedä lanka viimeisellä läpivedolla kaikkien koukulla olevien 3 s:n läpi. ---------------------------------------------------------- LAUKKU: Virkataan suljettuna virkkauksena 2-kertaisella langalla (LUE LANKAVINKKI). Virkkaa 5 kjs 2-kertaisella kirkkaan roosalla langalla ja koukulla nro 4,5. Sulje kjs:t renkaaksi 1 ps:lla ensimmäiseen kjs:aan. Virkkaa jatkossa suljettua virkkausta piirroksen A.1 mukaisesti (krs:lle tulee 12 piirroksen A.1 mallikertaa). LUE VÄRIKUVIO! 1.KRS: Virkkaa 12 p renkaaseen. LUE VIRKKAUSINFO! 2.KRS: Virkkaa 2 p jokaiseen p:seen = 24 p. 3.KRS: Virkkaa *1 p ensimmäiseen p:seen, 2 p seuraavaan p:seen*, toista *-* koko krs:n ajan = 36 p. 4.KRS: Virkkaa *1 p kumpaankin 2 ensimmäiseen p:seen, 2 p seuraavaan p:seen*, toista *-* koko krs:n ajan = 48 p. TARKISTA VIRKKUUTIHEYS! 5.-10.KRS: Jatka lisäyksiä ja mallivirkkausta kuten aiemmin, eli virkkaa jokaisella krs:lla lisäysten väliin 1 p enemmän = 120 p. 11.KRS: Virkkaa piirroksen A.1 viimeisen krs:n mukaisesti ja kavenna samalla tasavälein 4 p (LUE KAVENNUSVINKKI) = 116 p. 12.KRS: Jatka virkkaamalla piirroksen A.2 mallivirkkausta ilman lisäyksiä (= 7 mallikertaa krs:lla). Kavenna SAMALLA piirroksen A.2 1. krs:lla tasavälein 4 p = 112 p. Jatka mallivirkkausta, kunnes olet virkannut piirroksen A.2 loppuun. Katkaise lanka ja päättele langanpäät. HIHNA: Leikkaa jokaisesta väristä 6 kpl 120 cm:n pituista lankaa = 36 lankaa. Yhdistä langat ja tee löyhä solmu siten, että solmun jälkeen jää päähän n. 12 cm:n pituiset langat. Jaa langat 3 nippuun = 12 lankaa jokaisessa nipussa. Palmikoi niput yhteen, kunnes palmikon pituus on n. 68 cm. Jaa langanpäät 2 nippuun. Pujota niput yksitellen laukun reunan kolmannen kerroksen läpi, 1 pylvään etäisyydeltä toisistaan. Solmi niput yhteen laukun etupuolella. Avaa palmikon alkuosan solmu ja kiinnitä palmikon toisen pään langat laukun toiselle puolelle samalla tavalla. Tee toinen palmikko samalla tavalla (kts.kuva). |
|||||||||||||||||||
Ruutupiirroksen selitykset |
|||||||||||||||||||
|
|||||||||||||||||||
|
|||||||||||||||||||
Oletko tehnyt tämän mallin?Tägää tällöin kuviasi #dropspattern #marketdaybag tai lähetä kuvat #dropsfan galleriaan. Tarvitsetko apua tämän ohjeen kanssa?Löydät 9 ohjevideota, kommentteja/kysymyksiä ja muuta osoitteessa www.garnstudio.com © 1982-2025 DROPS Design A/S. Pidätämme kaikki oikeudet. Tämä tiedosto ja kaikki sen alatiedostot on suojattu tekijänoikeuslailla. Lue lisää siitä, mitä voit tehdä ohjeillamme, verkkosivujemme jokaisen ohjeen alaosasta. |
|||||||||||||||||||


DROPS Design on toiminut neule- ja virkkausalalla yli 40 vuotta ja meillä on yksi kaikkein laajin valikoima ilmaisia ohjeita verkossa - käännettynä 17 kielelle. Tänään meiltä löytyy 314 lehteä ja 11822 ohjetta - joista 11197 ohjetta on käännetty suomeksi.
Työskentelemme ahkerasti, jotta voisimme antaa teille kaikkein parhaimpia neule- ja virkkausohjeita, inspiraatiota ja neuvoja sekä korkealaatuisia lankoja todella edulliseen hintaan! Haluaisitko käyttää ohjeitamme muuhun kuin henkilökohtaiseen käyttöön? Voit lukea säännöistä ohjeiden Tekijänoikeus -tekstissä, joka löytyy kaikkien ohjeidemme alapuolelta. Hauskoja hetkiä käsitöiden parissa!
Lisää kommentti ohjeeseen DROPS 170-1
Haluamme mielellämme kuulla mielipiteesi tästä ohjeesta!
Mikäli haluat esittää kysymyksen, valitse oikea kategoria alla olevasta valikosta - tällä tavoin saat vastauksen nopeammin. Pakolliset kentät on merkitty tähdellä *.