
Popular categories
Looking for a yarn?


Comments / Questions (22)
![]() Ann Lewis wrote:
Ann Lewis wrote:
How do you close the foot...
06.11.2024 - 22:30
![]() Lenkaa wrote:
Lenkaa wrote:
Dobrý den, chtěla bych se zeptat jak mám ve schématu chápat = lícový žerzej (líc hladce, rub obrace) = rubový žerzej (líc obrace, rub hladce) V kruhu pletu vše v lícové straně ne? Nebo mam jednu kruhovou radu plést hl/obr a v té další naopak? Dekuji
09.12.2021 - 15:19DROPS Design answered:
Dobrý den, Lenko, ano, máte pravdu, že v kruhových řadách pleteme pouze lícovou stranu. U ponožek však pleteme některé části zvlášť, v řadách (tj. líc a rub). Vysvětlivky ke schématu jsou proto psány s ohledem na pletení v řadách, přičemž v kruhu pleteme pouze lícová oka. Hodně zdaru! Hana
11.02.2022 - 14:04
![]() Wenche wrote:
Wenche wrote:
Jeg har str totalt 18 cm i stedet for 30 cm da jeg skønnet skaftet blev for langt m 30cm!! Så jeg fandt min fejlvurdering, men der burde stå i opskr. obs vigtigt m mindst 30cm, endvidere smukke sokker, tak for opskrift
16.09.2021 - 18:24
![]() Gitte wrote:
Gitte wrote:
Det måste ju vara fel i mönstret. 76m på stickor 4 blir ju väldigt stort. Jag provade att sticka efter mönstret, men fattar inte hur det är tänkt att det ska passa.
20.11.2020 - 16:54DROPS Design answered:
Hej Gitte. Eftersom det stickas i resår så drar sig arbetet ihop sig och tänk också på att sockan ska vikas ner som på bilden. Se också till att få den stickfasthet som uppges på mönstret. Mvh DROPS Design
24.11.2020 - 12:13
![]() Kathrin wrote:
Kathrin wrote:
Hallo :) Ich habe dieses paar Socken gestrickt und habe jetzt das Problem die Sohle zusammenzunähen mit einem maschenstich. Könnt ihr wohl ein Video produzieren indem ihr das zeigt, wie ihr die Sohle zusammen nehmt?
11.06.2015 - 09:28DROPS Design answered:
Gucken Sie mal bei den Technikvideos unter "Fertigstellen: Maschenstich", dort wird der Maschenstich erklärt. Die Abkettkante bildet ja die untere Mitte des Sockens, d.h. Abkettkante wird doppelt gelegt und aneinander genäht.
21.06.2015 - 20:47
![]() Kathrin wrote:
Kathrin wrote:
Hallo :) Ich habe dieses paar Socken gestrickt und habe jetzt das Problem die Sohle zusammenzunähen mit einem maschenstich. Könnt ihr wohl ein Video produzieren indem ihr das zeigt, wie ihr die Sohle zusammen nehmt?
10.06.2015 - 16:37DROPS Design answered:
Antwort siehe oben! :-)
21.06.2015 - 20:47
![]() Anja wrote:
Anja wrote:
Wunderschöne Socken, die einfach und schnell zu stricken sind. Leider ist der Schaft bei "normalen" Beinen etwas weit. Vielleicht sollte man etwas weniger Maschen aufnehmen.
10.07.2014 - 16:56
![]() Evelyne wrote:
Evelyne wrote:
J'aimerais avoir des conseils combien e mailles par aiguilleset je ne comprends pas vraiment le diagrame merci pour une repons j'aimerais egalement l'adresse d'1 forum d'entraide merci cordialement evelyne
08.02.2013 - 20:10DROPS Design answered:
Bonjour Evelyne, si vous tricotez avec un jeu de 5 aiguilles, montez 19 m par aiguilles x 3 aiguilles = 76 m. Dans le diagramme, 1 case = 1 m x 1 rang, ce sont des côtes 1/1 avec des torsades tous les 8 rangs. Pour toute aide complémentaire, n'hésitez pas à contacter votre magasin Drops ou à vous inscrire sur le forum DROPS (menu Astuces et Aide (tout en haut de la page)/ Forums puis cliquez sur Forum DROPS. Bon tricot !
09.02.2013 - 11:01
![]() WELO wrote:
WELO wrote:
Je bloque après les 30 premier rangs
30.01.2013 - 07:47DROPS Design answered:
Bonjour Madame Welo, à 30 cm, vous continuez sur les 29 premières m, et mettez les 47 autres en attente. Vous tricotez le dessus du pied comme avant (+ 1 m de chaque côté au 1er rang, rabat à 8-10-12cm). Après avoir tricoté le dessus du pied, vous relevez à gauche le long du dessus du pied, tricotez les 47 m en attente et relevez à droite du dessus du pied et tricotez ensuite en rond, comme avant en côtes et torsades puis en jersey pour la semelle. Bon tricot !
30.01.2013 - 10:32
![]() Anita wrote:
Anita wrote:
Jag har stickat skaftet och baksidan av hälen, tagit upp maskor så att jag har 116 m. Hur ska jag fortsätta sen? Det står "fortsätt runt med mönster som förut och resår över de resterande m i 2 cm". Ska man inte göra en hälavmaskning? Resterande m? 2 cm? Kan ngn förklara? Hälsningar Anita
24.11.2012 - 16:34DROPS Design answered:
Nej ingen klassisk hälavmaskning i denna beskrivningen, bara följ beskrivningen så får du de fina sockorna som på bilden!
04.12.2012 - 12:01
|
|||||||||||||
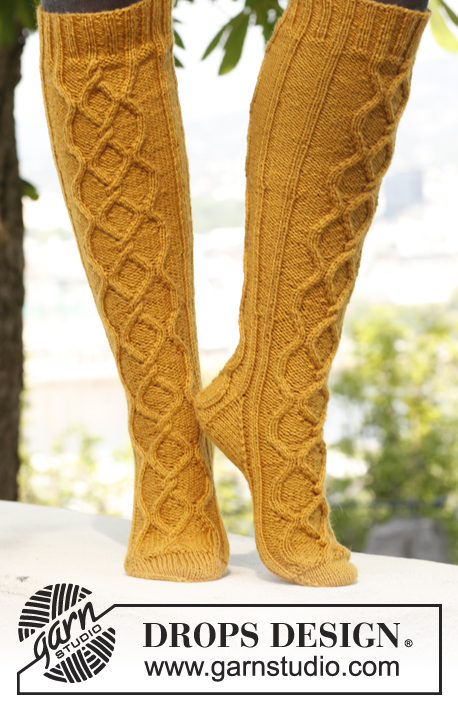
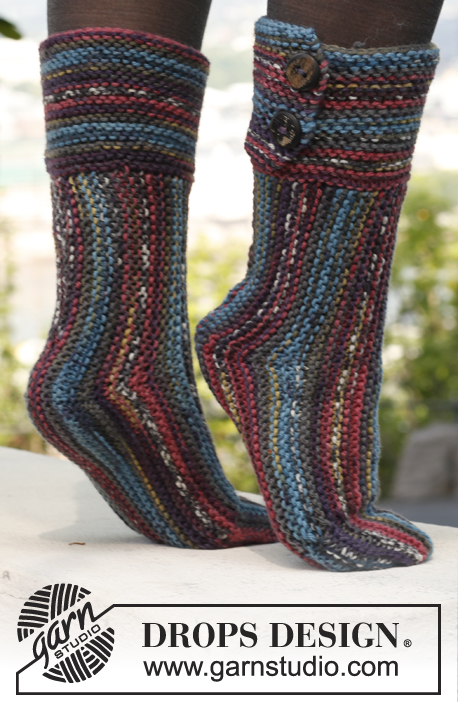
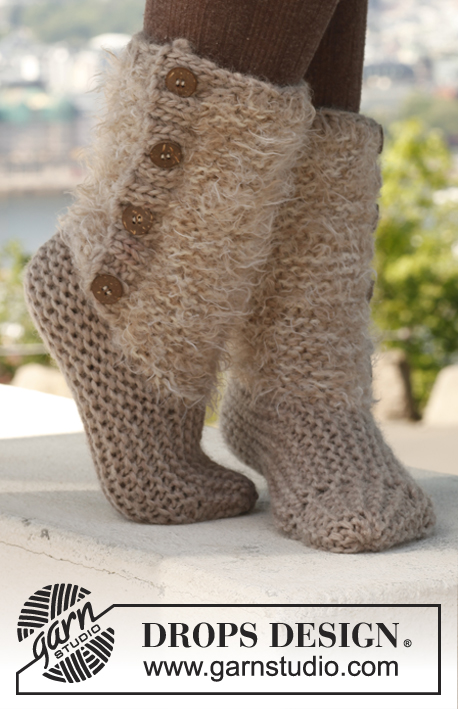
Stairway to Heaven#stairwaytoheavensocks |
|||||||||||||
|
|
|||||||||||||
Knitted DROPS slipper socks with cables and rib in ”Alaska”. Size 35 - 43.
DROPS 143-34 |
|||||||||||||
|
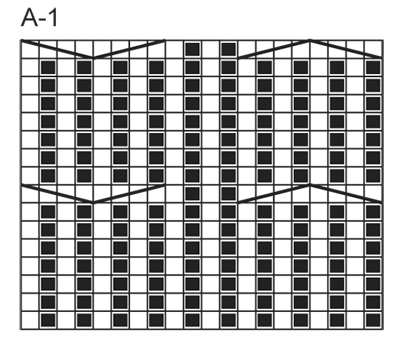
PATTERN: See diagram A-1. Diagram shows all rows seen from RS. ---------------------------------------------------------- SOCK: Worked in the round on double pointed needles. Cast on 76 sts in all sizes on double pointed needles size 3 mm with Alaska. Work rib = K 1/P 1 for 6 cm. Switch to double pointed needles size 4 mm and continue as follows: Rib as before over the first 5 sts, then diagram A-1 (= 20 sts = mid on top of foot), then work rib as before over the next 18 sts, then work A-1 again (= 20 sts = mid back of heel), and work the remaining 13 sts in rib as before. Continue like this until piece measures 30 cm in total. Now keep the first 29 sts on needle (= mid on top of foot) and slip the remaining 47 sts on a stitch holder. Insert a marker. Continue with pattern and rib as before over sts on needle (= middle piece) - AT THE SAME TIME on 1st row cast on 1 new st in each side (= edge st, this is worked K on all rows) = 31 sts. When piece measures 8-10-12 cm from marker, cast off 1 edge st in each side = 29 sts. Switch to circular needle. Then slip the sts from stitch holder back on needle and knit up 20-24-28 sts on each side of middle piece inside 1 edge st = 116-124-132 sts in total on needle. Continue in the round with pattern as before and rib over the remaining sts for 2 cm. Then work in stocking st over all sts – AT THE SAME TIME on 1st round, dec 6 sts evenly over both diagrams A-1 = 104-112-120 sts. Insert 1 marker mid front on toe and 1 marker mid back on heel. On next round, K 2 tog before both markers and K 2 twisted tog after both markers (= 4 sts dec), repeat dec every other round until section in stocking st measures 3-3-4 cm, loosely cast off. Sew seam mid under foot edge to edge in cast off edge to avoid a chunky seam to walk on. |
|||||||||||||
Diagram explanations |
|||||||||||||
|
|||||||||||||
|
|||||||||||||
Have you finished this pattern?Tag your pictures with #dropspattern #stairwaytoheavensocks or submit them to the #dropsfan gallery. Do you need help with this pattern?You'll find 6 tutorial videos, a Comments/Questions area and more by visiting the pattern on garnstudio.com. © 1982-2025 DROPS Design A/S. We reserve all rights. This document, including all its sub-sections, has copyrights. Read more about what you can do with our patterns at the bottom of each pattern on our site. |
|||||||||||||


With over 40 years in knitting and crochet design, DROPS Design offers one of the most extensive collections of free patterns on the internet - translated to 17 languages. As of today we count 314 catalogues and 11822 patterns translated into English (UK/cm).
We work hard to bring you the best knitting and crochet have to offer, inspiration and advice as well as great quality yarns at incredible prices! Would you like to use our patterns for other than personal use? You can read what you are allowed to do in the Copyright text at the bottom of all our patterns. Happy crafting!
Post a comment to pattern DROPS 143-34
We would love to hear what you have to say about this pattern!
If you want to leave a question, please make sure you select the correct category in the form below, to speed up the answering process. Required fields are marked *.