
Popular categories
Looking for a yarn?


Comments / Questions (169)
![]() Stefan Nordholm wrote:
Stefan Nordholm wrote:
Jag har problem med M1. hur jag än gör, så får jag bara 97 maskor ( inklusive kantmaskan)jag har repat upp, stickat om, räknat på fingrarna, räknat på papper och med miniräknare. En kompis har gjort samma sak, med samma resultat. Enligt mönster ska det vara 129 maskor på stickan när M1 (15 varv) är klara. Var nånstans i diagrammet eller i videon finns ökningarna beskrivna så jag får 32 maskor till = 129 m ?
28.07.2024 - 12:32DROPS Design answered:
Hej Stefan, har du set videoen som er lavet til denne opskrift? Øverst i opskriften klikker du på Videoer, her kan du se nøjagtig hvordan man gør for at få alle udtagningerne med :)
01.08.2024 - 11:54
![]() Anne wrote:
Anne wrote:
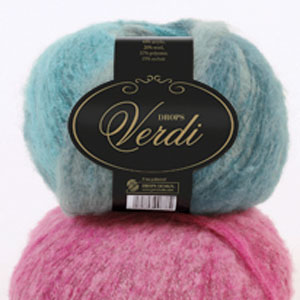
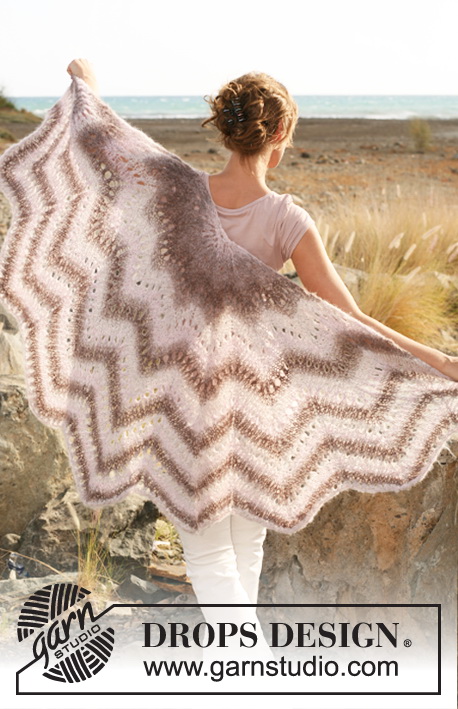
Hej Sjalet på billedet er to farver, men opskriften nævner kun én farve garn. Hvor meget af hver farve skal bruges hvis jeg vil lave det stribet? Og hvornår skal man skifte farve for at få striber som dem på billedet? Hilsen Anne
29.03.2024 - 20:01DROPS Design answered:
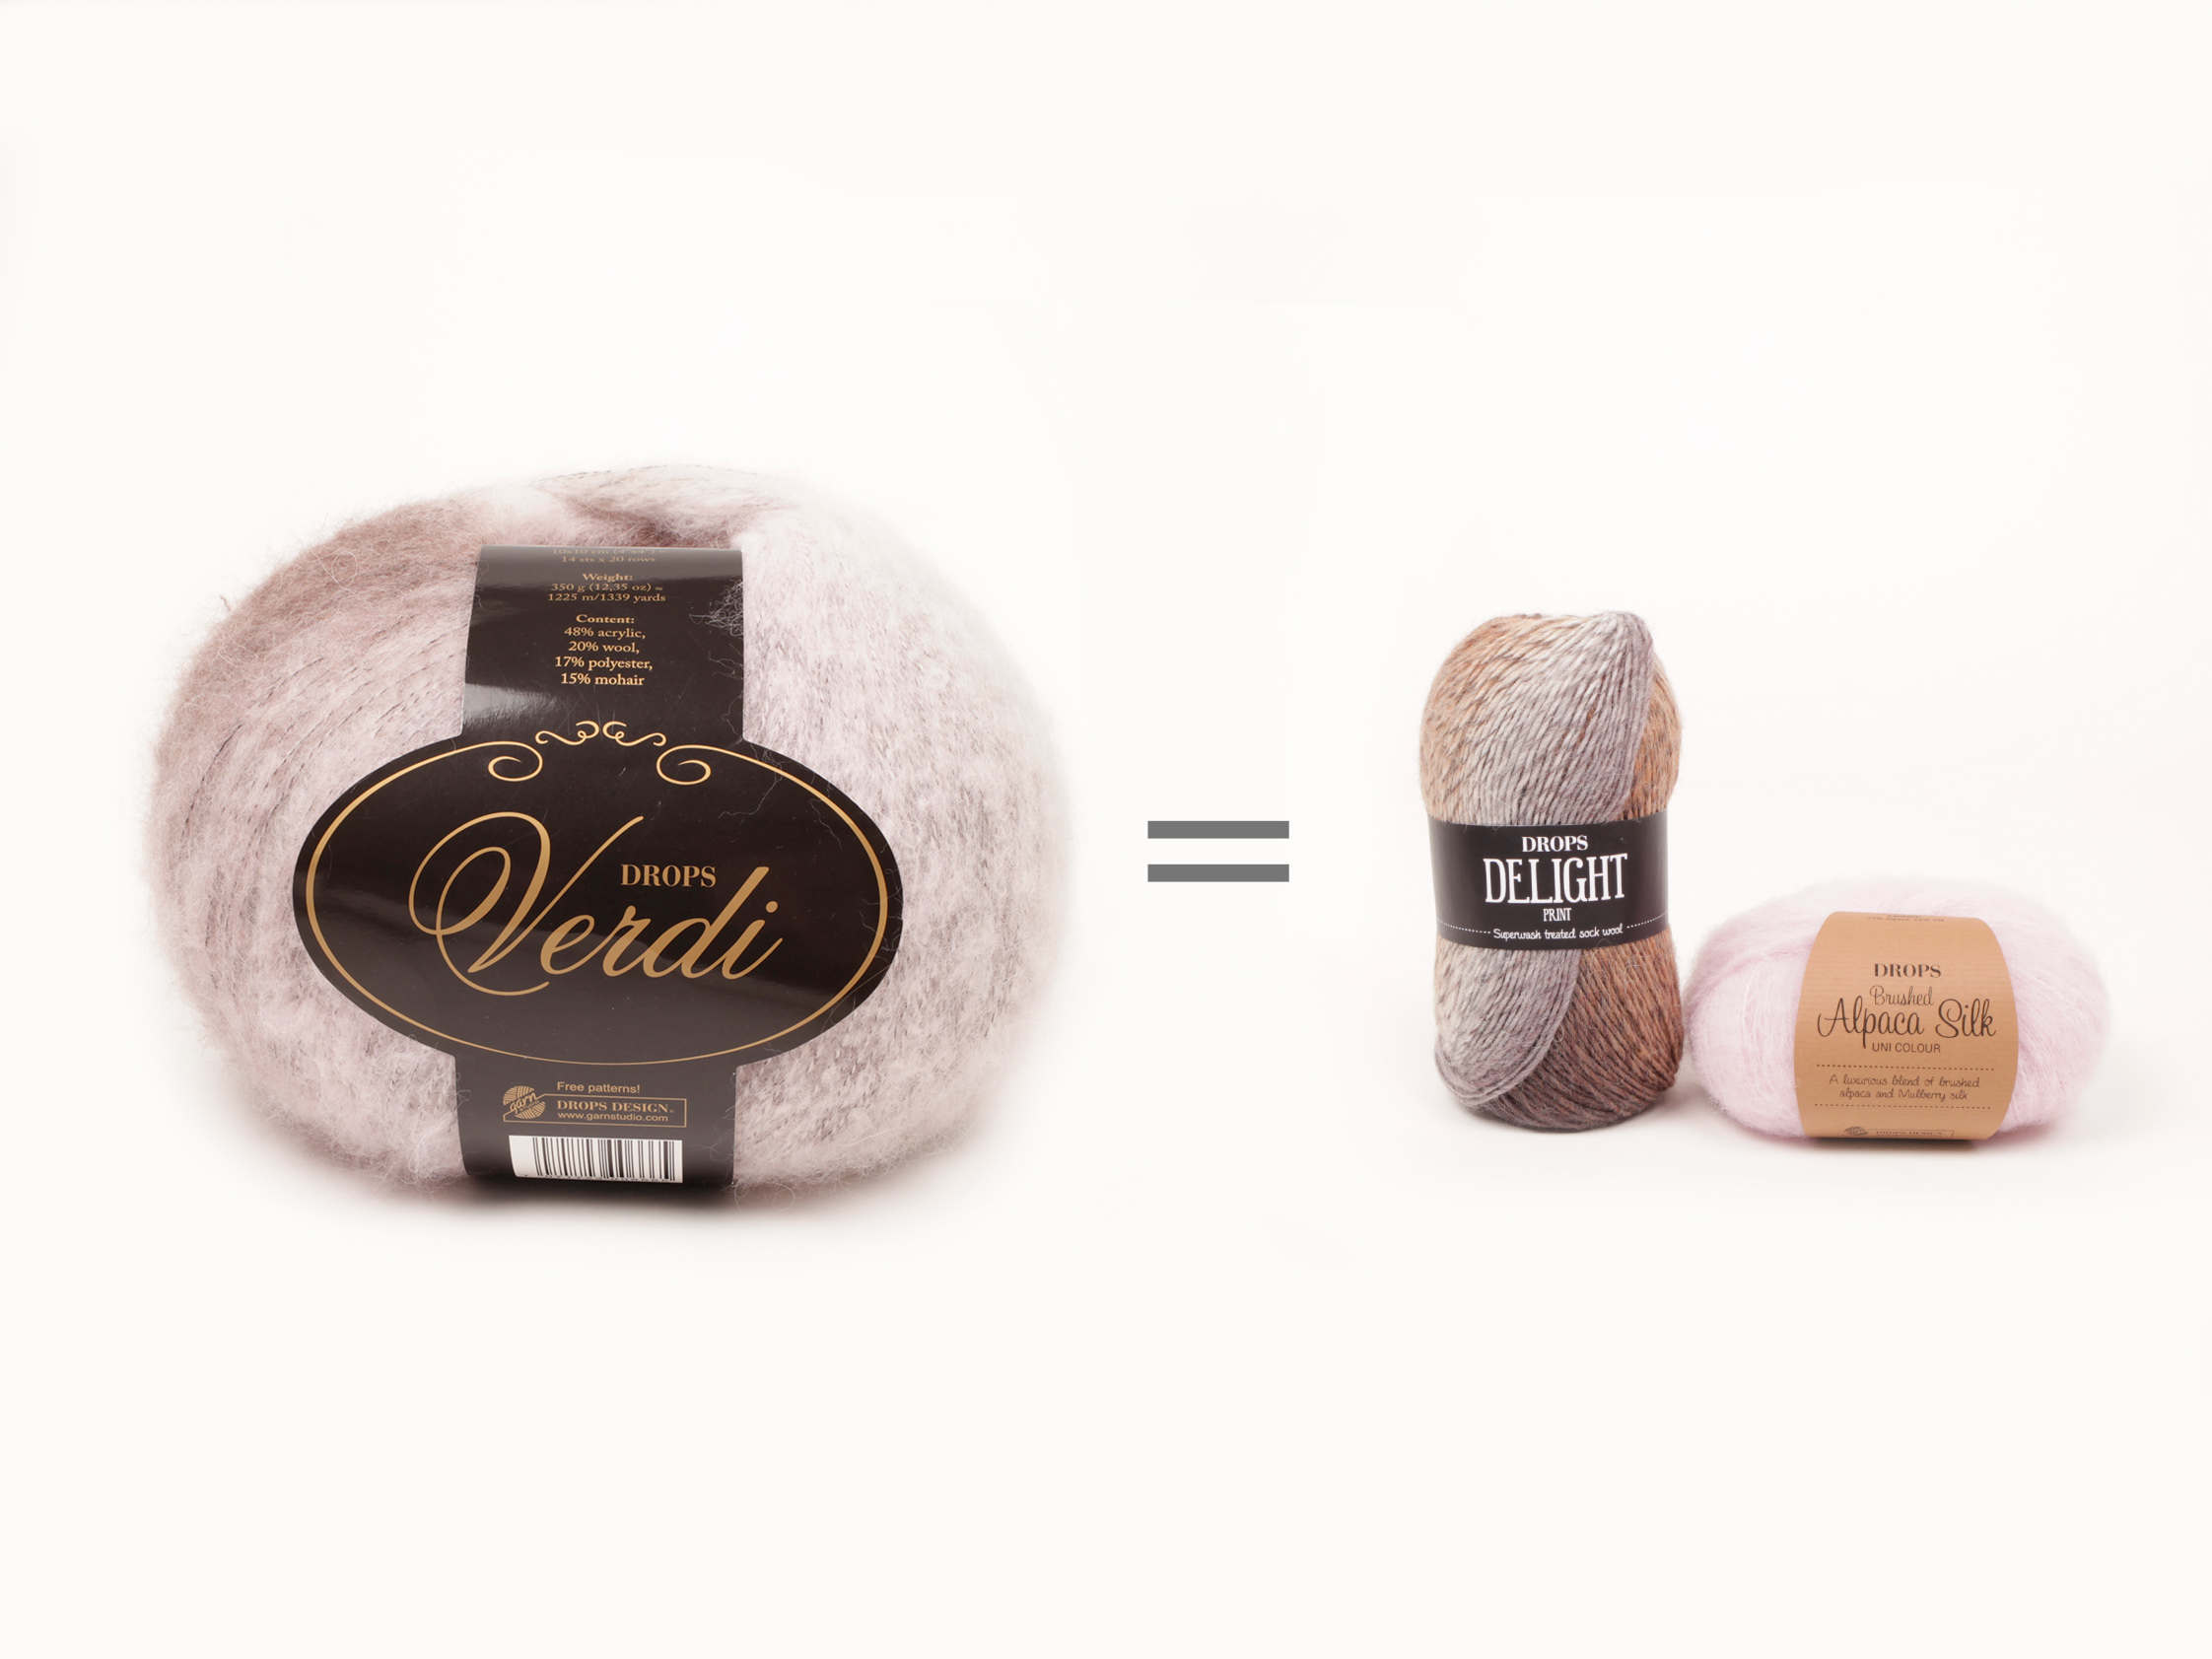
Hei Anne. Dette sjalet er strikket i DROPS Verdi og det kom i et mega-nøste på 350 gram og var multifarget, (altså 1 nøste på 350 gram hadde 1 tråd, men flere farger). Dette garnet er dessverre utgått fra vårt sortiment. mvh DROPS Design
02.04.2024 - 08:56
![]() Jalisco Gonzalez wrote:
Jalisco Gonzalez wrote:
Me gustaba más en contratado los videos de ayuda debajo del diagrama
03.03.2024 - 14:11
![]() Ulrike wrote:
Ulrike wrote:
Was bedeutet 2 Maschen in 1masche
21.06.2023 - 12:58DROPS Design answered:
Liebe Ulrike, in diesem Video zeigen wir, wie man 2 Maschen aus einer Masche strickt - und in diesem Video, wie man das Diagram am Anfang strickt, und in diesem Video, wie man weiterstrickt. Viel Spaß beim stricken!
21.06.2023 - 14:46
![]() Martinelli Francoise wrote:
Martinelli Francoise wrote:
Châle 130- 1 dois je répéter toujours m1 et on jusqu'à la fin du châle merci madame pour ce precieux renseignement
01.03.2020 - 18:10DROPS Design answered:
Bonjour Mme Martinelli, quand M.1 est terminé, on répète M.1B en hauteur jusqu'à la fin, notez simplement qu'il y aura à chaque fois plus de mailles entre les augmentations du début et de la fin du diagramme et les diminutions du milieu. Avez-vous regardé cette vidéo? Bon tricot!
02.03.2020 - 11:32
![]() Tuula Lintusaari wrote:
Tuula Lintusaari wrote:
Hei, Huomasin myös, että sanallinen ohje ja kuva eivät olleet samanlaiset krs.7.
09.10.2018 - 19:46
![]() Bernard wrote:
Bernard wrote:
Bonjour est il possible de réaliser ce modèle au crochet?
08.10.2018 - 13:55DROPS Design answered:
Bonjour Mme Bernard, probablement, mais nous ne sommes malheureusement pas en mesure de pouvoir adapter chacun de nos modèles à chaque demande individuelle. N'hésitez pas à contacter un forum de crochet et/ou votre magasin DROPS, même par mail ou téléphone pour toute assistance complémentaire. Bon tricot!
08.10.2018 - 14:24Shanna wrote:
Hi, I would like to ask if I can use Drops Eskimo to make this shawl. I want it to be quite warm :) . Thank you, Shanna
19.09.2018 - 13:34
![]() Bettina wrote:
Bettina wrote:
Liebes Team, ich habe für dieses Modell die als mögliche Ersatzwolle genannte "Alpaca Silk" gewählt. Welche Nadelstärke sollte ich nun verwenden? Nr. 5, wie auf der Wolle steht, oder dicker? Bei "Verdi" sollte normalerweise Nr. 6 verwendet werden, für dieses Modell aber Nr. 8. Grüße von Bettina
23.04.2018 - 21:01DROPS Design answered:
Liebe Bettina, Das Tuch war hier locker mit Nadeln Nr 8 gestrickt und Verdi war Garngruppe D und Brushed Alpaca Silk ist Garngruppe C, am besten stricken Sie noch ein Garngruppe A dazu (= 2 Fäden A = 1 Faden C / 3 Fäden A (= 1 Faden C + 1 Faden A) = 1 Faden D) - siehe auch hier. Viel Spaß beim stricken!
24.04.2018 - 08:55
![]() Janne Severinsen wrote:
Janne Severinsen wrote:
Ha.....nu har jeg knækket koden. Når man begynder anden M.1B skal antalle af retmasker øges til 5 (pind 4) og 4 på (pind 6 ), 6 ret (pind 8) og 5 ret (pind 10) osv.
13.09.2017 - 19:23
|
||||||||||||||||
Scheherazade#scheherazadeshawl |
||||||||||||||||
 |
 |
|||||||||||||||
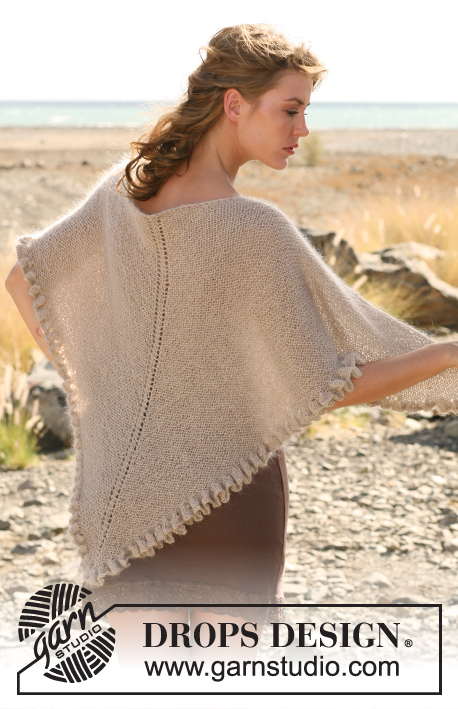
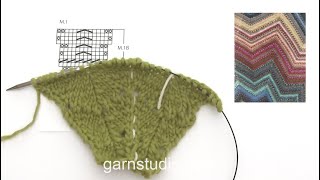
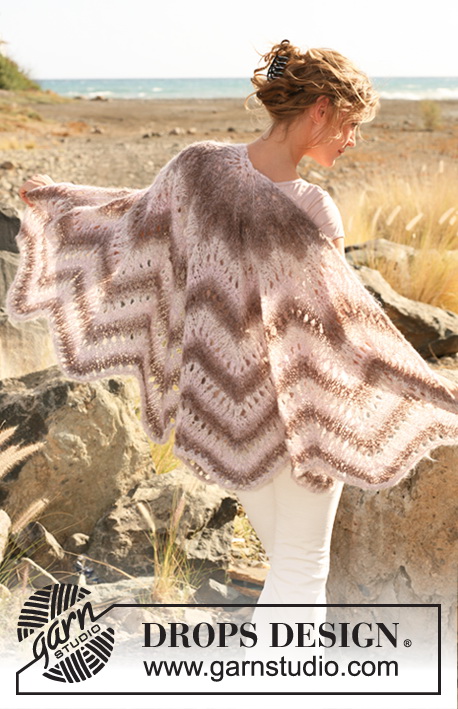
Knitted DROPS shawl with lace and zigzag pattern in “Verdi”.
DROPS 130-1 |
||||||||||||||||
|
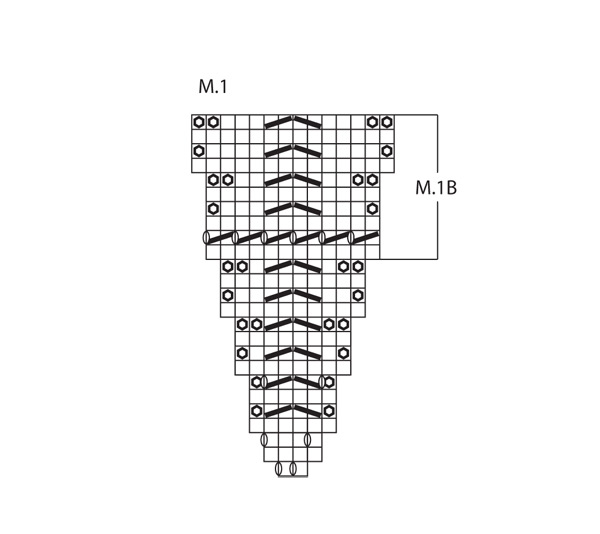
SHAWL: The shawl is worked back and forth on circular needle to make room for all the sts. Cast on 17 sts on circular needle size 8 mm with Verdi. P 1 row from WS. Continue to work as follows (row 1 = from RS): diagram M.1 is repeated 8 times and finish with 1 stocking st (K from RS, P from WS). Work M.1 as follows: Row 1 (RS): *K1, yo, K1, yo, place marker *, repeat *-* and end row with 1 st in stocking st. There are now 8 markers, one after each repeat of M.1. Row 2 and all rows from WS: P all sts and yo's. Row 3: *K1, yo, K3, yo*, repeat *-* and end row with 1 st in stocking st. Row 5: * K2 in 1 st, slip 1 st as if to K, K1, psso, K2 tog, K2 in 1 st* repeat *-* and end row with 1 st in stocking st. Row 7: *K2 in 1 st, yo, slip 1 st as if to K, K1, psso, K2 tog, yo, K2 in 1 st* repeat *-* and end row with 1 st in stocking st. Continue the 8 repeats of diagram M.1 and 1 st in stockinette at the end of row. Continue until diagram M.1 has been knitted 1 time vertically. Now continue by repeating M.1B vertically. Continue until piece reaches desired length, finish after a second row in M.1B (i.e. the row with the YOs). K 1 row from WS. Cast off with K from RS. Sew a thread through the sts in the cast on edge, tighten and fasten. |
||||||||||||||||
Diagram explanations |
||||||||||||||||
|
||||||||||||||||
|
||||||||||||||||
Have you finished this pattern?Tag your pictures with #dropspattern #scheherazadeshawl or submit them to the #dropsfan gallery. Do you need help with this pattern?You'll find 14 tutorial videos, a Comments/Questions area and more by visiting the pattern on garnstudio.com. © 1982-2025 DROPS Design A/S. We reserve all rights. This document, including all its sub-sections, has copyrights. Read more about what you can do with our patterns at the bottom of each pattern on our site. |
||||||||||||||||


With over 40 years in knitting and crochet design, DROPS Design offers one of the most extensive collections of free patterns on the internet - translated to 17 languages. As of today we count 314 catalogues and 11822 patterns translated into English (UK/cm).
We work hard to bring you the best knitting and crochet have to offer, inspiration and advice as well as great quality yarns at incredible prices! Would you like to use our patterns for other than personal use? You can read what you are allowed to do in the Copyright text at the bottom of all our patterns. Happy crafting!
Post a comment to pattern DROPS 130-1
We would love to hear what you have to say about this pattern!
If you want to leave a question, please make sure you select the correct category in the form below, to speed up the answering process. Required fields are marked *.