
Popular categories
Looking for a yarn?


Comments / Questions (75)
![]() Susie wrote:
Susie wrote:
Hi, on Right Part, am I casting on new stitches at same end after binding off armhole, thus creating an armhole? Am confused by phrase ‘ from end of WS’, when I think it would be RS if I do what I have described? Many thanks.
19.12.2021 - 16:50DROPS Design answered:
Dear Susie, you will first cast off stitches at the beginning of the rows from RS then cast on the new stitches for armhole at the end of the rows from WS (the new stitches cast on will be over the stitches cast off creating a hole = armhole). Happy knitting!
20.12.2021 - 08:01
![]() Christine wrote:
Christine wrote:
Unable to pick up the correct amount of stitches on the borders can you tell me where the bottom starts and finishes and the upper border starts and finishes.as working on 16 stitches to 10cm is not giving me the correct counts. the smallest size cardigan is the one been knitted.
09.01.2020 - 14:33DROPS Design answered:
Dear Christine, picking up 16 sts for 10 cm should give you a total of 233 stitches along the 146 cm of the bottom edge (73 cm x 2). Shouldn't you get the exact number of stitches you can always ajust to the right number on next row. Happy knitting!
09.01.2020 - 15:10
![]() Julia wrote:
Julia wrote:
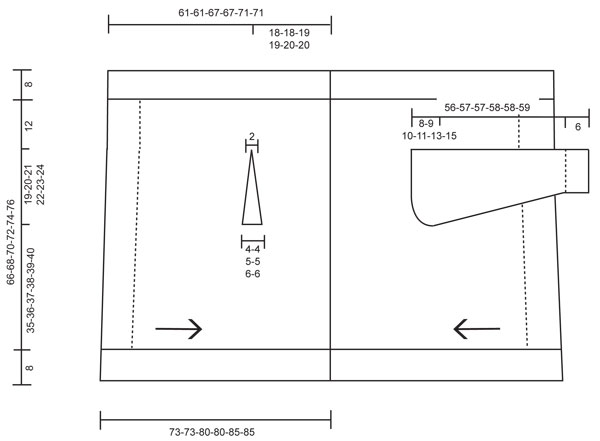
Kann es sein das in der Skizze, dasDreieck für die Ärmel falschrum eingefügt ist? Wenn ich nämlich die äußeren 20 Maschen stricke, ich habe es so verstanden das dies die ersten 20 sind, dann bildet sich die längere Kante oben und nicht wie in der Skizze gezeigt unten. Oder habe ich die Anleitung falsch interpretiert? Auf den Fotos sieht es auch so aus als wäre die breitere Kante oben.
19.08.2016 - 11:47DROPS Design answered:
Hallo Julia, haben Sie beachtet, dass Sie bei der linken Hälfte das Armloch von der Rückseite beginnen müssen?
27.08.2016 - 15:27
![]() Liesken wrote:
Liesken wrote:
Hallo, ich stricke diese Jacke momentan. Ich habe das Patent bei den Ärmeln gestrickt wie am Vorder und Rückenteil. Nun sehe ich dass bei dem Patent für die Bündchen steht "und Ärmel". Welches ist nun für die Ärmel? Ist es egal wenn ich das "obere" Patentmuster für die Ärmel genommen habe?? LG Liesken
08.10.2015 - 09:52DROPS Design answered:
Das bezieht sich auf die Ärmelbündchen. Sie haben es richtig gemacht, dass Sie die Ärmel im gleichen Patentmuster wie das Rumpfteil gestrickt haben.
13.10.2015 - 13:02
![]() Gemma Watson wrote:
Gemma Watson wrote:
I was wondering if you have a size chart as i'm not sure which size to go for
23.05.2015 - 23:43DROPS Design answered:
Dear Mrs Watson, you will find at the bottom of the pattern a measurement chart in cm with all measurements taken flat from side to side. Compare these to a similar garment you have and like the shape to find out the matching size. Happy knitting!
26.05.2015 - 11:07
![]() Liesken wrote:
Liesken wrote:
Hallo, ich wollte die wunderschöne Jacke gern stricken, aber ich bin mir unsicher in den Größen. Haben Sie irgendwo eine Maßtabelle? Oder könnten Sie mir sagen was von S oder M wie 32, 34, 36 oder ausfällt? Ansonsten habe ich nur die Maßangaben in der Anleitung selbst gefunden, aber ich tu mich schwer, mich da zu entscheiden, weil ja ein paar cm doch schon viel ausmachen.
22.12.2014 - 12:46DROPS Design answered:
Sie finden alle Maße unten in der Maßskizze ganz am Ende der Anleitung, daran sollten Sie sich orientieren. Gutes Gelingen!
29.12.2014 - 10:22
![]() Ann Nybråten wrote:
Ann Nybråten wrote:
Gjelder det samme som Alice spør om. Forstår ikke svaret.For når du har strikket de 20m 4omg og satt på en "tråd". Så feller du over 2ganger og øker over 2ganger, men da blir jo "spissen" under armen.
26.08.2014 - 11:09
![]() Marion Hoffmann wrote:
Marion Hoffmann wrote:
Hallöchen, möchte diese tolle Jacke gerne stricken, habe mich aber für ein von ihnen vorgeschlagenes Alternativgarn entschieden und zwar Drops Delight in regenbogenfarben... meine Frage: muss ich diese Wolle auch mit 2 Fäden stricken so wie in der Anleitung? Lieben Dank im Voraus, Marion
20.08.2014 - 14:02DROPS Design answered:
Ja, denn Sie müssen ja auch auf die passende Maschenprobe kommen (die auch mit 2 Fäden gestrickt werden muss). Dadurch wird der Farbeindruck etwas "wirrer".
21.08.2014 - 00:01
![]() Elisabeth wrote:
Elisabeth wrote:
Er det mulig å heller strikke vanlig vranbord med en rett og en vrang i bolen, eller vil dette føre til at det ikke går opp med antall masker?
16.06.2014 - 23:19DROPS Design answered:
Hei Elisabeth. Det kan du jo godt med et lige antal masker (= delbart med 2). Men vaer opmaerksom paa at en vrangbord med 1 r/1 vr traekker sig mere sammen end patent saa du maaske skal starte med flere masker end hvad der staar. Men strik en pröve og tjek strikkefastheden.
17.06.2014 - 17:05
![]() Petra wrote:
Petra wrote:
Ik heb nu 3 keer een poging gedaan... hoe kan ik nou uitkomen als ik een even aantal steken heb, maar een oneven aantal steken dat herhaald moet worden??? Dus bij 154 steken - 2 kantsteken (ribbelsteken) kan ik nooit uitkomen met een patroon dat uit 3 steken bestaat... kortom... hoe zit het dan nog met de rest van het patroon?
20.03.2014 - 19:07DROPS Design answered:
Hoi Petra. Je breit 1 ribbelst en herhaalt *2 st recht samen, 1 omsl, haal 1 st av af* over de volgende 150 st = 50 herhalingen (150/3) en eindigt met 2 r samen en 1 ribbelst over de laatste 3 st. Je hebt nu over de 154 st gebreid en kan verder.
02.04.2014 - 11:36
|
|
Midnight Queen#midnightqueencardigan |
|
 |
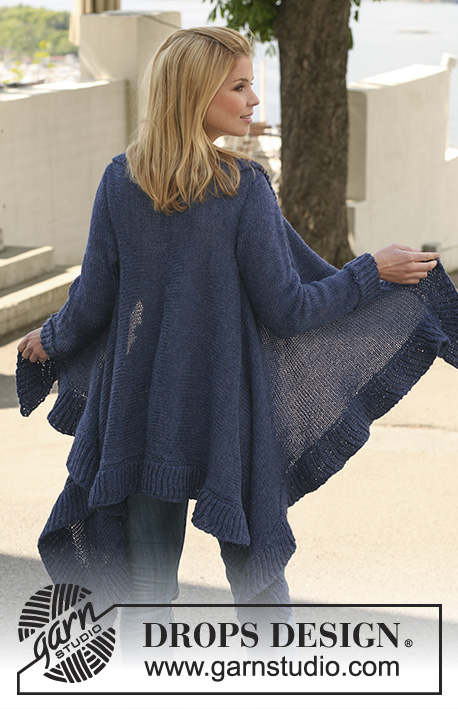 |
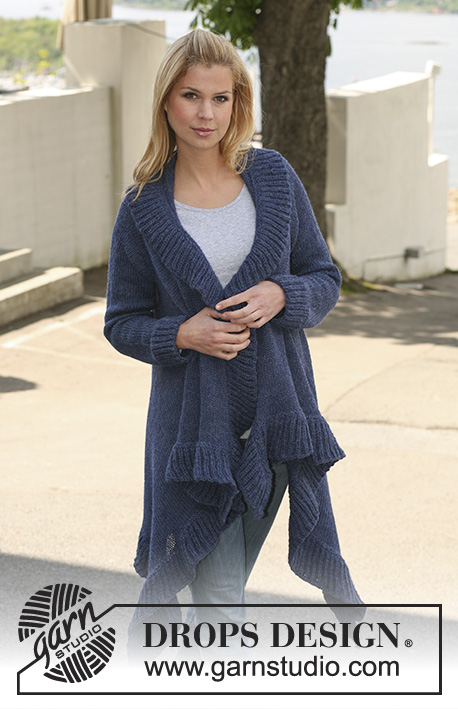
DROPS jacket knitted from side to side in 2 strands ”Alpaca”. Size S-XXXL.
DROPS 121-1 |
|
|
GARTER ST (back and forth on needle): K all rows. MEASUREMENT TIP: Because of the weight of the yarn make all measurements in the knitting direction while the garment is hanging, otherwise it will be too long when worn. ENGLISH RIB ON BODY PIECE (back and forth on needle): Row 1: 1 garter st, * K2 tog, 1 YO, slip 1 st as if to P *, repeat from *-* until 3 sts remain, finish with K2 tog and 1 garter st. Row 2: 1 garter st, * 1 YO, slip 1 st as if to P, K tog YO and slipped st *, repeat from *-* until 2 sts remain, finish with 1 YO, slip 1 st as if to P, 1 garter st. Row 3: 1 garter st, * K tog YO and slipped st, 1 YO, slip 1 st as if to P, repeat from *-* until 3 sts remain, K tog YO and slipped st, 1 garter st. Repeat row 2 and 3. ENGLISH RIB ON BORDERS AND SLEEVES (back and forth on needle): Row 1: 1 garter st, * K1, 1 YO, slip 1 st as if to P *, repeat from *-* until 2 sts remain, finish with K1, 1 garter st. Work row 2 and 3 as described for body piece - see above! Repeat row 2 and 3. -------------------------------------------------------- Body piece is worked in 2 parts and sewn tog mid back afterwards. RIGHT PART: Worked back and forth on circular needle. Cast on 142-148-154-154-160-166 sts on circular needle size 5.5 mm with 2 strands Alpaca. Work ENGLISH RIB - see above! (row 1 = WS). After first row in English rib there are 141-147-153-153-159-165 sts on needle. Continue with Row 2 and row 3 in English rib. When piece measures 5 cm change to circular needle size 4.5 mm. Continue in English rib until piece measures 8 cm (finish after row 3 = WS). Work 2 rows GARTER ST on all sts – see above. Change back to circular needle size 5.5 mm. On next row from RS continue in stocking st, AT THE SAME TIME dec 33-36-39-36-39-41 sts evenly = 108-111-114-117-120-124 sts (includes 1 edge st each side). Continue in stocking st with 1 garter st each side until piece measures 41-41-46-46-49-49 cm. REMEMBER THE KNITTING TENSION and See MEASUREMENT TIP! Now work 4 rows back and forth on only the first 20 sts for all sizes (as seen from RS), and slip these 20 sts on a stitch holder = 88-91-94-97-100-104 sts left on needle. Now cast off for armhole at beg of next row from RS as follows: 20-22-22-23-24-26 sts 1 time, work the remaining sts, turn and work return row. Turn and now cast off the next 10-10-12-12-12-12 sts = 58-59-60-62-64-66 sts. Work 0-0-2-2-4-4 rows on all sts. Insert a marker in first st on needle (as seen from RS), in the middle of these last 0-0-2-2-4-4 rows without dec (= mid under sleeve). Now cast on new sts at the end of every row from WS as follows: 10-10-12-12-12-12 sts 1 time and 20-22-22-23-24-26 sts 1 time = 88-91-94-97-100-104 sts. Slip the 20 sts from stitch holder back on needle = 108-111-114-117-120-124 sts. Continue in stocking st with 1 garter st each side until piece measures 18-18-19-19-20-20 cm from where the last sts were cast on after armhole. Piece now measures approx 61-61-67-67-71-71 cm from cast on row, measured at the top towards neckline. Continue with shortened rows to create extra width at bottom edge mid back as follows (beg from RS = from neckline): Work the first 52 sts on needle and then slip these sts on a stitch holder, work remaining sts on needle, turn piece and work all sts, * work the first 6-6-6-7-7-7 sts on needle, slip sts on the same stitch holder and work remaining sts on needle, turn piece and work all sts *, repeat from *-* a total of 7 times for all sizes. Turn piece and work the remaining 14-17-20-16-19-23 sts. Now slip all sts from stitch holder back on needle and K 2 rows on all sts (beg from RS), then cast off loosely = mid back. Piece now measures approx 61-61-67-67-71-71 cm on the right side of piece (as seen from RS) and approx 73-73-80-80-85-85 cm on the left side of piece – measured in the knitting direction. LEFT PART: Like right part, but mirrored, i.e. make all dec for armhole with start from WS and inc with start from RS. Beg shortened rows mid back from WS (= from neckline). SLEEVE: Worked back and forth on circular needle. Cast on 34-34-34-40-40-40 sts on circular needle size 4.5 mm with 2 strands Alpaca. Continue in English rib (row 1 = WS). After first row in English rib there are 33-33-33-39-39-39 sts on needle. Continue with row 2 and row 3 in English rib until piece measures 6 cm (finish after row 3 = WS). K 2 rows on all sts, change to circular needle size 5.5 mm and continue stocking st with 1 garter st each side, AT THE SAME TIME inc 5-7-9-5-7-7 sts on first row = 38-40-42-44-46-46 sts. Continue in stocking st with 1 garter st each side. When piece measures 10 cm inc 1 st each side and repeat the inc on every 3-2.5-2.5-2-2-1.5 cm a total of 12-13-14-15-17-19 times = 62-66-70-74-80-84 sts. When piece measures 48-48-47-47-45-44 cm (less for the larger sizes because of longer sleeve cap and wider shoulder) cast off for sleeve cap at the beg of every row each side as follows: 3-3-4-4-5-5 sts 1 time, 2 sts 6-7-3-4-4-4 times 1 st 0-0-1-1-3-5 times, then cast off 2 sts each side until piece measures 55-56-56-57-57-58 cm. Now cast off 3 sts 1 time each side and cast off remaining sts. Piece measures approx 56-57-57-58-58-59 cm. ASSEMBLY: Sew the 2 parts tog mid back, garter st towards garter st. Sew sleeve seams. Set in sleeves. BORDER: Bottom edge: Worked back and forth on circular needle. Pick up 233-233-257-257-272-272 sts inside the garter st on circular needle size 4.5 mm with 2 strands Alpaca (pick up approx 16 sts per 10 cm). K 1 row from WS and continue from RS as follows: 1 garter st, * K2, work 2 sts in next st *, repeat from *-* until 4 sts remain, finish with K3 and 1 garter st = 309-309-341-341-361-361 sts. Continue in ENGLISH RIB – see above! When piece measures 3 cm change to circular needle size 5.5 mm. Continue in English rib until border measures 8 cm. Cast off, but to make the edge elastic make a YO after every other st and cast off YO as a st. Upper edge: Worked back and forth on circular needle. Pick up 197-197-215-215-227-227 sts inside the garter st on circular needle size 4.5 mm with 2 strands Alpaca (pick up approx 16 sts per 10 cm). K 1 row from WS and continue from RS as follows: 1 garter st, * K2, work 2 sts in next st *, repeat from *-* until 4 sts remain, finish with K3 and 1 garter st = 261-261-285-285-301-301 sts. Now continue as described for bottom edge. |
|
|
|
Have you finished this pattern?Tag your pictures with #dropspattern #midnightqueencardigan or submit them to the #dropsfan gallery. Do you need help with this pattern?You'll find 21 tutorial videos, a Comments/Questions area and more by visiting the pattern on garnstudio.com. © 1982-2025 DROPS Design A/S. We reserve all rights. This document, including all its sub-sections, has copyrights. Read more about what you can do with our patterns at the bottom of each pattern on our site. |
|


With over 40 years in knitting and crochet design, DROPS Design offers one of the most extensive collections of free patterns on the internet - translated to 17 languages. As of today we count 314 catalogues and 11822 patterns translated into English (UK/cm).
We work hard to bring you the best knitting and crochet have to offer, inspiration and advice as well as great quality yarns at incredible prices! Would you like to use our patterns for other than personal use? You can read what you are allowed to do in the Copyright text at the bottom of all our patterns. Happy crafting!
Post a comment to pattern DROPS 121-1
We would love to hear what you have to say about this pattern!
If you want to leave a question, please make sure you select the correct category in the form below, to speed up the answering process. Required fields are marked *.