Clicking the ORDER button will redirect you to Wool Warehouse Direct Ltd website
The yarn cost is calculated from the pattern’s smallest size and the yarn’s cheapest product type. Looking for an even better price? You might find it on the DROPS Deals!
-------------------------------------------------------
Alternative Yarn – See how to change yarns here
Yarn Groups A to F – Use the same pattern and change the yarn here
Yarn usage using an alternative yarn – Use our yarn converter here
-------------------------------------------------------
Clicking the ORDER button will redirect you to Wool Warehouse Direct Ltd website
The yarn cost is calculated from the pattern’s smallest size and the yarn’s cheapest product type. Looking for an even better price? You might find it on the DROPS Deals!
Each of our patterns has specific tutorial videos to help you.
These step-by-step tutorials might also help you:
Why is the knitting/crochet tension so important?
Knitting tension is what determines the final measurements of your work, and is usually measured per 10 x 10 cm. It is provided like so: number of stitches in width x number of rows in height - eg: 19 stitches x 26 rows = 10 x 10 cm.
The knitting tension is very individual; some people knit/crochet loosely while others work tightly. You adjust the knitting tension with the needle size, which is why the suggested needle size only serve as a guide! You need to adjust this (up or down) to ensure that YOUR knitting tension matches the knitting tension provided in the pattern. If you work with a different knitting tension than provided you will have a different yarn consumption, and your work will have different measurements than what the pattern suggests.
The knitting tension also determines which yarns can replace each other. As long as you achieve the same knitting tension you can replace one yarn with another.
See DROPS lesson: How to measure your tension/gauge
See DROPS video: How to make a gauge tension swatch
How do I know how many balls of yarn I need?
The required amount of yarn is provided in grams, eg: 450 g. To calculate how many balls you’ll need you first need to know how many grams are in 1 ball (25g, 50g or 100g). This information is available if you click on the individual yarn quality on our pages. Divide the amount required with the amount of each ball. For example, if each ball is 50g (the most common amount), the calculation will be as follows: 450 / 50 = 9 balls.
Can I use a different yarn than what the pattern suggests?
The important thing when changing from one yarn to another is that the knitting/crochet tension remains the same. This is so that the measurements of the finished piece will be the same as on the sketch provided. It is easier to achieve the same knitting tension using yarns from the same yarn group. It is also possible to work with multiple strands of a thinner yarn to achieve the knitting tension of a thicker one. Please try our yarn converter. We recommend you to always work a test swatch.
Please NOTE: when changing yarn the garment might have a different look and feel to the garment in the photo, due to individual properties and qualities of each yarn.
See DROPS lesson: Can I use a different yarn than the one mentioned in the pattern?
What are the yarn groups?
All our yarns are categorised into yarn groups (from A to F) according to thickness and knitting tension – group A contains the thinnest yarns and group F the thickest. This makes it easier for you to find alternative yarns to our patterns, should you wish to switch yarn. All yarns within the same group have a similar knitting tension and can easily replace each other. However, different yarn qualities have different structures and properties which will give the finished work a unique look and feel.
How do I use the yarn converter?
At the top of all our patterns you’ll find a link to our yarn converter, which is a helpful tool should you wish to use a different yarn than suggested. By filling in the yarn quality you wish to replace, the amount (in your size) and number of strands, the converter will present good alternative yarns with the same knitting tension. Additionally it will tell you how much you’ll require in the new qualities and whether you’ll need to work with multiple strands. Most skeins are 50g (some are 25g or 100g).
If the pattern is worked with multiple colours, every colour will have to be converted separately. Similarly, if the pattern is worked with several strands of different yarns (for example 1 strand Alpaca and 1 strand Kid-Silk) you will have to find alternatives for each, individually.
Why do you show discontinued yarns in the patterns?
Since different yarns have different qualities and textures we have chosen to keep the original yarn in our patterns. However, you can easily find options among our available qualities by using our yarn converter, or simply pick a yarn from the same yarn group.
It is possible that some retailers still have discontinued yarns in stock, or that someone has a few skeins at home that they would like to find patterns for.
The yarn converter will provide both alternative yarn as well as required amount in the new quality.
What size should I knit?
If you think it's hard to decide what size to make, it can be a good idea to measure a garment you own already and like the size of. Then you can pick the size by comparing those measures with the ones available in the pattern's size chart.
You'll find the size chart at the bottom of the pattern.
See DROPS lesson: How to read size chart
Why do I get the wrong knitting tension with the suggested needle size?
The needle size provided in the pattern serves only as a guide, the important thing is to follow the knitting tension. And since knitting tension is very individual, you will have to adjust the needle size to ensure that YOUR tension is the same as in the pattern – maybe you’ll have to adjust 1, or even 2 needle sizes, up or down to achieve the correct tension. For this, we recommend that you work test swatches.
Should you work with a different knitting tension than the one provided, the measurements of the finished garment might deviate from the measurement sketch.
See DROPS lesson: How to measure your tension/gauge
See DROPS video: How to make a gauge tension swatch
Why is the pattern worked top-down?
Working a garment top-down provides more flexibility and room for personal adjustment. For example it is easier to try the garment on while working, as well as making adjustments to length of yoke and shoulder caps.
The instructions are carefully explaining every step, in the correct order. Diagrams are adjusted to the knitting direction and are worked as usual.
How do I work according to a knitting diagram?
The diagram depicts all rows/rounds, and every stitch seen from the right side. It is read from bottom to top, from right to left. 1 square = 1 stitch.
When working back and forth, every other row is worked from the right side and every other row is worked from the wrong side. When working from the wrong side, the diagram will have to be worked reversed: from left to right, knit stitches are purled, purl stitches are knit etc.
When working in the round every round is worked from the right side and the diagram are worked from right to left on all rounds.
See DROPS lesson: How to read knitting diagrams
How do I work according to a crochet diagram?
The diagram depicts all rows/rounds, and every stitch seen from the right side. It is worked from bottom to top, from right to left.
When working back and forth every other row is worked from the right side: from right to left and every other row is worked from the wrong side: from left to right.
When working in the round, every row in the diagram are worked from the right side, from right to left.
When working a circular diagram you start in the middle and work your way outwards, counter clockwise, row by row.
The rows usually start with a given number of chain stitches (equivalent to the height of the following stitch), this will either be depicted in the diagram or explained in the pattern.
See DROPS lesson: How to read crochet diagrams
How do I work several diagrams simultaneously on the same row/round?
Instructions for working several diagrams after each other on the same row/round, will often be written like so: “work A.1, A.2, A.3 a total of 0-0-2-3-4 times". This means you work A.1 once, then A.2 is worked once, and A.3 is repeated (in width) the number of times provided for your size – in this case like so: S = 0 times, M = 0 times, L=2 times, XL= 3 times and XXL = 4 times.
The diagrams are worked as usual: begin with the first row in A.1, then work the first row in A.2 etc.
See DROPS lesson: How to read knitting diagrams
See DROPS lesson: How to read crochet diagrams
Why are the sleeves shorter in larger sizes?
The total width of the garment (from wrist-to-wrist) will be larger in the larger sizes, despite the actual sleeves being shorter. The larger sizes have longer sleeve caps and wider shoulders, so there will be a good fit in all sizes.
Where on the garment is the length measured?
The measurement sketch/schematic drawing provides information regarding the full length of the garment. If it’s a jumper or a jacket the length is measured from the highest point on the shoulder (usually closest to the neckline), and straight down to the bottom of the garment. It is NOT measured from the tip of shoulder. Similarly, the length of yoke is measured from the highest point on the shoulder and down to where yoke is split into body and sleeves.
See DROPS lesson: How to read a schematic drawing
What is a repeat?
Diagrams are often repeated on the round or in height. 1 repeat is the diagram the way it appears in the pattern. If it says to work 5 repeats of A.1 in the round, then you work A.1 a total of 5 times after/next to each other in the round. If it says to work 2 repeats of A.1 vertically/in height you work the entire diagram once, then begin again at the start and work the entire diagram one more time.
Why does the piece start with more chain stitches than it’s worked with?
Chain stitches are slightly narrower than other stitches and to avoid working the cast-on edge too tight, we simply chain more stitches to begin with. The stitch count will be adjusted on the following row to fit the pattern and measurement sketch.
Why increase before the rib edge when the piece is worked top-down?
The rib edge is more elastic and will contract slightly compared to, for example, stocking stitch. By increasing before the rib edge, you avoid a visible difference in width between the rib edge and the rest of the body.
Why increase in the cast-off edge?
It’s very easy to cast off too tightly, and by making yarn overs while casting off (and simultaneously casting these off) you avoid a too tight cast off edge.
See DROPS video: How to bind off with yarn overs (yo)
How do I increase/decrease on every 3rd and 4th row/round alternately?
To achieve an even increase (or decrease) you can increase on, for example: every 3rd and 4th row alternately, like so: work 2 rows and increase on the 3rd row, work 3 rows and increase on the 4th. Repeat this until the increase is complete.
See DROPS lesson: Increase or decrease 1 st on every 3rd and 4th row alternately
How can I work a jacket in the round instead of back and forth?
Should you prefer to work in the round instead of back and forth, you may of course adjust the pattern. You’ll need to add steeks mid-front (usually 5 stitches), and follow the instructions. When you would normally turn and work from the wrong side, simply work across the steek and continue in the round. At the end you’ll cut the piece open, pick up stitches to work bands, and cover the cut edges.
See DROPS video: How to knit steeks and cut open
Can I work a jumper back and forth instead of in the round?
Should you prefer to work back and forth instead of in the round, you may of course adjust the pattern so you work the pieces separately and then assemble them at the end. Divide the stitches for the body in 2, add 1 edge stitch in each side (for sewing) and work the front and back pieces separately.
See DROPS lesson: Can I adapt a pattern for circular needles into straight needles?
Why is the pattern slightly different than what I see in the photo?
Pattern repeats can vary slightly in the different sizes, in order to get the correct proportions. If you’re not working the exact same size as the garment in the photo, yours might deviate slightly. This has been carefully developed and adjusted so that the complete impression of the garment is the same in all sizes.
Make sure to follow instructions and diagrams for your size!
How do I make a women’s size garment into a men’s size one?
If you have found a pattern you like which is available in women’s size it’s not very difficult to convert it to men’s size. The biggest difference will be the length of sleeves and body. Start working on the women size that you think would fit across the chest. The additional length will be worked right before you cast off for the armhole/sleeve cap. If the pattern is worked top-down you can add the length right after the armhole or before the first decrease on sleeve.
Regarding additional yarn amount, this will depend on how much length you add, but it is better with a skein too many than too few.
How do I prevent a hairy garment from shedding?
All yarns will have excess fibres (from production) that might come off as lint or shedding. Brushed yarns (ie hairier yarns) have more of these loose, excess fibres, causing more shedding.
Shedding also depends on what is worn under or over the garment, and whether this pulls at the yarn fibres. It’s therefore not possible to guarantee that there will be no shedding
Below are some tips on how to get the best result when working with hairier yarns:
1. When the garment is finished (before you wash it) shake it vigorously so the looser hairs come off. NOTE: do NOT use a lint roller, brush or any method that pulls at the yarn.
2. Place the garment in a plastic bag and put it in your freezer - the temperature will cause the fibres to become less attached to each other, and excess fibres will come off easier.
3. Leave in the freezer for a few hours before taking it out and shaking it again.
4. Wash the garment according to the instructions on the yarn label.
Why does my garment pill?
Pilling is a natural process that happens to even the most exclusive of fibers. It's a natural sign of wear and tear that is hard to avoid, and that is most visible in high friction areas of your garment like a sweater's arms and cuffs.
You can make your garment look as new by removing the pilling, using a fabric comb or a pill/lint remover.
DROPS 123-25 |
|
|
|
Knitted DROPS jacket with short sleeves and pockets in ”Snow”. Size S - XXXL.
DROPS 123-25 |
|
GARTER ST (back and forth on circular needle): K all rows. DECREASING TIP-1 (applies to body piece): Make all dec from RS. Beg 3 sts before marker and dec as follows: K2 tog, K2 (marker sits between these 2 sts), slip 1 st as if to K, K1, psso. BUTTONHOLES: Make buttonholes on right front band. 1 buttonhole = bind off third st from mid front and cast on 1 new st on next row. Make buttonholes when piece measures: SIZE S: 13, 21, 29, 37 and 45 cm / 5⅛",8¼",11⅜",14½" and 17¾" SIZE M: 15, 23, 31, 39 and 47 cm / 6",9",12¼", 15¼" and 18½" SIZE L: 15, 23, 32, 40 and 49 cm / 6",9",12½",15¾" and 19¼" SIZE XL: 15, 22, 30, 37, 45 and 52 cm / 6",8¾",11¾",14½",17¾" and 20½" SIZE XXL: 15, 23, 30, 38, 45 and 53 cm / 6",9",11¾",15",17¾" and 21" SIZE XXXL: 15, 23, 31, 39, 47 and 55 cm / 6",9",12¼",15¼",18½" and 21⅝" NOTE: Make last buttonhole on neckline. -------------------------------------------------------- JACKET: Worked back and forth on circular needle from mid front. BODY PIECE: Cast on 127-135-145-157-171-183 sts (includes 5 front band sts each side towards front edge) on circular needle size 7 mm / US 10½ with Snow. P 1 row from WS and continue in rib as follows from RS: 5 front band sts in GARTER ST - see above, * K1, P1 *, repeat from *-* until 6 sts remain and finish with K1 and 5 front band sts in GARTER ST. When rib measures 5 cm / 2" change to circular needle size 8 mm / US 11. Work next row as follows from RS: 5 front band sts in garter st as before, 3-3-5-5-7-7 stockinette sts, slip the next 23-23-23-25-25-27 sts on a stitch holder (for pocket), AT THE SAME TIME pick up 1 new st on the back of each of the 23-23-23-25-25-27 sts on stitch holder, work stockinette st on the next 65-73-79-87-97-105 sts, slip the next 23-23-23-25-25-27 sts on a stitch holder (for pocket), AT THE SAME TIME pick up 1 new st on the back of each of the 23-23-23-25-25-27 sts on stitch holder, work 3-3-5-5-7-7 stockinette sts and finish with 5 front band sts in garter st as before = 127-135-145-157-171-183 sts. Now insert 2 markers 34-36-39-42-45-48 sts in from each side (= 59-63-67-73-81-87 sts between markers on back piece). Continue in stockinette st and front bands in garter st. REMEMBER THE GAUGE! When piece measures 8 cm / 3⅛" dec 1 st each side of both markers – See DECREASING TIP (= 4 dec sts) and repeat the dec on every 3.5-3.5-4-4-4-4 cm / 1¼"-1¼"-1½"-1½"-1½"-1½" a total of 7 times = 99-107-117-129-143-155 sts. REMEMBER BUTTONHOLES ON RIGHT FRONT BAND – see above. When piece measures 32-33-34-35-36-37 cm / 12½"-13½"-13⅜"-13¾"-14¼"-14½" divide for sleeves and complete front and back pieces separately. BACK PIECE: READ ALL OF THIS SECTION BEFORE CONTINUING! = 45-49-53-59-67-73 sts. Now cast on 8-8-8-8-7-7 new sts at the end of the next 2 rows for sleeves = 61-65-69-75-81-87 sts. Continue in stockinette st and 1 edge st in garter st each side. When piece measures 55-57-59-61-63-65 cm / 21⅝"-22½"-23¼"-24"-24¾"-25½" slip sts at the beg of every row each side on a stitch holder for shaped shoulder as follows: 5-6-6-7-9-10 sts 1 time (work sts before slipping them on stitch holder to avoid cutting the thread), 6-7-7-8-9-10 sts 1 time and then the remaining 11-11-13-13-13-14 sts – NOTE: when working the first st after having slipped sts on stitch holder, slip this st and tighten thread to avoid hole in transition. AT THE SAME TIME when piece measures 56-58-60-62-64-66 cm / 22"-22¾"-23⅝"-24⅜"-25¼"-26" bind off the middle 15-15-15-17-17-17 sts for neck and complete each shoulder separately. Bind off 1 st on neckline on next row. When all sts have been slipped on stitch holder piece measures approx 58-60-62-64-66-68 cm / 22¾"-23⅝"-24⅜"-25¼"-26"-26¾" from bottom edge and up to shoulder, where longest. RIGHT FRONT PIECE: = 27-29-32-35-38-41 sts. Now cast on 8-8-8-8-7-7 new sts at the end of row towards the side for sleeve = 35-37-40-43-45-48 sts. Continue in stockinette st, 5 front band sts in garter st as before and 1 edge st in garter st towards the side. When piece measures 51-53-55-57-59-61 cm / 20"-21"-21⅝"-22½"-23¼"-24" slip the 6-6-7-7-7-7 sts towards mid front on a stitch holder for neck and bind off to shape the neckline at the beg of every row from mid front: 3 sts 1 time, 2 sts 1 time and 1 st 2-2-2-3-2-2 times. AT THE SAME TIME when piece measures 55-57-59-61-63-65 cm / 21⅝"-22½"-23¼"-24"-24¾"-25½" / slip sts at the beg of every row from the side on a stitch holder for shaped shoulder as described for back piece. When all sts have been slipped on stitch holder piece measures approx 58-60-62-64-66-68 cm / 22¾"-23⅝"-24⅜"-25¼"-26"-26¾" from bottom edge and up to shoulder, where longest. LEFT FRONT PIECE: Like right front piece, but mirrored. ASSEMBLY: Slip the 22-24-26-28-31-34 sts from stitch holder on one shoulder on circular needle size 8 mm / US 11 and work back and forth as follows: K 1 row from RS – NOTE: To avoid a hole in each transition pick up a st in transition and work this tog with first st on left needle. On next row bind off loosely with K sts from RS. Repeat in the same way along the 3 other shoulders. Sew shoulder seams inside bind off row – make sure seam isn’t too tight. Sew under arm seams and side seams inside 1 edge st. NECKLINE: Pick up from RS approx 53 to 63 sts round neck (includes sts from stitch holders at front) on circular needle size 7 mm / US 10½ with Snow (divisible by 2 + 1). Work rib as follows (Row 1 = WS): 5 front band sts in garter st, * P1, K1 *, repeat from *-* until 6 sts remain and finish with P1 and 5 front band sts in garter st (from RS rib beg and end with K1 inside front band each side). When neckline measures 2 cm / ¾" make 1 buttonhole in line with the others on right front band. Bind off with K over K and P over P when neckline measures 5 cm / 2". SLEEVE EDGE: Pick up 1 st in each st round sleeve edge on small circular needle size 7 mm / US 10½ with Snow. Work rib in the round, K1/ P1, AT THE SAME TIME adjust no of sts to 64-66-68-70-72-74 sts on round 1. Bind off with K over K and P over P when sleeve edge measures 5 cm / 2". POCKET: Slip the 23-23-23-25-25-27 sts from stitch holder on one front piece on needle size 8 mm / US 11 and work rib as follows (from RS): 1 garter st, * K1, P1 *, repeat from *-* until 2 sts remain and finish with K1 and 1 edge st in garter st. When pocket measures approx 15-15-16-16-17-17 cm / 6"-6"-6¼"-6¼"-6¾"-6¾" (or desired length) bind off with K over K and P over P. Make a similar pocket on the other front piece and sew the pockets to each side. |
|
Have you made this or any other of our designs? Tag your pictures in social media with #dropsdesign so we can see them! Do you need help with this pattern?You'll find tutorial videos, a Comments/Questions area and more by visiting the pattern on garnstudio.com. © 1982-2024 DROPS Design A/S. We reserve all rights. This document, including all its sub-sections, has copyrights. Read more about what you can do with our patterns at the bottom of each pattern on our site. |
With over 40 years in knitting and crochet design, DROPS Design offers one of the most extensive collections of free patterns on the internet - translated to 17 languages. As of today we count 304 catalogs and 11422 patterns - 11417 of which are translated into English (US/in).
We work hard to bring you the best knitting and crochet have to offer, inspiration and advice as well as great quality yarns at incredible prices! Would you like to use our patterns for other than personal use? You can read what you are allowed to do in the Copyright text at the bottom of all our patterns. Happy crafting!
Comments / Questions (42)
Oksana Merklas wrote:
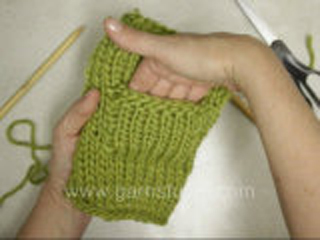
Hi! I cant get this part: slip the next 23-23-23-25-25-27 sts on a stitch holder (for pocket), AT THE SAME TIME pick up 1 new st on the back of each of the 23-23-23-25-25-27 sts on stitch holder - Could you please suggest a tutorial video about?
14.03.2016 - 08:52DROPS Design answered:
Dear Mrs Merklas, yes sure, the video below shows how to make this kind of pocket - remember to follow the pattern, it's a "generic" video. Happy knitting!
14.03.2016 - 10:09Martin wrote:
J'aimerais obtenir explications avec aiguilles droites. Je vous remercie d'avance.
28.12.2015 - 19:13DROPS Design answered:
Bonjour Mme Martin, on tricote ici en allers et retours sur aiguille circulaire pour avoir suffisamment de place pour y loger toutes les mailles. Cliquez ici pour en savoir plus sur l'adaptation des modèles. Bon tricot!
02.01.2016 - 14:59Bourquencier Nicole wrote:
Bonsoir ! je suis en train de tricoter ce modèle et j'ai un problème à partir des diminutions à 8cm de hauteur . N'y -a-t-il pas une erreur dans le nombre de mailles après les diminutions ? Poutr la taille M , il y aurait 107 mailles ... Désolée mais je ne comprends pas . Merci de votre réponse.
31.07.2015 - 20:39DROPS Design answered:
Bonjour Mme Bourquencier, en taille M, on a 135 m pour le dos et les 2 devants, on place un marqueur à 36 m de chaque côté (= 63 m pour le dos entre les marqueurs) et on diminue 1 m de chaque côté de chaque marqueur (= 4 m diminuées par rang) 7 fois au total tous les 3,5 cm, soit: 135 - (4 dim x 7 fois = 28 dim au total) = 107 m. Bon tricot!
01.08.2015 - 10:49Eet Alva wrote:
I am having problems understanding shaping the shoulders and neck, this is next to about the last 10 rows on back and front. Any input and help would be appreciated.
17.10.2013 - 12:44DROPS Design answered:
Dear Mrs Alva, when you continue each piece separately, you cast on new sts on the side (both sides for back piece) for the sleeve. When piece measures 55-65 cm (see size), you will put the sts of sleeves on a st holder (3 times each side) and at the same time, when piece measures 56-66 cm you will cast off for neck on back piece and continue each shoulder separately. Happy knitting!
17.10.2013 - 15:48Vaz Chantal wrote:
Je ne trouve personne pour m'expliquer comment faire ce modèle à partir des emenchures je n'ai jamais tricoté avec des aiguilles circulaires merci de venir à mon secours
06.11.2012 - 12:04DROPS Design answered:
Bonjour Madame Vaz, à partir de 32...37 cm, vous divisez votre ouvrage en 3 parties, vous mettez en attente sur un fil ou un arrêt de mailles les mailles des 2 devants pour tricoter le dos comme indiqué dans les explications. Vous trouverez dans la vidéothèque des vidéos qui expliquent comment tricoter en allers et retours sur aiguille circulaire. Pour toute aide personnalisée, pensez à contacter votre magasin DROPS ou le forum DROPS. Bon tricot !
06.11.2012 - 12:19Fellay Madeleine wrote:
Bonjour, J'ai tricoté ce modèle et il y a une erreur...les boutonnières sont sur la gauche , pour les dames c'est à droite. Merci d'en prendre note. Meilleures salutations Madeleine
18.02.2012 - 21:24DROPS Design answered:
Les boutonnières apparaissent à gauche sur la photo car elle est inversée, mais elles se situent bien sur la bordure devant droit, comme l'indiquent les explications.
21.02.2012 - 21:09Hanna wrote:
Ihana, lämmin ja käytännöllinen taskuineen ja nopea kutoa
22.11.2011 - 13:31Annie Chantret wrote:
Je viens de terminer ce modèle et j'en suis enchantée . Je vais maintenant en commencer un autre. Je suis également séduite par la qualilé de la laine. Merci.
23.07.2010 - 09:40Cousin wrote:
Dommage que le modèle soit tricoter avec des aiguilles si grosses, j'aurais beaucoup aimé le réaliser. A bientôt
19.07.2010 - 11:15Inger wrote:
Synes den er gammeldags i facon og kluntet
03.07.2010 - 20:26