
Popular categories
Looking for a yarn?


Comments / Questions (52)
![]() Christiane wrote:
Christiane wrote:
Was bedeutet es, dass ich die linke Stulpe spiegelverkehrt stricken soll ? Bezieht sich das auf das Muster ? Also soll ich das Muster von links nach rechts lesen ???? Danke für eine Antwort
07.03.2023 - 23:49DROPS Design answered:
Liebe Christiane, es bezieht sich nur auf dem Daumen, ie die markierung werden Sie in die 9. Masche nach der Rundbeginn einsetzen. Viel Spaß beim stricken!
08.03.2023 - 09:20
![]() Christiane wrote:
Christiane wrote:
Hallo, wenn ich anfangen muss Maschen aufzunehmen, ist das die 4 te Reihe ab dem Markierungsfaden, oder ist das die 6 te Reihe, bei der ich das erste Mal Maschen aufnehme??? Und versteh ich es richtig, dass das Muster nicht ganz in Runden aufgeht, sondern durch die Zunahmen da wo der Daumen ist anfängt und endet? Also das Muster nicht in einer kompletten Runde läuft ? Danke für Ihre Antwort
31.01.2023 - 16:07DROPS Design answered:
Liebe Christiane, die 1. Zunahmen für den Daumen entseht bei der 6. Runde nach dem Bündchen, dann nehmen Sie in jeder 4. Runde zu - die Zunahmen stricken Sie wie im Muster/Diagram - das Muster wird aber manchmal nicht nach jeder Zunahme passen. Viel Spaß beim stricken!
31.01.2023 - 17:03
![]() Maria wrote:
Maria wrote:
De ökade maskorna stickas in i mönstret efterhand. Hur då?
26.08.2022 - 21:46DROPS Design answered:
Hei Maria. Jo, du strikker den økte masken slik at den passer med mønstret/fargen, (noen ganger kan det hende at det ikke passer 100%). F.eks du øker på 3. omgang der du strikker med mørkegrå, på neste omgang strikkes det med grå og den nye masken strikkes da også med grå. mvh DROPS Design
29.08.2022 - 11:53
![]() Josée Landry wrote:
Josée Landry wrote:
Tricoter 1 rang en augmentant d’1m pour la taille S/M = 41 m. Pour le format L-XL, combien de maille en augmentation? Merci!
20.10.2020 - 02:02DROPS Design answered:
Bonjour Mme Landry, on n'augmente pas à ce niveau-là en taille L-XL. Bon tricot!
20.10.2020 - 10:47
![]() Sarita Kotkavalkama wrote:
Sarita Kotkavalkama wrote:
Someone REAL person should translate this pattern to Finnish. Current translation have done with translating program.
13.01.2019 - 06:50Canada wrote:
Pattern 98-8, finish M.1, 43 sts change to 3mm and work 5 rounds in rib, k2/p2? This makes rib uneven? Right and left wrist warmers in size small are worked same?
29.01.2018 - 01:50DROPS Design answered:
Hello, Now, the rib will not be uneven. The right and left mittens are worked the same way BUT the pattern. After knitting the left mitten, you knit the right mitten but reverse the pattern (read the chart from left to right). Happy Knitting!
30.08.2018 - 11:10Canada wrote:
Pattern 98-8, for thumb gusset stitches, 6 new stitches on each side of marker. Put 12 stitches on stitch holder, is this done at beginning of row?
22.01.2018 - 01:56DROPS Design answered:
Dear Canada, for right mitten you will slip the 6 sts inc before marker + the 6 sts inc after marker on a thread for thumb, start slipping on the thread the 6 sts before end of round + 6 sts from beg of round = 12 sts for the thumb, cast on 2 new sts over these 12 sts = 43-50 sts for hand. Happy knitting!
22.01.2018 - 10:38
![]() Bev wrote:
Bev wrote:
Pattern 98-8 for the inc 1st. what type of inc is used? Is this any increase or specific?
03.12.2017 - 15:54DROPS Design answered:
Dear Bev, you can use any specific technique to increase. Happy knitting!
04.12.2017 - 09:40Beverly Adams wrote:
Change to dpn US 6 and knit 1 round, at the same time inc.1 st =41. Where is the increase made? At beginning of row? Pattern 98-8.
03.12.2017 - 02:56DROPS Design answered:
Hi Beverly, Yes, the increase is made at the beginning og the round. Happy knitting!
03.12.2017 - 06:14Kim Dahee wrote:
It's very usefull for me thank you
15.03.2016 - 04:56
|
|||||||||||||
Stjerneskog |
|||||||||||||
 |
 |
||||||||||||
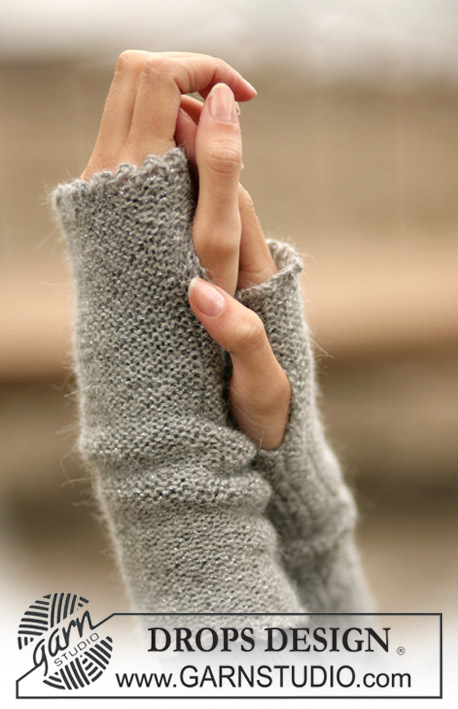
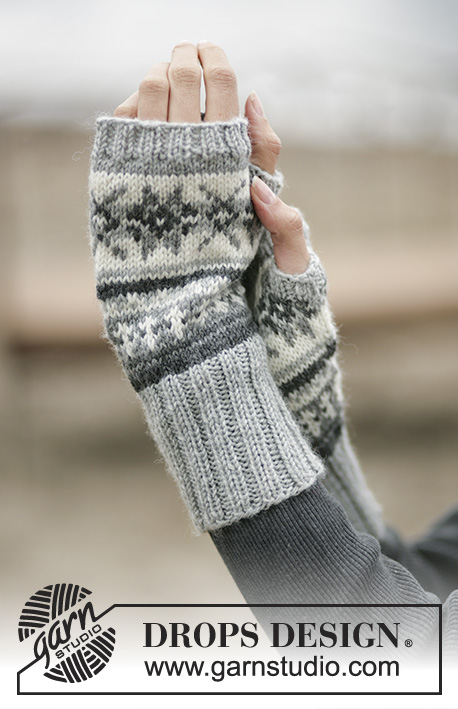
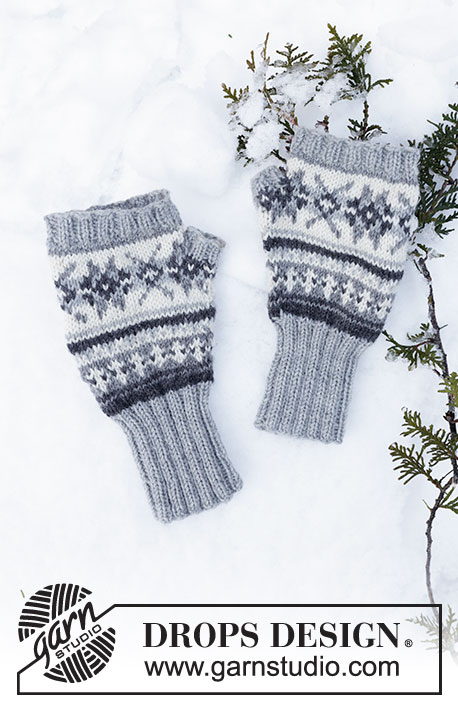
DROPS Wrist warmers with pattern in Karisma Superwash
DROPS 98-8 |
|||||||||||||
|
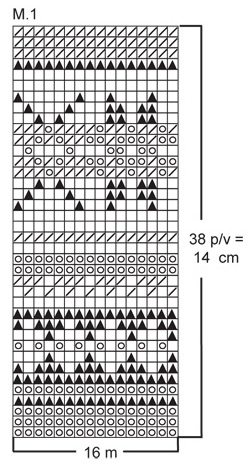
Knitting Tension: 21 x 28 rows on needles size 4 mm in stocking sts = 10 x 10 cm. Pattern: See diagram M.1. Right wrist warmer: Cast on 40-48 sts on double pointed needle size 3 mm with light grey. Knit 10 cm Rib, K2/P2. Change to double pointed needles size 4 mm and knit 1 round, at the same time for size S/M inc 1 st = 41 sts. Now continue in M.1. After 2 rounds of M.1 insert a marker at the beg of round and make inc for thumb as follows: 1st round: Knit without inc 2nd round: Knit without inc 3rd round: Knit until 1 st left before the marker, inc 1 st (incorporate new sts in pattern as you go along) 4th round: Knit 1 st, inc 1 st in the second st after the marker and finish the round. Repeat round 1 to 4 until there are 6 new sts on each side of the MT = 53-60 sts. Knit 2 rounds and then put the 12 thumb sts on a thread. On the next round cast on 2 new sts behind the 12 thumb sts = 43-50 sts on round. Finish M.1, piece measures approx 24 cm. Change to double pointed needles size 3 mm and knit 5 rounds in Rib with light grey and cast off loosely. Thumb: Put the 12 thumb sts on double pointed needles size 3 mm and pick up 2 new sts in the 2 sts cast on behind sts on thread = 14 sts. Knit 1 round and at the same time adjust the number of sts to 12-16 sts. Knit 4 rounds in Rib with light grey. Cast off loosely. Left wrist warmer: Cast on and knit as right wrist warmer, but insert the marker in size L/XL in the 9th st from beg of round. |
|||||||||||||
Diagram explanations |
|||||||||||||
|
|||||||||||||
|
|||||||||||||
Have you finished this pattern?Tag your pictures with #dropspattern or submit them to the #dropsfan gallery. Do you need help with this pattern?You'll find 18 tutorial videos, a Comments/Questions area and more by visiting the pattern on garnstudio.com. © 1982-2025 DROPS Design A/S. We reserve all rights. This document, including all its sub-sections, has copyrights. Read more about what you can do with our patterns at the bottom of each pattern on our site. |
|||||||||||||


With over 40 years in knitting and crochet design, DROPS Design offers one of the most extensive collections of free patterns on the internet - translated to 17 languages. As of today we count 314 catalogues and 11822 patterns translated into English (UK/cm).
We work hard to bring you the best knitting and crochet have to offer, inspiration and advice as well as great quality yarns at incredible prices! Would you like to use our patterns for other than personal use? You can read what you are allowed to do in the Copyright text at the bottom of all our patterns. Happy crafting!
Post a comment to pattern DROPS 98-8
We would love to hear what you have to say about this pattern!
If you want to leave a question, please make sure you select the correct category in the form below, to speed up the answering process. Required fields are marked *.