
Catégories populaires
Vous cherchez un fil?


Commentaires / Questions (113)
![]() Brenda a écrit:
Brenda a écrit:
Any chance of doing a video tutorial on you-tube. I really like this headband, but am confused with the written pattern.
01.12.2022 - 01:02DROPS Design a répondu:
Dear Brenda, you will find videos relative to the techniques used in that pattern at the bottom of the pattern, feel free to ask your question here so that we can help you further in the part of the pattern you don't understand. Happy knitting!
01.12.2022 - 11:46
![]() Kathy a écrit:
Kathy a écrit:
I am on the first increase row to 24 stitches and following the established rib pattern but there are not enough stitches to complete the rib pattern! What do I do?
11.10.2021 - 01:08DROPS Design a répondu:
Hi Kathy, You increase all P1 to P2 (5 stitches increased) which gives you 24 stitches. You now have 1 stitch in garter stitch, 5 x K2, P2 (20 stitches), K2 and 1 stitch in garter stitch = 24 stitches. Happy knitting!
11.10.2021 - 07:04
![]() Iris a écrit:
Iris a écrit:
Hallo! Ich bin ziemliche Anfängerin und komme mit der Anleitung nicht ganz zurecht. Betrifft das Fertigstellen des Stirnbands mit den Maschen auf einem Hilfsfaden. Habe leider auch kein passendes Videotutorial dazu finden können. Wie lange muß der Hilfsfaden sein? und wird er mithineingenäht? Danke im Voraus für die Hilfe!
01.01.2021 - 22:03DROPS Design a répondu:
Liebe Iris, die stillgelegten Maschen werden wie in diesem Video zusammen mit der Anschlagskante - wie in diesem Video zusammen genäht, dh so eine "Mischung" je nach den Maschen. Viel Spaß beim zusammennähen!
04.01.2021 - 14:43
![]() Diana Connolly a écrit:
Diana Connolly a écrit:
This increase is called a make 1 in English. If you’d written it like this many here wouldn’t have had so many problems, make 1 is a term used when you increase by picking up the loop between stitches. Hope this helps.
27.10.2020 - 21:20
![]() Kirsty a écrit:
Kirsty a écrit:
Hi, wow many thanks for your helpful video reply. I really appreciate it. Love your site. Well wishes, Kirsty
28.06.2020 - 20:24
![]() Sherie Rodrigues a écrit:
Sherie Rodrigues a écrit:
To all the knitters who commented and asked questions, and to all the staff who answered the questions, I say THANK YOU. Without your help I may not have worked the pattern out by myself, but I am so glad I did. It is simple, when the light bulb goes off. I would suggest you look at the questions and answers until it makes sense. I do so LOVE this pattern . Thanks again everyone. Regards and happy knitting.
10.06.2020 - 15:30
![]() Karren a écrit:
Karren a écrit:
Thank you so much for the guidance in my pattern. I am almost finished and think I will love it. Karren
18.04.2020 - 01:05
![]() Karren a écrit:
Karren a écrit:
I do not understand what I am supposed to do on the wrong side of the pattern in between the increase rows. The increases occur on the right side. Does the ribbing continue through out the whole pattern?
17.04.2020 - 00:53DROPS Design a répondu:
Dear Karren, you increase in the P-sections seen from RS (these sts are worked K from WS), when working from WS you will K over K and P over P, and the number of K stitches from WS will increase (then decrease on the 2nd half of piece) as the P stitches from WS increases. Happy knitting!
17.04.2020 - 09:01
![]() Judith a écrit:
Judith a écrit:
I was sold a yarn that gets 2 st/inch on an 8 needle and is not too stiff. will the pattern work as written? Do I knit first stitch, then do the edge stitch? hat seem strange to me, so I am asking. I thought the edge stitch would be first. Thank you
16.12.2019 - 04:45DROPS Design a répondu:
Dear Judith, please check your tension - read more here about tension. Pattern is worked in rib with 1 edge stitch in garter stitch on each side. Happy knitting!
16.12.2019 - 09:10
![]() Shannon a écrit:
Shannon a écrit:
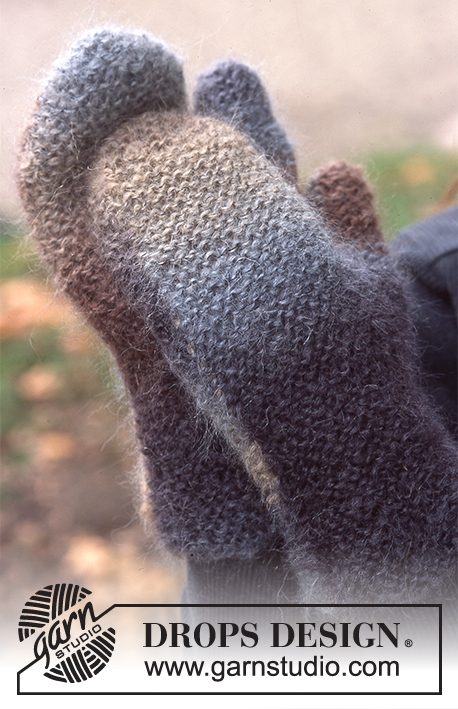
What is the multi colored yarn in the second picture?
14.12.2019 - 04:07DROPS Design a répondu:
Dear Shannon, in the second picture, the mittens are made with Vivaldi ( from group C) but this yarn is discontinued. Happy knitting!
15.12.2019 - 18:41
|
|
Saturn Rings |
|
|
|
|
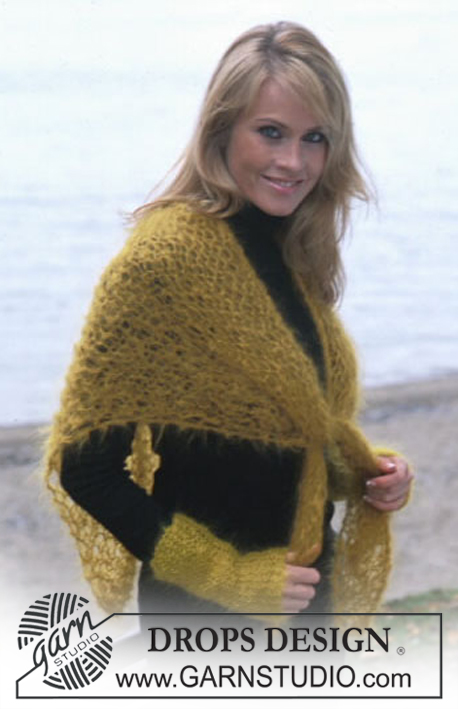
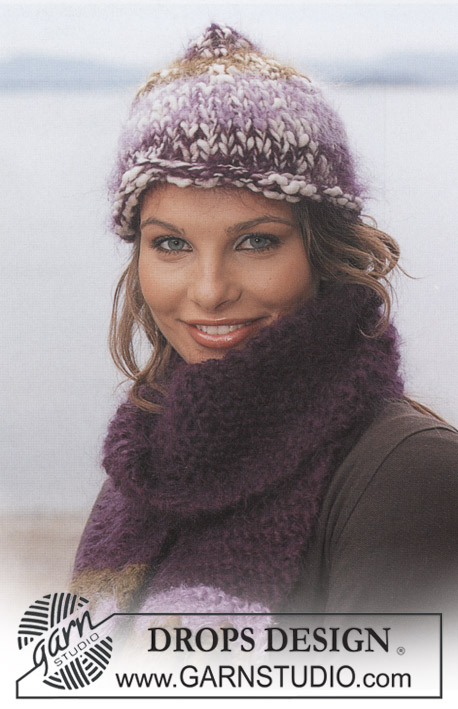
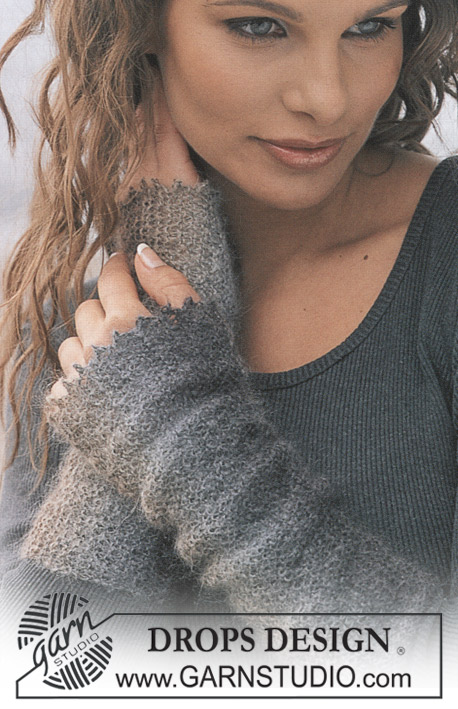
Bandeau Drops en Alaska et Châle en Vienna
DROPS 86-10 |
|
|
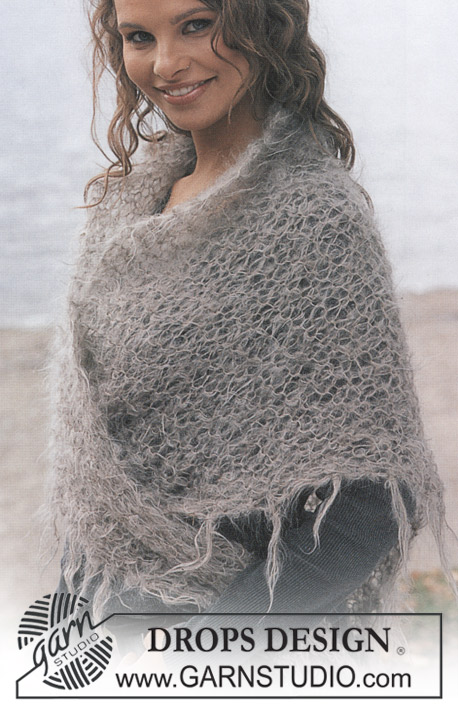
ÉCHANTILLON : 18 m x 23 rangs = 10 x 10 cm BANDEAU: Commencer par le milieu dos. Monter 19 mailles, et tricoter en côtes ainsi : R 1 (endroit) : 1 m lis au point mousse, *2 m end, 1 m env* répéter de *à* 5 fois, terminer par 2 m end, 1 m lis au point mousse R 2 (envers) : 1 m lis au point mousse, *2 m env, 1 m end* répéter de *à* 5 fois , terminer par 2 m env, 1 m lis au point mousse Faire toutes les augmentations sur l’endroit. A 8 cm de hauteur totale, augmenter 1 m envers dans toutes les sections envers = 24 mailles A 14 cm de hauteur totale, augmenter 1 m envers dans toutes les sections 2 m envers = 29 m A 18 cm de hauteur totale, augmenter 1 m envers dans toutes les sections 3 m envers = 34 m A 21 cm de hauteur totale, augmenter 1 m envers dans toutes les sections 4 m envers = 39 m A 24 cm de hauteur totale, placer un marqueur = c’est le milieu du tour de tête. Ensuite, inverser la mise en forme, mesurer à partir du marqueur A 3 cm de hauteur du marqueur, diminuer 1 m envers dans toutes les sections 5 m envers = 34 m A 6 cm de hauteur du marqueur, diminuer 1 m envers dans toutes les sections 4 m envers = 29 m A 10 cm de hauteur du marqueur, diminuer 1 m envers dans toutes les sections 3 m envers = 24 m A 16 cm du marqueur, diminuer 1 m envers dans toutes les sections 2 m envers = 19 m A 48 cm de hauteur totale, joindre au rang de montage ( ne pas rabattre les mailles avant de coudre). --------------------------------------------------- CHÂLE DROPS en VIENNA Dimensions : Longueur milieu dos : environ 100 cm Largeur en haut : environ 205 cm. Fournitures : DROPS Vienna de Garnstudio 200 g coloris n° 43, brun clair Aiguilles Drops n° 15, + ou – grosses pour obtenir l’échantillon ÉCHANTILLON 5 m x 9 rangs = 10 x 10 cm au point mousse (tricoté très souplement) CHÂLE Monter 4 m et tricoter au point mousse, augmenter 1 m de chaque côté tous les 2 rangs en tricotant 2 fois la même m. Continuer à augmenter jusqu’à obtenir 50 mailles. L’ouvrage mesure environ 102 cm. Diminuer maintenant sur les mêmes côtés que les augmentations – diminuer tous les 2 rangs en tricotant les 2 premières/dernières m ensemble à l’endroit. Continuer à diminuer jusqu’à obtenir 4 mailles. L’ouvrage mesure environ 205 cm. rabattre toutes les mailles. Franges : nouer des franches le long des 2 côtés du châle, à environ 4-5 cm les unes des autres – commencer par la pointe. Couper 6 fils de 35 cm de long, plier en 2, passer la boucle obtenue dans la m au bord du châle, et passer les extrémités des fils à travers la boucle. |
|
Vous avez terminé ce modèle?Alors taguez vos photos avec #dropspattern ou bien présentez-les dans la galerie #dropsfan Vous avez besoin d'aide pour ce modèle ?Vous trouverez 16 tutoriels vidéo, une rubrique commentaires/questions et plus encore en vous rendant sur la page du modèle sur garnstudio.com © 1982-2026 DROPS Design A/S. Tous droits réservés. Ce document, y compris ces sous-sections, est protégé par les droits d'auteur (copyright). Apprenez-en davantage sur ce que vous pouvez faire avec nos modèles en bas de chacune des pages de notre site. |


Avec plus de 40 ans dans la conception de modèles tricot et crochet, DROPS Design offre l'une des plus vastes collections de modèles gratuits sur internet - traduits dans 17 langues. À ce jour, on compte 324 catalogues et 12290 modèles en français.
Nous nous efforçons de vous apporter le meilleur de ce que le tricot et le crochet peuvent vous offrir, inspiration et conseils mais également des fils de haute qualité à des prix incroyables! Vous souhaiteriez utiliser nos modèles autrement que pour un usage personnel? Vous pouvez lire ce que vous êtes autorisés à faire dans le Copyright en bas de page de chacun de nos modèles. Bon tricot!
Poster un commentaire sur le modèle DROPS 86-10
Nous aimerions connaître votre avis sur ce modèle !
Si vous souhaitez poser une question, merci de bien vouloir vérifier que vous avez choisi la bonne catégorie dans le formulaire ci-dessous afin d'accélérer la réponse. Les champs obligatoires sont indiqués par une *.