
Popular categories
Looking for a yarn?


Comments / Questions (4)
![]() Gun wrote:
Gun wrote:
Er det ikke forskjell på høyre og venstre vott når en strikker tommel?
02.03.2026 - 08:22DROPS Design answered:
Hei Gun. Ikke i denne oppskriften, men husk å forme arbeidet etter vask mens det fortsatt er vått. mvh DROPS Design
03.03.2026 - 08:42
![]() Nicole wrote:
Nicole wrote:
Good day, can this pattern be done with Eskimo yarn? Thank you
03.07.2019 - 13:00DROPS Design answered:
Dear Nicole, due to the tension, you should either work with 3 strands yarn group A (as Alpaca) or 1 strand group A + 1 strand group C (make sure you use yarn that can be felted). You'll find mittens with Eskimo but these are not felted. Happy knitting!
03.07.2019 - 13:35
![]() Ulli wrote:
Ulli wrote:
Hallo, ich möchte gerne wissen, wieviel diese Handschuhe wiegen. Wenn ich sie mit nur einer Farbe (auch mit 3 Fäden) stricken würde, benötige ich dann auch 300 g? Vielen Dank für die Antwort.
05.11.2018 - 11:30DROPS Design answered:
Liebe Ulli, dafür haben wir leider keine Erfahrung, da diese Handschuhen mit 3 verschiedenen Farben gestrickt werden. Mehr persönnliche Hilfen bekommen Sie von Ihrem DROPS Laden, auch telefonisch oder per E-mail. Viel Spaß beim stricken!
05.11.2018 - 13:26
![]() Jenny wrote:
Jenny wrote:
I love these!!!
29.07.2018 - 18:44
|
|
Gingersnaps#gingersnapsmittens |
|
 |
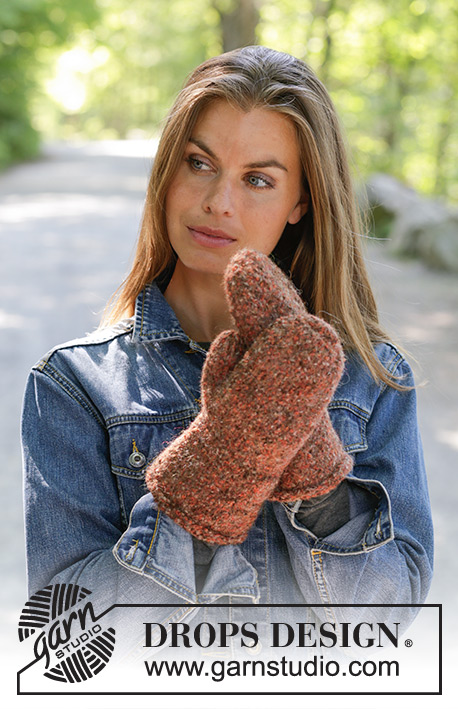 |
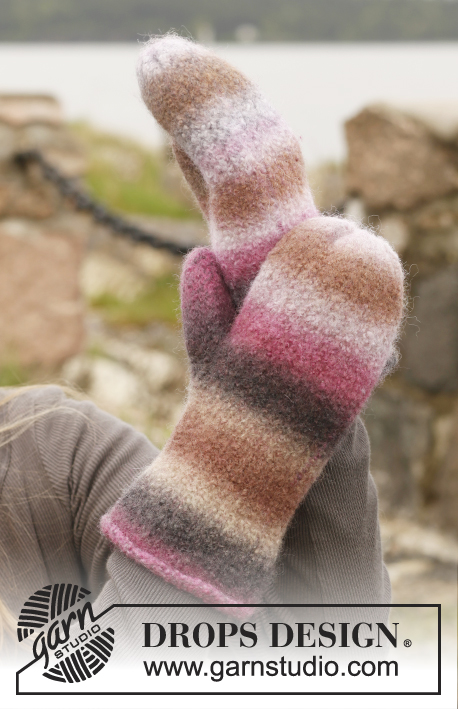
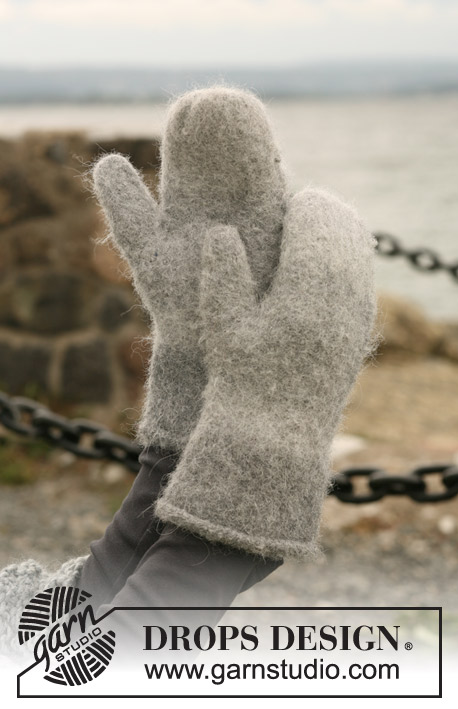
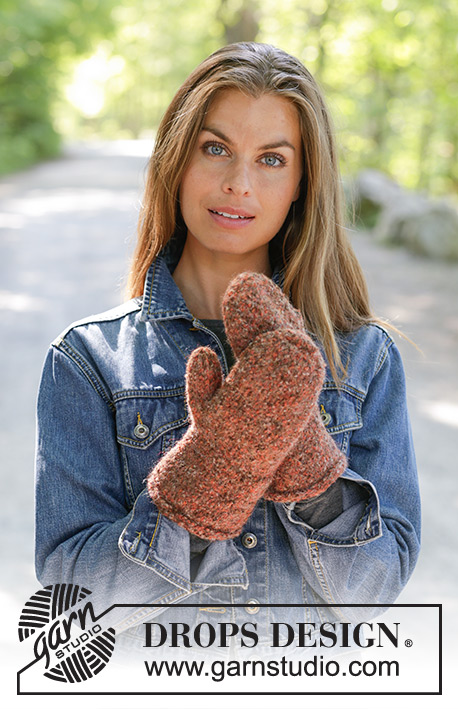
Knitted and felted mittens in 3 strands DROPS Alpaca.
DROPS 192-25 |
|
|
EXPLANATIONS FOR THE PATTERN: ------------------------------------------------------- DECREASE TIP (evenly spaced): To work out how to decrease evenly, count the total number of stitches on the needles (e.g. 52 stitches) and divide by the number of decreases to be made (e.g. 8) = 6.5. In this example, decrease by alternately knitting together each 5th and 6th stitch and each 6th and 7th stitch. INCREASE TIP: Increase 1 stitch by working 2 stitches in the same stitch (knit in front and back loop). ------------------------------------------------------- START THE PIECE HERE: ------------------------------------------------------- MITTENS - SHORT OVERVIEW OF THE PIECE: The piece is worked in the round with double pointed needles bottom up, towards the tip of the mitten. MITTEN: Cast on 52-52-56 stitches with double pointed needles size 5.5 mm and 1 strand of each colour (= 3 strands). The whole mitten is worked in stocking stitch - REMEMBER THE KNITTING TENSION! When the piece measures 8-9-10 cm decrease 8 stitches evenly on next round – read DECREASE TIP = 44-44-48 stitches. Continue working until the piece measures 14-15-16 cm. On the next round decrease 6-6-8 stitches evenly on round = 38-38-40 stitches. When the piece measures 15-16-17 cm insert 1 marker in the 19th-19th-20th stitch on the round (= mark for thumb). On the next round increase 1 stitch on each side of the stitch with the marker – read INCREASE TIP. Increase like this on the outside of the increased stitches every 2nd round a total of 4-4-5 times = 46-46-50 stitches. After the last increase, place the increased stitches + the stitch with the marker + 1 stitch on each side of these stitches on a thread for thumb = 11-11-13 thumb-stitches. Cast on 3 stitches behind the thumb-stitches = 38-38-40 stitches. The piece measures approx. 21-23-25 cm. Continue with stocking stitch in the round. When the piece measures 36-38-42 cm work all stitches together 2 and 2 = 19-19-20 stitches. When the piece measures 38-40-44 cm work all stitches together 2 and 2 one more time (where the number of stitches doesn’t fit, knit the last stitch) = 10-10-10 stitches. Cut the strand, pull it through the remaining stitches, pull tight and fasten well. THUMB: Place the 11-11-13 thumb-stitches on double pointed needles size 5.5 mm and knit up 5 stitches in the 3 increased stitches on the hand (i.e. knit up both in the stitches and between the stitches) = 16-16-18 stitches. Work stocking stitch in the round. When the thumb measures approx. 6-6-6½ cm from where it was divided from the mitten, decrease 4-4-6 stitches evenly on round = 12 stitches. Work 2 rounds. On the next round decrease 4 stitches evenly on round = 8 stitches. When the piece measures 8½-8½-9 cm work all stitches together 2 and 2 = 4 stitches. Cut the strand, pull it through the remaining stitches, pull tight and fasten well. Work one more mitten in the same way. FELTING: To avoid the thumb being felted to the mitten, turn it inside out and fasten a small plastic bag/silk ribbon over the top of the thumb with a safety pin. The opening of the safety pin should point towards the tip of the thumb so it is easy to remove after felting. Turn the mitten back to the right side, with the bag/ribbon inside the thumb. The piece can be felted either in the washing machine or the tumble dryer – read description below. Remember: Subsequent washes are as for a normal wool garment. IN WASHING MACHINE: Washing machines will vary when felting. If the piece is not felted enough, it can be felted again. If it is felted too much, it can be stretched to the correct size while still wet. DO THE FOLLOWING: Lay the piece in the washing machine and use a programme of approx. 40 minutes (not a wool programme). Wash at 40 degrees without pre-wash, detergent is optional. After washing, shape the piece while it is still wet. IN TUMBLE DRYER: Felting in a tumble dryer gives good control over the degree of felting. The tumble dryer can be opened during drying to check the size of the piece. If it is not felted enough it can be thoroughly wetted and felted again. If it is felted too much it can be stretched to the correct size while still wet. DO THE FOLLOWING: Lay the piece in water so it becomes completely wet, then place it in the tumble dryer and begin the drying process. Dry to the desired size, checking regularly. |
|
Have you finished this pattern?Tag your pictures with #dropspattern #gingersnapsmittens or submit them to the #dropsfan gallery. Do you need help with this pattern?You'll find 9 tutorial videos, a Comments/Questions area and more by visiting the pattern on garnstudio.com. © 1982-2026 DROPS Design A/S. We reserve all rights. This document, including all its sub-sections, has copyrights. Read more about what you can do with our patterns at the bottom of each pattern on our site. |
|


With over 40 years in knitting and crochet design, DROPS Design offers one of the most extensive collections of free patterns on the internet - translated to 17 languages. As of today we count 324 catalogues and 12252 patterns translated into English (UK/cm). 12252
We work hard to bring you the best knitting and crochet have to offer, inspiration and advice as well as great quality yarns at incredible prices! Would you like to use our patterns for other than personal use? You can read what you are allowed to do in the Copyright text at the bottom of all our patterns. Happy crafting!
Post a comment to pattern DROPS 192-25
We would love to hear what you have to say about this pattern!
If you want to leave a question, please make sure you select the correct category in the form below, to speed up the answering process. Required fields are marked *.