
Categorie popolari
State cercando un filato?


Commenti / Domande (21)
![]() Unni Sand ha scritto:
Unni Sand ha scritto:
Allerede på p 2 går det galt for mig. Når der er slået 36 masker op og rapporter går hen over 5 masker, er der jo en maske til overs til sidst. 5 m x 6 ganger = 35 m. Ikke 36 m. Hvad forstår jeg ikke?
14.01.2024 - 18:34DROPS Design ha risposto:
Hej Unni, jo 2 kantmasker diagram A.1=5m x 6 = 30m + 2 første m i A.1 + 2 kantmasker = 36m
16.01.2024 - 14:15
![]() Ilona ha scritto:
Ilona ha scritto:
Kupiłam włóczki tyle ile w opisie (i takiej jak w opisie). Skończyła mi się właśnie cała gruba włóczka i mam może jakiś metr szalika. Natomiast tej cienkiej mam jeszcze 2,5 motka. Chyba coś jest nie tak w opisie. Rozczarowanie.
25.02.2023 - 17:09DROPS Design ha risposto:
Witaj Ilono, niestety sama nie wykonywałam tego szalika, a w pozostawionych do niego komentarzach nie widzę żadnego związanego ze zbyt małą ilością włóczki. Na myśl przychodzi mi tylko pytanie czy przed wykonaniem wykonałaś próbkę i była ona zgodna z tą w opisie?
27.02.2023 - 08:55
![]() Sara ha scritto:
Sara ha scritto:
Hej jag skulle vilja att första och sista maskan på halsduken/kantmaskorna alltid blir räta från rätsidan Hur gör jag då? (Hur får jag kanten att inte bli varannan r varannan a utan bara r m från rätsidan/framsidan? )
13.01.2022 - 14:26DROPS Design ha risposto:
Hej Sara. Då får du sticka de räta från rätsidan och aviga från avigsidan, men tänk på att en slätstickad kant ofta rullar sig (det är därför man oftast gör kanter i rätstickning). Mvh DROPS Design
14.01.2022 - 14:12
![]() Lola ha scritto:
Lola ha scritto:
Bonjour, je ne comprends pas comment tricoter le premier rang : faut-il tricoter un rang à l'envers ou commencer directement par le motif A1 ? Merci !
24.11.2021 - 11:40DROPS Design ha risposto:
Bonjour Lola, vous tricotez d'abord 1 rang en mailles envers (ce rang est l'envers de l'écharpe) puis tricotez le rang suivant sur l'endroit avec le motif A.1 (=1er rang de A.1 = sur l'endroit). Bon tricot!
24.11.2021 - 15:42
![]() Zazou ha scritto:
Zazou ha scritto:
Bonjour, Je suis débutante en tricot et ne comprends pas le début de l'ouvrage. Si je dois faire 6x A1, donc 6x5 mailles = 30, que dois-je faire des 6 mailles restantes ? Dois-je commencer directement par le rang 1 de A1, ou faire le premier rang à l'envers ? Merci de m'éclairer ! Meilleures salutations, Zazou
21.02.2021 - 10:04DROPS Design ha risposto:
Bonjour Zazou, vous devez tricoter ainsi vos 36 mailles: 2 mailles au point mousse, répétez ensuite 6 fois les 5 mailles de A.1, il reste 4 mailles: tricotez les 2 premières mailles de A.1 (ainsi le motif est symétrique de chaque côté) et terminez par 2 mailles point mousse. Le 1er rang de A.1 se lit de droite à gauche sur l'endroit. Retrouvez ici plus d'infos sur les diagrammes. Bon tricot!
22.02.2021 - 08:39
![]() Oksana ha scritto:
Oksana ha scritto:
I watched the video before writing to you. But the matter is that on the video there is no " thread over the piece so that it is towards you", cause the thread is behind the work and there is no " slip yarn over purlwise" cause all the stitches within the pattern are Knitted. So please, - what to follow than - video or description? If description, please specify this place. thank you!
13.11.2019 - 14:56DROPS Design ha risposto:
Dear Oksana, the video is showing this row from the RS (as worked in the round), but you are here working back and forth, so that this row is worked from WS, the yarn should be towards you (ready to work the next purled st), then slip the yarn over, purl 3 sts, slip the yarn over and pass yarn behind work, ready to work next stitch which is a knitted stitch. Happy knitting!
13.11.2019 - 15:34
![]() Pál Anikó Noémi ha scritto:
Pál Anikó Noémi ha scritto:
Sajnos nincs diagram ehhez a sálhoz.
12.11.2019 - 10:56DROPS Design ha risposto:
Kedves Anikó, köszönjük, hogy felhívta a figyelmünket a technikai hibára, ami javításra került, így már látható a diagram. Sikeres kézimunkázást kívánunk!
15.11.2019 - 02:48
![]() Ulrika ha scritto:
Ulrika ha scritto:
Hej, diagrammet går inte att se. Under rubriken Diagram finns endast en liten ruta, som inte går att klicka på eller annat. Jag har köpt garn och skulle börja sticka, men nu går det inte, då diagrammet inte syns, vad har hänt? MVH Ulrika
06.04.2019 - 17:08DROPS Design ha risposto:
Hej. Nu finns diagrammet även på den svenska översättningen. Mvh DROPS Design
08.04.2019 - 08:57
![]() Jas Chua ha scritto:
Jas Chua ha scritto:
Diagram A1 first row, last 2 sts, is it a K2 tog?
21.03.2019 - 11:02DROPS Design ha risposto:
Dear Mrs Chua, last 2 sts should be purled together - diagram text will be edited. Thank you, happy knitting!
21.03.2019 - 12:41
![]() Cathy ha scritto:
Cathy ha scritto:
Ik vind het patroon onduidelijk of mis ik iets? 36 steken opzetten, de eerste 2 steken in ribbelsteek, 6x 5steken in A1 en dan blijf ik met 4 steken over... Als het patroon alle naalden langs de goede zijde weergeeft, hoe wordt de teruggaande naald gebreid? Dank voor uw reactie.
29.12.2018 - 18:05DROPS Design ha risposto:
Dag Cathy,
Nadat je 6 keer A.1 hebt gebreid, brei je de volgende 2 steken alleen de eerste 2 steken van A.1, dan nog 2 steken in ribbelsteek.
01.01.2019 - 19:15
|
||||||||||||||||||||||||||||
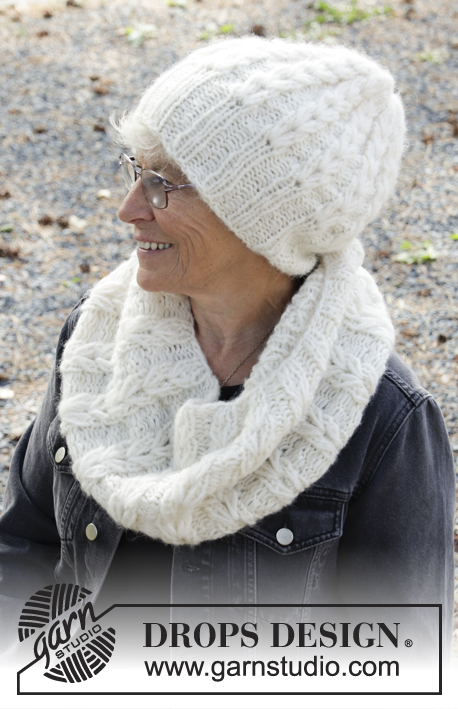
Polar Winter#polarwinterscarf |
||||||||||||||||||||||||||||
 |
 |
|||||||||||||||||||||||||||
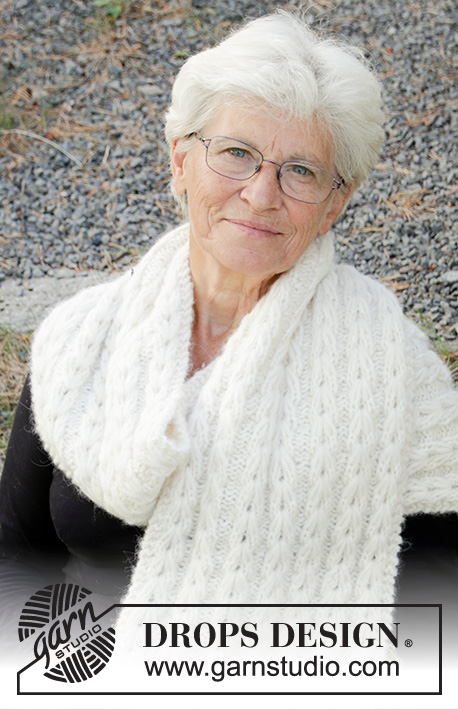
Sciarpa ai ferri in DROPS Air e DROPS Brushed Alpaca Silk. La sciarpa è lavorata avanti e indietro con un motivo a punto fantasia
DROPS 192-20 |
||||||||||||||||||||||||||||
|
---------------------------------------------------------- TECNICHE IMPIEGATE: ---------------------------------------------------------- PUNTO LEGACCIO (avanti e indietro sui ferri): 1 costa a legaccio = lavorare 2 ferri a diritto. MOTIVO: Vedere i diagrammi A.1 e A2. I diagrammi mostrano tutti i ferri del motivo, visti sul diritto del lavoro. ---------------------------------------------------------- IL LAVORO INIZIA QUI: ---------------------------------------------------------- SCIARPA - BREVI INDICAZIONI PER IL LAVORO: Si lavora avanti e indietro sui ferri circolari. SCIARPA: Avviare 36 maglie sui ferri circolari n° 7 con 1 capo del filato Air + 1 capo del filato Brushed Alpaca Silk (= 2 capi). Lavorare 1 ferro a rovescio sul rovescio del lavoro, Proseguire come segue sul diritto del lavoro: 2 maglie a PUNTO LEGACCIO - vedere le indicazioni sopra, ripetere il diagramma A.1 (= 5 m) 6 volte in tutto in larghezza, lavorare le prime 2 maglie del diagramma A.1, 2 maglie a punto legaccio. Durante il primo ferro, diminuire 6 maglie (le diminuzione sono indicate nel diagramma) = 30 maglie. Al 3° ferro aumentare 7 maglie (gli aumenti sono indicati nel diagramma) = 37 maglie. Dopo aver lavorato il diagramma A.1 una volta in verticale, ripetere gli ultimi 6 ferri del diagramma finché il lavoro non misura 151 cm. RICORDARSI DI MANTENERE LA CORRETTA TENSIONE DEL LAVORO! Lavorare ora il diagramma A.2 (= 5 m) su ogni ripetizione del diagramma A.1. Al 5° ferro del diagramma A.2, diminuire 7 maglie (le diminuzioni sono indicate nel diagramma) = 30 maglie. Al 7° ferro, aumentare 6 maglie (gli aumenti sono indicati nel diagramma) = 36 maglie. Dopo aver lavorato il diagramma A.2 una volta in verticale, la sciarpa misura circa 156 cm. Intrecciare le maglie lavorando a diritto le maglie a diritto e a rovescio le maglie a rovescio. |
||||||||||||||||||||||||||||
Spiegazioni del diagramma |
||||||||||||||||||||||||||||
|
||||||||||||||||||||||||||||
 |
||||||||||||||||||||||||||||
Avete terminato questo modello?Allora taggate le vostre foto con #dropspattern #polarwinterscarf o inviatele alla #dropsfan gallery. Avete bisogno di aiuto con questo modello?Troverete 16 video tutorial, una sezione per i commenti/domande e molto altro guardando il modello su www.garnstudio.com © 1982-2026 DROPS Design A/S. Ci riserviamo tutti i diritti. Questo documento, compreso tutte le sue sotto-sezioni, è protetto dalle leggi sul copyright. Potete leggere quello che potete fare con i nostri modelli alla fine di ogni modello sul nostro sito. |
||||||||||||||||||||||||||||


Con oltre 40 anni di esperienza nel design di modelli di maglia e uncinetto, DROPS Design offre la più estesa collezione di modelli gratuiti su internet - tradotti in 17 lingue. Ad oggi vi possiamo fornire 324 cataloghi e 12290 modelli - 9561 dei quali sono tradotti in Italiano.
Ci stiamo impegnando molto per darvi il meglio che vi possiamo offrire in termini di maglia e uncinetto, ispirazioni e consigli così come filati di grande qualità ad un prezzo incredibile! Volete utilizzare i nostri modelli per qualcosa d'altro oltre al vostro uso personale? Potete leggere tutto ciò che è consentito nel testo sul Copyright in basso su tutte le pagine dei nostri modelli. Buon lavoro!
Lasciare un commento sul modello DROPS 192-20
Noi saremmo felici di ricevere i tuoi commenti e opinioni su questo modello!
Se vuoi fare una domanda, fai per favore attenzione a selezionare la categoria corretta nella casella qui sotto per velocizzare il processo di risposta. I campi richiesti sono indicati da *.