
Categorie popolari
State cercando un filato?


Commenti / Domande (9)
![]() Michelle ha scritto:
Michelle ha scritto:
When moving from m1 to m2 what do I do with the first two stitches when they move over
24.02.2026 - 18:19DROPS Design ha risposto:
Hi Maichelle, row 13: at the beginning put 2 sts on a cable needle behind the work (2 first sts in M1 diagram), then K 2, P 2 from the cable needle. Happy knitting!
08.04.2026 - 15:29
![]() Barbara Vagianos ha scritto:
Barbara Vagianos ha scritto:
How is the best way to adjust this pattern for a larger size? I want to make it for a 34.5 inch bust. Should I try to get a larger gauge and following the instructions for size L or should I add more cable repeats? Thanks for your help.
29.08.2025 - 16:59DROPS Design ha risposto:
Dear Barbara, if you modify the gauge then it will be difficult to ensure that you have the correct gauge when working the different steps of the pattern. It would be best to cast on more initial stitches and work more cable repeats for a larger size. Happy knitting!
31.08.2025 - 20:54
![]() Petra Mannsshardt ha scritto:
Petra Mannsshardt ha scritto:
Wie ist das zu verstehen? Ich habe die Schultern zusammen genäht und wollte jetzt den Halsausschnitt sticken. 80 Maschen Plus die ca 88 Maschen vom hilfsfaden aufnehmen? Das kommt mir so viel vor. Da ich „Anfängerin“ bin , kenne ich mich da nicht so aus.
09.04.2024 - 13:29
![]() Jean Grimble ha scritto:
Jean Grimble ha scritto:
I am reading the chart. I have 208 stitches on my needles. The chart says to knit 5 repeats of Pattern 1 (80 sts) , then Pattern 2 one time (16 stiches) for a total of 96 stitches. Repeat that sequence and you have 192 stitches, leaving 16 stitches. Am I to knit 8 stiches either side of the cables????? The photo of the pattern does not indicate this. Bear with me, this is my first time reading a chart!!! I am sure this is my confusion!!
30.06.2023 - 17:05DROPS Design ha risposto:
Dear Jean, the repeats are not horizontally but rather vertically. That is, you will work 1st row of M.1 on the whole row, then the 2nd row of M.1, e.t.c. After working all rows of M.1, instead of working M.2 you need to work M.1 again, until you have worked all of M.1 5 times vertically in total. On the next row, work 1st row of M.2, which will displace the pattern slightly, as explained in the pattern. After the last row of M.2, start working M.3 and repeat M.3 until you reach the final measurements. Happy knitting!
30.06.2023 - 21:09
![]() Ellen Rachich ha scritto:
Ellen Rachich ha scritto:
Your instructions are not very clear when decreasing or armholes...please explain when we start knitting front And start decreasing
03.04.2021 - 22:22DROPS Design ha risposto:
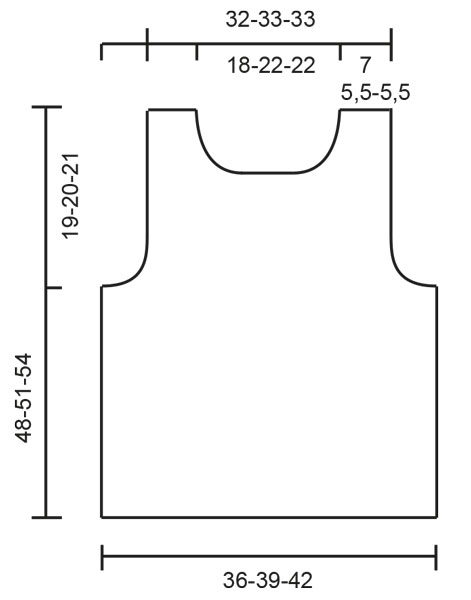
Dear Ellen, the numbers that are not in the description can be calculated from teh schematic drawing: you start decreasing for the armhole, when the piece is 29-31-33 cm long (depending on the size you are making). Happy Knitting!
04.04.2021 - 21:30
![]() Ellen Rachich ha scritto:
Ellen Rachich ha scritto:
How can I make this into a vneck for size small?
16.03.2021 - 20:12DROPS Design ha risposto:
Dear Mrs Rachich, we are unfortunately not able to adjust every pattern to every single request - please contact your yarn store for any assistance adjusting the pattern to your own wishes. Thanks for your comprehension. Happy knitting!
17.03.2021 - 08:37
![]() Robyn ha scritto:
Robyn ha scritto:
For shaping the shoulders; since the middle 28 stitches are on a stitch holder how can I continue knitting in full rows? Surely I'll have to focus on one shoulder at a time rejoining the yarn for the second shoulder? Can you clarify?
21.06.2020 - 23:23DROPS Design ha risposto:
Dear Robyn, after you have slipped the middle 28 sts for neck on a thread/stitch holder, continue each shoulder separately continuing dec for armhole as before and slipping more sts on same thread for neck. When first shoulder is finished, just work the 2nd one the same way but mirrored. Happy knitting!
22.06.2020 - 08:45
![]() Robyn ha scritto:
Robyn ha scritto:
I don't understand how to continue after the last part of the Body instruction, "Knit the rest of each part separately." Doesn't that mean I'll have to cut and rejoin the yarn for the back? Thank you
16.06.2020 - 00:18DROPS Design ha risposto:
Dear Robyn, that's right you will slip all stitches for back piece on a thread or on a extra needle and continue first front piece, then join yarn to work back piece to the end. Happy knitting!
16.06.2020 - 09:04Heather ha scritto:
What does this mean at the front "then put sts at each neck edge on the st holder every other row: 2 sts 2 times, 1 st 2 times = 40-48-48 sts on the st holder and 19-17-17 sts on each shoulder". I normally bind off for neck shaping, not sure about the way this is worded. Can you explain a little more in detail what I am to do here. I am stuck at this point and no local yarn store to assist. Thanks.!
19.07.2017 - 20:48DROPS Design ha risposto:
Dear Heather, When working rows from neckline work the first 2 sts, then put them on the same st holder as sts for neckline, work to the end of row, work next row as before, then at the beg of next row work the first 2 sts and slip them on the st holder, continue row as before, work next row, then at the beg of next row, work the first st and slip it on the st holder. Repeat the last 2 rows = 6 sts are slipped on the st holder. Happy knitting!
20.07.2017 - 09:34
|
|||||||||||||||||||
Whiteout#whiteouttop |
|||||||||||||||||||
 |
 |
||||||||||||||||||
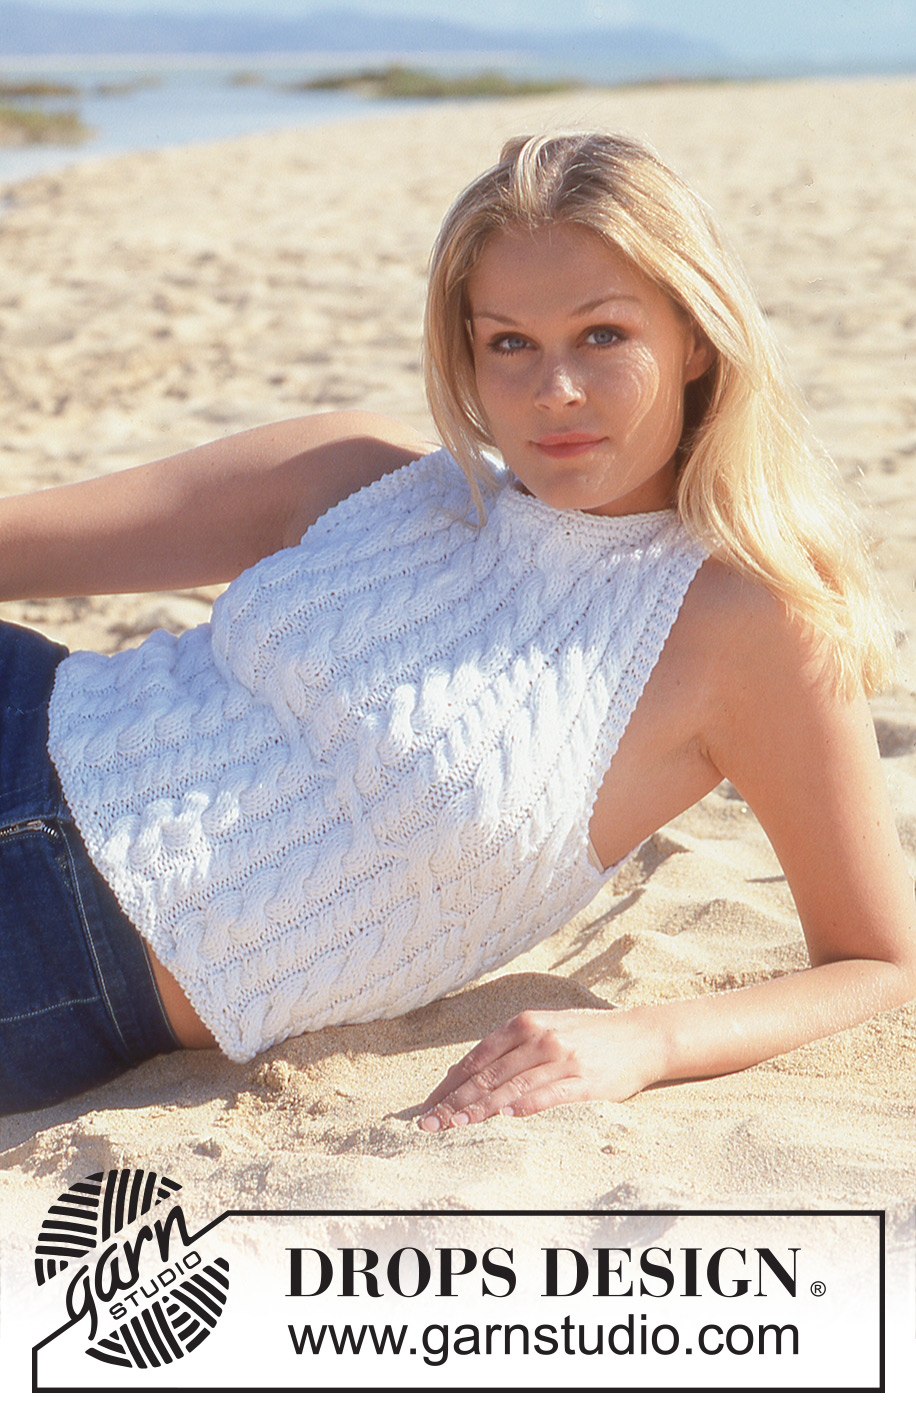
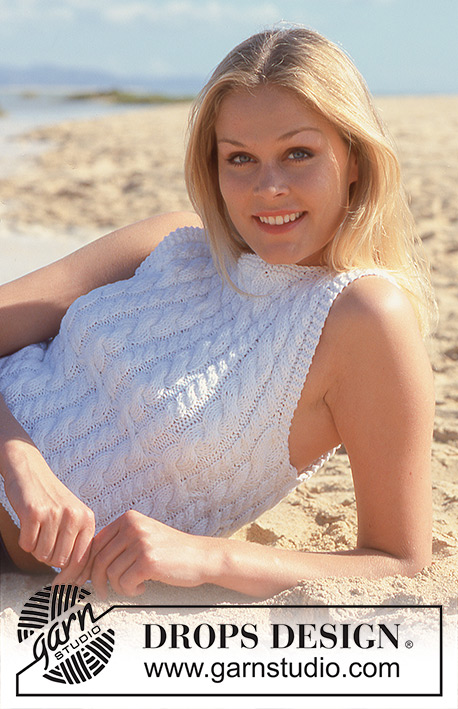
Top DROPS con trecce in Paris.
DROPS 64-9 |
|||||||||||||||||||
|
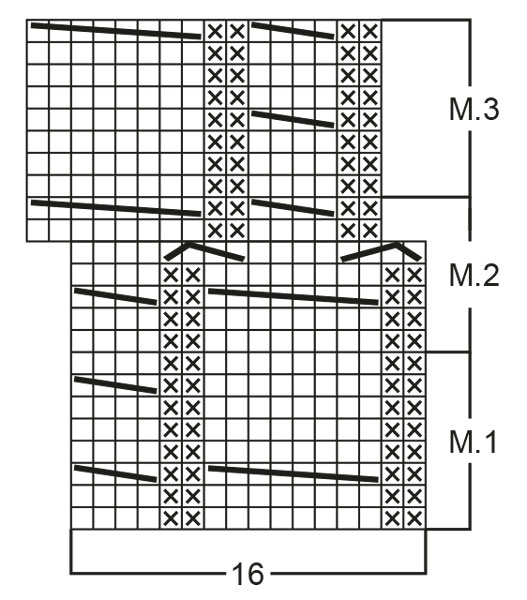
SUGGERIMENTO PER IL LAVORO: Fare tutte le diminuzioni sul diritto del lavoro come segue: Diminuire 2 m: Dopo le 3 m di vivagno: passare 1 m a dir senza lavorarla, 2 m insieme a dir, accavallare la m passata sopra quelle appena lavorate. Prima delle 3 m di vivagno: 3 m insieme a dir. Diminuire 1 m: Dopo le 3 m di vivagno: passare 1 m a dir senza lavorarla, 1 m dir, accavallare la m passata sopra quella appena lavorata. Prima delle 3 m di vivagno: 2 m insieme a dir. MOTIVO: Vedere il diagramma (1 diagramma = 1 ripetizione). Il motivo è visto dal diritto del lavoro. M LEGACCIO, avanti e indietro sui f: Lavorare tutti i f a dir. M LEGACCIO, in tondo: *1 giro dir, 1 giro rov*. Ripetere * - *. -------------------------------------------------------- CORPO: Avviare 130-140-152 m con i f circolari; unire e lavorare 4 f a m legaccio, distribuendo 62-68-72 aumenti in modo uniforme sull’ultimo f = 192-208-224 m. Lavorare 5 ripetizioni del motivo 1, poi il motivo 2 una volta (il motivo 2 sposta il motivo di 2 m – la treccia piccola diventa la treccia grande e vice versa). Poi lavorare il motivo 3 fino alla fine del lavoro. Quando il lavoro misura 28-30-32 cm, mettere dei segnapunti ai lati (davanti e dietro = 96-104-112 m ognuno). Assicurarsi che per la: TAGLIA S: una treccia piccola sia al centro davanti TAGLIE M & L: una treccia grande sia al centro davanti Continuare con il motivo a trecce come stabilito, ma lavorare 14 m a ogni lato, (7 m a ogni lato del segnapunti) a m legaccio, poi intrecciare 8 m a ogni lato (4 m a ogni lato del segnapunti) per gli scalfi. Lavorare il resto di ogni parte in modo separato. DAVANTI: = 88-96-104 m. Tenere 3 m a ogni bordo dello scalfo a m legaccio per tutto il lavoro e modellare lo scalfo diminuendo all’interno di queste 3 m di vivagno a f alterni: 2 m 2-2-4 volte, 1 m 1-3-3 volte = 78-82-82 m. Quando il lavoro misura 42-45-48 cm, mettere le 28-36-36 m centrali su un fermamaglie per il collo, poi mettere le m all’altezza di ogni bordo del collo sul fermamaglie a f alterni: 2 m 2 volte, 1 m 2 volte = 40-48-48 m sul fermamaglie e 19-17-17 m su ogni spalla. Quando il lavoro misura 47-50-53 cm, lavorare 1 f sulle m della spalla (f dal diritto del lavoro), distribuendo 3-2-2 diminuzioni in modo uniforme sul f = 16-15-15 m. Lavorare 2 f a m legaccio, intrecciare. DIETRO: = 88-96-104 m. Modellare gli scalfi a ogni lato come sul davanti = 78-82-82 m. Quando il lavoro misura 46-49-52 cm, mettere le 36-44-44 m centrali su un fermamaglie per il collo. Poi mettere 2 m all’altezza di ogni bordo del collo sul fermamaglie sul f successivo = 19-17-17 m rimaste su ogni spalla. Quando il lavoro misura 47-50-53 cm, lavorare 1 f sulle m della spalla (f dal diritto del lavoro), distribuendo 3-2-2 diminuzioni in modo uniforme sul f = 16-15-15 m. Lavorare 2 f a m legaccio, intrecciare. CONFEZIONE: Cucire i margini delle spalle. Riprendere circa 80-100 m con i f a doppia punta attorno al collo (comprese le m sui fermamaglie). Unire e lavorare 1 f a m rasata, distribuendo 14-20-20 m in modo uniforme sul f. Lavorare 4 f a m legaccio, intrecciare. |
|||||||||||||||||||
Spiegazioni del diagramma |
|||||||||||||||||||
|
|||||||||||||||||||
 |
|||||||||||||||||||
 |
|||||||||||||||||||
Avete terminato questo modello?Allora taggate le vostre foto con #dropspattern #whiteouttop o inviatele alla #dropsfan gallery. Avete bisogno di aiuto con questo modello?Troverete 23 video tutorial, una sezione per i commenti/domande e molto altro guardando il modello su www.garnstudio.com © 1982-2026 DROPS Design A/S. Ci riserviamo tutti i diritti. Questo documento, compreso tutte le sue sotto-sezioni, è protetto dalle leggi sul copyright. Potete leggere quello che potete fare con i nostri modelli alla fine di ogni modello sul nostro sito. |
|||||||||||||||||||


Con oltre 40 anni di esperienza nel design di modelli di maglia e uncinetto, DROPS Design offre la più estesa collezione di modelli gratuiti su internet - tradotti in 17 lingue. Ad oggi vi possiamo fornire 324 cataloghi e 12290 modelli - 9561 dei quali sono tradotti in Italiano.
Ci stiamo impegnando molto per darvi il meglio che vi possiamo offrire in termini di maglia e uncinetto, ispirazioni e consigli così come filati di grande qualità ad un prezzo incredibile! Volete utilizzare i nostri modelli per qualcosa d'altro oltre al vostro uso personale? Potete leggere tutto ciò che è consentito nel testo sul Copyright in basso su tutte le pagine dei nostri modelli. Buon lavoro!
Lasciare un commento sul modello DROPS 64-9
Noi saremmo felici di ricevere i tuoi commenti e opinioni su questo modello!
Se vuoi fare una domanda, fai per favore attenzione a selezionare la categoria corretta nella casella qui sotto per velocizzare il processo di risposta. I campi richiesti sono indicati da *.