
Categorie popolari
State cercando un filato?




















Commenti / Domande (112)
 Simone ha scritto:
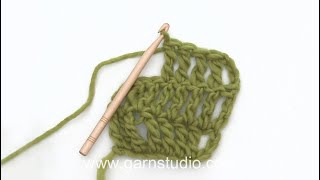
Habt ihr ein Video für das Muster A 1? Ich komme nicht hin, bin eigentlich auch ein Stricker, kein Häkler, aber das Modell hat mir so gut gefallen.
02.04.2017 - 20:12DROPS Design ha risposto:
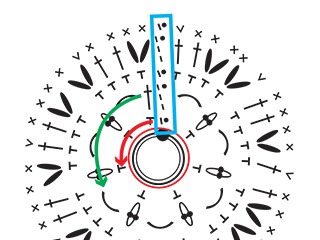
Liebe Simone, Beschreibung für jedes Zeichen finden Sie über Diagram, bei der 1. Reihe häkeln Sie links nach rechts (= *1 fM, 4 Lm, 2 Stb überspringen, 1 fM in den nächsten Stb*, von *-* wiederholen = 1 Rapport A.1), und bei Rückreihen rechts nach links lesen: 2. R = 3 Stb, 2 Lm, 3 Stb um den Lm-Bogen, 1 Stb um den nächsten Lm-Bogen. Viel Spaß beim häkeln!
03.04.2017 - 11:07
Simone ha scritto:
Beim Fächermuster dieses Modells verstehe ich "34 Rapporte in der Breite" nicht. Wenn ich meine 4 Luftmaschen alle 3 Stäbchen mit einer fM anhäkel komme ich allein je Hälfte (Mitte Rückenteil bis Mitte Vorderteil) auf 34 Rapporte. Was mache ich falsch?
30.03.2017 - 23:59DROPS Design ha risposto:
Liebe Simone, A.1 wird über 6 Stb gehäkelt, dann haben Sie 34 x 6 M = 204 M in der 2. Größe. Viel Spaß beim häkeln!
31.03.2017 - 09:06
 Corinne F ha scritto:
Bonjour Camilla, Je commence ce modèle pour la première fois avec vous et je vous remercie pour cette possibilité J'aimerais comprendre si je dois déjà commencer par le bas ou le haut et si je commence par le bas, il me semble que je dois réaliser les motifs mais je ne le vois pas clairement sur les explications Merci pour votre aide
20.03.2017 - 14:39DROPS Design ha risposto:
Bonjour Corinne, ce top se crochète de haut en bas, et les tours commencent au milieu dos. Suivez bien les indications pas à pas pour votre taille, et en même temps les diagrammes en les lisant de bas en haut, de droite à gauche sur l'endroit, et de gauche à droite sur l'envers. Vous trouverez en bas de page différentes vidéos pour vous aider. Bon crochet!
20.03.2017 - 15:43
 Camila ha scritto:
Tengo problemas con la fila en que se agregan los marcapuntos: Parto con 152 puntos (XL), pero no entiendo bien cómo si agregamos en total 6+12+6=24 ("AL MISMO TIEMPO" aumentar), terminamos con 160... como si sólo hubiésemos agregado 8 puntos. Quizás no estoy incrementando bien. Si me dice que debo aumentar 1-0-0-2-2-1 mientras hago 20 p.a.. lo que he hecho es hacer 2 p.a, al 3º aumento 1 en la misma cad. después hice 6 (0-0) y en el 12º hice 2 p.a más (total de 3 por cadena) ... y así.
17.11.2016 - 04:47DROPS Design ha risposto:
Hola Camila. Cuando dicen por ejemplo aum 1-0-0-2-2-1 pts (es decir que para la talla S aum 1 pt, para la talla M y L aquí no hay aum = 0, para la talla XL 2 pts y etc.) Cada número de la serie equivale a una talla.
19.11.2016 - 18:33
 Aline ha scritto:
Thank you. Then do I space the markers back by the two additional stiches or keep only 4 stiches in between?
15.10.2016 - 01:15DROPS Design ha risposto:
Dear Aline, if you have only crocheted 1 inc row (ie inc 1 st on each side of each marker) after inserting markers, you should have now 2 more sts between each marker. Happy crocheting!
17.10.2016 - 08:55
Aline ha scritto:
Another question: as we continue the crochet to rows 14 and 22, we will be very far from the marker. What then determines what "on either side of" or "before every" marker really means?
13.10.2016 - 23:04DROPS Design ha risposto:
Dear Aline, the 12 markers should follow work so that you keep them on place when increasing on each side of them or then before each of them. Happy crocheting!
14.10.2016 - 09:17
Aline ha scritto:
Good afteernoon. Lovely patterns. I am making your Lady Ascot top in XL and have 2 questions: When indicating: "repeat increase on every row from RS 7 times..." This means increasing by 24 tr - or 12as the case may be- every second row? When counting the increases, given we start with160, add 24tr 7 times and 12tr 4 times, should I not be ending with 396 stitches vs the indicated 376? Thank you, aline
13.10.2016 - 22:17DROPS Design ha risposto:
Dear Aline, you are inc 1 st on each side of each of the 12 markers a total of 7 times in size XL: 7x24 = 168 inc - then inc 1 st before each marker a total of 4 times: 4x12=48. There were 160 sts + 168+48=376sts. Happy crocheting!
14.10.2016 - 09:12
 Fay Powell ha scritto:
First of all, I love your patterns! I seldom have real difficulty following or adapting them. They are versatile, current, and gorgeous. I get many compliments on garments made from your patterns. On this particular Lady Ascot pattern, I was wondering if the single increases at the stitch markers need to be inside the markers or can they be right before the marker? Thank you so much for all you do. Fay
02.09.2016 - 00:28DROPS Design ha risposto:
Dear Mrs Powell, inc have to be done either on each side of markers (= inc in the st before marker + in the st after marker = 2 inc x 12 markers = 24 sts inc) then before each marker: work until 1 st remain before marker, inc 1 st, slip marker and continue until 1 st remain before next marker, etc - Markers are between sts, not in a st. Happy crocheting!
02.09.2016 - 08:28
 Maria ha scritto:
Solfjädersmönster är otydligt Hur ska man virka mönster A1???? Flera kommentatorer har antagit att man virkar varv1 i mönster A1 och sen varv2 i mönster A1. Därefter virkas varv3 i mönster A1 tills arb mäter ca 33cm. Detta torde vara det rätta Vänligen svara så att det går att begripa svaret Såsom det står i mönstret är inte tillräckligt
16.07.2016 - 13:48DROPS Design ha risposto:
Hej Maria, Ja du virkar varv 1+2+3 i A1 totalt 31-34-37-40-45-49 ggr och sedan varv 4 tills arb mäter ca 40-42-43-45-45-45 cm. Lycka till!
29.03.2017 - 09:09
Ducros Raymonde ha scritto:
Que signifie *-* après la pause des marqueurs faut'il augmenter de 2 brides ou 3 exemple après 17 brides du dos 2 brides dans la meme bride on a donc 3 brides ensemble merci de votre reponse
15.07.2016 - 10:49DROPS Design ha risposto:
Bonjour Mme Ducros, une fois que vous avez posé vos marqueurs, au tour suivant, vous augmentez 24 B au total, soit 2B de chaque côté de chaque marqueur (= crochetez 2 B dans la même B avant le marqueur et 2 B dans la même B après le marqueur), au dos par ex, on aura 17 + 2 augm = 19 B pour le dos après ce tour. Bon crochet!
15.07.2016 - 13:33
|
||||||||||||||||||||||||||||
Lady Ascot#ladyascottop |
||||||||||||||||||||||||||||
 |
 |
|||||||||||||||||||||||||||
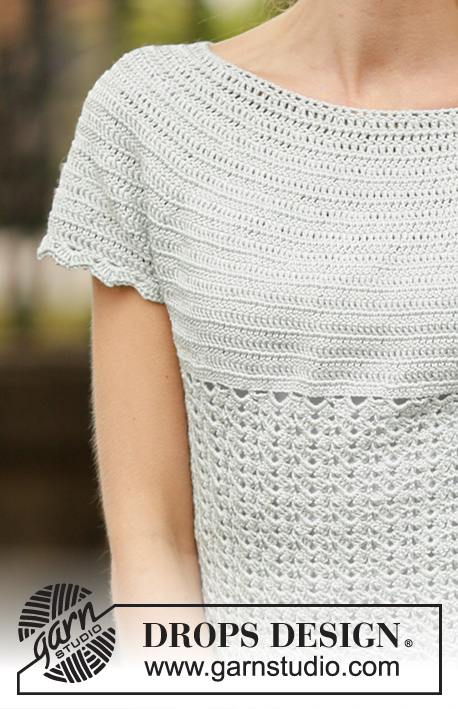
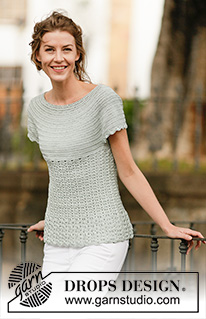
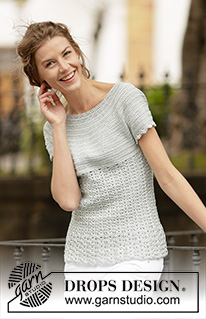
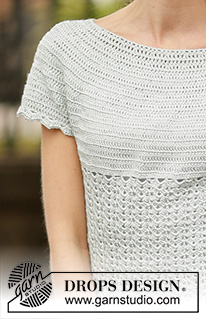
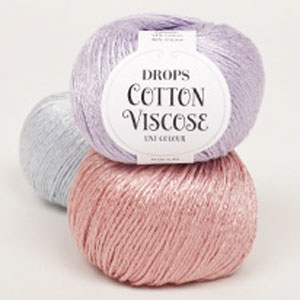
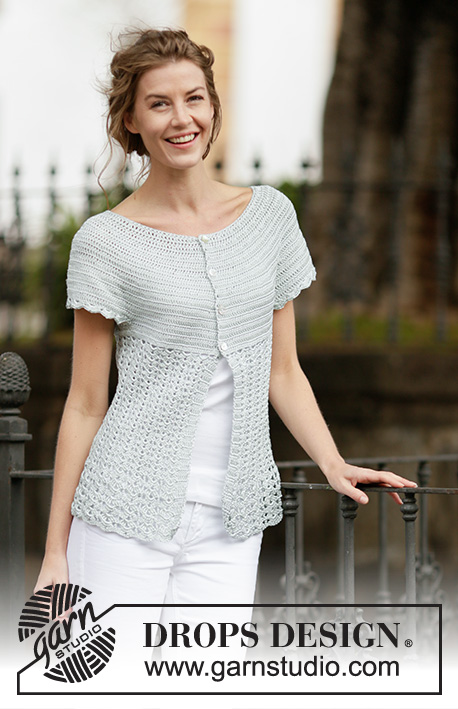
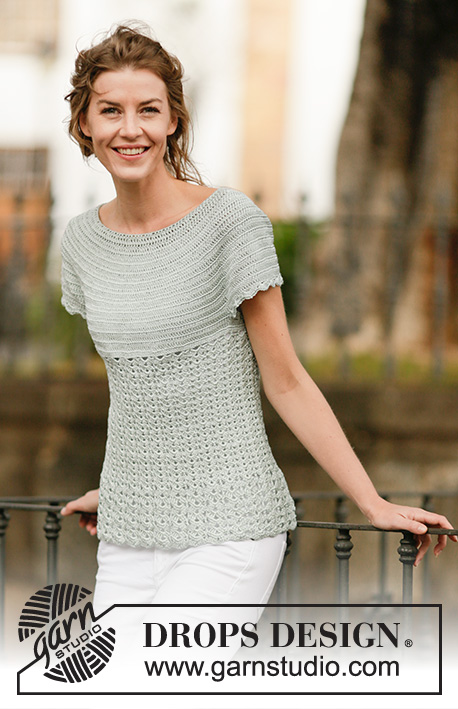
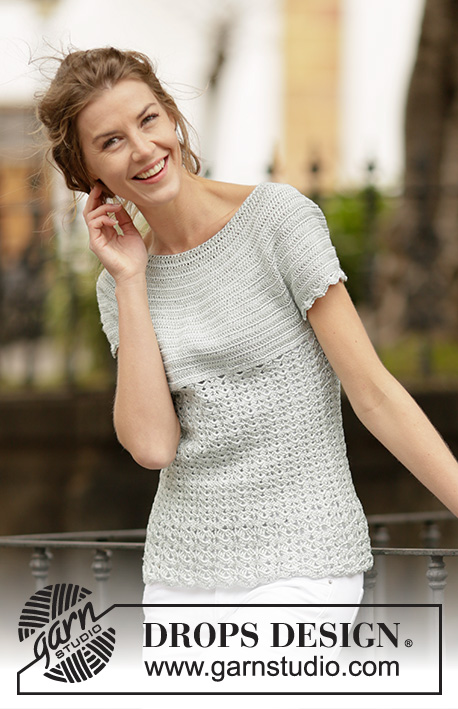
Top DROPS all’uncinetto, con motivo a ventaglio e sprone rotondo, lavorato dall’alto verso il basso (top down), in "Cotton Viscose". Taglie: Dalla S alla XXXL.
DROPS 162-26 |
||||||||||||||||||||||||||||
|
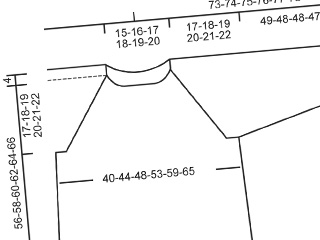
MOTIVO: Vedere i diagrammi A.1-A.2 INFORMAZIONI PER IL LAVORO-1: Sostituire la prima m.a di ogni riga di m.a con 3 cat; finire la riga con 1 m.bss nella 3a cat. INFORMAZIONI PER IL LAVORO-2: Iniziare ogni giro con 3 cat e finire ogni giro con 1 m.bss nella 3a cat. SUGGERIMENTO PER GLI AUMENTI: Per aumentare 1 m.a, lavorare 2 m.a nella stessa m.a. ---------------------------------------------------------- TOP: Si lavora dall’alto verso il basso con inizio al centro, sul dietro. Con l’uncinetto n° 3,5 ed il filato Cotton Viscose, avviare 133-137-142-147-152-157 cat e formare un anello con 1 m.bss nella prima cat. Lavorare il giro successivo, come segue: 3 cat (= 1 m.a), 1 m.a nella prima cat dell’anello di cat, * saltare 1 cat, 1 m.a in ognuna delle 5 cat successive *, ripetere da *-* finché non rimangono 0-4-3-2-1-0 cat, 1 m.a in ognuna delle ultime 0-4-3-2-1-0 cat = 112-116-120-124-128-132 m.a. Proseguire avanti e indietro. Finire ogni riga con 1 m.bss nella prima cat dall’inizio della riga - VEDERE LE INFORMAZIONI PER IL LAVORO -1. Girare il lavoro. Lavorare 1 riga con 1 m.a in ogni m.a e, ALLO STESSO TEMPO, aumentare 28 m.a a intervalli regolari (quindi aumentare 1 m.a dopo ca. ogni 4 m.a) – VEDERE IL SUGGERIMENTO PER GLI AUMENTI = 140-144-148-152-156-160 m.a. Inserire 12 segni, come segue: Lavorare 17-18-19-20-21-22 m.a (= metà dietro), ALLO STESSO TEMPO, aumentare 1-0-0-2-2-1 m.a a intervalli regolari, inserire il primo segno, * lavorare 4 m.a, inserire il segno successivo *, ripetere da *-* ancora 1 volta, lavorare 20 m.a, inserire il segno successivo, * lavorare 4 m.a, inserire il segno successivo *, ripetere da *-* ancora 1 volta, lavorare 34-36-38-40-42-44 m.a (= davanti), ALLO STESSO TEMPO aumentare 2-0-0-4-4-2 m.a a intervalli regolari, inserire il segno successivo, * lavorare 4 m.a, inserire il segno successivo *, ripetere da *-* ancora 1 volta, lavorare 20 m.a, inserire il segno successivo, * lavorare 4 m.a, inserire il segno successivo *, ripetere da *-* ancora 1 volta, lavorare 17-18-19-20-21-22 m.a (= metà dietro), ALLO STESSO TEMPO, aumentare 1-0-0-2-2-1 m.a a intervalli regolari = 144-144-148-160-164-164 m.a. RICORDARSI LA TENSIONE DEL LAVORO! Alla riga successiva sul diritto del lavoro, aumentare come segue: aumentare 1 m.a da ciascun lato di ogni segno (= 24 m.a aumentate), ripetere questi aumenti ad ogni riga sul diritto del lavoro 1-4-5-7-8-10 volte in tutto, poi aumentare prima di ogni segno (= 12 m.a aumentate), ripetere questi aumenti ad ogni riga sul diritto del lavoro 9-6-6-4-4-3 volte in tutto = 276-312-340-376-404-440 m.a. Il lavoro misura ca.18-18-20-20-22-23 cm. Lavorare la riga successiva come segue: 36-43-48-54-59-66 m.a (= metà dietro), lavorare 12 cat (inserire un segno al centro di queste nuove m = sotto manica), saltare 66-70-74-80-84-88 m.a della riga precedente (= manica), lavorare 72-86-96-108-118-132 m.a (= davanti), lavorare 12 cat (inserire un segno al centro di queste nuove m = sotto manica), saltare 66-70-74-80-84-88 m.a della riga precedente e lavorare 36-43-48-54-59-66 m.a (= metà dietro) = 168-196-216-240-260-288 m.a / cat (= 84-98-108-120-130-144 m.a /cat per il dietro e il davanti). Inserire 1 segno nel lavoro. DA ADESSO IN AVANTI, MISURARE IL LAVORO DA QUESTO PUNTO ! Lavorare 1 riga con 1 m.a in ogni m.a e 1 m.a in ogni cat sotto la manica e, ALLO STESSO TEMPO, aumentare 18-8-6-0-10-6 m.a a intervalli regolari = 186-204-222-240-270-294 m.a. Lavorare 1 riga con 1 m.a in ogni m.a. Lavorare ora in tondo senza girare il lavoro. MOTIVO A VENTAGLIO: Lavorare i giri 1 -3 del diagramma A.1 31-34-37-40-45-49 volte - VEDERE LE INFORMAZIONI PER IL LAVORO -2. Poi ripetere il giro 3 finché il lavoro non misura ca.29-31-31-33-31-31 cm. Lavorare ora il giro 4 finché il lavoro non misura ca.40-42-43-45-45-45 cm. Tagliare il filo. BORDO DELLA MANICA: Iniziare al centro, sotto la manica e lavorare come segue: Lavorare 1 m.b nella 6a cat delle 12 cat dello scalfo, 3 cat (= 1 m.a), 1 m.a in ognuna delle 6 cat successive, 1 m.a nella riga di m.a dove sono state lavorate le cat per lo scalfo, 1 m.a in ognuna delle 66-70-74-80-84-88 m.a successive (= manica); ALLO STESSO TEMPO, aumentare 0-4-0-2-6-2 m.a a intervalli regolari, 1 m.a nella riga di m.a dove sono state lavorate le cat per lo scalfo, 1 m.a in ognuna delle 5 cat rimanenti sotto la manica = 80-88-88-96-104-104 m.a. Ripetere il diagramma A.2 10-11-11-12-13-13 volte in tutto. Tagliare il filo quando il diagramma A.2 è stato lavorato 1 volta in verticale. Lavorare l’altro bordo della manica in modo uguale. |
||||||||||||||||||||||||||||
Spiegazioni del diagramma |
||||||||||||||||||||||||||||
|
||||||||||||||||||||||||||||
 |
||||||||||||||||||||||||||||
 |
||||||||||||||||||||||||||||
Avete terminato questo modello?Allora taggate le vostre foto con #dropspattern #ladyascottop o inviatele alla #dropsfan gallery. Avete bisogno di aiuto con questo modello?Troverete 14 video tutorial, una sezione per i commenti/domande e molto altro guardando il modello su www.garnstudio.com © 1982-2026 DROPS Design A/S. Ci riserviamo tutti i diritti. Questo documento, compreso tutte le sue sotto-sezioni, è protetto dalle leggi sul copyright. Potete leggere quello che potete fare con i nostri modelli alla fine di ogni modello sul nostro sito. |
||||||||||||||||||||||||||||

Con oltre 40 anni di esperienza nel design di modelli di maglia e uncinetto, DROPS Design offre la più estesa collezione di modelli gratuiti su internet - tradotti in 17 lingue. Ad oggi vi possiamo fornire 333 cataloghi e 12549 modelli - 9823 dei quali sono tradotti in Italiano.
Ci stiamo impegnando molto per darvi il meglio che vi possiamo offrire in termini di maglia e uncinetto, ispirazioni e consigli così come filati di grande qualità ad un prezzo incredibile! Volete utilizzare i nostri modelli per qualcosa d'altro oltre al vostro uso personale? Potete leggere tutto ciò che è consentito nel testo sul Copyright in basso su tutte le pagine dei nostri modelli. Buon lavoro!
Lasciare un commento sul modello DROPS 162-26
Noi saremmo felici di ricevere i tuoi commenti e opinioni su questo modello!
Se vuoi fare una domanda, fai per favore attenzione a selezionare la categoria corretta nella casella qui sotto per velocizzare il processo di risposta. I campi richiesti sono indicati da *.