
Categorie popolari
State cercando un filato?




















Commenti / Domande (112)
 Silvia ha scritto:
Buongiorno, ho una domanda relativa al motivo a ventaglio nel corpo della maglia: a lavoro terminato la parte visibile del motivo sará il dritto o il rovescio? E per le maniche invece? Grazie del Suo tempo
16.05.2020 - 15:44DROPS Design ha risposto:
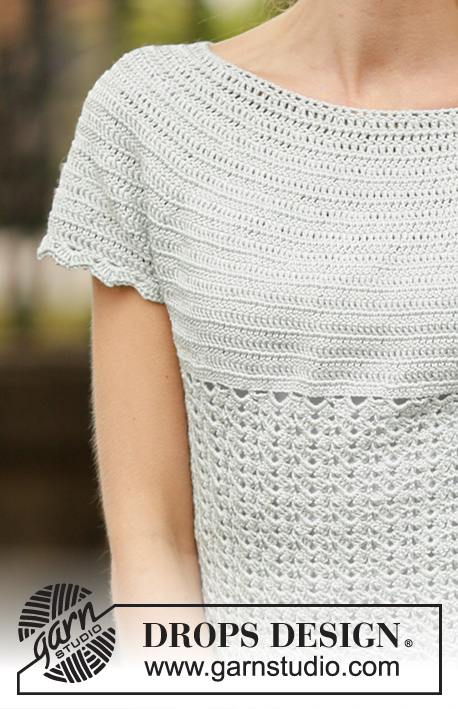
Buongiorno Silvia. A lavoro ultimato, la parte visibile è quella sul dritto del lavoro sia sul corpo che sulle maniche. Lavorando in tondo, è la parte che resta all'esterno del lavoro. La fotografia con il dettaglio del motivo può esserle di aiuto per verificare il risultato finale. Buon lavoro!
16.05.2020 - 17:13
 Alalith ha scritto:
TOP : size M. 137p.a Despues del trabajo de la ida y vuelta (back and forth) dice que se debe aumentar (talla M no tiene aumento). La blusa no tiene botones, a no ser que los tenga en la parte de atras. 137ch: 116 dc +28dc = 144dc. Repetir de *a*, ... Como se repiten los 18,4,20,4,36,4,20, 4,18=128? no se pueden repetir. Y la suma de los previos p.a. es 128 no 144. Agradecida por la valiosa ayuda.
09.04.2020 - 23:20DROPS Design ha risposto:
Hola Alalith. Lee atentamente el patrón. Los 4 puntos se trabajan 2 veces seguidas, no una, es decir 18+4+4+20+4+4+36+4+4+20+4+4+18 = 144 puntos.
12.04.2020 - 19:05
 Lily ha scritto:
Dear DROPS team, yes I have checked the tension, it is as said. What could have heppened then? I will try crocheting further, thank you!
09.04.2020 - 18:43
Lily ha scritto:
Hello, I'm making it in size S. Hook size as noted. But after this part „... times in total = 276-312-340-376-404-440 tr. Piece measures approx. 18... “ my piece does not measure 18cm, it's only 12cm. What should I do now? Thanks for the help!
09.04.2020 - 18:29DROPS Design ha risposto:
Dear Lily, did you check your tension? you should have 22 tr (UK) / dc (US) x 12 rows = 10 x 10 cm. If your tension in width is right, you can probably continue working as before (but do not increase anymore) until piece measures 18 cm. Try on and check if pattern is working, otherwise you should check again your tension, your store will help you providing any individual assistance required, even per mail or telephone. Happy crocheting!
09.04.2020 - 18:36
 Maria ha scritto:
About my last comment. I did not say I don't understand your patterns. I absolutely do and they are amazing and I always make something of your collection. I just wanted to note that writing everything in one big text is hard do follow. Whe I finish the line I always have to read the text from the top and see where I have stopped... It's just a little bit messy trying to keep up with your text and find which row I'm at.
09.04.2020 - 18:24
 Alalith ha scritto:
I am making size M there is no increase for the beginning of the yoke, it counts 128 (18+4+20+4+36+4+20+4+18), but at I ended up having 16 left. How is it?. The pretty blouse I am making is not open ( no buttons). I don't understand. Would you please help me? Thank you.
09.04.2020 - 03:17DROPS Design ha risposto:
Dear Alalith, the fundation chain is often too tight, that's the reason why we crochet here 137 chains when we only require 116 stitches on first row, ie working as explained will allow you to skip chains evenly and keep the first row being loose enough and not too tight. Happy crocheting!
09.04.2020 - 17:47
Alalith ha scritto:
I don't know what it means or how to work the part it says: until 0-4-3-2-1-0 ch remain, 1 dc in each of the last 0-4-3-2-1-0 ch = 112-116-120-124-128-132 dc until 0-4-3-2-1-0 ch remain, 1 dc in each of the last 0-4-3-2-1-0 ch = 112-116-120-124-128-132 dc. It is a little confuse for me. Thank yoy!
08.04.2020 - 03:55DROPS Design ha risposto:
Dear Alalith, each number refers to the size, for example in size M = 2nd size, you will crochet from *-* until 4 chains remain, and finish with 1 dc in each of the last 4 chains = there are now 116 dc. Happy crocheting!
09.04.2020 - 16:20
Maria ha scritto:
Could you reconsider writing your patterns in a more understandable way? It would be much easier not to get lost in a one big text if you just wrote like this: Row 1:... Row 2:... Now it's very easy to get lost and get confused at which point I am...
03.04.2020 - 14:12DROPS Design ha risposto:
Dear Maria, the DROPS patterns are knitted and crocheted by thousands and thousands of people around the world. We understand however that in certain countries, with different knitting/crochet traditions than Scandinavia, our patterns might be written in a way that differs from what some are used to. But of course we want everyone to understand our patterns, so that’s why we have created an extensive library of tutorial videos as well as step by step lessons that explain how to follow the techniques we use and how to read the diagrams in our patterns. Give them a try!
03.04.2020 - 14:33
 Fleur Høg ha scritto:
Jeg forstår simpelthen ikke diagrammet A1 og så beskrivelsen, ifht billedet af trøjen. Det er teknisk umuligt at hækle række 1 igen efter række 3, så blir mønsteret ikke over hinanden. Og på billedet ligner det at nederst er der skiftevis række 3 og 4. Og ikke KUN 4,som der står skrevet. Min hæklefadthed passer perfekt, og målene passer, men mønsteret begynder midt på mit bryst og ikke under, og jeg har en kort krop. Må indrømme at det er lidt en underlig opskrift. 🤔
27.01.2020 - 21:13DROPS Design ha risposto:
Hei Fleur. Du skal ikke hekle 1. omgang etter 3. omgang. Det er kun 3. omgang som gjentas til arb måler ca 29-31-31-33-31-31 cm. Man ser på bildet at viftemønstrer er litt tettere på "mellompartiet" da viftemønster består av 1 stav + 1 stavgruppe (3 staver + 2 luftmasker + 3 staver om sammen luftmaskebue). Mens viftemønstret i A.4 er større (viftemønstret består av 1 dobbeltstav + 1 dobbeltstavgruppe (3 dobbeltstaver + 2 luftmasker + 3 dobbeltstaver om sammen luftmaskebue). Deretter hekles 4.omgang til A.1 til arbeidet måler ca 40-42-43-45-45-45 cm. mvh DROPS design
10.02.2020 - 13:55
 Pascale Repoussard ha scritto:
Pouvez-vous m'envoyer le diagramme du pull svp? merci
15.10.2019 - 16:53DROPS Design ha risposto:
Bonjour Mme Repoussard, tous les diagrammes de ce modèle sont déjà en ligne, vous trouverez ici comment lire des diagrammes crochet. Bon crochet!
15.10.2019 - 17:34
|
||||||||||||||||||||||||||||
Lady Ascot#ladyascottop |
||||||||||||||||||||||||||||
 |
 |
|||||||||||||||||||||||||||
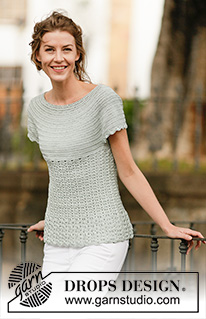
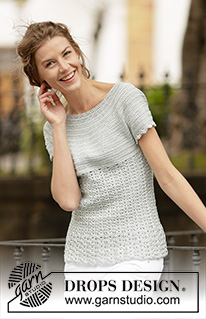
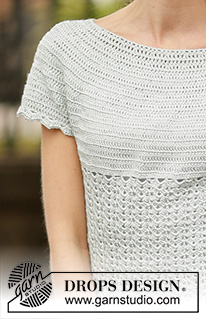
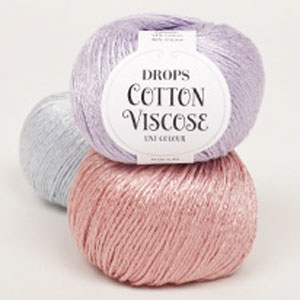
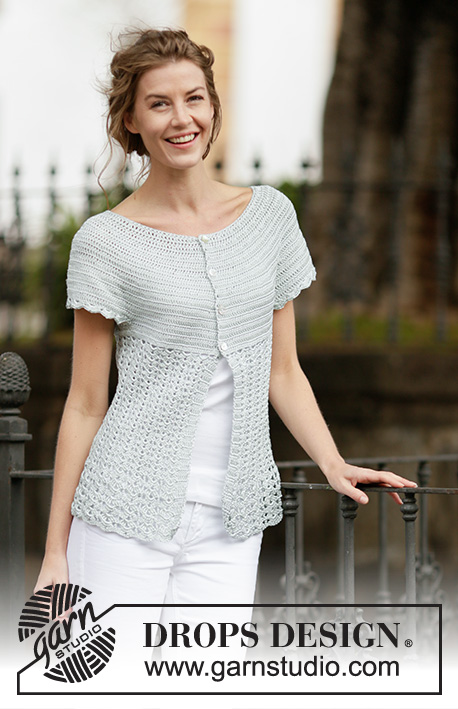
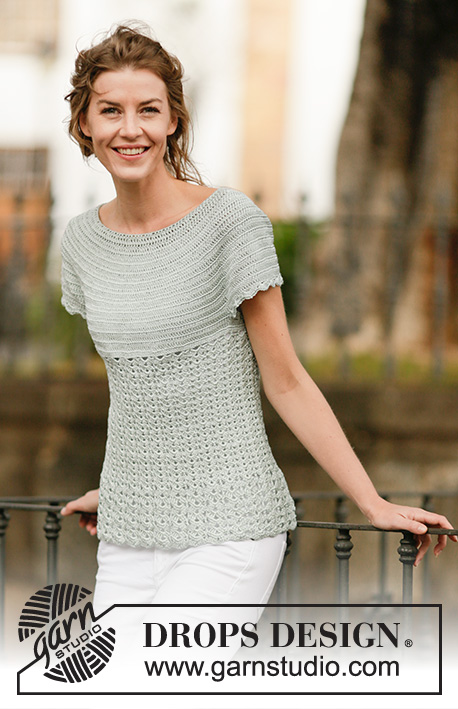
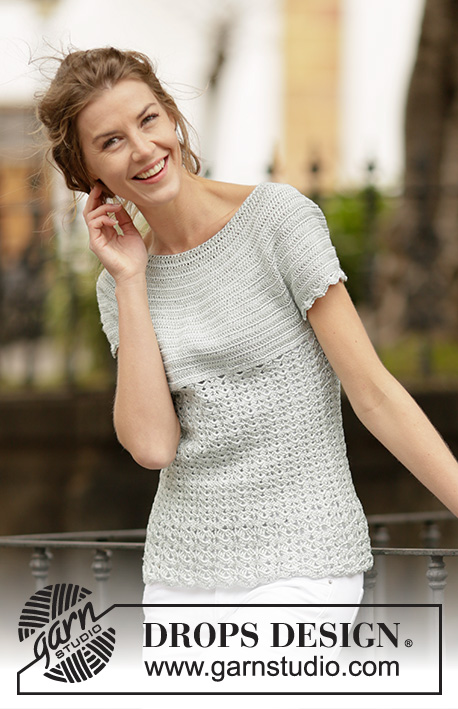
Top DROPS all’uncinetto, con motivo a ventaglio e sprone rotondo, lavorato dall’alto verso il basso (top down), in "Cotton Viscose". Taglie: Dalla S alla XXXL.
DROPS 162-26 |
||||||||||||||||||||||||||||
|
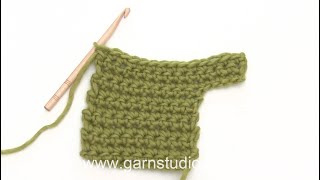
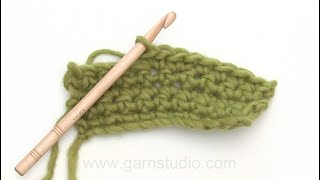
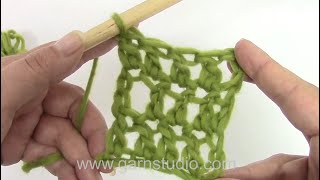
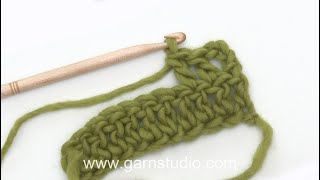
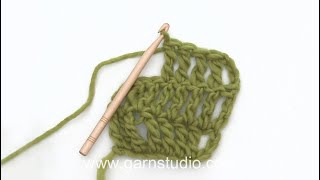
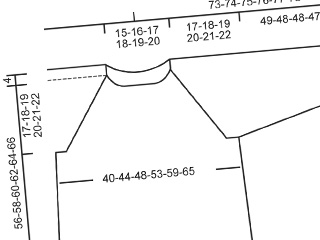
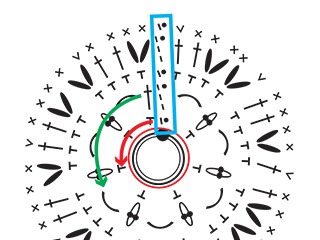
MOTIVO: Vedere i diagrammi A.1-A.2 INFORMAZIONI PER IL LAVORO-1: Sostituire la prima m.a di ogni riga di m.a con 3 cat; finire la riga con 1 m.bss nella 3a cat. INFORMAZIONI PER IL LAVORO-2: Iniziare ogni giro con 3 cat e finire ogni giro con 1 m.bss nella 3a cat. SUGGERIMENTO PER GLI AUMENTI: Per aumentare 1 m.a, lavorare 2 m.a nella stessa m.a. ---------------------------------------------------------- TOP: Si lavora dall’alto verso il basso con inizio al centro, sul dietro. Con l’uncinetto n° 3,5 ed il filato Cotton Viscose, avviare 133-137-142-147-152-157 cat e formare un anello con 1 m.bss nella prima cat. Lavorare il giro successivo, come segue: 3 cat (= 1 m.a), 1 m.a nella prima cat dell’anello di cat, * saltare 1 cat, 1 m.a in ognuna delle 5 cat successive *, ripetere da *-* finché non rimangono 0-4-3-2-1-0 cat, 1 m.a in ognuna delle ultime 0-4-3-2-1-0 cat = 112-116-120-124-128-132 m.a. Proseguire avanti e indietro. Finire ogni riga con 1 m.bss nella prima cat dall’inizio della riga - VEDERE LE INFORMAZIONI PER IL LAVORO -1. Girare il lavoro. Lavorare 1 riga con 1 m.a in ogni m.a e, ALLO STESSO TEMPO, aumentare 28 m.a a intervalli regolari (quindi aumentare 1 m.a dopo ca. ogni 4 m.a) – VEDERE IL SUGGERIMENTO PER GLI AUMENTI = 140-144-148-152-156-160 m.a. Inserire 12 segni, come segue: Lavorare 17-18-19-20-21-22 m.a (= metà dietro), ALLO STESSO TEMPO, aumentare 1-0-0-2-2-1 m.a a intervalli regolari, inserire il primo segno, * lavorare 4 m.a, inserire il segno successivo *, ripetere da *-* ancora 1 volta, lavorare 20 m.a, inserire il segno successivo, * lavorare 4 m.a, inserire il segno successivo *, ripetere da *-* ancora 1 volta, lavorare 34-36-38-40-42-44 m.a (= davanti), ALLO STESSO TEMPO aumentare 2-0-0-4-4-2 m.a a intervalli regolari, inserire il segno successivo, * lavorare 4 m.a, inserire il segno successivo *, ripetere da *-* ancora 1 volta, lavorare 20 m.a, inserire il segno successivo, * lavorare 4 m.a, inserire il segno successivo *, ripetere da *-* ancora 1 volta, lavorare 17-18-19-20-21-22 m.a (= metà dietro), ALLO STESSO TEMPO, aumentare 1-0-0-2-2-1 m.a a intervalli regolari = 144-144-148-160-164-164 m.a. RICORDARSI LA TENSIONE DEL LAVORO! Alla riga successiva sul diritto del lavoro, aumentare come segue: aumentare 1 m.a da ciascun lato di ogni segno (= 24 m.a aumentate), ripetere questi aumenti ad ogni riga sul diritto del lavoro 1-4-5-7-8-10 volte in tutto, poi aumentare prima di ogni segno (= 12 m.a aumentate), ripetere questi aumenti ad ogni riga sul diritto del lavoro 9-6-6-4-4-3 volte in tutto = 276-312-340-376-404-440 m.a. Il lavoro misura ca.18-18-20-20-22-23 cm. Lavorare la riga successiva come segue: 36-43-48-54-59-66 m.a (= metà dietro), lavorare 12 cat (inserire un segno al centro di queste nuove m = sotto manica), saltare 66-70-74-80-84-88 m.a della riga precedente (= manica), lavorare 72-86-96-108-118-132 m.a (= davanti), lavorare 12 cat (inserire un segno al centro di queste nuove m = sotto manica), saltare 66-70-74-80-84-88 m.a della riga precedente e lavorare 36-43-48-54-59-66 m.a (= metà dietro) = 168-196-216-240-260-288 m.a / cat (= 84-98-108-120-130-144 m.a /cat per il dietro e il davanti). Inserire 1 segno nel lavoro. DA ADESSO IN AVANTI, MISURARE IL LAVORO DA QUESTO PUNTO ! Lavorare 1 riga con 1 m.a in ogni m.a e 1 m.a in ogni cat sotto la manica e, ALLO STESSO TEMPO, aumentare 18-8-6-0-10-6 m.a a intervalli regolari = 186-204-222-240-270-294 m.a. Lavorare 1 riga con 1 m.a in ogni m.a. Lavorare ora in tondo senza girare il lavoro. MOTIVO A VENTAGLIO: Lavorare i giri 1 -3 del diagramma A.1 31-34-37-40-45-49 volte - VEDERE LE INFORMAZIONI PER IL LAVORO -2. Poi ripetere il giro 3 finché il lavoro non misura ca.29-31-31-33-31-31 cm. Lavorare ora il giro 4 finché il lavoro non misura ca.40-42-43-45-45-45 cm. Tagliare il filo. BORDO DELLA MANICA: Iniziare al centro, sotto la manica e lavorare come segue: Lavorare 1 m.b nella 6a cat delle 12 cat dello scalfo, 3 cat (= 1 m.a), 1 m.a in ognuna delle 6 cat successive, 1 m.a nella riga di m.a dove sono state lavorate le cat per lo scalfo, 1 m.a in ognuna delle 66-70-74-80-84-88 m.a successive (= manica); ALLO STESSO TEMPO, aumentare 0-4-0-2-6-2 m.a a intervalli regolari, 1 m.a nella riga di m.a dove sono state lavorate le cat per lo scalfo, 1 m.a in ognuna delle 5 cat rimanenti sotto la manica = 80-88-88-96-104-104 m.a. Ripetere il diagramma A.2 10-11-11-12-13-13 volte in tutto. Tagliare il filo quando il diagramma A.2 è stato lavorato 1 volta in verticale. Lavorare l’altro bordo della manica in modo uguale. |
||||||||||||||||||||||||||||
Spiegazioni del diagramma |
||||||||||||||||||||||||||||
|
||||||||||||||||||||||||||||
 |
||||||||||||||||||||||||||||
 |
||||||||||||||||||||||||||||
Avete terminato questo modello?Allora taggate le vostre foto con #dropspattern #ladyascottop o inviatele alla #dropsfan gallery. Avete bisogno di aiuto con questo modello?Troverete 14 video tutorial, una sezione per i commenti/domande e molto altro guardando il modello su www.garnstudio.com © 1982-2026 DROPS Design A/S. Ci riserviamo tutti i diritti. Questo documento, compreso tutte le sue sotto-sezioni, è protetto dalle leggi sul copyright. Potete leggere quello che potete fare con i nostri modelli alla fine di ogni modello sul nostro sito. |
||||||||||||||||||||||||||||

Con oltre 40 anni di esperienza nel design di modelli di maglia e uncinetto, DROPS Design offre la più estesa collezione di modelli gratuiti su internet - tradotti in 17 lingue. Ad oggi vi possiamo fornire 333 cataloghi e 12549 modelli - 9823 dei quali sono tradotti in Italiano.
Ci stiamo impegnando molto per darvi il meglio che vi possiamo offrire in termini di maglia e uncinetto, ispirazioni e consigli così come filati di grande qualità ad un prezzo incredibile! Volete utilizzare i nostri modelli per qualcosa d'altro oltre al vostro uso personale? Potete leggere tutto ciò che è consentito nel testo sul Copyright in basso su tutte le pagine dei nostri modelli. Buon lavoro!
Lasciare un commento sul modello DROPS 162-26
Noi saremmo felici di ricevere i tuoi commenti e opinioni su questo modello!
Se vuoi fare una domanda, fai per favore attenzione a selezionare la categoria corretta nella casella qui sotto per velocizzare il processo di risposta. I campi richiesti sono indicati da *.