
Categorie popolari
State cercando un filato?




















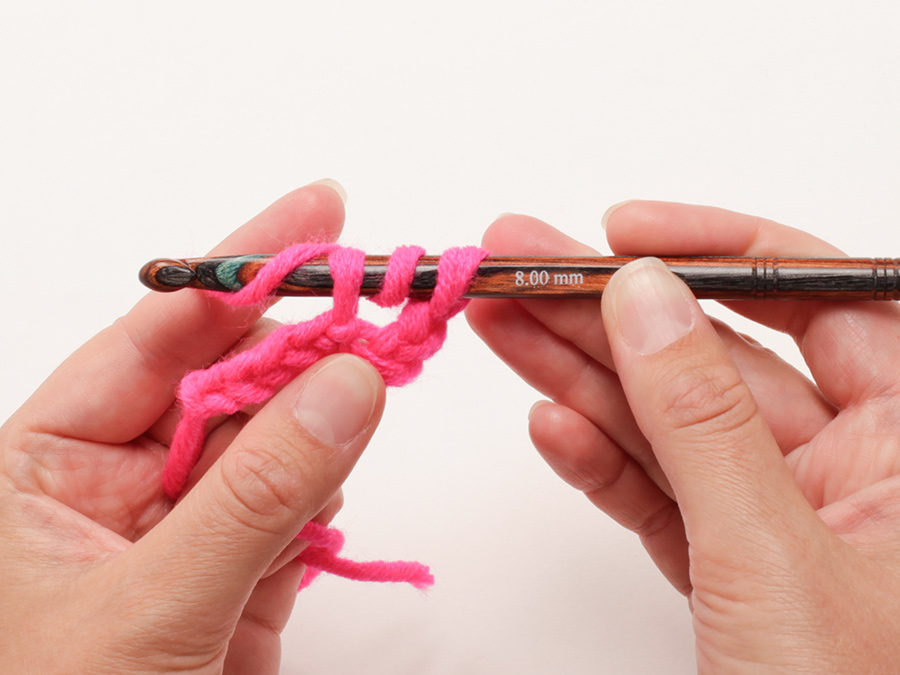
Commenti / Domande (112)
 Linda De Greef ha scritto:
Ik begrijp het niet. Bovenkant is af en heb nu een centimeter of 4 waaierpatroon gehaakt, maar het truitje blijkt nu veel te wijd. Heb maat (M) gemaakt maar rondom borst wel 10 cm wijder dan in patroon zou moeten zijn. Haak ik dan zo los? Moet hem toch weer uithalen helaas. Niet aan te doen.
12.07.2015 - 20:55
Anja Fix-Boerdijk ha scritto:
Ik ben bezig met dit patroon en toe aan het waaierpatroon. Nu staat er in het telpatroon A1. dat ik moet beginnen met een vaste, 4 lossen en dan weer een vaste. Nu word het mij niet duidelijk of er 2 of 3 stokjes tussen de vasten zitten. Het kruisje in het telpatroon staat tussen het derde en vierde stokje. Kunt u mij meer duidelijkheid geven?
10.07.2015 - 10:48DROPS Design ha risposto:
Hoi Anja. Er zijn 2 stk tussen de vasten
30.07.2015 - 13:28
 Karen Brookes ha scritto:
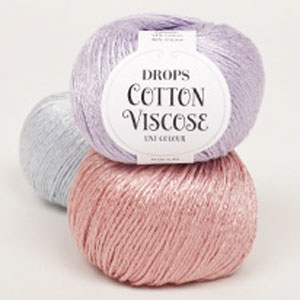
What sizes are equivalent to UK size 18 and why is my first attempt/ round coming out at just 43 cm for XL size? I am using UK 3.5 crochet hook, my tension is usually too loose not too tight. I am ready to give up. Cotton viscerally nightmare splitting all the time. Not happy.
04.06.2015 - 01:27DROPS Design ha risposto:
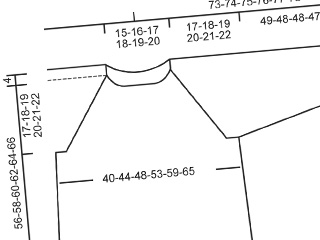
Dear Mrs Brookes, you will find at the bottom of the pattern a measurement chart with all measurements for each size in cm taken flat from side to side - compare these to a similar garment you have and like the shape to find out the matching size. The top is worked top down, so that you start by neckline and end with bottom edge. Happy crocheting!
04.06.2015 - 08:40
 Kathrin ha scritto:
Hallo, ich verstehe nicht wie ich die 12 Marker setzen soll. In der 3.Rd sollen die ersten 18 Stäbchen behäkelt werden, es sollen aber gleichzeitig 1-0-0-2-2-1 Stb zugenommen werden. Frage ist wie ist die zunahme gemeint? in welchen Stb. soll eine zunahme erfolgen? Wie geht es dann weiter? mit den Wdh. meine ich. Vielen Dank
03.05.2015 - 19:00DROPS Design ha risposto:
Sie brauchen in Ihrer Größe (M) gar keine Zunahmen arbeiten, es ist jeweils "0" angegeben (1-0-0-2-2-1 = 1 Stb in Gr. S zunehmen, 0 Stb in Gr. M zunehmen, 0 Stb in Gr. L zunehmen, 2 Stb in Gr. XL zunehmen usw.). Als nächstes nehmen Si dann beidseitig jedes Markierers zu, dafür häkeln Sie in das Stb vor jedem Markierer 2 Stb und in das Stb nach jedem Markierer auch 2 Stb.
15.05.2015 - 10:42
 Charlene ha scritto:
I am a bit confused on the rows. I understand the rows are worked back and forth. I should have 1 RS row, 1 WS row inc 28 evenly, and then 1 RS row inserting the markers. Do I then work a WS row before I proceed with the next paragraph which says 'On the next row from RS' or will I be working 2 rows on the right side?
11.04.2015 - 05:46DROPS Design ha risposto:
Dear Charlene, you are correct, you will crochet one row from WS then on the next row (= from RS), start the inc at each marker. Happy crocheting!
11.04.2015 - 09:24
Betsy Steffens ha scritto:
Na de eerste alinea heb ik 3 toeren gehaakt en 144 stk. In de volgende toer (4e) moet ik, aan de goede kant, aan weerskanten van de markeerder meerderen. Betekent dat dat de 4e toer de goede kant is en dus automatisch de 1e toer de verkeerde kant is?
08.04.2015 - 21:53DROPS Design ha risposto:
De eerste toer wordt dan vanzelf de verkeerde kant inderdaad.
08.04.2015 - 22:37
 Cat ha scritto:
Also,i am left handed,does this make a difference when following the pattern?
08.04.2015 - 05:30DROPS Design ha risposto:
Dear Cat, you will find videos related to the techniques used in that pattern under tab "videos" on the right side of the picture - if you have any question, you are welcome to ask here or contact your DROPS Store. Happy crocheting!
08.04.2015 - 09:14Bev Keller ha scritto:
Questions about Top: 1) Does the piece get turned at the end of each row? Or is it worked in the round? 2) I don't see any indication on how many inches are worked before beginning the increase row? I think this sweater is very beautiful. I'm just terribly confused. Thank you!
06.04.2015 - 01:28DROPS Design ha risposto:
Dear Mrs Keller, piece is worked in the round, ie you will end each row with 1 sl in first/3rd ch of row, but you will turn at the end of each row working alternately from RS and from WS. You work 1 row then inc evenly 28 sts, then work 1 more while inserting markers, then continue inc as stated in 2nd paragraph, ie from next row from RS. Happy crocheting!
07.04.2015 - 09:36
Suleika ha scritto:
Heel mooi patroon! Helaas is de aangegeven hoeveelheid garen niet juist. Had 10 bollen besteld voor maat L. en ik heb zojuist nog 2 bollen besteld omdat ik nog niet genoeg heb.
17.03.2015 - 14:36DROPS Design ha risposto:
Hoi Suleika. Bedankt voor het melden. Wij zullen het noteren en bekijken of een aanpassing nodig zal zijn.
18.03.2015 - 15:35
 Ingrid ha scritto:
Jag tycker att det är nonchalant attityd att inte svara på frågor som ställs.Gäller två från svenska frågare som ,liksom jag,har svårt att tyda beskrivningen.
07.03.2015 - 13:02
|
||||||||||||||||||||||||||||
Lady Ascot#ladyascottop |
||||||||||||||||||||||||||||
 |
 |
|||||||||||||||||||||||||||
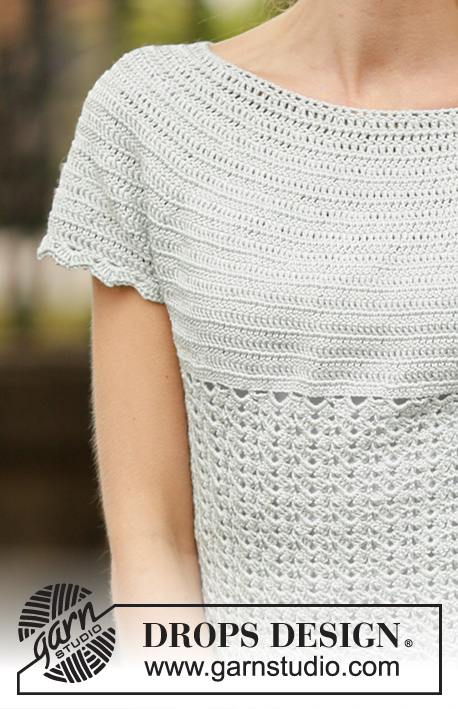
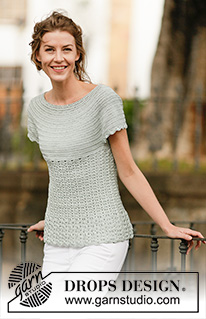
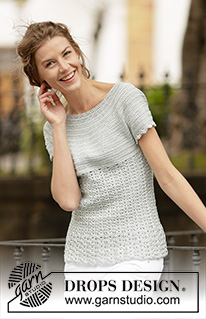
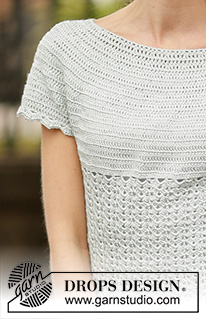
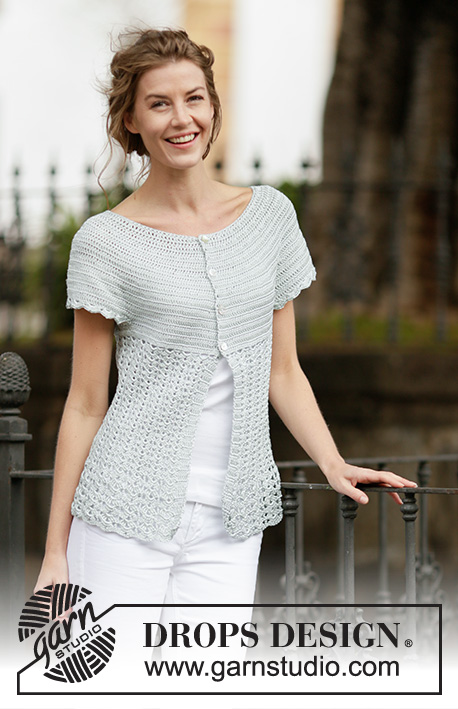
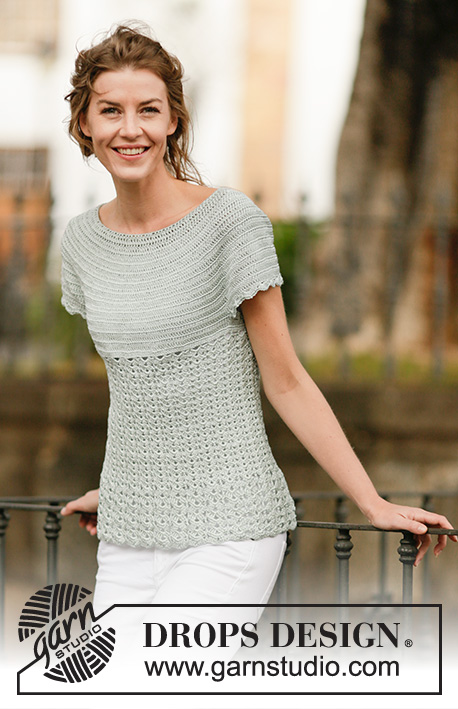
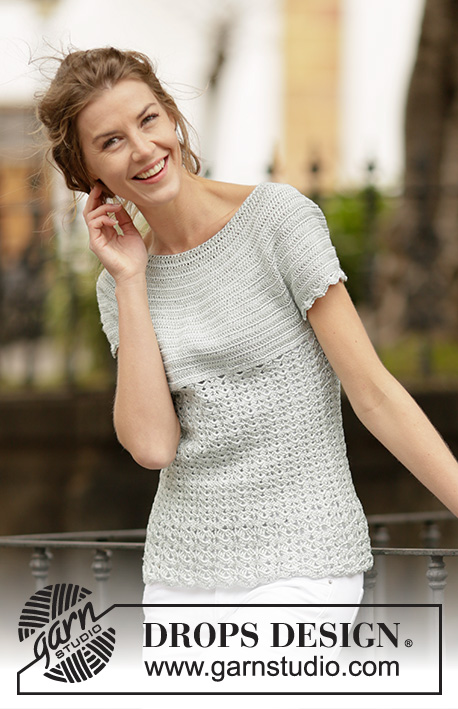
Top DROPS all’uncinetto, con motivo a ventaglio e sprone rotondo, lavorato dall’alto verso il basso (top down), in "Cotton Viscose". Taglie: Dalla S alla XXXL.
DROPS 162-26 |
||||||||||||||||||||||||||||
|
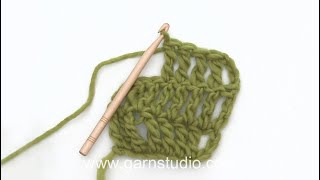
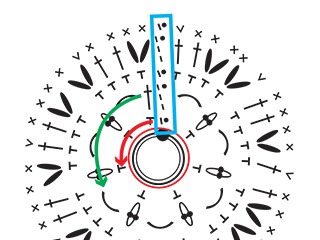
MOTIVO: Vedere i diagrammi A.1-A.2 INFORMAZIONI PER IL LAVORO-1: Sostituire la prima m.a di ogni riga di m.a con 3 cat; finire la riga con 1 m.bss nella 3a cat. INFORMAZIONI PER IL LAVORO-2: Iniziare ogni giro con 3 cat e finire ogni giro con 1 m.bss nella 3a cat. SUGGERIMENTO PER GLI AUMENTI: Per aumentare 1 m.a, lavorare 2 m.a nella stessa m.a. ---------------------------------------------------------- TOP: Si lavora dall’alto verso il basso con inizio al centro, sul dietro. Con l’uncinetto n° 3,5 ed il filato Cotton Viscose, avviare 133-137-142-147-152-157 cat e formare un anello con 1 m.bss nella prima cat. Lavorare il giro successivo, come segue: 3 cat (= 1 m.a), 1 m.a nella prima cat dell’anello di cat, * saltare 1 cat, 1 m.a in ognuna delle 5 cat successive *, ripetere da *-* finché non rimangono 0-4-3-2-1-0 cat, 1 m.a in ognuna delle ultime 0-4-3-2-1-0 cat = 112-116-120-124-128-132 m.a. Proseguire avanti e indietro. Finire ogni riga con 1 m.bss nella prima cat dall’inizio della riga - VEDERE LE INFORMAZIONI PER IL LAVORO -1. Girare il lavoro. Lavorare 1 riga con 1 m.a in ogni m.a e, ALLO STESSO TEMPO, aumentare 28 m.a a intervalli regolari (quindi aumentare 1 m.a dopo ca. ogni 4 m.a) – VEDERE IL SUGGERIMENTO PER GLI AUMENTI = 140-144-148-152-156-160 m.a. Inserire 12 segni, come segue: Lavorare 17-18-19-20-21-22 m.a (= metà dietro), ALLO STESSO TEMPO, aumentare 1-0-0-2-2-1 m.a a intervalli regolari, inserire il primo segno, * lavorare 4 m.a, inserire il segno successivo *, ripetere da *-* ancora 1 volta, lavorare 20 m.a, inserire il segno successivo, * lavorare 4 m.a, inserire il segno successivo *, ripetere da *-* ancora 1 volta, lavorare 34-36-38-40-42-44 m.a (= davanti), ALLO STESSO TEMPO aumentare 2-0-0-4-4-2 m.a a intervalli regolari, inserire il segno successivo, * lavorare 4 m.a, inserire il segno successivo *, ripetere da *-* ancora 1 volta, lavorare 20 m.a, inserire il segno successivo, * lavorare 4 m.a, inserire il segno successivo *, ripetere da *-* ancora 1 volta, lavorare 17-18-19-20-21-22 m.a (= metà dietro), ALLO STESSO TEMPO, aumentare 1-0-0-2-2-1 m.a a intervalli regolari = 144-144-148-160-164-164 m.a. RICORDARSI LA TENSIONE DEL LAVORO! Alla riga successiva sul diritto del lavoro, aumentare come segue: aumentare 1 m.a da ciascun lato di ogni segno (= 24 m.a aumentate), ripetere questi aumenti ad ogni riga sul diritto del lavoro 1-4-5-7-8-10 volte in tutto, poi aumentare prima di ogni segno (= 12 m.a aumentate), ripetere questi aumenti ad ogni riga sul diritto del lavoro 9-6-6-4-4-3 volte in tutto = 276-312-340-376-404-440 m.a. Il lavoro misura ca.18-18-20-20-22-23 cm. Lavorare la riga successiva come segue: 36-43-48-54-59-66 m.a (= metà dietro), lavorare 12 cat (inserire un segno al centro di queste nuove m = sotto manica), saltare 66-70-74-80-84-88 m.a della riga precedente (= manica), lavorare 72-86-96-108-118-132 m.a (= davanti), lavorare 12 cat (inserire un segno al centro di queste nuove m = sotto manica), saltare 66-70-74-80-84-88 m.a della riga precedente e lavorare 36-43-48-54-59-66 m.a (= metà dietro) = 168-196-216-240-260-288 m.a / cat (= 84-98-108-120-130-144 m.a /cat per il dietro e il davanti). Inserire 1 segno nel lavoro. DA ADESSO IN AVANTI, MISURARE IL LAVORO DA QUESTO PUNTO ! Lavorare 1 riga con 1 m.a in ogni m.a e 1 m.a in ogni cat sotto la manica e, ALLO STESSO TEMPO, aumentare 18-8-6-0-10-6 m.a a intervalli regolari = 186-204-222-240-270-294 m.a. Lavorare 1 riga con 1 m.a in ogni m.a. Lavorare ora in tondo senza girare il lavoro. MOTIVO A VENTAGLIO: Lavorare i giri 1 -3 del diagramma A.1 31-34-37-40-45-49 volte - VEDERE LE INFORMAZIONI PER IL LAVORO -2. Poi ripetere il giro 3 finché il lavoro non misura ca.29-31-31-33-31-31 cm. Lavorare ora il giro 4 finché il lavoro non misura ca.40-42-43-45-45-45 cm. Tagliare il filo. BORDO DELLA MANICA: Iniziare al centro, sotto la manica e lavorare come segue: Lavorare 1 m.b nella 6a cat delle 12 cat dello scalfo, 3 cat (= 1 m.a), 1 m.a in ognuna delle 6 cat successive, 1 m.a nella riga di m.a dove sono state lavorate le cat per lo scalfo, 1 m.a in ognuna delle 66-70-74-80-84-88 m.a successive (= manica); ALLO STESSO TEMPO, aumentare 0-4-0-2-6-2 m.a a intervalli regolari, 1 m.a nella riga di m.a dove sono state lavorate le cat per lo scalfo, 1 m.a in ognuna delle 5 cat rimanenti sotto la manica = 80-88-88-96-104-104 m.a. Ripetere il diagramma A.2 10-11-11-12-13-13 volte in tutto. Tagliare il filo quando il diagramma A.2 è stato lavorato 1 volta in verticale. Lavorare l’altro bordo della manica in modo uguale. |
||||||||||||||||||||||||||||
Spiegazioni del diagramma |
||||||||||||||||||||||||||||
|
||||||||||||||||||||||||||||
 |
||||||||||||||||||||||||||||
 |
||||||||||||||||||||||||||||
Avete terminato questo modello?Allora taggate le vostre foto con #dropspattern #ladyascottop o inviatele alla #dropsfan gallery. Avete bisogno di aiuto con questo modello?Troverete 14 video tutorial, una sezione per i commenti/domande e molto altro guardando il modello su www.garnstudio.com © 1982-2026 DROPS Design A/S. Ci riserviamo tutti i diritti. Questo documento, compreso tutte le sue sotto-sezioni, è protetto dalle leggi sul copyright. Potete leggere quello che potete fare con i nostri modelli alla fine di ogni modello sul nostro sito. |
||||||||||||||||||||||||||||

Con oltre 40 anni di esperienza nel design di modelli di maglia e uncinetto, DROPS Design offre la più estesa collezione di modelli gratuiti su internet - tradotti in 17 lingue. Ad oggi vi possiamo fornire 333 cataloghi e 12549 modelli - 9823 dei quali sono tradotti in Italiano.
Ci stiamo impegnando molto per darvi il meglio che vi possiamo offrire in termini di maglia e uncinetto, ispirazioni e consigli così come filati di grande qualità ad un prezzo incredibile! Volete utilizzare i nostri modelli per qualcosa d'altro oltre al vostro uso personale? Potete leggere tutto ciò che è consentito nel testo sul Copyright in basso su tutte le pagine dei nostri modelli. Buon lavoro!
Lasciare un commento sul modello DROPS 162-26
Noi saremmo felici di ricevere i tuoi commenti e opinioni su questo modello!
Se vuoi fare una domanda, fai per favore attenzione a selezionare la categoria corretta nella casella qui sotto per velocizzare il processo di risposta. I campi richiesti sono indicati da *.