
Categorie popolari
State cercando un filato?



























Commenti / Domande (88)
 Lenia ha scritto:
Please explain the chart to me.
01.02.2019 - 16:16
 Friedel ha scritto:
Merci de votre réponse. Il n'y a toutefois pas d'information sur ce(s) tour(s) de brides. "Bordure : Continuer ainsi" : comment ? combien de tours ? combien de brides au total ? Il semblerait qu'il manque une ligne... Et pour la cordelette : quel 2ème tour de quelle première section ? Ce n'est pas très clair...
23.01.2019 - 18:30DROPS Design ha risposto:
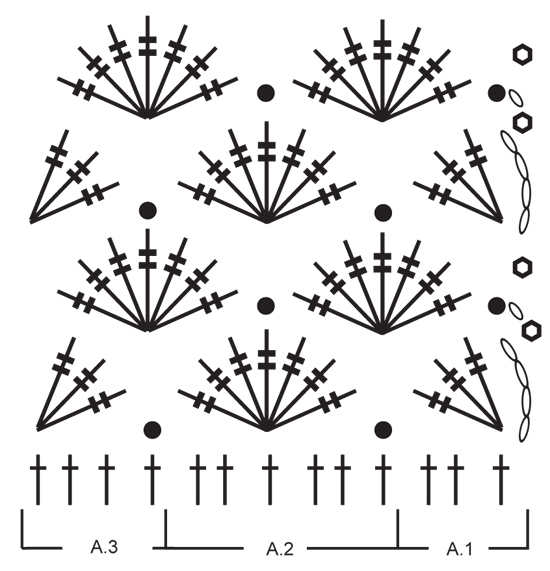
Bonjour Mme Friedel, vous crochetez les diagrammes A.1 (= début du tour), A.2 (= à répéter) et A.3 (fin du tour) soit au 1er tour: 1 bride dans chaque maille du tour précédent, puis les tours 2 à 5 (= groupes de double-brides). La cordelette est enfilée dans les trous formés par les groupes de double-brides du rang 2. Bon crochet!
24.01.2019 - 09:32
Friedel ha scritto:
Bonjour, avant de commencer la bordure (après les 3 tours de ms), faut-il faire un tour en brides ? Le diagramme du point fantaisie se base sur des brides... Merci de votre réponse.
20.01.2019 - 19:08DROPS Design ha risposto:
Bonjour Mme Friedel, vous devez crocheter ce tour de brides, c'est là que vous enfilerez le cordon par la suite. Bon crochet!
21.01.2019 - 12:13Yu-Chi ha scritto:
Hi, I would like to know after two rounds of pattern (round 9&10), the following second round, "Work 1 ch, * 1 dc in next dc, 1 ch, skip 1 dc *," are the total sts less than the 1st round(85 sts)?
25.09.2018 - 16:21DROPS Design ha risposto:
Dear Yu-Chi, this round is the hole round to slip the twisted string through, you should have the same number of sts = 85 sts (including dc and chains). Happy crocheting!
26.09.2018 - 07:28Yu-Chi ha scritto:
您好,請問在第十二排(Round 2)的總針數是否因為跳過短針的關係少於85?如果是這樣的話,那麼下一排怎麼加六針後會是91針呢?還請幫忙解惑,謝謝!
25.09.2018 - 15:50DROPS Design ha risposto:
Dear Yu-Chi, we can only answer in English - hope this will be okay for you. When you work first round following diagram, you will have 85 sts in 1st size or 91 sts in 2nd size - you repeat A.2 a total of 13 times in the round in the first size and a total of 14 times in the round in the 2nd size. Happy crocheting!
25.09.2018 - 15:55
 Annabelle ha scritto:
Bonjour, je trouvais ce chapeau très fin et joli, mais, je suis déçue. Je le trouve trop haut sur la tête, il ne tombe pas bien (j\'ai pensé que j\'aurais dû ajouter un rang au niveau du lien), pourtant, toutes mes mesures étaient ok et je ne fais que 55 de tour de tête. Le point fantaisie est raffiné. Je ne comprends pas pourquoi ça ne rend pas alors que sur la photo, c\'est superbe, si il y a d\'autres personnes qui l\'ont fait, je veux bien votre témoignage....Merci
09.09.2018 - 17:36DROPS Design ha risposto:
Bonjour Annabelle, aviez-vous bien le bon échantillon? soit 18 brides x 9 rangs = 10 x 10 cm? Avez-vous pu conserver cette tension tout le long de la réalisation de votre chapeau? En fonction de la morphologie de chacune, le résultat peut être différent, vous pouvez volontiers rajouter/supprimer des rangs pour obtenir l'effet souhaité. N'hésitez pas à contacter votre magasin DROPS, on saura vous aider et vous renseigner si besoin. Bon crochet!
11.09.2018 - 09:46
 Yvonne ha scritto:
Hallo, ich bin mir nicht sicher, ob ich die 8. und 9. Runde richtig verstehe. Soll ich in jeder dieser Runden jeweils 5 Stäbchen zusätzlich aufnehmen, jedoch einzeln verteilt? Oder was ist mit 5 (1) gemeint? Habe ich am Ende der 9. Runde dann 85 oder 91 Stäbchen? Dankeschön Yvonne
15.05.2018 - 23:42DROPS Design ha risposto:
Liebe Yvonne, wenn Sie die erste Größe häkeln, folgen Sie die Anleitung vor den Klammern und wenn Sie die 2. Größe häkeln folgen Sie die Anleitung in Klammern. Viel Spaß beim häkeln!
16.05.2018 - 09:22
 Lisa ha scritto:
Hej igen, nu har jag färdigställt hatten, men precis som för flera andra som kommenterat före mig, så blir inte hatten som på bilden. Hatten blir överdrivet bred nedtill och liknar snarare en solhatt med sitt vågiga och mjuka brätte, än den hatt som syns på modellbilden. Har följt mönstret till punkt och pricka och är en van virkare. Kan inte komma fram till vad jag kan ha missförstått. Hjälp?! Är det något som lämnats bort i mönstret som man borde veta om?
27.04.2018 - 16:30
 Rachael Page ha scritto:
Sorry to be a pain. Thanks for answering last question. On the brim. Rounds 2-5. I’ve increased the numbers on dtr for every round. So R2 - 8 dtr R3 - 9 dtr R4 - 10 dtr R5 - 11 dtr Is this wrong? Should all of these last round have been fans/clusters of 8 dtr? This might explain why my hat isn’t the right shape. I may have interpreted the pattern wrong
25.04.2018 - 09:59DROPS Design ha risposto:
Dear Mrs Page, you inc 1 dtr in each fan so that you will have 11 dtr in each fan on last row of the brim. Happy crocheting!
25.04.2018 - 10:45
Rachael Page ha scritto:
Hello I’ve finished this hat and found the pattern good to work with however my hat isn’t as flat. Do I need to block it to make it look the same as picture. Mine is a bit more textured. Not blocked before. Would you fully wet it and pin or iron with steam?
25.04.2018 - 00:06DROPS Design ha risposto:
Dear Mrs Page, you can block it fully wet and pin, making sure to keep correct measurements. Enjoy!
25.04.2018 - 08:38
|
||||||||||||||||
Glimpse of Spring#glimpseofspringhat |
||||||||||||||||
|
|
||||||||||||||||
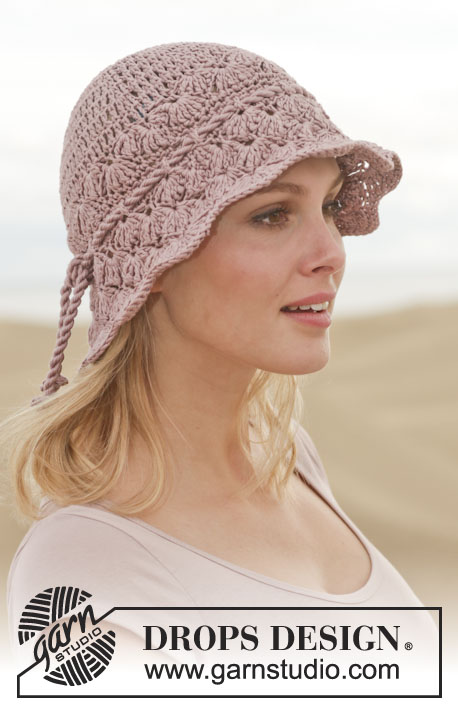
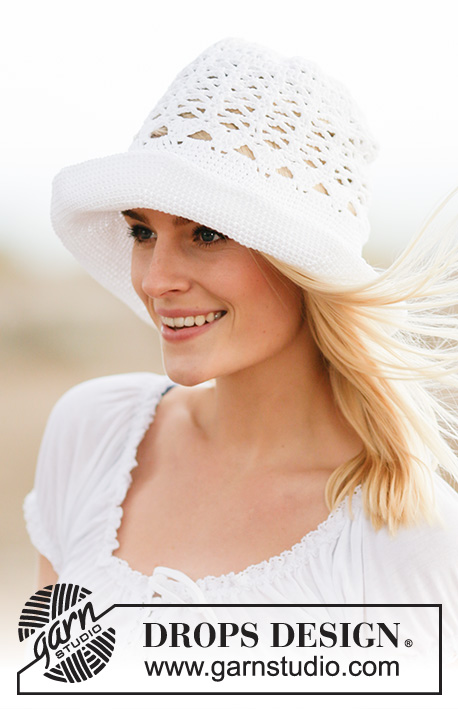
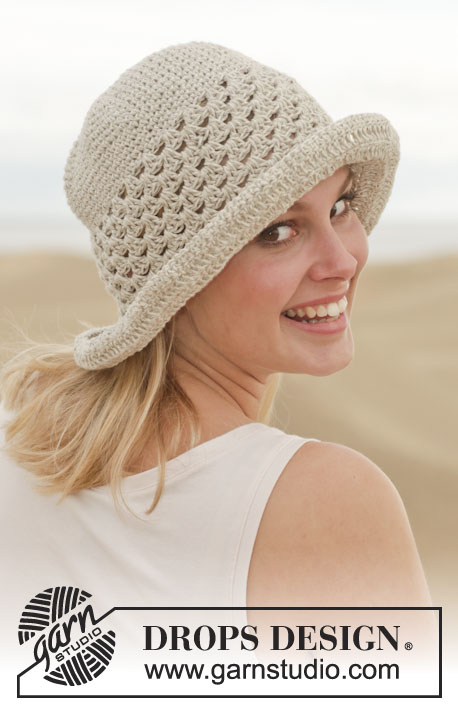
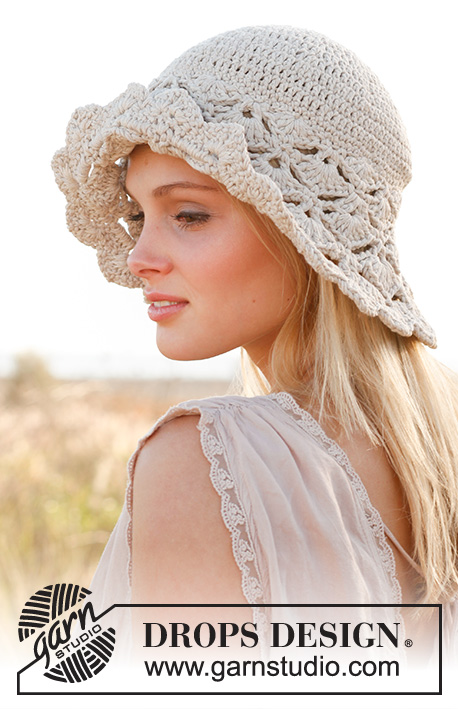
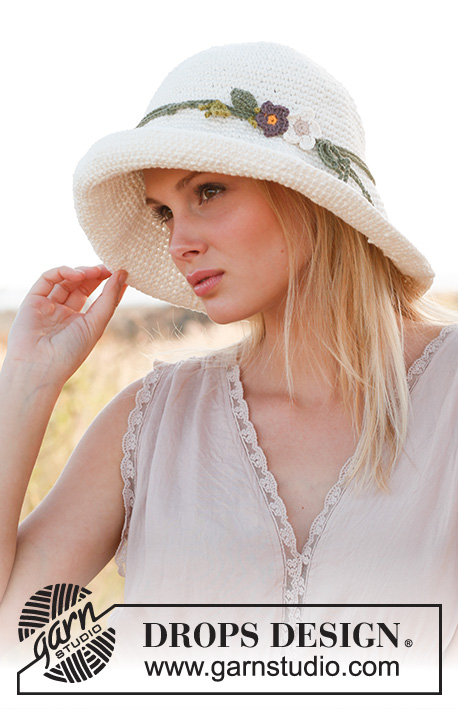
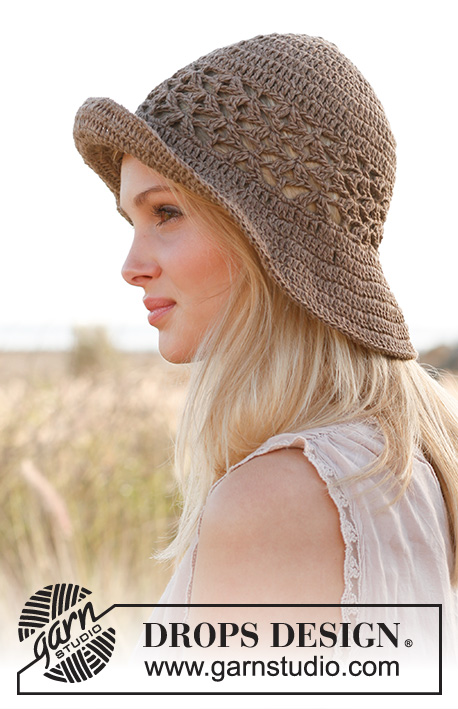
Cappello DROPS, all’uncinetto, in "Muskat".
DROPS 153-36 |
||||||||||||||||
|
SUGGERIMENTO PER IL LAVORO: Sostituire la prima m.a all’inizio di ogni giro di m.a con 3 cat. Finire ogni giro di m.a con 1 m.bss nella 3a cat dall’inizio del giro (= nella prima m.a). Sostituire la prima m.b all’inizio di ogni giro di m.b con 1 cat. Finire ogni giro di m.b con 1 m.bss nella cat all’inizio del giro. SUGGERIMENTO PER GLI AUMENTI: Aumentare 1 m.a o 1 m.b lavorando 2 m.a / m.b nella stessa m. MOTIVO: Vedere i diagrammi da A.1 a A.3. ---------------------------------------------------------- CAPPELLO: Con l’uncinetto n° 4 e 1 capo del filato Muskat, avviare 5 cat e formare un anello con 1 m.bss nella prima cat. VEDERE IL SUGGERIMENTO PER IL LAVORO ! GIRO 1: Lavorare 10 (10) m.a nell’anello di cat. GIRO 2: Lavorare 2 m.a in ogni m.a = 20 (20) m.a. GIRO 3: * 1 m.a nella m.a successiva, 2 m.a nella m.a successiva *, ripetere da *-* = 30 (30) m.a. GIRO 4: * 1 m.a in ognuna delle 2 m.a successive, 2 m.a nella m.a successiva *, ripetere da *-* = 40 (40) m.a. GIRI 5-8 (5-9): proseguire aumentando in modo uguale, quindi aumentare 10 m.a ogni giro; aumentare nello stesso punto del giro precedente, lavorare quindi 1 m.a in più tra ogni aumento ad ogni giro. Aumentare come prima lavorando 2 m.a in 1 m.a; ALLO STESSO TEMPO, nel corso del giro 8 (9) aumentare ulteriori 5 (1) m.a a intervalli regolari – VEDERE IL SUGGERIMENTO PER GLI AUMENTI = 85 (91) m.a. Il lavoro misura 9 (10) cm. GIRI 9-10 (10-11): Proseguire con il motivo come segue: Lavorare il diagramma A.1, ripetere il diagramma A.2 13 (14) volte in tutto, e finire con il diagramma A.3. Al giro successivo lavorare come segue: GIRO 1: Lavorare 1 m.b nella prima m.b del giro precedente, saltare 1 m.a.d, 1 m.b in ognuna delle 2 m.a.d successive, * 1 m.b in ognuna delle 3 m.a.d successive, saltare 1 m.a.d, 1 m.b nella m.b successiva, saltare 1 m.a.d, 1 m.b in ognuna delle 2 m.a.d successive *, ripetere da *-* finché sul giro non rimangono 4 m.a.d, 1 m.b in ognuna delle ultime 4 m.a.d = 85 (91) m.b sul giro. GIRO 2: Lavorare 1 cat, * 1 m.b nella m.b successiva, 1 cat, saltare 1 m.b *, ripetere da *-* su tutto il giro e finire con 1 m.bss nella prima cat dall’inizio del giro. GIRO 3: Lavorare 1 m.b nella cat successiva, * 1 m.b nella m.b successiva, 1 m.b nella cat successiva *, ripetere da *-* su tutto il giro; ALLO STESSO TEMPO, aumentare 6 (12) m.b a intervalli regolari sul giro = 91 (103) m.b. Finire con 1 m.bss nella prima m.b dall’inizio del giro. TESA: Proseguire lavorando la tesa, come segue: GIRO 1: Proseguire con il motivo, come segue: Lavorare il diagramma A.1, ripetere il diagramma A.2 14 (16) volte in tutto, e finire con il diagramma A.3. GIRI 2-5: proseguire lavorando i diagrammi A.1, A.2 e A.3; ALLO STESSO TEMPO, aumentare 1 m.a.d in ogni gruppo di m.a.d (quindi iniziando dal 2° giro, lavorare 8 m.a.d in ogni gruppo di m.a.d). Proseguire in modo uguale e aumentare ad ogni giro 1 m.a.d in ogni gruppo di m.a.d. Dopo aver lavorato il giro 5 della tesa, lavorare 1 m.b in ogni m.a.d del giro precedente. Tagliare il filo. CORDINO: Tagliare 8 capi lunghi ca. 3 metri ciascuno. Avvolgerli insieme molto stretti, finché non oppongono resistenza, piegarli in due in modo che si avvolgano ancora. Fare un nodo ad una estremità. Passare l’estremità del cordino senza nodo attraverso la riga traforata lavorata nel giro 2 dopo la prima parte di gruppi di m.a. Regolare la lunghezza del cordino alla lunghezza desiderata e fare un nodo all’altra estremità. |
||||||||||||||||
Spiegazioni del diagramma |
||||||||||||||||
|
||||||||||||||||
 |
||||||||||||||||
Avete terminato questo modello?Allora taggate le vostre foto con #dropspattern #glimpseofspringhat o inviatele alla #dropsfan gallery. Avete bisogno di aiuto con questo modello?Troverete 11 video tutorial, una sezione per i commenti/domande e molto altro guardando il modello su www.garnstudio.com © 1982-2026 DROPS Design A/S. Ci riserviamo tutti i diritti. Questo documento, compreso tutte le sue sotto-sezioni, è protetto dalle leggi sul copyright. Potete leggere quello che potete fare con i nostri modelli alla fine di ogni modello sul nostro sito. |
||||||||||||||||






Con oltre 40 anni di esperienza nel design di modelli di maglia e uncinetto, DROPS Design offre la più estesa collezione di modelli gratuiti su internet - tradotti in 17 lingue. Ad oggi vi possiamo fornire 333 cataloghi e 12525 modelli - 9799 dei quali sono tradotti in Italiano.
Ci stiamo impegnando molto per darvi il meglio che vi possiamo offrire in termini di maglia e uncinetto, ispirazioni e consigli così come filati di grande qualità ad un prezzo incredibile! Volete utilizzare i nostri modelli per qualcosa d'altro oltre al vostro uso personale? Potete leggere tutto ciò che è consentito nel testo sul Copyright in basso su tutte le pagine dei nostri modelli. Buon lavoro!
Lasciare un commento sul modello DROPS 153-36
Noi saremmo felici di ricevere i tuoi commenti e opinioni su questo modello!
Se vuoi fare una domanda, fai per favore attenzione a selezionare la categoria corretta nella casella qui sotto per velocizzare il processo di risposta. I campi richiesti sono indicati da *.