
Categorie popolari
State cercando un filato?


Commenti / Domande (53)
![]() Julia ha scritto:
Julia ha scritto:
Hola Por favor quisiera que me expliquen como se entiende estas disminuciones de sisa, ESPALDA: = 48-54-60-66-72 pts. Continuar de ida y vuelta con el patrón como antes – AL MISMO TIEMPO, rem para las sisas al inicio de cada hilera, en cada lado, de la manera sig: 2 pts 1-1-1-2-2 veces y 1 pt 1-1-1-2-2 veces = 42-48-54-54-60 pts. Gracias de antemano
19.01.2020 - 00:04DROPS Design ha risposto:
Hej. Se svar över. Mvh DROPS Design
07.02.2020 - 09:03
![]() Eli Orset ha scritto:
Eli Orset ha scritto:
Hei! Finnes denne oppskriften til herre M?
13.11.2019 - 12:51DROPS Design ha risposto:
Hei Eli. Dette mønsteret finnes dessverre ikke til herre, men vi har mange mønstre til herregensere med lignende sjalkrage, for eksempel: DROPS 0-1159 God fornøyelse!
13.11.2019 - 15:50
![]() Kim Tchon ha scritto:
Kim Tchon ha scritto:
Increasing at the start of the sweater, how many rows between inc?
24.10.2019 - 17:26DROPS Design ha risposto:
Dear Mrs Tchon, first increase is done when piece measures 6 or 7 cm = 2½" or2 3/4", (see size), and you repeat them every 7-7½-8-9-4½ cm = 2 3/4"-2 7/8"-3 1/8"-3½", ie measure in cm and do not count in rows to get the increased worked evenly spaced as in pattern. Happy knitting!
25.10.2019 - 08:57
![]() Julia Ines ha scritto:
Julia Ines ha scritto:
Hola, estoy haciendo la talla 12, mi problema es entender lo que escriben en el patrón en lo que se refiere a esto : En cada lado de cada marcapuntos. Repetir los aum a cada 7-7½-8-9-4½ cm 2-2-2-2-5 veces más (= un total de 3-3-3-3-6 aum) = 108-120-132-144-156 pts , a que se refiere, si le pongo 6 aumentos no me da la cantidad de 156 p que piden para seguir tejiendo. Espero su respuesta, les estaré muy agradecida por su ayuda. Yo les he escrito anteriormente y les dejé mi e-mail
24.10.2019 - 12:11DROPS Design ha risposto:
Ver la respuesta abajo
27.10.2019 - 18:32
![]() Julia ha scritto:
Julia ha scritto:
Quisiera saber como entender o leer las indicaciones. 2 marcapuntos en la pieza; 1 marcapuntos al inicio de la vta y 1 marcapuntos después de 48-54-60-66-66 pts. Ahora aum 1 pt – LEER TIP PARA AUMENTO – en cada lado de cada marcapuntos. Repetir los aum a cada 7-7½-8-9-4½ cm 2-2-2-2-5 veces más (= un total de 3-3-3-3-6 aum) = 108-120-132-144-156 pts – NOTA: Tejer los pts aum en el patrón.
24.10.2019 - 11:51DROPS Design ha risposto:
Hola Julia. En cada vuelta con aumentos aumentamos 4 puntos ( 1 punto a cada lado de cada marcapuntos y hay 2 marcapuntos). Después de completar los aumentos hay 24 puntos aumentados . 132 puntos ( los que teníamos al empezar los aumentos ) + 24 = 156 puntos
27.10.2019 - 18:31
![]() Hanlie ha scritto:
Hanlie ha scritto:
Started knitting this pattern for my grandson. I would like to know the following: Does the rib get knitted in the round and when you start pattern do you knit back and forth in pattern?
15.05.2019 - 16:50DROPS Design ha risposto:
Dear Hanlie, you knit rib in the round and continue in the round with pattern as well. Piece is divided and knitted back/forth by the armholes and neckline. Happy knitting!
15.05.2019 - 18:57
![]() Shirley ha scritto:
Shirley ha scritto:
I am having a lot a trouble trying to maintain the pattern stitches when adding the increase sts. there's always an area that goes off pattern. I have ripped my work out 4 times, trying to make the increase sts area less noticeable. can you give me any wise words for this issue
07.05.2019 - 17:46DROPS Design ha risposto:
Dear Shirley, when increasing on body, the first stitche increased (at the beg of round) will be now worked as the last stitch in A.1, the 2nd increase (before 2nd marker) will be worked as next stitch folllowing pattern (if the st before inc is the last st in A.1, work the inc as the first st in A.1), after marker work the inc as the st before the first st after marker and work the last inc (before 1st marker) as next st in pattern. Pattern will not match anymore on the sides at marker, but continue working pattern between markers. Happy knitting!
08.05.2019 - 07:16
![]() Shirley ha scritto:
Shirley ha scritto:
Thank you soo much for your quick response. That totally makes sense to me now. By the way, I love your designs
01.05.2019 - 13:42
![]() Shirley ha scritto:
Shirley ha scritto:
Apparently a diagram is different from a graph, which is what I have done. I am sorry but I am still confused. If the first round is K4 sts, how is the rest of the row worked? 2nd round is K4 sts and than what? 3rd round K1 st and 2 Psts. I guess what I need to know is , how is the rest of the round worked beyond the first 4 sts? Please help me!!
01.05.2019 - 13:27DROPS Design ha risposto:
Hello Shirley. You must repeat diagram on all sts on round. So on 1st, 2nd and 4th round you will knit all sts; on 3rd round you will * knit 1, purl 2* and repeat *-* on all sts . Happy knitting!
01.05.2019 - 13:36
![]() Shirley ha scritto:
Shirley ha scritto:
I have knit from diagrams many times, but I just can't figure this one out. The diagram A1 consists only of a block with 4 rows. I read this as knit 1 row - purl2 and knit 1-- than knit 2 rows. This pattern shows a nice texture, but I am having a hard time reading the diagram. Please help
01.05.2019 - 00:30DROPS Design ha risposto:
Dear Shirley, diagrams are to be read from the bottom right corner to the left. So, the first 2 rounds are K4, the third round is K1, P2, and the last round is K4. You have to repeat these rounds upwards. Happy knitting!
01.05.2019 - 09:48
|
|||||||
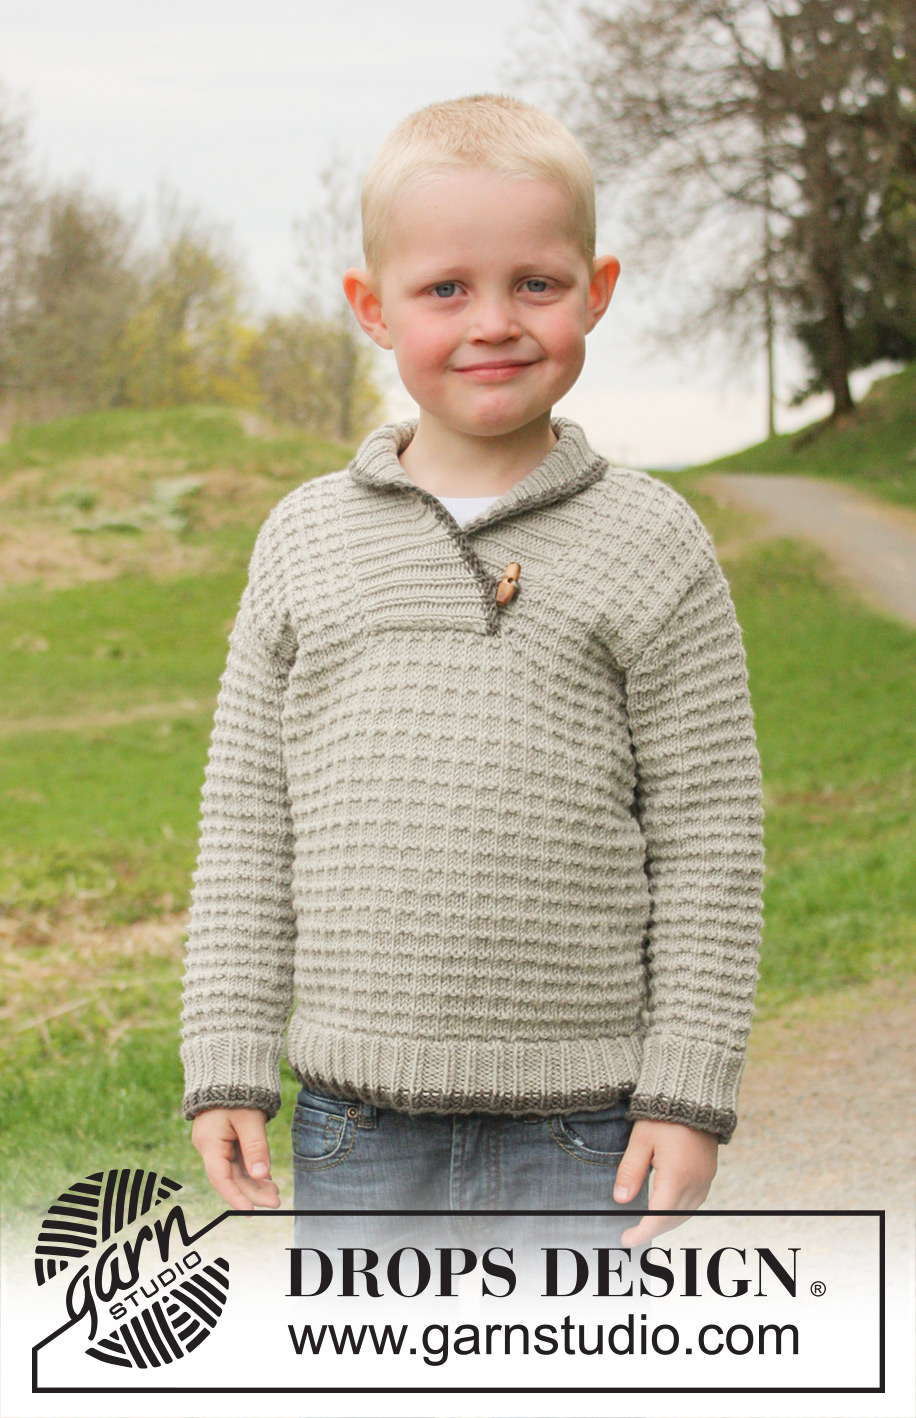
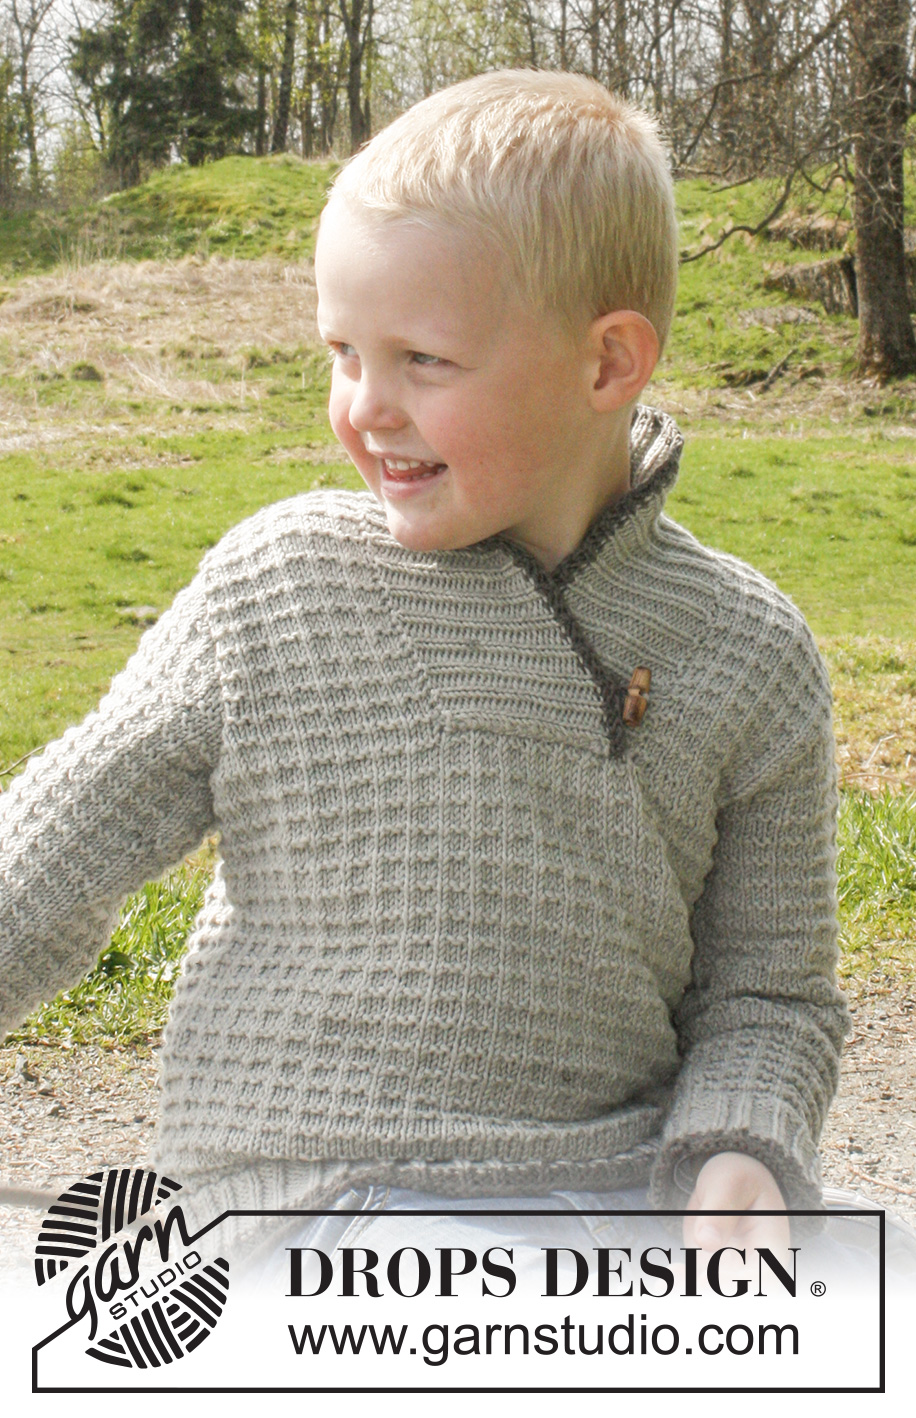
Jonathan#jonathansweater |
|||||||
 |
 |
||||||
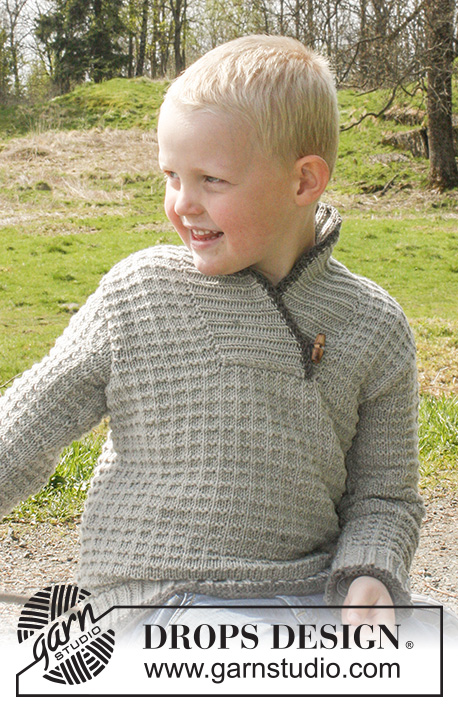
Maglione lavorato ai ferri con motivo a punto fantasia e colletto a scialle in DROPS Nepal. Taglie: dai 3 ai 12 anni.
DROPS Children 23-28 |
|||||||
|
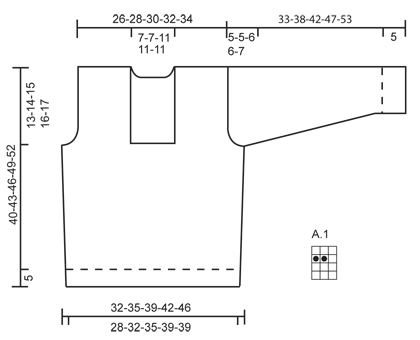
MOTIVO: Vedere il diagramma A.1. Il diagramma mostra il motivo dal diritto del lavoro. SUGGERIMENTO PER GLI AUMENTI: Aumentare 1 m. lavorando 2 m. nella stessa m. ---------------------------------------------------------- CORPO: Lavorato in tondo con i ferri circolari. Avviare 112-126-140-154-154 m. con i ferri circolari n° 4,5 mm con il Nepal grigio scuro. Lavorare 1 giro a dir. Poi lavorare il giro successivo come segue: * 1 m. dir., 2 m. rov., 1 m. dir., 3 m. rov. *, ripetere da *-* per tutto il giro. Continuare a coste in questo modo. ALLO STESSO TEMPO quando sono stati lavorati 2 giri a coste, passare al grigio e lavorare in grigio fino alla fine del lavoro. Quando le coste misurano 5 cm, diminuire tutte le sezioni con 3 m. rov. a 2 m. rov. (lavorando 2 m. insieme a rov.) = 96-108-120-132-132 m. Passare ai ferri circolari n° 5 mm e lavorare il motivo A.1. Quando il lavoro misura 6-6-7-7-7 cm, inserire 2 segnapunti nel lavoro; 1 segnapunti all’inizio del giro e 1 segnapunti dopo 48-54-60-66-66 m. Ora aumentare 1 m. – LEGGERE IL SUGGERIMENTO PER GLI AUMENTI – da ogni lato di tutti i segnapunti. Ripetere gli aumenti ogni 7-7½-8-9-4½ cm altre 2-2-2-2-5 volte (= un totale di 3-3-3-3-6 aumenti) = 108-120-132-144-156 m. - NOTA: Lavorare le m. aumentate secondo il motivo. Quando il lavoro misura 27-29-31-33-35 cm lavorare il f. successivo come segue: intrecciare 3 m. per lo scalfo, lavorare 18-21-21-24-27 m. secondo il motivo come prima (= davanti sinistro), intrecciare le 12-12-18-18-18 m. successive per il collo, lavorare 18-21-21-24-27 m. (= davanti destro), intrecciare 6 m. per lo scalfo, lavorare 48-54-60-66-72 m. (= dietro) e intrecciare le 3 m. rimaste per lo scalfo. Finire ogni parte in modo separato. DIETRO: = 48-54-60-66-72 m. Continuare avanti e indietro con il motivo come prima – ALLO STESSO TEMPO intrecciare per gli scalfi all’inizio di ogni f. da ogni lato come segue: 2 m. 1-1-1-2-2 volte e 1 m. 1-1-1-2-2 volte = 42-48-54-54-60 m. Lavorare fino a quando il lavoro misura 38-41-44-47-50 cm. Ora intrecciare le 10-10-16-16-16 m. centrali per il collo e finire ogni spalla in modo separato. Continuare a intrecciare 1 m. sul f. successivo dal collo = 15-18-18-18-21 m. rimaste sulla spalla. Continuare fino a quando il lavoro misura 40-43-46-49-52 cm e intrecciare. DAVANTI DESTRO: = 18-21-21-24-27 m. Continuare avanti e indietro con il motivo come prima e ALLO STESSO TEMPO intrecciare per gli scalfi all’inizio di ogni f. dal lato come sul dietro = 15-18-18-18-21 m. Continuare il motivo fino a quando il lavoro misura 40-43-46-49-52 cm e intrecciare - NOTA: Intrecciare sullo stesso f. del motivo come sul dietro. DAVANTI SINISTRO: = 18-21-21-24-27 m. Lavorare come sul davanti destro ma al contrario. MANICA: Avviare 35-35-42-42-42 m. con i ferri a doppia punta n° 4,5 mm con il filato grigio scuro. Lavorare 1 giro a dir. Poi lavorare il giro successivo come segue: * 1 m. dir., 2 m. rov. 1 m. dir., 3 m. rov. *, ripetere da *-* per tutto il giro. Continuare a coste in questo modo. ALLO STESSO TEMPO quando sono stati lavorati 2 giri a coste, passare al grigio e lavorare in grigio fino alla fine del lavoro. Quando le coste misurano 5 cm, diminuire tutte le sezioni con 3 m. rov. a 2 m. rov. = 30-30-36-36-36 m. Passare ai ferri a doppia punta n° 5 mm e lavorare il motivo A.1. Quando il lavoro misura 6 cm, inserire un segnapunti all’inizio del giro. Ora aumentare 2 m. al centro sotto la manica (cioè 1 m. da ogni lato del segnapunti), ripetere gli aumenti ogni 3½-4½-5-4-4½ cm per un totale di 6-6-6-9-9 volte = 42-42-48-54-54 m. – lavorare le m. aumentate secondo il motivo. Quando il lavoro misura 28-33-36-41-46 cm, intrecciare 6 m. al centro sotto la manica (cioè intrecciare 3 m. da ogni lato del segnapunti) e lavorare la manica avanti e indietro sui f. fino alla fine del lavoro. Intrecciare per l’arrotondamento della manica all’inizio di ogni f. da ogni lato come segue: 2 m. 1 volta e 1 m. 1 volta. Poi intrecciare 2 m. all’inizio di ogni f. da ogni lato fino a quando il lavoro misura 32-37-41-46-52 cm, poi intrecciare 3 m. all’inizio dei 2 f. successivi. Intrecciare le m. rimaste, il lavoro misura circa 33-38-42-47-53 cm. CONFEZIONE: Cucire i margini delle spalle. Cucire le maniche. COLLETTO A SCIALLE: Iniziare al centro davanti sul lato sinistro delle m. intrecciate per il collo (cioè sul davanti destro). Con i ferri circolari n° 4,5 mm e il filato grigio riprendere le m. come segue: 27-36 m. su verso la spalla, poi riprendere 15-21 m. sul dietro del collo, e infine 27-36 m. giù lungo il lato sinistro delle diminuzioni del collo = 69-93 m. (NOTA: non riprendere dove sono state intrecciate le m. sul davanti del collo). Lavorare 1 giro a dir. dal rovescio del lavoro e ALLO STESSO TEMPO aumentare in modo uniforme a 87-93-105-111-111 m. Poi lavorare a coste come segue (dal diritto del lavoro): 1 m. di vivagno che viene lavorata a dir. su tutti i f., * 1 m. dir., 2 m. rov. *, ripetere da *-* fino a quando rimangono 2 m., finire con 1 m. dir. e 1 m. di vivagno che viene lavorata a dir. s tutti i f. Continuare a coste in questo modo fino a quando il colletto misura circa 3-3-5-5-5 cm. Ora aumentare 1 m. dir. a ogni lato delle 10-12-12-14-14 m. dir. centrali visto dal diritto del lavoro (= dietro del collo) = 97-105-117-125-125 m. Lavorare a coste fino a quando il colletto misura 6-6-10-10-10 cm. Passare al grigio scuro e lavorare 2 f. a coste come prima, poi intrecciare senza stringere con dir. su dir. e rov. su rov. Piegare il colletto a metà (lato destro su lato sinistro) sulla parte inferiore dell’apertura del collo ed affrancare con piccoli punti alla scollatura attraverso entrambi gli strati – la m. di vivagno più esterna da ogni lato del colletto è cucita margine a margine nel filo davanti della m. più esterna verso il bordo di chiusura al centro davanti. Attaccare le maniche. ASOLA VOLANTE: Fare 1 asola volante così: Arrotolare 2 fili di 40 cm in grigio e piegarli i 2. Fissare l'asola ca 3 cm sopra la scollatura (ca 1 cm dal bordo del davanti).Passare l'estremità dei fili nel collo del davanti destro (appena dopo il bordo in grigio scuro) e fissare le estremità al dietro. Attaccare il bottone di legno sul collo davanti sinistro, ca 3 cm dalla scollatura. |
|||||||
Spiegazioni del diagramma |
|||||||
|
|||||||
 |
|||||||
Avete terminato questo modello?Allora taggate le vostre foto con #dropspattern #jonathansweater o inviatele alla #dropsfan gallery. Avete bisogno di aiuto con questo modello?Troverete 8 video tutorial, una sezione per i commenti/domande e molto altro guardando il modello su www.garnstudio.com © 1982-2026 DROPS Design A/S. Ci riserviamo tutti i diritti. Questo documento, compreso tutte le sue sotto-sezioni, è protetto dalle leggi sul copyright. Potete leggere quello che potete fare con i nostri modelli alla fine di ogni modello sul nostro sito. |
|||||||


Con oltre 40 anni di esperienza nel design di modelli di maglia e uncinetto, DROPS Design offre la più estesa collezione di modelli gratuiti su internet - tradotti in 17 lingue. Ad oggi vi possiamo fornire 325 cataloghi e 12298 modelli - 9569 dei quali sono tradotti in Italiano.
Ci stiamo impegnando molto per darvi il meglio che vi possiamo offrire in termini di maglia e uncinetto, ispirazioni e consigli così come filati di grande qualità ad un prezzo incredibile! Volete utilizzare i nostri modelli per qualcosa d'altro oltre al vostro uso personale? Potete leggere tutto ciò che è consentito nel testo sul Copyright in basso su tutte le pagine dei nostri modelli. Buon lavoro!
Lasciare un commento sul modello DROPS Children 23-28
Noi saremmo felici di ricevere i tuoi commenti e opinioni su questo modello!
Se vuoi fare una domanda, fai per favore attenzione a selezionare la categoria corretta nella casella qui sotto per velocizzare il processo di risposta. I campi richiesti sono indicati da *.