
Categorie popolari
State cercando un filato?


Commenti / Domande (118)
![]() Maria ha scritto:
Maria ha scritto:
Is it possible, that your stitch count is incorrect? With size XL I get 212 stitches around the chest, which come to 124 cm of circumference with a gauge of 17 stitches, instead of the indicated 116 cm... As Klaudia, I do not get your proportions: 84 cm (144 stitches at a 17 st gauge) of neckline circumference!?
04.02.2026 - 14:55
![]() Silvia ha scritto:
Silvia ha scritto:
Buongiorno, i 4 ferri in cui metto in attesa le maglie per lo scollo devono coincidere con gli ultimi 4 ferri del raglan? Io ho iniziato a mettere in attesa a 41 cm ma poi il raglan è continuato per un po' e mi sono trovata uno scalino...
30.12.2025 - 09:21DROPS Design ha risposto:
Buongiorno Silvia, deve seguire le indicazioni riportate: se le diminuzioni non sono terminate deve diminuire 1 maglia su ogni ferro fino alla fine delle diminuzioni. Buon lavoro!
30.12.2025 - 22:09
![]() Klaudia ha scritto:
Klaudia ha scritto:
Vielen Dank für die rasche Antwort. Mir war nicht klar, dass die Jacke einen so weiten Halsausschnitt hat - aber kein Problem, ich stricke einfach ein paar Abnahmen und Reihen mehr. Passt dann sicherlich auch noch oder?
02.12.2025 - 08:56DROPS Design ha risposto:
Liebe Klaudia, wenn Sie Änderungen machen möchten, denken Sie daran, die Jacke regelmäßig anzuprobieren, so wissen Sie, ob alles passt. Viel Spaß beim Stricken!
02.12.2025 - 17:07
![]() Klaudia ha scritto:
Klaudia ha scritto:
Servus, rein mathematisch bleiben mir erheblich mehr Maschen nach Abschluss der Raglanabnahmen übrig: ich stricke in XXL und habe bei Beginn der Rundpasse 352 M auf der Nadel, nehme dann 20 plus 6 x 8 M ab - sind 208 M. Es bleiben also 144 M übrig. Laut Anleitung sollten es jedoch "ca. 80 - 120 M entlang des gesamten Halsrandes" sein. Ich hab mal für alle Größen gerechnet und komm auf 92 - 156 M ??
01.12.2025 - 14:22DROPS Design ha risposto:
Liebe Klaudia, in XXL sind es 352 M am Anfang der Passe, für Raglan wird man insgesamt 208 Maschen abnehmen, dazu werden noch auch wenigstens 44 Maschen für den Hals stillgelegt und zwar: 12 M + (3 Maschen x 2) + (2 M x 2)= 22 M + 1 M in jeder 2. Reihe bis die Raglanabnahmen fertig sind. So sind es ca: 352-208-(22x2 Seiten) = 100 Maschen - dann stricken Sie alle Maschen inkl. die stillgelgten Maschen = wenigstens 44 Maschen (22 beidseitig) = ca 144 M. Viel Spaß beim Stricken!
01.12.2025 - 16:17
![]() Karishma Shah ha scritto:
Karishma Shah ha scritto:
Hi! When you say "remember the gauge" for the button band garter stitch, does that mean I should switch back to my Size 7 needles for the button band while using Size 8 needles for the stockinette?
24.10.2025 - 21:33DROPS Design ha risposto:
Dear Karishma Shah, after garter stitch at the bottom, you start working all the stitches on circular needle size 8 mm (including band mid front stitches). Happy knitting!
03.11.2025 - 08:53
![]() Tanja ha scritto:
Tanja ha scritto:
Kann das erste Knopfloch auch bereits nach 16cm statt nach 24 cm gearbeitet werden oder fällt der Kragen dann nicht richtig? Ich möchte den Hals lieber geschlossener haben.
03.09.2025 - 08:45DROPS Design ha risposto:
Liebe Tanja, das letzte Knopfloch wird ca 1 cm bevor man die Maschen für den Hals stilllegt, so können Sie kalkulieren, ob Sie am besten ein anderes Knopfloch vor dem 1. stricken möchten oder ob Sie dann liber das letzte früher stricken. Viel Spaß beim Stricken!
03.09.2025 - 16:18
![]() Susanne Hermann Danielsen ha scritto:
Susanne Hermann Danielsen ha scritto:
Hvor er opskriften til kraven ???
05.05.2025 - 13:07DROPS Design ha risposto:
Hei Susanne. Står under HALS: Når raglan indtagningerne er færdige skiftes til rundp 4,5 og der strikkes m op fra trådene = ca 80 til 120 m langs hele halskanten. Strik 1 p r - Samtidig med at m-ant justeres til 84-88-92-96-100-108 m. Fortsæt med retstrik til kraven måler 8-8-8-9-9-9 cm. Luk alle m løst af. mvh DROPS Design
05.05.2025 - 14:10
![]() Marie Duranceau ha scritto:
Marie Duranceau ha scritto:
Can you help me please, I have decreased 13 times and have reached the length recommended before I start to decrease on both the knit side and again on the purl side. How can I progress?
26.04.2025 - 23:53DROPS Design ha risposto:
Dear Mrs Duranceau, what about your tension? Do you have the 22 rows stocking stitch = 10 cm in height? If not, then you might have to edit how often you should work the decreases to match your own tension and the finished measurements. Happy knitting!
28.04.2025 - 09:29
![]() Marie Duranceau ha scritto:
Marie Duranceau ha scritto:
I find the instructions for the yoke very confusing, what do I do? Do I do the decreases on the knit and purl rows then do a plain knit and purl rows with no decreases? That makes 4rows altogether, and then do the 2 decrease rows again?
23.04.2025 - 15:49DROPS Design ha risposto:
See answer below, if it's still not clear, make sure to tell us which size you are working on. Happy knitting!
23.04.2025 - 16:20
![]() Marie Duranceau ha scritto:
Marie Duranceau ha scritto:
I find the instructions for the yoke very confusing, what do I do? Do I do the decreases on the knit and purl rows then do a plain knit and purl rows with no decreases? That makes 4rows altogether, and then do the 2 decrease rows again?
23.04.2025 - 15:49DROPS Design ha risposto:
Dear Mrs Duranceau, you start to decrease for raglan on the very first row over all stitches for yoke; and decrease for raglan a total of 18 -20 times (see size) on every other row = on every row from the right side then 2 to 8 times on every row = from both right side and wrong side, at the same time, remember to shape neck when piece measures 41-45 cm, first slipping stitches on each side on a thread/stitch holder, then casting off stitches. Can this help? Happy knitting!
23.04.2025 - 16:19
|
|
Winter Morning#wintermorningcardigan |
|
 |
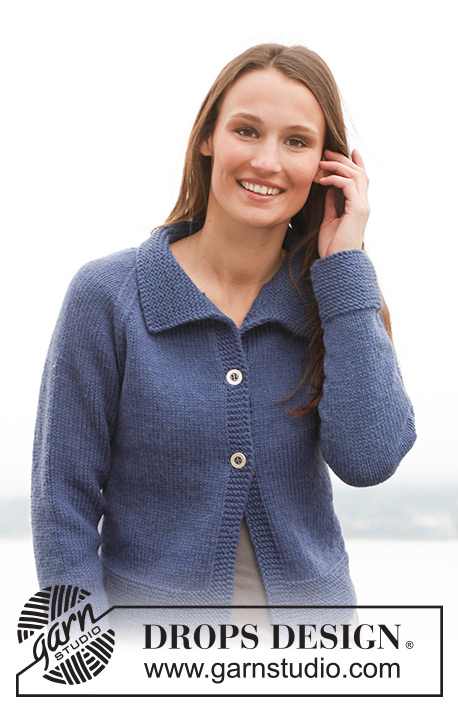 |
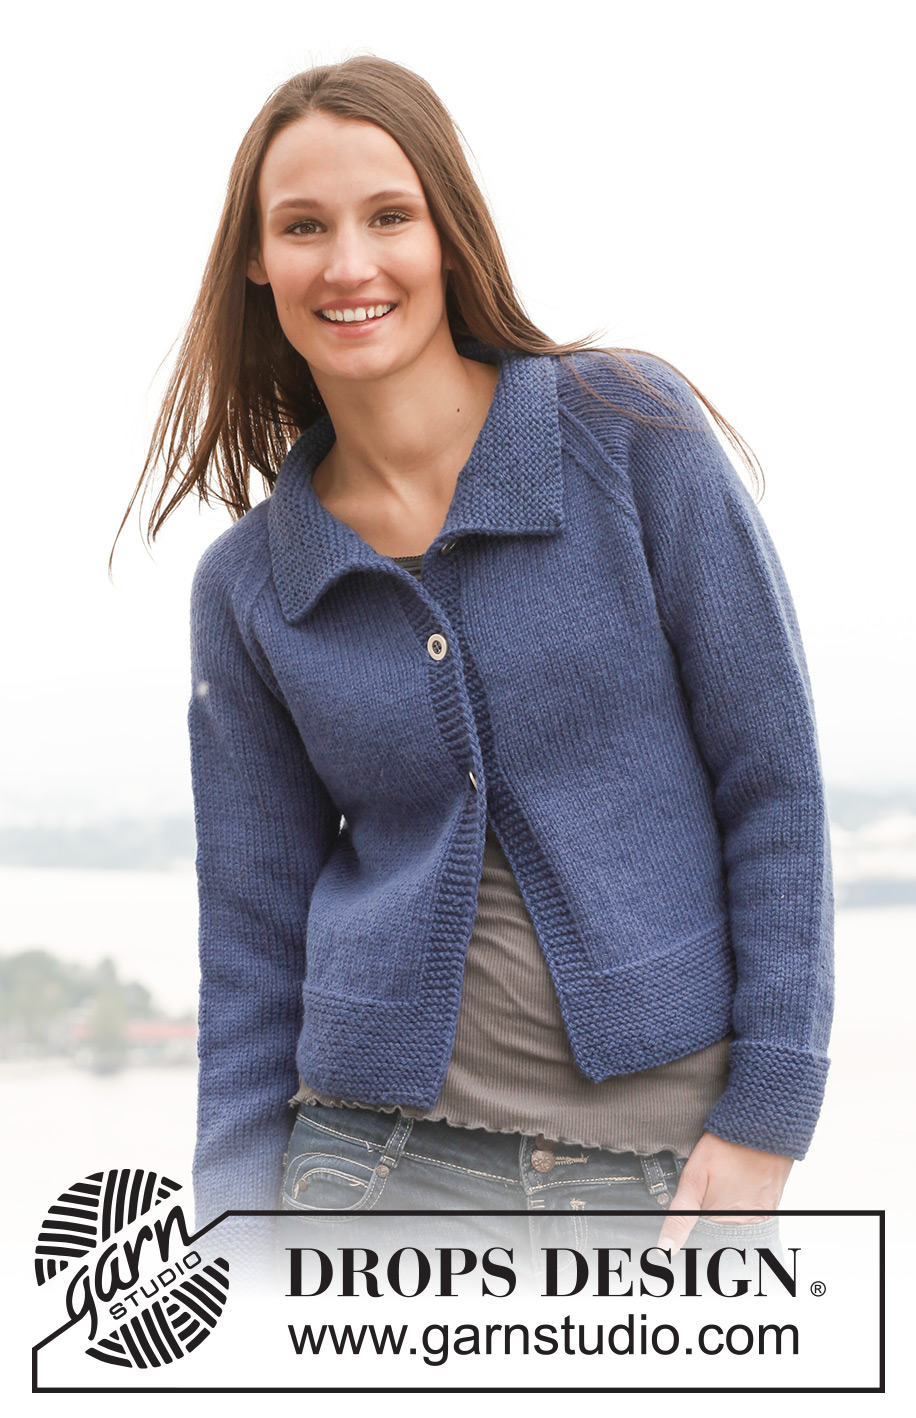
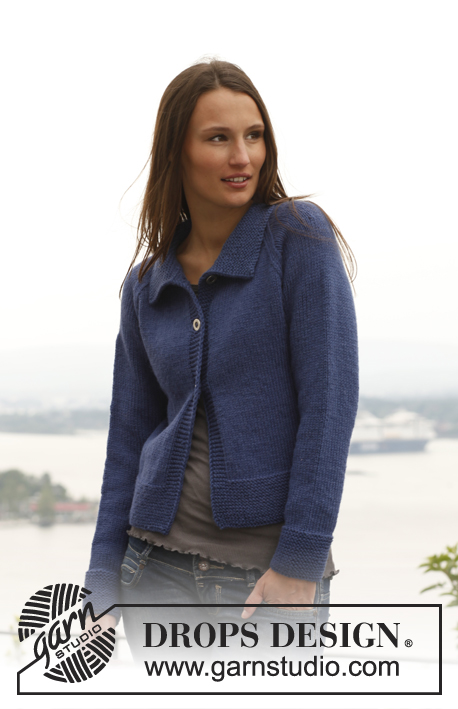
Giacca DROPS ai ferri con maniche raglan in "Alaska". Taglie: Dalla S alla XXXL.
DROPS 141-9 |
|
|
PUNTO LEGACCIO (avanti e indietro sui ferri): Lavorare tutti i ferri a dir. 1 “costa” a legaccio = 2 ferri a dir. PUNTO LEGACCIO (in tondo, sui ferri circolari): Lavorare * 1 giro a dir e 1 giro a rov *, ripetere da *-*. SUGGERIMENTO PER GLI AUMENTI: Aumentare 1 m da ciascun lato del segno, come segue: lavorare finché non rimane 1 m prima del segno, 1 m gettata, lavorare 2 m (il segno si trova tra queste 2 m), 1 m gettata. Al ferro successivo, lavorare le m gettate ritorte, per evitare che si formi un buco. RAGLAN: Diminuire come segue, sul diritto del lavoro: lavorare finché non rimangono 3 m prima del segno, 2 m insieme a dir, 2 m dir (il segno si trova tra queste 2 m), passare 1 m a dir senza lavorarla, 1 m dir, accavallare la m passata sulla m lavorata. Diminuire come segue, sul rovescio del lavoro: lavorare finché non rimangono 3 m prima del segno, 2 m insieme a rov ritorto (lavorare quindi le m nell’asola posteriore e non in quella anteriore), 2 m rov (il segno si trova tra queste 2 m), 2 m insieme a rov. ASOLE: Intrecciare, sul diritto del lavoro, le m per le 3 asole sul bordo davanti destro. 1 asola = intrecciare la 5° e la 6° m dal bordo al centro; al ferro successivo, avviare due nuove m sopra le m intrecciate. Intrecciare le m per le asole quando il lavoro misura: TAGLIA S: 24, 32, 40 cm. TAGLIA M: 25, 33, 41 cm. TAGLIA L: 24, 33, 42 cm. TAGLIA XL: 25, 34, 43 cm. TAGLIA XXL: 24, 34, 44 cm. TAGLIA XXXL: 24, 34, 44 cm. -------------------------------------------------------- DAVANTI & DIETRO: Si lavorano avanti e indietro sui ferri circolari; si inizia al centro, sul davanti. Avviare 140-156-172-192-212-232 m con il filato Alaska sui ferri circolari n° 4,5. Lavorare a PUNTO LEGACCIO - vedere le spiegazioni sopra - per 8-8-8-9-9-9 cm. Al ferro successivo, sul diritto del lavoro, passare ai ferri circolari n° 5; lavorare a maglia rasata - ma lavorare le 6-6-6-8-8-8 m più esterne, da ciascun lato, a punto legaccio (= bordi al centro, sul davanti). RICORDARSI LA TENSIONE DEL LAVORO! LEGGERE TUTTE LE INDICAZIONI SUCCESSIVE PRIMA DI PROSEGUIRE. Proseguire a maglia rasata con 6-6-6-8-8-8 m a punto legaccio, da ciascun lato, finché il lavoro non misura 9-9-9-10-10-10 cm. Inserire un segno dopo le prime 38-42-46-52-57-62 m e un segno prima delle ultime 38-42-46-52-57-62 m (= 64-72-80-88-98-108 m tra i due segni per il dietro). Spostare i segni progressivamente verso l’alto, man mano che si procede con il lavoro. Aumentare ora 1 m da ciascun lato di ognuno dei 2 segni - vedere il SUGGERIMENTO PER GLI AUMENTI sopra = sono state aumentate 4 m. Ripetere questi aumenti ogni 4-4-4½-4½-4½-4½ cm altre 4 volte (per un totale di 5 volte) = 160-176-192-212-232-252 m (= 74-82-90-98-108-118 m tra i 2 segni per il dietro) - ALLO STESSO TEMPO, quando il lavoro misura 24-25-24-25-24-24 cm, intrecciare le m per la prima asola sul bordo davanti destro – vedere ASOLE. Proseguire finché il lavoro non misura 29-30-31-32-33-34 cm. Intrecciare ora, per gli scalfi, 3 m da ciascun lato di ognuno dei 2 segni (intrecciare quindi 6 m da ciascun lato) = sul ferro rimangono 148-164-180-200-220-240 m. Lasciare il lavoro in sospeso e proseguire con le maniche. MANICHE: Si lavorano in tondo sui ferri a doppia punta. Avviare 36-38-40-42-44-44 m sui ferri a doppia punta n° 4,5 con il filato Alaska. Lavorare a punto legaccio per 8 cm. Passare poi ai ferri a doppia punta n° 5 e proseguire a maglia rasata. Inserire un segno all’inizio del giro (= centro, sotto la manica). Quando il lavoro misura 9 cm, aumentare 1 m da ciascun lato del segno. Ripetere questi aumenti altre 10-11-12-12-13-15 volte ogni 3½-3-3-3-2½-2 cm (= in tutto 11-12-13-13-14-16 volte) = 58-62-66-68-72-76 m. Quando il lavoro misura 48-48-47-47-46-46 cm (misure più corte per le taglie più grandi perché l’arrotondamento della manica è più lungo e le spalle sono più larghe), intrecciare 3 m da ciascun lato del segno (= intrecciare 6 m al centro, sotto la manica) = sul ferro rimangono 52-56-60-62-66-70 m. SPRONE: Passare le m delle maniche sullo stesso ferro circolare usato per lavorare il dietro e il davanti, nel punto in cui sono state intrecciate le m per gli scalfi = 252-276-300-324-352-380 m. Inserire un segno in corrispondenza di ciascun passaggio tra le maniche e il davanti / dietro (= 4 segni), Spostare i segni progressivamente verso l’alto, man mano che si procede con il lavoro. Lavorare ora a maglia rasata con 6-6-6-8-8-8 m a punto legaccio da ciascun lato - ALLO STESSO TEMPO, durante il primo ferro sul diritto del lavoro, iniziare a diminuire per il RAGLAN - vedere le spiegazioni sopra. Diminuire ogni 2 ferri per un totale di 18-18-18-20-20-20 volte, poi ogni ferro per 2-4-6-4-6-8 volte. ALLO STESSO TEMPO, quando il lavoro misura 41-42-43-44-45-45 cm, mettere in attesa su un ferma maglie le prime m all’inizio di ogni ferro, dal lato del collo, come segue: 8-8-10-10-12-12 m 1 volta, 3 m 1-1-1-2-2-2 volte, 2 m 2 volte, poi 1 m finché non sono state lavorate le diminuzioni per il raglan. COLLETTO: Terminate tutte le diminuzioni per il raglan, passare ai ferri circolari n° 4,5; lavorare le m messe precedentemente in attesa sui ferma maglie = lungo tutto il bordo del collo ci sono ca. da 80 a 120 m. Lavorare 1 ferro a dir e ALLO STESSO TEMPO portare il n° delle m a 84-88-92-96-100-108. Lavorare a punto legaccio finché il colletto non misura 8-8-8-9-9-9 cm. Intrecciare tutte le m senza stringere troppo il filo. CONFEZIONE: Cucire le aperture sotto le maniche. Attaccare i bottoni sul bordo davanti sinistro. |
|
 |
|
Avete terminato questo modello?Allora taggate le vostre foto con #dropspattern #wintermorningcardigan o inviatele alla #dropsfan gallery. Avete bisogno di aiuto con questo modello?Troverete 16 video tutorial, una sezione per i commenti/domande e molto altro guardando il modello su www.garnstudio.com © 1982-2026 DROPS Design A/S. Ci riserviamo tutti i diritti. Questo documento, compreso tutte le sue sotto-sezioni, è protetto dalle leggi sul copyright. Potete leggere quello che potete fare con i nostri modelli alla fine di ogni modello sul nostro sito. |
|


Con oltre 40 anni di esperienza nel design di modelli di maglia e uncinetto, DROPS Design offre la più estesa collezione di modelli gratuiti su internet - tradotti in 17 lingue. Ad oggi vi possiamo fornire 324 cataloghi e 12290 modelli - 9561 dei quali sono tradotti in Italiano.
Ci stiamo impegnando molto per darvi il meglio che vi possiamo offrire in termini di maglia e uncinetto, ispirazioni e consigli così come filati di grande qualità ad un prezzo incredibile! Volete utilizzare i nostri modelli per qualcosa d'altro oltre al vostro uso personale? Potete leggere tutto ciò che è consentito nel testo sul Copyright in basso su tutte le pagine dei nostri modelli. Buon lavoro!
Lasciare un commento sul modello DROPS 141-9
Noi saremmo felici di ricevere i tuoi commenti e opinioni su questo modello!
Se vuoi fare una domanda, fai per favore attenzione a selezionare la categoria corretta nella casella qui sotto per velocizzare il processo di risposta. I campi richiesti sono indicati da *.