
Categorie popolari
State cercando un filato?


Commenti / Domande (261)
![]() DROPS Design ha scritto:
DROPS Design ha scritto:
Ja, man strikker hele arb. med 2 tråder.
12.09.2011 - 09:59
![]() Silje ha scritto:
Silje ha scritto:
Ser at det står "Legg opp 36-38-40 m på settp 6 med 1 tråd mellomgrå mix og 1 tråd grå mix." Betyr det at man strikker hele arbeidet med dobbel tråd?
09.09.2011 - 13:50
![]() DROPS Design ha scritto:
DROPS Design ha scritto:
Herdis: Hvor i oppskriften har du problemer?
06.09.2011 - 09:22
![]() DROPS Design ha scritto:
DROPS Design ha scritto:
Alberthe: Den siste delen (solen) strikkes glatt.
06.09.2011 - 09:21
![]() Herdis ha scritto:
Herdis ha scritto:
Ikke så let og skjønne opskriften på sokkene,kunne hvert bedre forklart.
05.09.2011 - 22:23
![]() Alberthe ha scritto:
Alberthe ha scritto:
Jeg strikkede disse sokker og opdagede, at der står i opskriften, at man skulle strikke, efter skaftet, strikke videre i galtstrik- men billedet viser jo tydeligt at den er i r/v stadigvæk...det kan da kun være en fejl ikk' Venligst Alberthe Hegner
27.07.2011 - 09:35
![]() Jeanette ha scritto:
Jeanette ha scritto:
Stoere Sokken, vallen prima in de smaak bij mijn drie puber dochters!
08.07.2011 - 14:40Cathy ha scritto:
Trop belles ces chausettes! Aurons-nous les explications? Merci!!
06.07.2011 - 23:13
![]() Paula ha scritto:
Paula ha scritto:
Så fina!
06.07.2011 - 18:19
![]() Geesje ha scritto:
Geesje ha scritto:
Ik kan niet wachten op het patroon van de sokken .ik wil het dolgraag breien.
02.07.2011 - 16:10
|
|
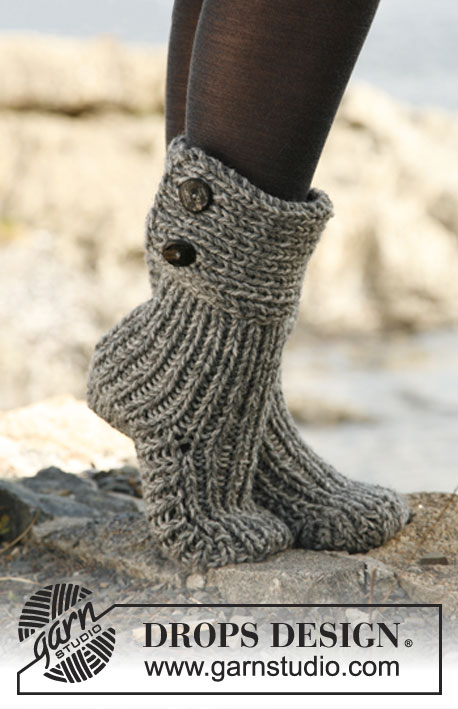
Moon Socks#moonsocks |
|
 |
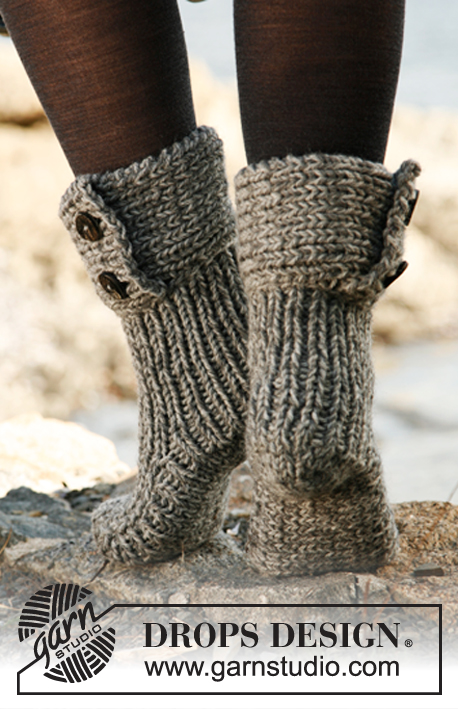 |
Calze DROPS lavorate con 2 capi, in "Nepal"
DROPS 134-42 |
|
|
PUNTO LEGACCIO (avanti e indietro sul f): Lavorare tutti i ferri a diritto. -------------------------------------------------------- CALZE: GAMBO: Avviare 36-38-40 m con i ferri a doppia punta 6 con 1 capo grigio medio mix e 1 capo grigio mix. Lavorare a coste 1 m dir / 1 m rov in tondo finché il lavoro non misuri ca 10 cm. PIEDE: Conservare poi le 9-11-11 prime m del giro sul ferro, passare in attesa le 27-27-29 m rimanenti su un fermamaglie/filo. Continuare a coste avanti e indietro sulle 9-11-11 m, ALLO STESSO TEMPO, al 1° ferro avviare 1 nuova m ad ogni lato (m vivagno) = 11-13-13 m. Dopo aver lavorato 7-8,5-10 cm, intrecciare 1 m vivagno ad ogni lato = 9-11-11 m. Rimettere poi le m in attesa dal fermamaglie/filo sul ferro e lavorare e riprendere 12-14-16 m ad ogni lato della parte centrale (all’interno di 1 m vivagno) = 60-66-72 m sul f. Misurare il lavoro da qui d’ora in poi. Lasciare 1 segno/filo in mezzo davanti sulla punta e 1 segno/filo in mezzo dietro sul tallone. Continuare in tondo a coste come prima per 2 cm. Terminare poi a maglia rasata - ALLO STESSO TEMPO, lavorare insieme 2 m a dir ad ogni lato di ogni segno/filo ogni 2 ferri (= 4 diminuzioni per giro). Continuare a diminuire finché la parte a maglia rasata non misuri 3-3-4 cm – intrecciare. Fare la cucitura in mezzo sotto il piede nel filo della maglia più esterna per evitare che diventi troppo spessa. BORDO, LAVORATO NEL SENSO DELLA LUNGHEZZA: Avviare 15-17-17 m con i ferri 6 e 1 capo grigio medio mix e 1 capo grigio mix. Lavorare così: 1 m PUNTO LEGACCIO - ved spieg sopra, * 1 m dir, 1 m rov *, ripetere da *-* e terminare con 1 m dir e 1 m punto legaccio. Quando il lavoro misura 2 cm, intrecciare per le 2 asole così sul diritto: 1 m punto legaccio, 1 m dir, 1 m rov, passare 1 m a dir senza lavorarla, 1 m dir, accavallare la m passata sopra quella lavorata, 1 gettato, * 1 m dir, 1 m rov *, ripetere da *-* finché non rimangano 5 m, 1 gettato, 2 m insieme a dir, 1 m rov, 1 m dir, 1 m punto legaccio. Continuate con le coste e punto legaccio ad ogni lato finché il lavoro non misuri ca 36-37-38 cm. Intrecciare con il dir sopra il dir e il rov sopra il rov. Attaccare i bottoni sul bordo e abbottonare. Infilare il gambo dentro il bordo abbottonato 2 cm. Fare attenzione che i bottoni rimangano all’esterno delle calze. Cucire il bordo di avviamento al bordo sul rovescio con punti invisibili. |
|
Avete terminato questo modello?Allora taggate le vostre foto con #dropspattern #moonsocks o inviatele alla #dropsfan gallery. Avete bisogno di aiuto con questo modello?Troverete 10 video tutorial, una sezione per i commenti/domande e molto altro guardando il modello su www.garnstudio.com © 1982-2026 DROPS Design A/S. Ci riserviamo tutti i diritti. Questo documento, compreso tutte le sue sotto-sezioni, è protetto dalle leggi sul copyright. Potete leggere quello che potete fare con i nostri modelli alla fine di ogni modello sul nostro sito. |
|


Con oltre 40 anni di esperienza nel design di modelli di maglia e uncinetto, DROPS Design offre la più estesa collezione di modelli gratuiti su internet - tradotti in 17 lingue. Ad oggi vi possiamo fornire 325 cataloghi e 12298 modelli - 9569 dei quali sono tradotti in Italiano.
Ci stiamo impegnando molto per darvi il meglio che vi possiamo offrire in termini di maglia e uncinetto, ispirazioni e consigli così come filati di grande qualità ad un prezzo incredibile! Volete utilizzare i nostri modelli per qualcosa d'altro oltre al vostro uso personale? Potete leggere tutto ciò che è consentito nel testo sul Copyright in basso su tutte le pagine dei nostri modelli. Buon lavoro!
Lasciare un commento sul modello DROPS 134-42
Noi saremmo felici di ricevere i tuoi commenti e opinioni su questo modello!
Se vuoi fare una domanda, fai per favore attenzione a selezionare la categoria corretta nella casella qui sotto per velocizzare il processo di risposta. I campi richiesti sono indicati da *.