
Categorie popolari
State cercando un filato?


Commenti / Domande (59)
![]() Camilla ha scritto:
Camilla ha scritto:
Jeg er ved at lave pandebåndet. I diagrammet står der man skal strikke ret over ret og vrang over vrang. Når jeg har slået de 12 masker op er 1. pind på vrang-siden, den næste pind på ret-siden. Dvs. snoninger bliver lavet fra vrang siden? Hvorfor skal jeg så strikke ret på hjælpepinden og de resterende masker?
02.11.2014 - 23:31DROPS Design ha risposto:
Hej Camilla. 1. pind er retsiden. Snoningerne laves paa retsiden.
06.11.2014 - 13:42
![]() Carla ha scritto:
Carla ha scritto:
Il modello è bellissimo, ma devo mettere il doppio dei punti. Come costruire lo schema? Devo farlo speculare? Grazie per la risposta
07.09.2014 - 10:29DROPS Design ha risposto:
Deve mettere il doppio dei punti perché utilizza un filato più sottile? Nel caso in cui dovesse fare così potrebbe lavorare la treccia più larga (con più maglie ogni fascia della treccia) per esempio. Se deve fare la fascia deve fare prima un campione per capire quanto rende con il filato che utilizzerà.
11.09.2014 - 16:31
![]() Klára S ha scritto:
Klára S ha scritto:
Dobrý den, v českém návodu neodpovídá popis vzorku originálu. Hezký den Klára S
01.02.2014 - 20:23DROPS Design ha risposto:
Dobrý den, děkuji za upozornění - opraveno!
08.02.2014 - 01:06
![]() Isabel ha scritto:
Isabel ha scritto:
Hallo, Maakt het nog uit wat voor maat kabelnaald ik gebruik voor de hoofdband? Bedankt
26.10.2013 - 14:06DROPS Design ha risposto:
Hoi Isabel. De kabelnld moet niet te dun zijn. Heb je niet een hele dikke kabelnld, dan kan je eventueel een sokkenbreinld gebruiken.
28.10.2013 - 19:13
![]() Jan ha scritto:
Jan ha scritto:
Got it - thank you - sorry to be so dense :)
30.01.2013 - 00:43
![]() Jan ha scritto:
Jan ha scritto:
Yes, I have checked your video which is great for a cable stitch in the middle of a row, not as the first stitch in the row. The difference is that the skein side of the wrapping yarn is on the cable needle not the right hand needle so i am not sure if that yarn should go behind the cable needle or infront of the cable needle prior to knitting the next/6th stitch.
29.01.2013 - 18:49DROPS Design ha risposto:
In front, because stitches you have to knit next are in front of slipped sts.
29.01.2013 - 21:49
![]() Jan ha scritto:
Jan ha scritto:
Another source of my confustion -the wrap over yarn is on the cable needle since it is the first 5 stiches being slipped, when a cable is worked in the middle of a piece, the wrap over yarn is on the right hand knitting needle. Thank you again.
29.01.2013 - 13:41DROPS Design ha risposto:
Have you checked out our Video tutorials for cable knitting?
29.01.2013 - 14:58
![]() Jan ha scritto:
Jan ha scritto:
Thank you for your response and clarification. One more question - does the wrapping yarn for the 11th row go behind the cable needle and slipped stiches or in front? Thank you
29.01.2013 - 13:35DROPS Design ha risposto:
The yarn should not run over stitches in front and should not be visible. When you slip first 5 sts to cable needle behind piece, keep yarn front to knit next st from left needle.
29.01.2013 - 14:48
![]() Jan ha scritto:
Jan ha scritto:
I am making the neckwarmer and have a question regarding the 11th row. If I read the pattern correctly, this row starts with the 5 stitches slipped off to the cable needle. I find this awkward since the first stitch has the wrapping yarn (for lack of a better term). Am I reading the pattern correctly? I hope I am explaining myself properly.
28.01.2013 - 23:43DROPS Design ha risposto:
Dear Jan, you are correct, on row 11 the first 5 sts are slipped on cable needle behind piece for the cable. Happy knitting!
29.01.2013 - 09:02
![]() Isabel Hicks ha scritto:
Isabel Hicks ha scritto:
Would be grateful for some help! Am doing this lovely headband but- cast on 12 stitches K1 then cabled 4 back knitted 4 . Three stitches left - please tell me how do I get the braiding as no stitches left to do the other half of the chart - where am I going wrong?.. Many thanks
20.01.2013 - 00:32DROPS Design ha risposto:
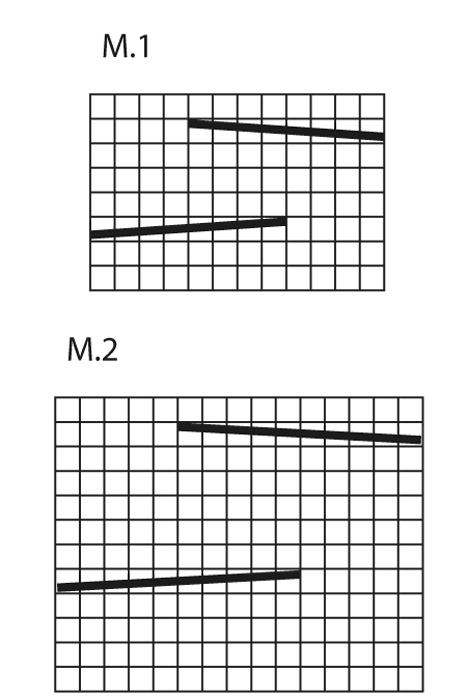
Dear Mrs Hicks, diagram is read from bottom right towards the left (RS) and left towards right side (WS), and M1 =12 sts, row 3 is : K4, cable on the next 8 sts. R7 : cable on the first 8 sts, K4. Happy knitting!
21.01.2013 - 18:21
|
||||||||||||||||
Braidy#braidyset |
||||||||||||||||
 |
 |
|||||||||||||||
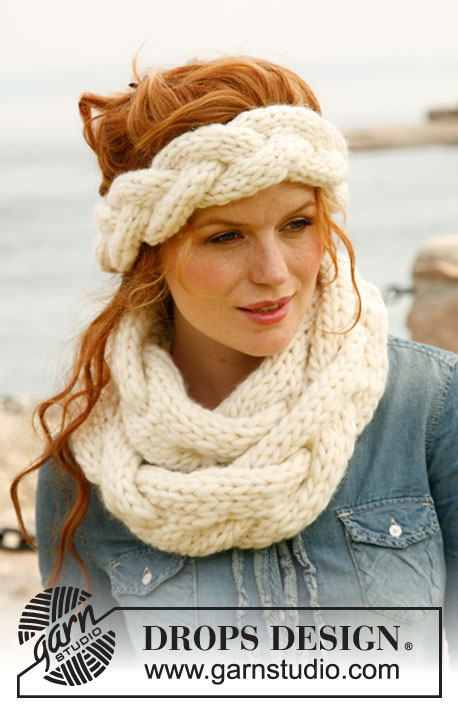
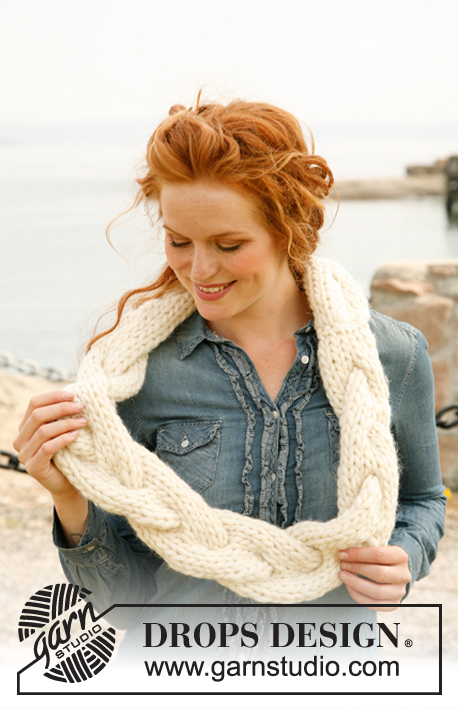
Fascia DROPS ai ferri e scalda collo con ampia treccia, in "Polaris".
DROPS 134-7 |
||||||||||||||||
|
MOTIVO: Vedere il diagramma M.1 per la fascia e il diagramma M.2 per lo scalda collo. I diagrammi mostrano il motivo sul diritto del lavoro. SUGGERIMENTO PER CAMBIARE GOMITOLO: Quando si cambia gomitolo con il filato Polaris, dividere in 2 gli ultimi 15 cm del filo del gomitolo finito – tagliare una delle due parti e fare la stessa cosa con il filo del gomitolo da iniziare. Sovrapporre i primi e gli ultimi 15 cm dei due gomitoli, in modo da ottenere lo spessore giusto e continuare a lavorare – questo consente di rendere invisibile il passaggio tra due gomitoli. FASCIA: Si lavora avanti e indietro in un unico lungo pezzo, cucito in cerchio alla fine. Avviare 12 m sul ferro n° 12 con il filato Polaris. Lavorare il diagramma M.1 finché il lavoro non misura ca. 50 cm – finire comunque dopo aver completato un’intera ripetizione del motivo. Lavorare 1 ferro a maglia rasata e chiudere le m senza stringere troppo il filo. Cucire insieme la riga di avvio delle m con la riga di chiusura; cucire bordo contro bordo per evitare una cucitura troppo spessa. SCALDACOLLO: Si lavora avanti e indietro in un unico lungo pezzo, cucito in cerchio alla fine. Avviare 15 m sui ferri n° 15 con il filato Polaris. Lavorare il diagramma M.2 finché il lavoro non misura ca 120 cm - finire comunque dopo aver completato un’intera ripetizione del motivo. Lavorare 4 ferri a maglia rasata e chiudere le m senza stringere troppo il filo. Cucire insieme la riga di avvio delle m con la riga di chiusura; cucire bordo contro bordo per evitare una cucitura troppo spessa Piegare in due lo scaldacollo (formare un otto), prima di indossarlo. |
||||||||||||||||
Spiegazioni del diagramma |
||||||||||||||||
|
||||||||||||||||
 |
||||||||||||||||
Avete terminato questo modello?Allora taggate le vostre foto con #dropspattern #braidyset o inviatele alla #dropsfan gallery. Avete bisogno di aiuto con questo modello?Troverete 5 video tutorial, una sezione per i commenti/domande e molto altro guardando il modello su www.garnstudio.com © 1982-2026 DROPS Design A/S. Ci riserviamo tutti i diritti. Questo documento, compreso tutte le sue sotto-sezioni, è protetto dalle leggi sul copyright. Potete leggere quello che potete fare con i nostri modelli alla fine di ogni modello sul nostro sito. |
||||||||||||||||


Con oltre 40 anni di esperienza nel design di modelli di maglia e uncinetto, DROPS Design offre la più estesa collezione di modelli gratuiti su internet - tradotti in 17 lingue. Ad oggi vi possiamo fornire 324 cataloghi e 12290 modelli - 9560 dei quali sono tradotti in Italiano.
Ci stiamo impegnando molto per darvi il meglio che vi possiamo offrire in termini di maglia e uncinetto, ispirazioni e consigli così come filati di grande qualità ad un prezzo incredibile! Volete utilizzare i nostri modelli per qualcosa d'altro oltre al vostro uso personale? Potete leggere tutto ciò che è consentito nel testo sul Copyright in basso su tutte le pagine dei nostri modelli. Buon lavoro!
Lasciare un commento sul modello DROPS 134-7
Noi saremmo felici di ricevere i tuoi commenti e opinioni su questo modello!
Se vuoi fare una domanda, fai per favore attenzione a selezionare la categoria corretta nella casella qui sotto per velocizzare il processo di risposta. I campi richiesti sono indicati da *.