
Categorie popolari
State cercando un filato?


Commenti / Domande (139)
![]() MackK ha scritto:
MackK ha scritto:
I know the pattern does not call for using the turning method (turn work after each round) but has it be done turning after each round? Should it? Larger squares such as this show a "lean" in the direction worked when not using the turning method.
08.11.2014 - 02:05DROPS Design ha risposto:
Dear Mrs Mackk, you can work in the round every round from RS as in pattern or work in the round alternately from RS and from WS to get a reversible effect, you can choose the way you rather like. Happy crocheting!
08.11.2014 - 10:09
![]() Bee ha scritto:
Bee ha scritto:
I can't see how many balls of wool are required for this pattern, please would you advise, thanks.
29.08.2014 - 17:40DROPS Design ha risposto:
Dear Bee, you will find total amount of yarn requested on the right side of the picture under tab "Materials", ie you need 350 g Karisma 01 / 50 g a ball Karisma = 7 balls colour 01 (+ 3 balls each colour 30, 37 and 43). Happy crocheting!
01.09.2014 - 10:19
![]() DROPS Design ha scritto:
DROPS Design ha scritto:
I ten również już gotowy po polsku!
25.08.2014 - 17:59
![]() Grethe ha scritto:
Grethe ha scritto:
Dårlig forklart, feil i oppskrift. :-(
24.08.2014 - 12:47
![]() Manon Wolters ha scritto:
Manon Wolters ha scritto:
Is er van dit geschreven patroon een grafiek/diagram? Of te wel een getekend patroon?
17.08.2014 - 15:24DROPS Design ha risposto:
Hoi Manon. Nee, we hebben helaas geen diagram voor dit patroon.
18.08.2014 - 17:00DROPS POland ha scritto:
Oczywiscie. Bedzie dostepny po 10 sierpnia. Pozdrawiam
07.08.2014 - 16:29Anna ha scritto:
Translate it to polish please.
07.08.2014 - 01:02
![]() Susanne C ha scritto:
Susanne C ha scritto:
Jeg forstår altså ikke start F.eks. omgang 3. ... En st.i den første af de 3 lm...hvilke 3 lm? der har kun været flere lm i træk i starten af runde 2, og jeg skal vel ikke ned i den første af dem? Jeg ved godt, at jeg selv kan komponere noget, jeg kan få til at virke, men der er flere steder, at det er uklart, og jeg er ellers vant til at hækle...
17.07.2014 - 13:20DROPS Design ha risposto:
Hej Susanne. Du er jo startet omgang 3 med 3 lm (3 lm erstatter 1e st), så hækler du 1 st i den første af disse 3 lm osv.
18.07.2014 - 13:16
![]() Francien ha scritto:
Francien ha scritto:
Ik heb kleur nr 43 nodig, ijsblauw maar die is nergens terug te vinden op de kleurenkaart, welk garen moet ik daar dan voor nemen?
04.07.2014 - 10:04DROPS Design ha risposto:
Hoi Francien. Deze kleur is helaas niet meer verkrijgbaar. Je kan een alternatief nemen van de kleurenkaart - bijvoorbeeld de nummer 68 of neem contact op met je verkooppunt. Ze helpen je graag met de juiste combinatie.
04.07.2014 - 15:46Penny Meyer ha scritto:
The video of the joining technique is great, BUT how do I do the corners? Specifically the 4 corner join. Perhaps you can suggest a link. Thanks.
28.06.2014 - 07:09DROPS Design ha risposto:
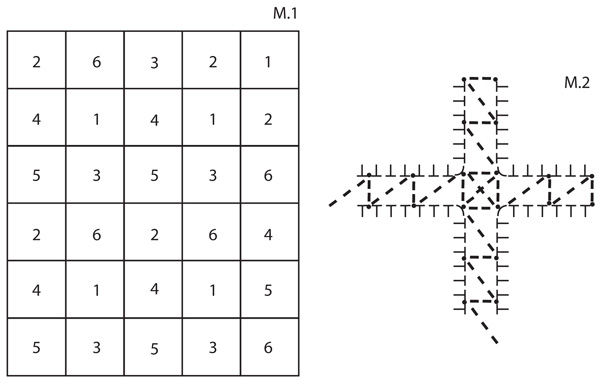
Dear Mrs Meyer, crochet the squares tog vertically in a stripe, then crochet stripes together horizontally as you joined them together vertically (see also chart M.2 + video). Happy crocheting!
28.06.2014 - 15:11
|
||||||||||
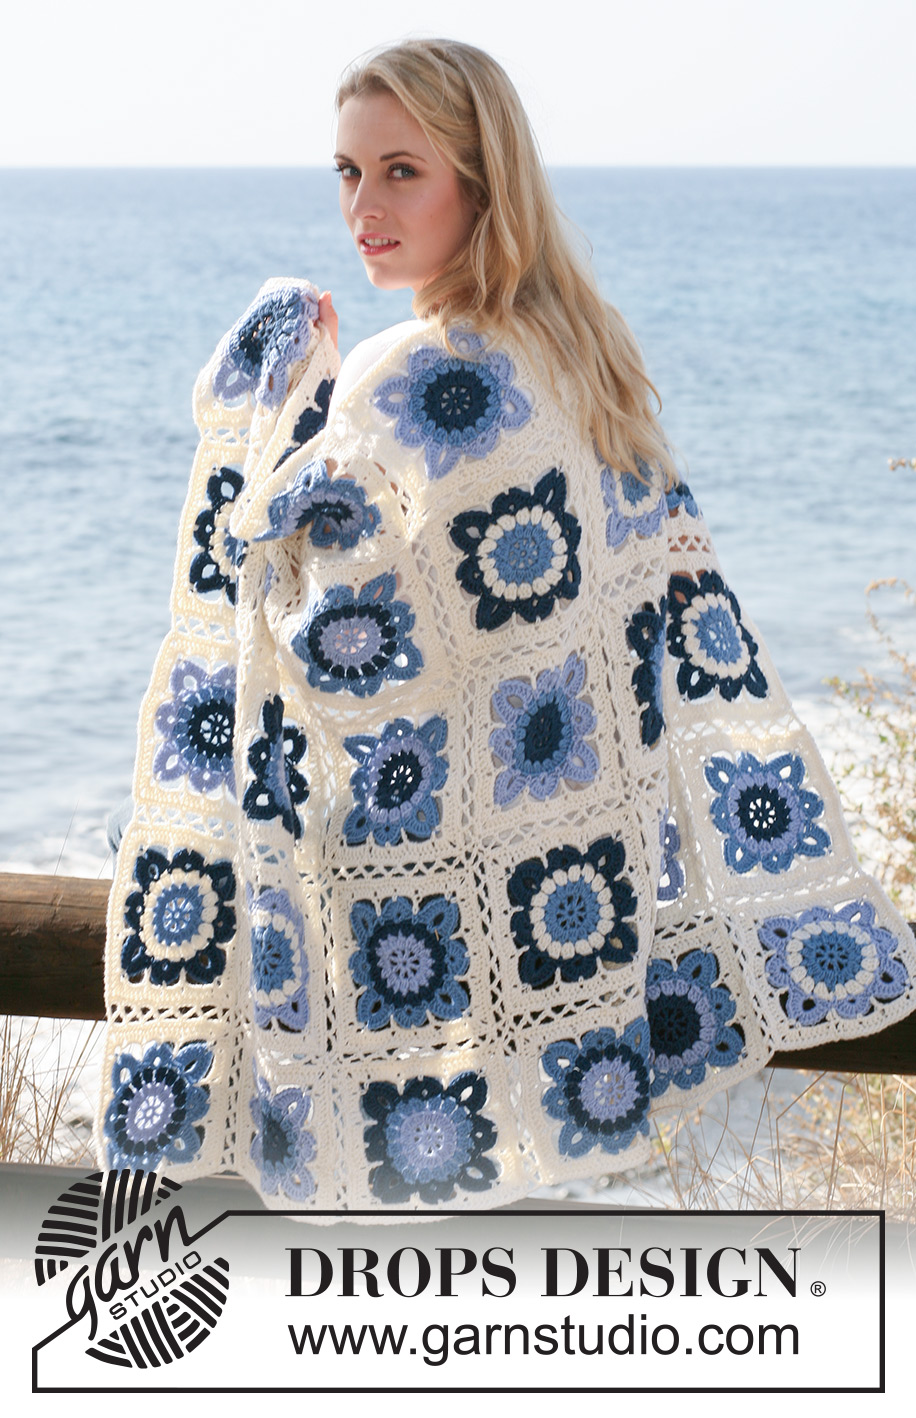
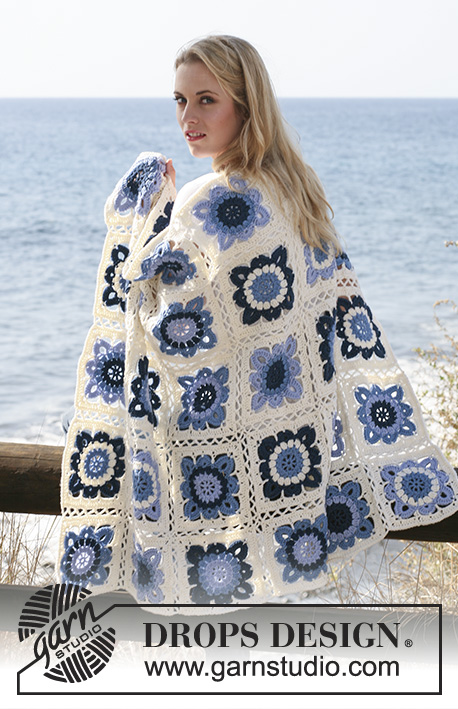
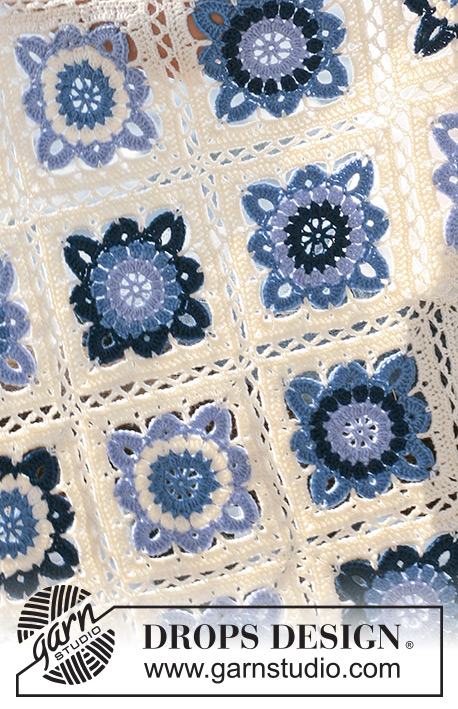
Seaside Blues#seasidebluesblanket |
||||||||||
 |
 |
|||||||||
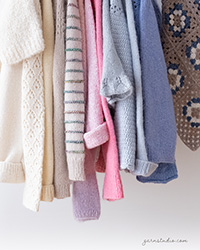
Coperta DROPS a quadrati all’uncinetto in ”Karisma”.
DROPS 120-3 |
||||||||||
|
COMBINAZIONE COLORI: Quadrato 1: 1° - 2° giro: blu jeans chiaro 3° giro: panna 4° - 5° giro: blu ghiaccio 6° - 8° giro: panna Quadrato 2: 1° - 2° giro: blu/grigio scuro 3° giro: blu ghiaccio 4° - 5° giro: blu jeans chiaro 6° - 8° giro: panna Quadrato 3: 1° - 2° giro: blu jeans chiaro 3° giro: panna 4° - 5° giro: blu/grigio scuro 6° - 8° giro: panna Quadrato 4: 1° - 2° giro: blu ghiaccio 3° giro: blu jeans chiaro 4° - 5° giro: blu/grigio scuro 6° - 8° giro: panna Quadrato 5: 1° - 2° giro: blu/grigio scuro 3° giro: blu jeans chiaro 4° - 5° giro: blu ghiaccio 6° - 8° giro: panna Quadrato 6: 1° - 2° giro: blu ghiaccio 3° giro: blu/grigio scuro 4° - 5° giro: blu jeans chiaro 6° - 8° giro: panna CONFEZIONE DEI QUADRATI: Ved diag M.1 e M.2. -------------------------------------------------------- COPERTA: Fare in totale 30 quadrati, 5 per ogni combinazione colore – vedere COMBINAZIONE COLORI! QUADRATO: Con 1 filo Karisma e l’uncinetto n° 5, avviare 4 cat e formare 1 anello con 1 m.bss nella 1° cat. 1° GIRO: 4 cat (= 1 m.a + 1 cat), * 1 m.a nell’anello, 1 cat *, ripetere da *-* in totale 7 volte, terminare con 1 m.bss nella 3a cat d’inizio giro = 8 m.a. RICORDATI LA TENSIONE DEL LAVORO! 2° GIRO: 3 cat (= 1 m.a), 1 m.a nella 1a di queste 3 cat, ma non fare l’ultima estrazione del filo (= 2 m sull’uncinetto), 1 m.a nella stessa cat, ma non fare l’ultima estrazione del filo (= 3 m sull’uncinetto), 1 gettato, far passare l’uncinetto attraverso tutte e 3 le m = 1 m sull’uncinetto (= 1 gruppo di m.a). Lavorare * 1 cat, 1 m.a nella cat successiva, ma non fare l’ultima estrazione del filo (= 2 m sull’uncinetto), 1 m.a nella stessa cat, ma non fare l’ultima estrazione del filo (= 3 m sull’uncinetto), 1 gettato, far passare l’uncinetto attraverso tutte e 3 le m = 1 m sull’uncinetto (= 1 gruppo di m.a), 1 cat, 1 m.a nella m.a successiva, ma non fare l’ultima estrazione del filo (= 2 m sull’uncinetto), 1 m.a nella stessa m.a, ma non fare l’ultima estrazione del filo (= 3 m sull’uncinetto), 1 gettato, far passare l’uncinetto attraverso tutte e 3 le m = 1 m sull’uncinetto (= 1 gruppo di m.a) *. Ripetere da *-* e finire con 1 gruppo di m.a nell’ultima cat, 1 cat e 1 m.bss nella 3a cat d’inizio giro = 16 gruppi di m.a. Tagliare il filo. 3° GIRO: Cambiare colore. Lavorare 4 cat, * 3 m.a nella cat successiva, 1 cat *, ripetere da *-*, e finire con 2 m.a nell’ultima cat e 1 m.bss nella 3a cat d’inizio giro. Tagliare il filo. 4° GIRO: Cambiare colore. Lavorare 1 cat, 1 m.b nella 1a cat, * 3 cat, 1 m.b nella cat successiva, 3 cat, 1 m.b nella stessa cat, 3 cat, 1 m.b nella cat successiva, 3 cat, 1 m.b nella cat successiva, 7 cat, 1 m.b nella stessa cat, 3 cat, 1 m.b nella cat successiva, *, ripetere da *-*, terminare con 1 m.bss nella 1a m.b d’inizio giro. (= 4 archetti di 7 cat = angoli). 5° GIRO: 1 cat, 1 m.b nella 1a m.b del giro precedente, * saltare l’archetto di 3 cat, nell’archetto di 3 cat successivo, lavorare così: 4 m.a, 1 cat, 4 m.a. Saltare l’archetto di 3 cat successivo, 1 m.b nella m.b successiva, saltare l’archetto di 3 cat successivo, nell’archetto di 7 cat, lavorare così: 6 m.a, 2 cat, 6 m.a. Saltare l’archetto di 3 cat successivo, 1 m.b nella m.b successiva *, ripetere da *-*, e finire con 1 m.bss nella 1a m.b d’inizio giro. Tagliare il filo. 6° GIRO: Cambiare colore. Lavorare * 1 m.a (= la prima volta, all’inizio del giro, sostituire con 3 cat) nella 1a m.b, 3 cat, 1 m.b nella cat del gruppo di 8 m.a, 3 cat, 1 m.a nella m.b successiva, 5 cat, nell’archetto (di 2 cat) dell’angolo lavorare così: 1 m.b, 3 cat, 1 m.b, 5 cat *, ripetere da *-*, finire con 1 m.bss nella 3a cat d’inizio giro. 7° GIRO: 3 cat, * 4 m.a (= la prima volta, all’inizio del giro, sostituire la prima m.a con 3 cat) nell’archetto di 3 cat, 4 m.a nell’archetto di 3 cat successivo, 5 m.a nell’archetto di 5 cat, nell’archetto (di 3 cat) dell’angolo lavorare così: 3 m.a, 2 cat, 3 m.a. 5 m.a nell’archetto di 5 cat successivo *, ripetere da *-*, finire con 1 m.bss nella 3a cat d’inizio giro. 8° GIRO: 1 cat, 1 m.b in ognuna delle 16 m.a successive, * nell’archetto (di 2 cat) dell’angolo lavorare così: 1 m.b, 1 cat, 1 m.b; poi 1 m.b nelle 24 m.a successive * ripetere da *-*, finire con 1 m.b in ognuna delle ultime 8 m.b, 1 m.bss nella 1a cat d’inizio giro. Tagliare filo. Fissare tutti i fili. CONFEZIONE: Posizionare i quadrati come indicato in M.1 con 5 quadrati in orizzontale e 6 quadrati in verticale – ved spieg sopra! Unire i quadrati tra di loro lavorando con il filo color panna e l’uncinetto n°5 come indicato in M.2 - unirli prima in altezza, poi in lunghezza. |
||||||||||
Spiegazioni del diagramma |
||||||||||
|
||||||||||
 |
||||||||||
Avete terminato questo modello?Allora taggate le vostre foto con #dropspattern #seasidebluesblanket o inviatele alla #dropsfan gallery. Avete bisogno di aiuto con questo modello?Troverete 9 video tutorial, una sezione per i commenti/domande e molto altro guardando il modello su www.garnstudio.com © 1982-2026 DROPS Design A/S. Ci riserviamo tutti i diritti. Questo documento, compreso tutte le sue sotto-sezioni, è protetto dalle leggi sul copyright. Potete leggere quello che potete fare con i nostri modelli alla fine di ogni modello sul nostro sito. |
||||||||||


Con oltre 40 anni di esperienza nel design di modelli di maglia e uncinetto, DROPS Design offre la più estesa collezione di modelli gratuiti su internet - tradotti in 17 lingue. Ad oggi vi possiamo fornire 324 cataloghi e 12190 modelli - 9461 dei quali sono tradotti in Italiano.
Ci stiamo impegnando molto per darvi il meglio che vi possiamo offrire in termini di maglia e uncinetto, ispirazioni e consigli così come filati di grande qualità ad un prezzo incredibile! Volete utilizzare i nostri modelli per qualcosa d'altro oltre al vostro uso personale? Potete leggere tutto ciò che è consentito nel testo sul Copyright in basso su tutte le pagine dei nostri modelli. Buon lavoro!
Lasciare un commento sul modello DROPS 120-3
Noi saremmo felici di ricevere i tuoi commenti e opinioni su questo modello!
Se vuoi fare una domanda, fai per favore attenzione a selezionare la categoria corretta nella casella qui sotto per velocizzare il processo di risposta. I campi richiesti sono indicati da *.