Commenti / Domande (6)
![]() Airashii ha scritto:
Airashii ha scritto:
Ooo, this is the perfect increase. Drops Design, thank you very much for your help. Kind regards.
21.02.2023 - 16:34
![]() Airashii ha scritto:
Airashii ha scritto:
Hello, Drops Design. I aprreciate your answer with example for increasing but following your instructions (1 st, yo, 2st, 1yo ...) I end up with 55 sts increased, which is not what is written in pattern (52 sts); and since it is said to increase evenly, just following instructions you have given until there are 52 sts does not distribute stitches evenly. I wonder how others who tried this pattern worked this out.
20.02.2023 - 16:35DROPS Design ha risposto:
Dear Airashii, as explained in the lesson, divide 84 by 52= 1.6 you will have to increase alternately after 1 and after 2 stitches until you have increased 52 sts; you can also work for ex: K1, (YO, K1) x 10, (YO, K2)x31, (YO, K1)x10, YO, K1. Happy knitting!
21.02.2023 - 09:56
![]() Airashii ha scritto:
Airashii ha scritto:
Which increasing method do you recommend for this hat pattern? I really do not know how to make nicely distributed increase with given number of stitches in the pattern (84 sts and increasing 52 sts). Further help would be much appreciated.
17.02.2023 - 14:54DROPS Design ha risposto:
Dear Airashii, for this pattern, work 1 yarn over after every 1 or 2 stitches alternatively. For example: 1 stitch, yarn over, 2 stitches, yarn over, 1 stitch, yarn over, 2 stitches, yarn over..... Continue like this until you have increased 52 sts. Happy knitting!
19.02.2023 - 19:49
![]() Airashii ha scritto:
Airashii ha scritto:
Hi. Can you please help me with blackberry pattern for the hat. I am curious what difference does it make if I do "p1, k3/k3, p1" (this hat) compared to "purl all sts in row 1 and row 3" (pattern nr. 67-22 and video )? It seems the same pattern for both hats, but the instructions are different (also regarding increase of the sts). I have trouble increasing 52 sts evenly - can you please also help me with that? =) Many thanks for your help.
17.02.2023 - 12:01DROPS Design ha risposto:
Dear Airashii, there are different way to work a blackberry pattern - you can swatch both to check which one you rather like. This lesson will help you increasing evenly. Happy knitting!
17.02.2023 - 12:11
![]() Ykje Hansma ha scritto:
Ykje Hansma ha scritto:
Erg handig in de zomer, als schouderwarmer. De lengte is precies goed. Ook voor beginners een leuk brei project. Wil het wel een naam geven. Lilly.
20.03.2018 - 16:18
![]() Lene Grøndahl ha scritto:
Lene Grøndahl ha scritto:
Jeg vil gerne strikke den i large kan I hjælpe med antal masker samt indtagningen? Havde købr garn da jeg opdagede at denne poncho kun er i str M i opskriften - ærgerligt men håber I kan hjælpe
03.01.2015 - 22:57DROPS Design ha risposto:
Hej Lene. Jeg kan desvaerre ikke skrive et helt mönster ud, men jeg ville anbefale at du maaler hvor meget större du vil have den og saa med hjaelp af strikkefastheden i mönstret (antal masker per 10 cm) beregne antal masker du skal begynde med. Jeg ville nok tage ind lidt höjere og maaske 1-2 gange mere, men se undervejs hvordan det ser ud. Haaber det gaar godt. God fornöjelse med den.
08.01.2015 - 16:48
DROPS 93-38 |
|
|
|
|
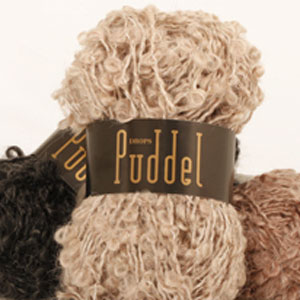
Cappello DROPS in "Alaska" e poncho DROPS in punto legaccio con frange, in "Puddel" e "Snow".
DROPS 93-38 |
|
|
CAPPELLO: Campione: 17 m x 22 f con i f. 5 a maglia rasata = 10 x 10 cm. Punto legaccio (in tondo sul f circolare): 1° ferro: Diritto 2° ferro: Rovescio Punto fantasia: Quando si lavora questo punto fantasia in tondo, il motivo sarà all’interno, questo vuol dire che alla fine del lavoro bisogna rovesciare il cappello. Il motivo è divisibile con 4. 1° giro: * 1 m rov, 3 m dir *, ripetere da *-* tutto il giro. 2° giro: * Lavorare 3 m dir nella stessa m così: 1 m dir, 1 m rov, 1 m dir, poi lavorare le 3 m seguenti insieme a rov *, ripetere da *-*. 3° giro: * 3 m dir, 1 m rov *, ripetere da *-*. 4° giro: * 3 m insieme a rov, lavorare poi 3 m nella stessa m così: 1 m dir, 1 m rov, 1 m dir *, ripetere da *-*. CAPPELLO: Avviare 84 m con i ferri a doppia punta 4 ed il filo Alaska e lavorare a punto legaccio. Quando il lavoro misura 4,5 cm, lavorare 2 giri (punto legaccio) nello stesso tempo, distribuire 52 aumenti uniformemente al 1° giro = 136 m. Continuare con i ferri a doppia punta 5 ed inserire 1 segnapunti all’inizio del giro (= in mezzo dietro). Lavorare ora in punto fantasia - vedere le spiegazioni sopra - NOTA: Fare attenzione ad iniziare ogni giro esattamente dopo il segnapunti n modo da ottenere il motivo diagonale. Ricordarsi la tensione del lavoro! Quando il lavoro misura 22 cm, lavorare tutte le m insieme a dir, 2 e 2 alla volta = 68 m. Ripetere queste diminuzioni al giro seguente = 34 m. Infilare un filo doppio attraverso le m rimanenti e stringere - NOTA: Ricordati di rovesciare il cappello per avere il motivo sul diritto del cappello prima di fissare i fili. PONCHO: Campione: 8 m x 16 f con il f 8 lavorato a punto legaccio = 10 x 10 cm Punto legaccio (avanti e indietro sul ferro): Lavorare tutti i f a dir. Poncho: Il poncho è realizzato in 2 parti e lavorati dal basso verso l’alto. Dietro: Avviare 51 m con 2 ferri n. 8 e il filo Puddel (questo per avere un bordo di avviamento più elastico. Sfilare uno dei ferri e lavorare a punto legaccio. Quando il lavoro misura 8 cm, diminuire 1 m ad ogni lato ogni 2 cm in totale 11 volte = 29 m. Quando il lavoro misura 32 cm, intrecciare tutte le m. Davanti: Avviare e lavorare come il dietro, ma quando il lavoro misura 28 cm, intrecciare le 9 m centrali per lo scollo. Continuare a diminuire lato collo ogni 2 f: 2 m 1 volta e 1 m 1 volta. Quando il lavoro misura 32 cm, intrecciare. Confezione: Cucire i 2 pezzi insieme nella maglia più esterna a partire dal collo verso il basso fino a quando non rimangano 8 cm (= fessura). Bordo all’uncinetto: Con il filo Snow e l’uncinetto 8, fare un bordo lungo tutto il bordo in fondo (compresa la fessura) così: 1 m.b nella m, * 3 cat, saltare ca 3,5-4 cm, 1 m.b nella m seguente *, ripetere da *-* e terminare con 3 cat, altare ca 3,5-4 cm e 1 m.bss nella m.b d’inizio giro. Frange: 1 frangia = 3 fili di Snow + 2 fili di Puddel (= 5 fili) a 60 cm. Piegare i fili in due, infilare in una maglia in basso all’angolo del poncho e passare le estremità nel cappio. Fissare una frangia ad ogni punta e poi distribuirle con uno spazio di ca 6-7 cm tra ogni frangia. Fare ca. 18 frange in totale. |
|
Avete terminato questo modello?Allora taggate le vostre foto con #dropspattern o inviatele alla #dropsfan gallery. Avete bisogno di aiuto con questo modello?Troverete 25 video tutorial, una sezione per i commenti/domande e molto altro guardando il modello su www.garnstudio.com © 1982-2026 DROPS Design A/S. Ci riserviamo tutti i diritti. Questo documento, compreso tutte le sue sotto-sezioni, è protetto dalle leggi sul copyright. Potete leggere quello che potete fare con i nostri modelli alla fine di ogni modello sul nostro sito. |


Lasciare un commento sul modello DROPS 93-38
Noi saremmo felici di ricevere i tuoi commenti e opinioni su questo modello!
Se vuoi fare una domanda, fai per favore attenzione a selezionare la categoria corretta nella casella qui sotto per velocizzare il processo di risposta. I campi richiesti sono indicati da *.