
Categorie popolari
State cercando un filato?


Commenti / Domande (19)
![]() Vanweddingen Ingrid ha scritto:
Vanweddingen Ingrid ha scritto:
Waar zijn die vasten gehaakt waarvan sprake is bij de bies? Ik begrijp niet hoe ik de bies moet haken en vast naaien aan de cirkels!?
17.06.2025 - 18:57DROPS Design ha risposto:
Dag Ingrid,
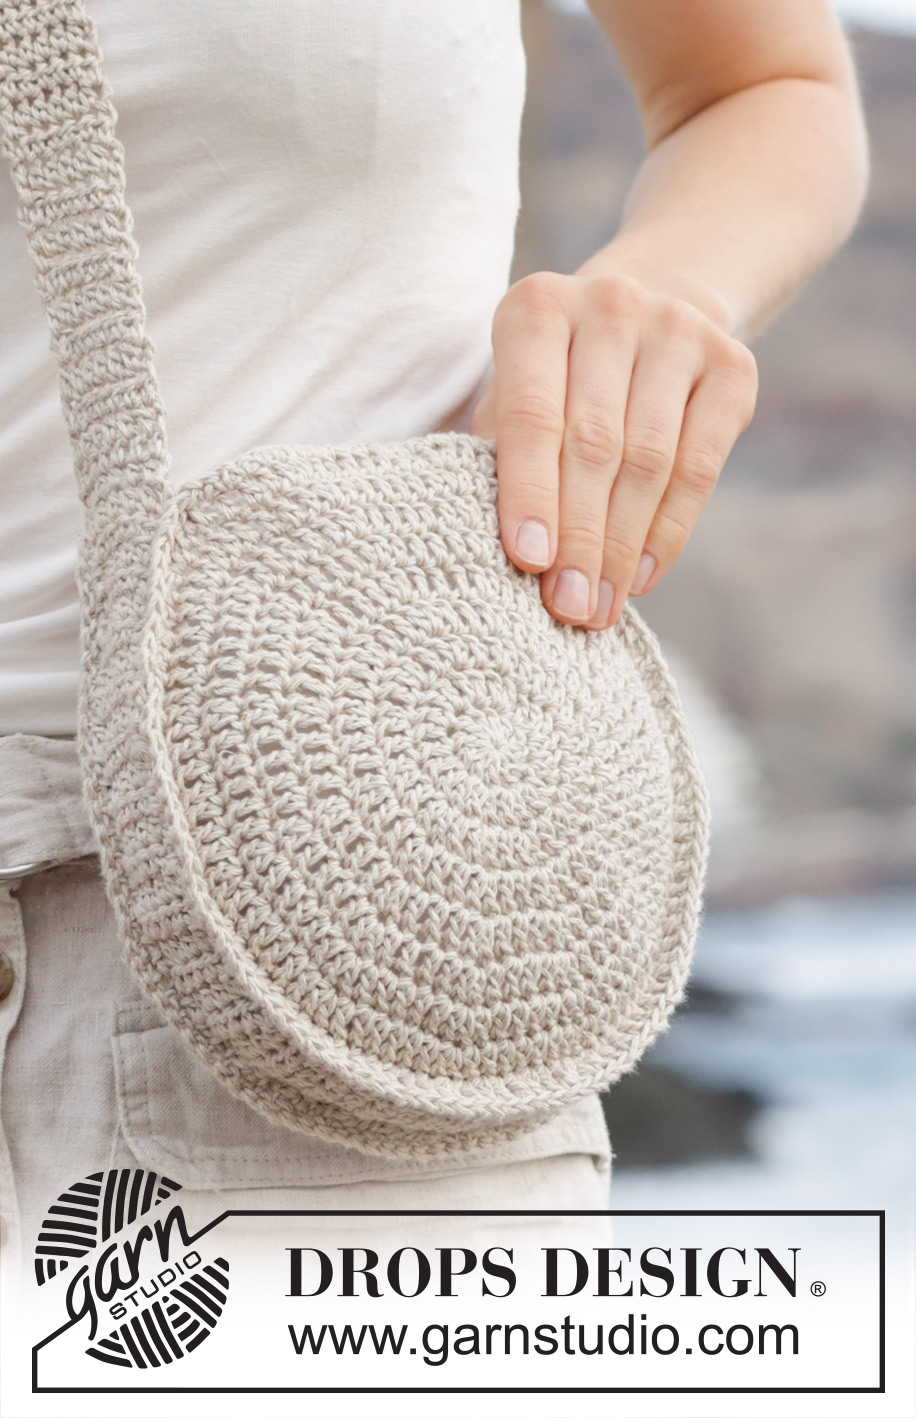
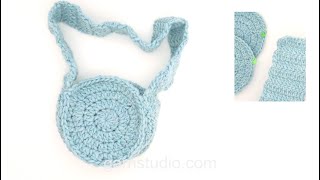
Op de eerste foto is te zien dat de bies aan de ene kant tegen cirkel 1 zit en aan de andere kant tegen cirkel 2. Om deze aan elkaar te haken, haak je vasten waarbij je de haaknaald steeds door de bies en de cirkel steekt, zodat je ze aan elkaar haakt.
17.06.2025 - 21:14
![]() Susana ha scritto:
Susana ha scritto:
Hello, what is the sewing technic used to sew both circles to the strap? There is no indication on the pattern or videos provided. Thank you
06.06.2025 - 12:30DROPS Design ha risposto:
Dear Susana, we don't have any video to that specific seam, you will use a mix of these 2 videos: how to sew a pice worked with treble crochets (here) = circle on one side and how to sew squares together (here) = strap. Make sure to not tighten piece, you can first add pins on your work so that it might make the seam easier. Happy assembly!
06.06.2025 - 13:08
![]() Susana ha scritto:
Susana ha scritto:
Heya, can I kindly ask if on this part "Work 6 treble crochets back and forth until the band measures a total of 140 cm" I will still need to work the crochet information "At the beginning of each round/row of treble crochets work 3 chain stitches, which do not replace the first treble crochet but are in addition"? Thank you
04.06.2025 - 22:50DROPS Design ha risposto:
Dear Susana, sure you still ned this info, this means you start each row with 3 chains to start row but these chains will not replace the first treble crochet, then crochet 1 treble crochet in each of the next 6 treble crochets = there are 6 treble crochets in total for the strap, repeat this row until the desired length. Happy crocheting!
05.06.2025 - 08:55
![]() Susana Araujo ha scritto:
Susana Araujo ha scritto:
What does the subtitle "1 treble crochet in stitch bellow" means? Is this on the 2nd stitch from the previous treble crochet ? Or around the actual chain stitch?
01.06.2025 - 23:40DROPS Design ha risposto:
Dear Susana, in the stitch below means that the treble crochet in this round is worked inside the stitch (the treble crochet from the previous round), and not around the stitch; you can check herethe difference between around and in the stitch. Happy crochetting!
01.06.2025 - 23:54
![]() Svitlana ha scritto:
Svitlana ha scritto:
Hei ! Er det mulig å se diagram A1 og A2 til denne oppskriften ?
12.05.2025 - 10:37DROPS Design ha risposto:
Hej Svitlana, ja du finder diagrammerne nederst i opskriften. Diagrammet starter ved cirklen nederst :)
12.05.2025 - 11:10
![]() Aoife Maeve ha scritto:
Aoife Maeve ha scritto:
Har dere instrukser på båndet med bilder som viser? jeg er en erfart hekler men det båndet gir ingen mening for meg
27.04.2025 - 12:59DROPS Design ha risposto:
Hei Aoife. Først hekler du et bånd med 12 staver til det måler 47 cm (= bunnen på vesken), så legger du dette båndet dobbelt og hekler kortsiden (12 staver) sammen med 1 stav i hver stav gjennom begge lag, slik at kortsiden nå består av 6 staver. Du har nå et bånd med 12 staver som er brettet dobbelt. Fortsett med å hekle staver over de 6 stavene ca 93 cm. Legg oppleggskanten (med 12 staver) dobbelt og sy igjen (kortsiden). Det doble båndet skal nå sys fast langs kanten på sirkelene. mvh DROPS Design
05.05.2025 - 10:23
![]() Helga Eitel ha scritto:
Helga Eitel ha scritto:
Ich vermisse bei den Videos immer die Erklärungen zu dem betreffenden Objekt. Wie nähe ich z. B. den gehäkelten Rand so an die beiden runden Taschenhälften dass es eine Kante ergibt ? Wie man Stäbchen usw. häkelt wird wohl jeder wissen der eine Anleitung sucht.
19.03.2025 - 15:02
![]() Sylvie Guilbot ha scritto:
Sylvie Guilbot ha scritto:
Bonjour pour débuter combien de Brides dans le cercle magique ? merci
24.07.2024 - 08:35DROPS Design ha risposto:
Bonjour Sylvie, le rond magique est presente ICI, mais faites-vous les brides au lieu des mailles serrees. Bon crochet!
24.07.2024 - 10:41
![]() Suzy ha scritto:
Suzy ha scritto:
Bonjour, pourquoi mon disque gondole merci
14.06.2024 - 08:53DROPS Design ha risposto:
Bonjour Susy, pensez à bien conserver la bonne tension en largeur et en hauteur, ajustez la taille du crochet si besoin. Bon crochet!
14.06.2024 - 16:18
![]() SUJO83 ha scritto:
SUJO83 ha scritto:
Bonjour je désire faire 2 ances pouvez vous me dire comment faire merci
10.06.2024 - 13:53DROPS Design ha risposto:
Bonjour Sujo83, tout dépend de ce que vous souhaitez comme résultat, vous pourrez peut-être trouver l'inspiration parmi tous nos modèles de sacs (cf ici), certains d'entre eux ont 2 anses. Bon crochet!
11.06.2024 - 07:47
|
||||||||||||||||
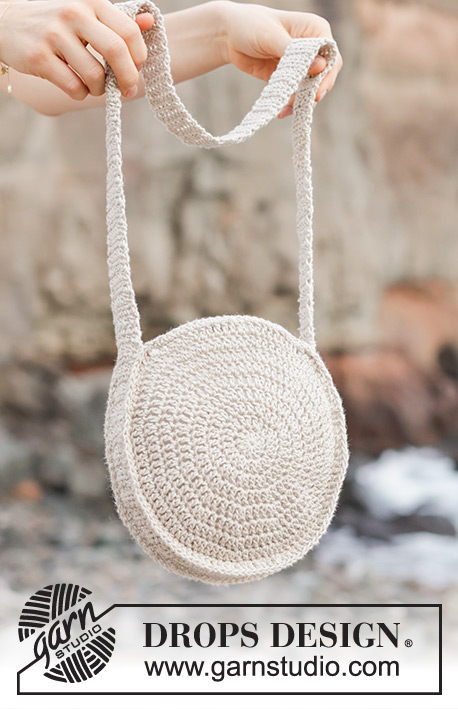
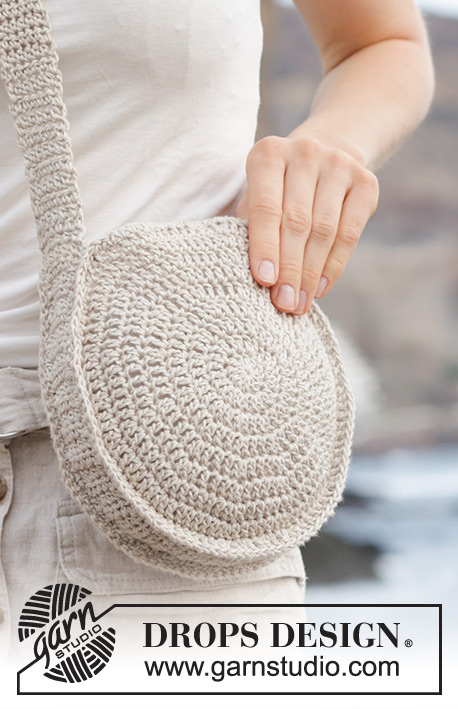
Tortilla Bag#tortillabag |
||||||||||||||||
 |
 |
|||||||||||||||
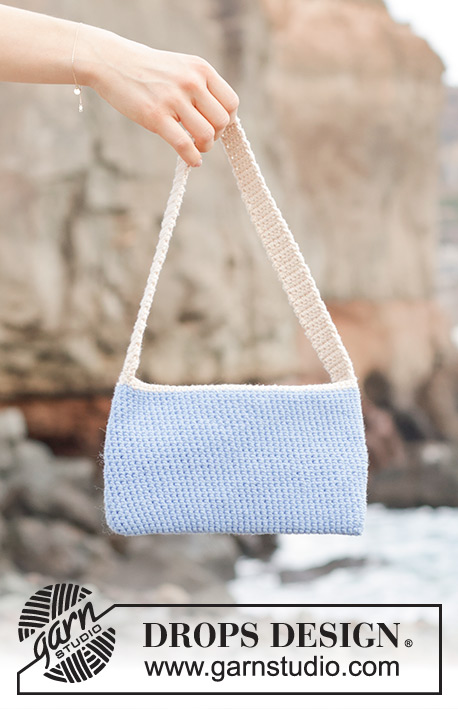
Borsa rotonda lavorata all’uncinetto in DROPS Bomull-Lin.
DROPS 247-5 |
||||||||||||||||
|
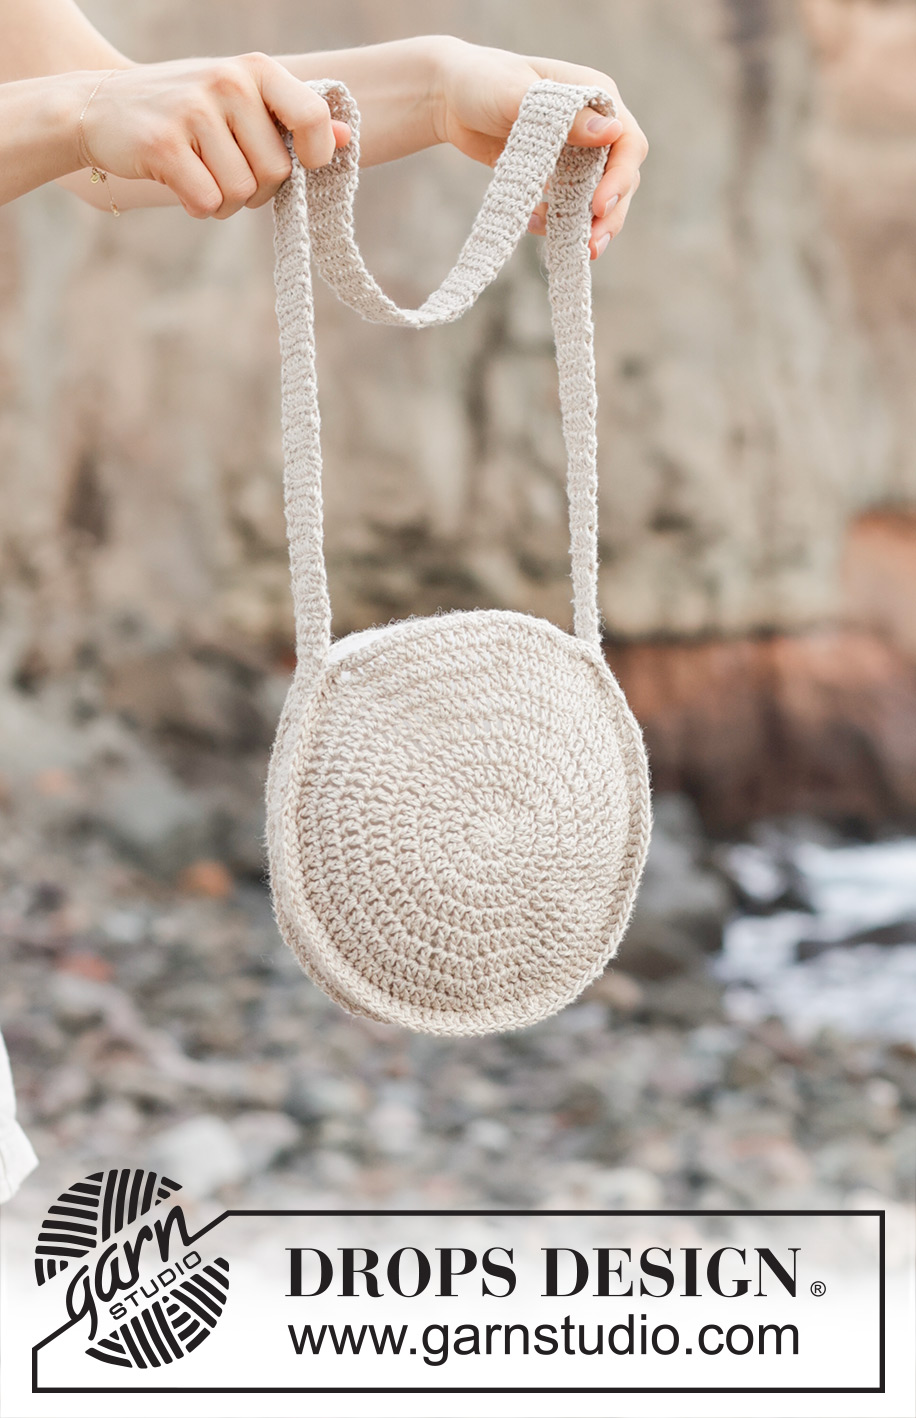
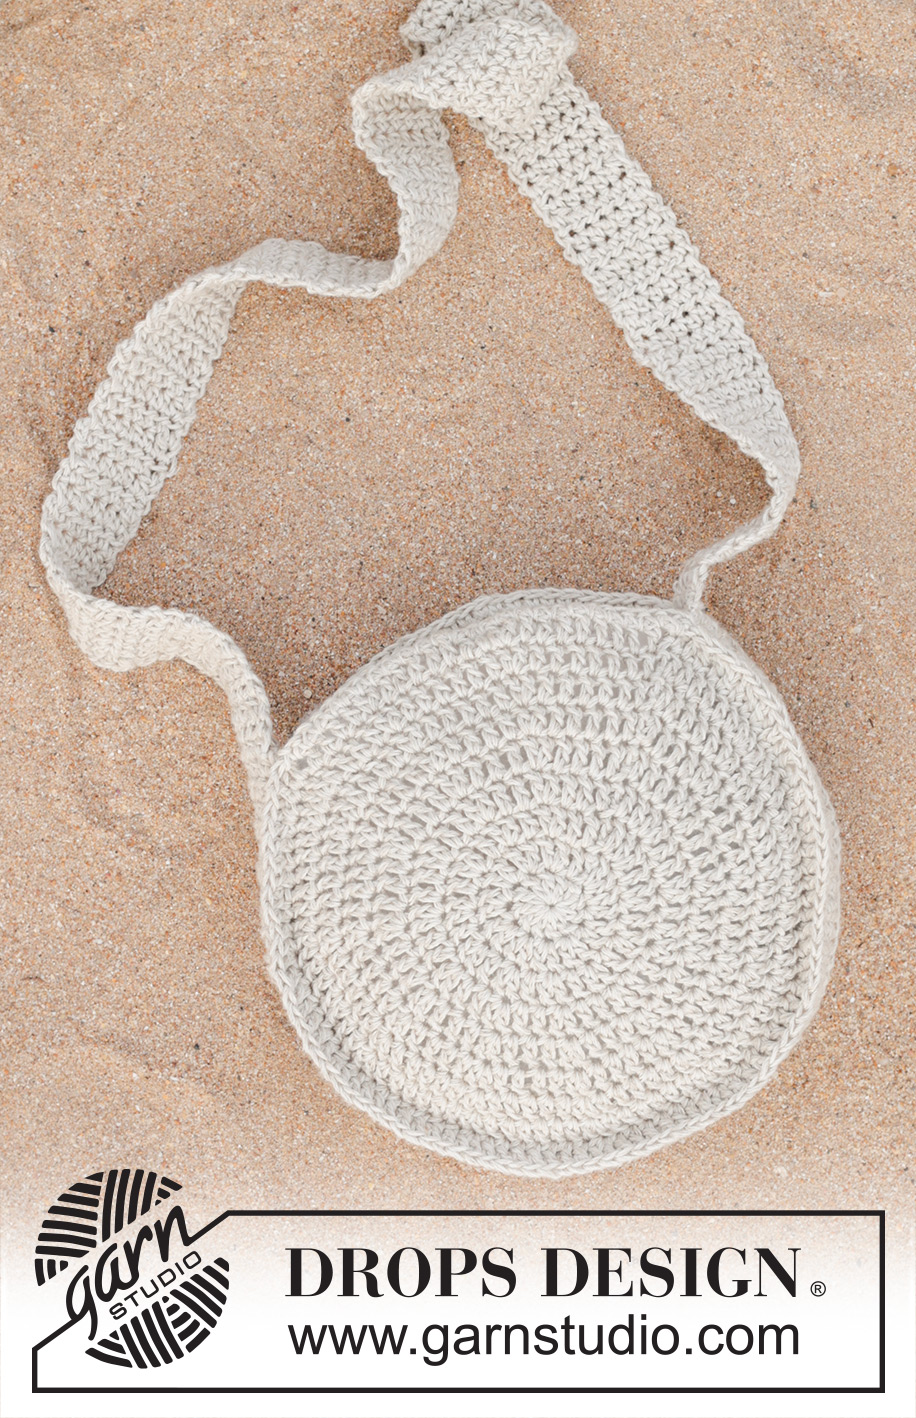
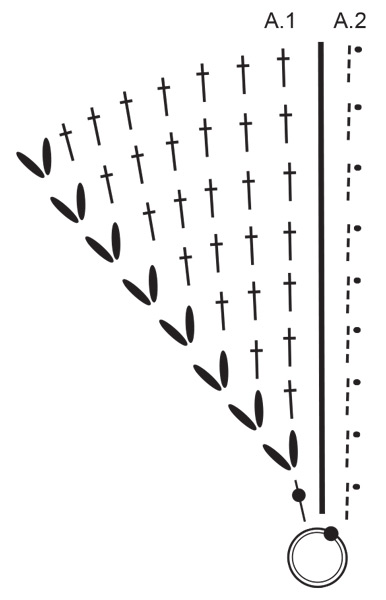
------------------------------------------------------- TECNICHE IMPIEGATE: ------------------------------------------------------- MOTIVO: Vedere i diagrammi A.1 e A.2. INFORMAZIONI PER IL LAVORO: All’inizio di ogni gir/riga a maglie alte lavorare 3 catenelle, che non sostituiscono la 1° maglia alta ma sono in aggiunta. Quando si lavora in tondo, finire con 1 maglia bassissima nella 3° catenella all’inizio del giro. Vedere il diagramma A.2. ------------------------------------------------------- INIZIO DEL LAVORO: ------------------------------------------------------- BORSA – BREVE RIASSUNTO DEL LAVORO: Lavorare 2 cerchi in tondo, dal centro verso l’esterno, poi lavorare i bordi per la tracolla e i lati. Cucire il lavoro. CERCHIO: Avviare 4 catenelle con l’uncinetto n° 4,5 mm e DROPS Bomull-Lin. Unirle ad anello con 1 maglia bassissima nella 1° catenella. Lavorare in tondo seguendo il diagramma A.1, lavorando A.1 12 volte sul giro – il diagramma A.2 mostra come iniziano e finiscono i giri ed è lavorato in aggiunta ad A.1. FARE ATTENZIONE ALLA TENSIONE DEL LAVORO! Alla fine del diagramma, il lavoro misura circa 20 cm in diametro. Lavorare 1 maglia bassa in ognuna delle prime 27 maglie alte sul giro. Tagliare e affrancare il filo. Lavorare un altro cerchio nello stesso modo. BORDO: Avviare 15 catenelle, girare e lavorare 1 maglia alta nella 4° catenella dall’uncinetto, poi 1 maglia alta in ogni catenella = 12 maglie alte. Lavorare in piano in questo modo per 47 cm – leggere le INFORMAZIONI PER IL LAVORO sopra. Piegare il bordo a metà, nel senso della lunghezza, e unire i lati corti, con 1 maglia alta in ogni maglia alta, attraverso entrambi gli strati = 6 maglie alte. Lavorare 6 maglie alte in piano fino a quando il bordo misura un totale di 140 cm. CONFEZIONE: Piegare il bordo di avvio a metà in modo che tutto il bordo sia largo 6 maglie e cucire il bordo attraverso entrambi gli strati. Ora affrancare il bordo doppio al bordo del cerchio – le maglie basse sul cerchio indicano l’apertura della borsa. Cucire come segue: iniziare nel punto in cui finiscono le maglie basse, cucire un lato lungo del bordo doppio alle maglie alte più esterne sul cerchio (ci dev’essere un piccolo bordo), continuare a cucire lungo il bordo fino all’inizio delle maglie basse – anche il bordo doppio finisce qui. Cucire l’altro lato del bordo doppio all’altro cerchio nello stesso modo. L’altra parte del bordo (che non è doppio) è la tracolla della borsa. |
||||||||||||||||
Spiegazioni del diagramma |
||||||||||||||||
|
||||||||||||||||
 |
||||||||||||||||
Avete terminato questo modello?Allora taggate le vostre foto con #dropspattern #tortillabag o inviatele alla #dropsfan gallery. Avete bisogno di aiuto con questo modello?Troverete 10 video tutorial, una sezione per i commenti/domande e molto altro guardando il modello su www.garnstudio.com © 1982-2026 DROPS Design A/S. Ci riserviamo tutti i diritti. Questo documento, compreso tutte le sue sotto-sezioni, è protetto dalle leggi sul copyright. Potete leggere quello che potete fare con i nostri modelli alla fine di ogni modello sul nostro sito. |
||||||||||||||||


Con oltre 40 anni di esperienza nel design di modelli di maglia e uncinetto, DROPS Design offre la più estesa collezione di modelli gratuiti su internet - tradotti in 17 lingue. Ad oggi vi possiamo fornire 324 cataloghi e 12290 modelli - 9561 dei quali sono tradotti in Italiano.
Ci stiamo impegnando molto per darvi il meglio che vi possiamo offrire in termini di maglia e uncinetto, ispirazioni e consigli così come filati di grande qualità ad un prezzo incredibile! Volete utilizzare i nostri modelli per qualcosa d'altro oltre al vostro uso personale? Potete leggere tutto ciò che è consentito nel testo sul Copyright in basso su tutte le pagine dei nostri modelli. Buon lavoro!
Lasciare un commento sul modello DROPS 247-5
Noi saremmo felici di ricevere i tuoi commenti e opinioni su questo modello!
Se vuoi fare una domanda, fai per favore attenzione a selezionare la categoria corretta nella casella qui sotto per velocizzare il processo di risposta. I campi richiesti sono indicati da *.