
Categorie popolari
State cercando un filato?


Commenti / Domande (18)
![]() Moira ha scritto:
Moira ha scritto:
Meine Frage zur Baskenmütze: Nach 4 Runden im Vollpatent sollen bei einer Maschenzahl von 60 Maschen (Grösse S-M) 6 Markierer im Abstand von 9 Maschen angebracht werden. Somit wird der letzte Markierer nach der 54. Masche gesetzt. Auf der Rundnadel sind die Maschen also nicht regelmässig durch die Markierer getrennt (6 Mal 9 Maschen und einmal 15 Maschen). Dies bedeutet, dass die Mütze nicht regelmässig rund gestrickt wird. Stimmt diese Aufteilung?
06.12.2025 - 11:14DROPS Design ha risposto:
Liebe Moira, die Markierungen sollen regelmäßig verteilt eingesetzt: (9 Maschen, 1 Masche mit einer Markierung) x 6 = 60 Maschen, und 6 Markierungen mit je 9 Maschen dazwischen, oder missverstehe ich Ihre Frage?
08.12.2025 - 08:20
![]() Johanna ha scritto:
Johanna ha scritto:
Ik begrijp niets van de minderingen bij de baret. Wanneer ik letterlijk de beschrijving volg zijn er 24 steken geminderd. Moet met de minderingen worden begonnen in de tweede of derde naald van de engelse patroonsteek?
19.11.2025 - 15:43DROPS Design ha risposto:
Dag Johanna,
Je mindert 2 steken bij elke markeerdraad. Je hebt 6 markeerdraden geplaatst, dus in totaal minder je 12 steken. Dit doe je nog 5-6 keer op iedere 6e naald, dus in totaal 6-7 in totaal, waardoor je 24 steken over houdt in elke maat.
22.11.2025 - 09:32
![]() Joanna ha scritto:
Joanna ha scritto:
I enjoy knitting the beret atm. This passage gives me difficulty: "On the next round work rib (knit 1, purl 1), working the yarn overs together with their respective stitches. Work 2 rounds like this. Work all stitches together 2 and 2 = 12-12 stitches" 1. Do I do the rib for 2 or 3 rounds? I am decreasing only in round 1, right? 2. Last round: Knit? Purl? Decrease? How? What is meant by working the stitches together 2 and 2 = 12-12? Thanks
22.04.2025 - 08:45DROPS Design ha risposto:
Dear Joanna, you work a total of 2 rounds rib K1, P1 (including the first round after English rib). You don't really decrease on first round you just knit together yarn overs and slipped stitch to keep K1 and work P1 inbetween (the purled stitches from English rib). The yarn overs are not included in the number of stitches as they belong to the slipped stitch. On last round knit together alls stitches 2 by 2 ( = K2 tog across). Happy knitting!
22.04.2025 - 17:10
![]() Brik Ghozala ha scritto:
Brik Ghozala ha scritto:
Très jolie j ai aimé
29.08.2024 - 11:26
![]() Karen ha scritto:
Karen ha scritto:
I'm knitting the neck warmer and I'm confused about this part. On the last round purl all purl-2 together to purl-1 = 80 stitches. So I did the 4cm already does this mean I purl 1 then purl two together to decrease.
23.12.2023 - 17:53DROPS Design ha risposto:
Dear Karen, right now you should have a knit 1, purl 2 rib. Now, work as follows on the last round: * knit 1, purl 2 together * and repeat the whole round. So the rib should look like a knit 1, purl 1 rib. Happy knitting!
28.12.2023 - 18:42
![]() Touchard Dominique ha scritto:
Touchard Dominique ha scritto:
Bonjour, je ne comprends pas les diminutions la façon de procéder, oui mais l'ordre des mailles décrit dans l'explication, je ne comprends pas un jeté une m.end. glissée, 1m.end,un jeté, 1m.env......deux mailles endroit se suivent?... merci de m'expliquer! merci d'avance !
12.12.2023 - 10:54Touchard Dominique ha risposto:
Désolée, je viens de comprendre comment procéder. Merci encore pour vos modèles !
12.12.2023 - 16:02
![]() Vicky Williams ha scritto:
Vicky Williams ha scritto:
When you get to the end part of the neck warmer instructions using the 4mm needles above the English rib, it says to knit one then purl two using 120 stitches. Does this mean we have to increase in the purl st to make 2 purl st before doing the normal rib to make 120 st. again?
06.12.2023 - 01:34DROPS Design ha risposto:
Dear Mrs Williams, on the first row with needle size 4 mm you will purl the yarn over and the slipped stitch separately so that you will get 2 purled stitches instead of just (purl together yarn over and slipped stitch), this will increase the number of stitches to 120. Happy knitting!
06.12.2023 - 08:36
![]() Hanaa Zahran ha scritto:
Hanaa Zahran ha scritto:
Hi please can you explain should I start decreasing after 14 cm from cast on edge, is this mean to measure 14cm from the beginning of the work or dismiss the edge thanks
09.11.2023 - 21:48DROPS Design ha risposto:
Hello Hanaa Zahran! It is measured from the cast-on edge as it says in the pattern. Happy knitting!
09.11.2023 - 22:28
![]() Hanaa Zahran ha scritto:
Hanaa Zahran ha scritto:
Hi, pls I supposed to start 5th row after increasing 2 sts with yarn over, slip 1 stitch purl-wise, is this correct thanks
03.11.2023 - 22:27DROPS Design ha risposto:
Dear Hanaa, the 5th row is the one where you increase. You have an increase at the beginning of the round, you can increase here at the beginning or the end of the round. If you start with the increase then you continue by knitting together the yarn over and slipped stitch. Now work 1 yarn over and slip 1 stitch purl-wise. Happy knitting!
05.11.2023 - 20:12
![]() Rossella ha scritto:
Rossella ha scritto:
Salve, Sto lavorando lo scaldacollo e non riesco a capire: lavorare insieme a rovescio tutte le sezioni di 2 maglie a rovescio a 1 maglia rovescio! Please help!! Grazie
02.11.2023 - 19:17DROPS Design ha risposto:
Buonasera Rossella, deve diminuire nelle sezioni con 2 maglie rovescio, lavorando 2 maglie insieme e portando la sezione a 1 maglia rovescio. Buon lavoro!
02.11.2023 - 22:52
|
|
Crème Chantilly#cremechantillyhat |
|
 |
 |
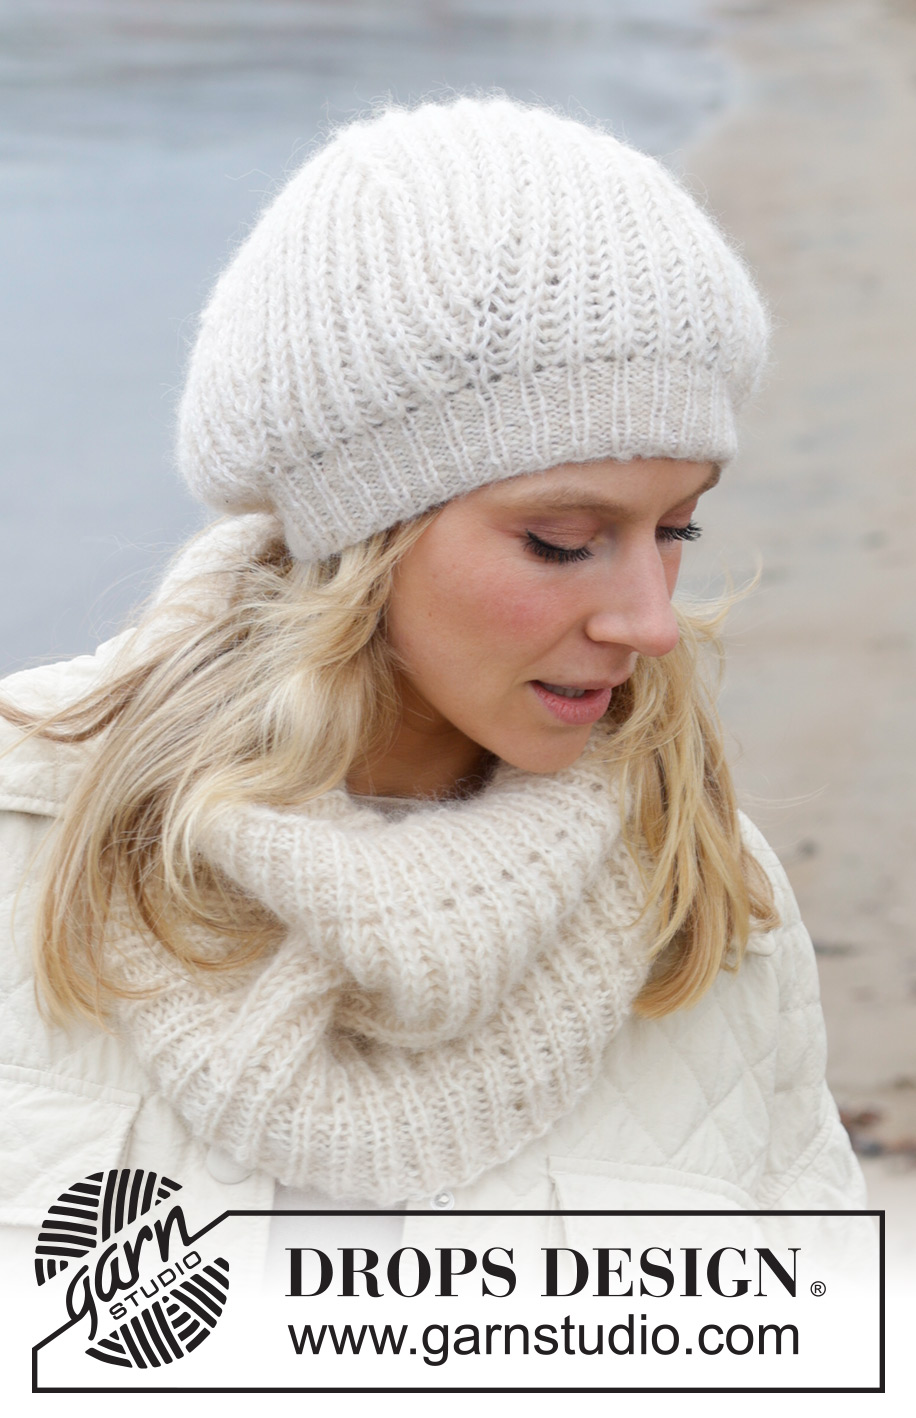
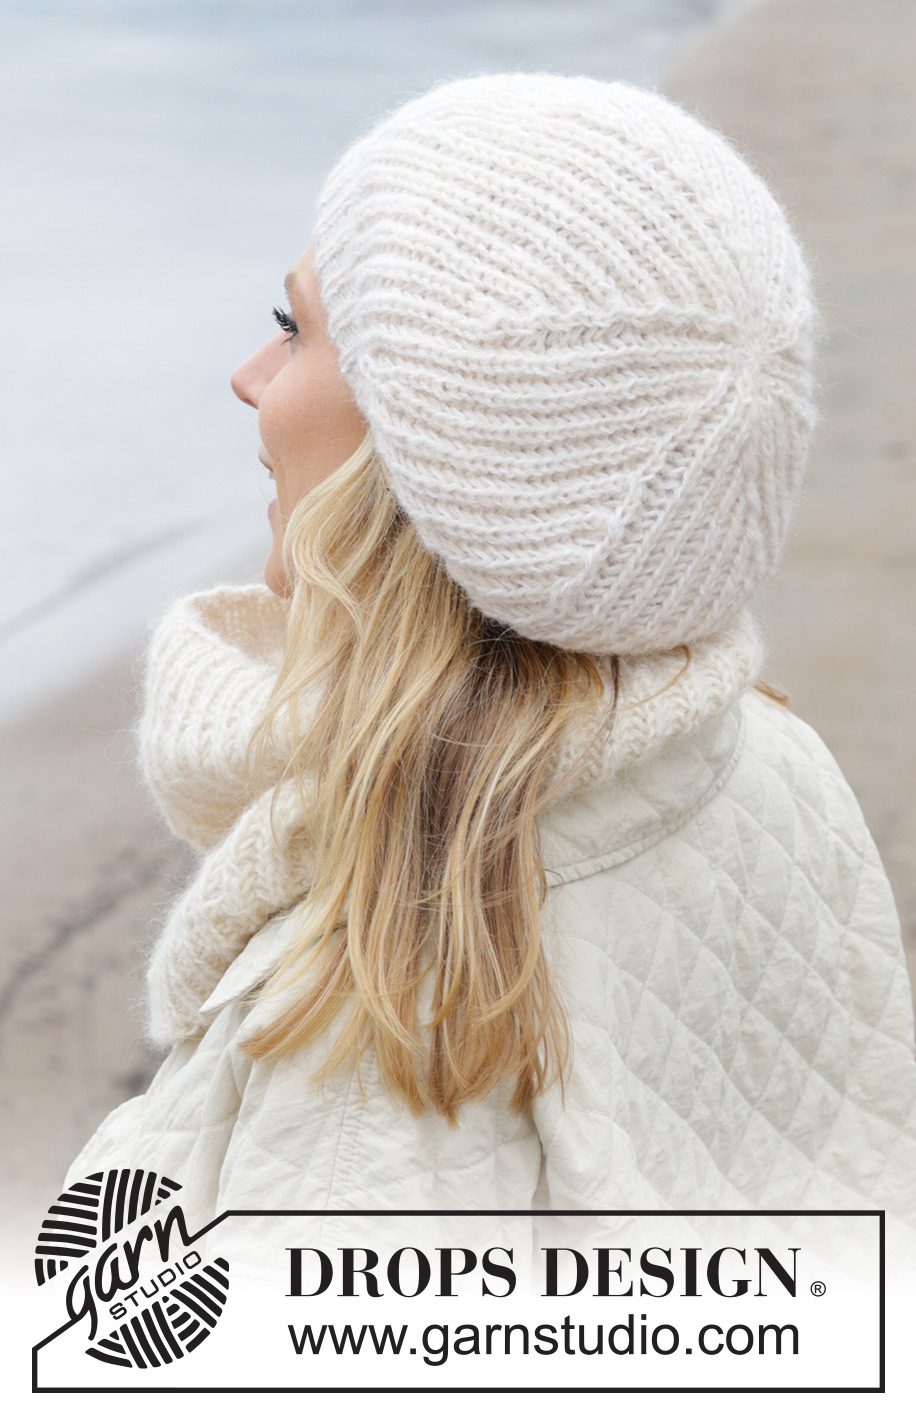
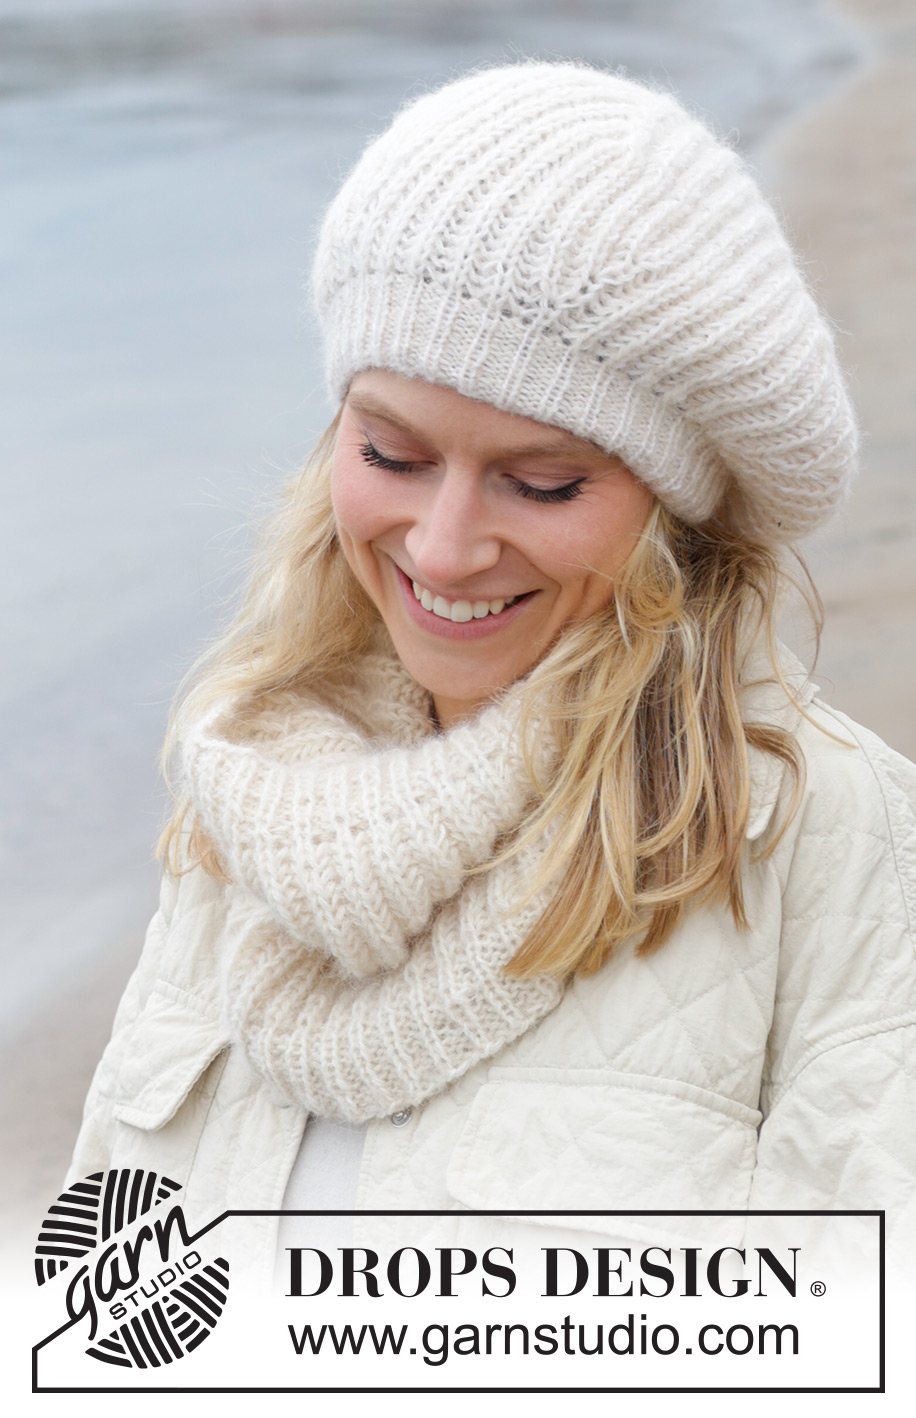
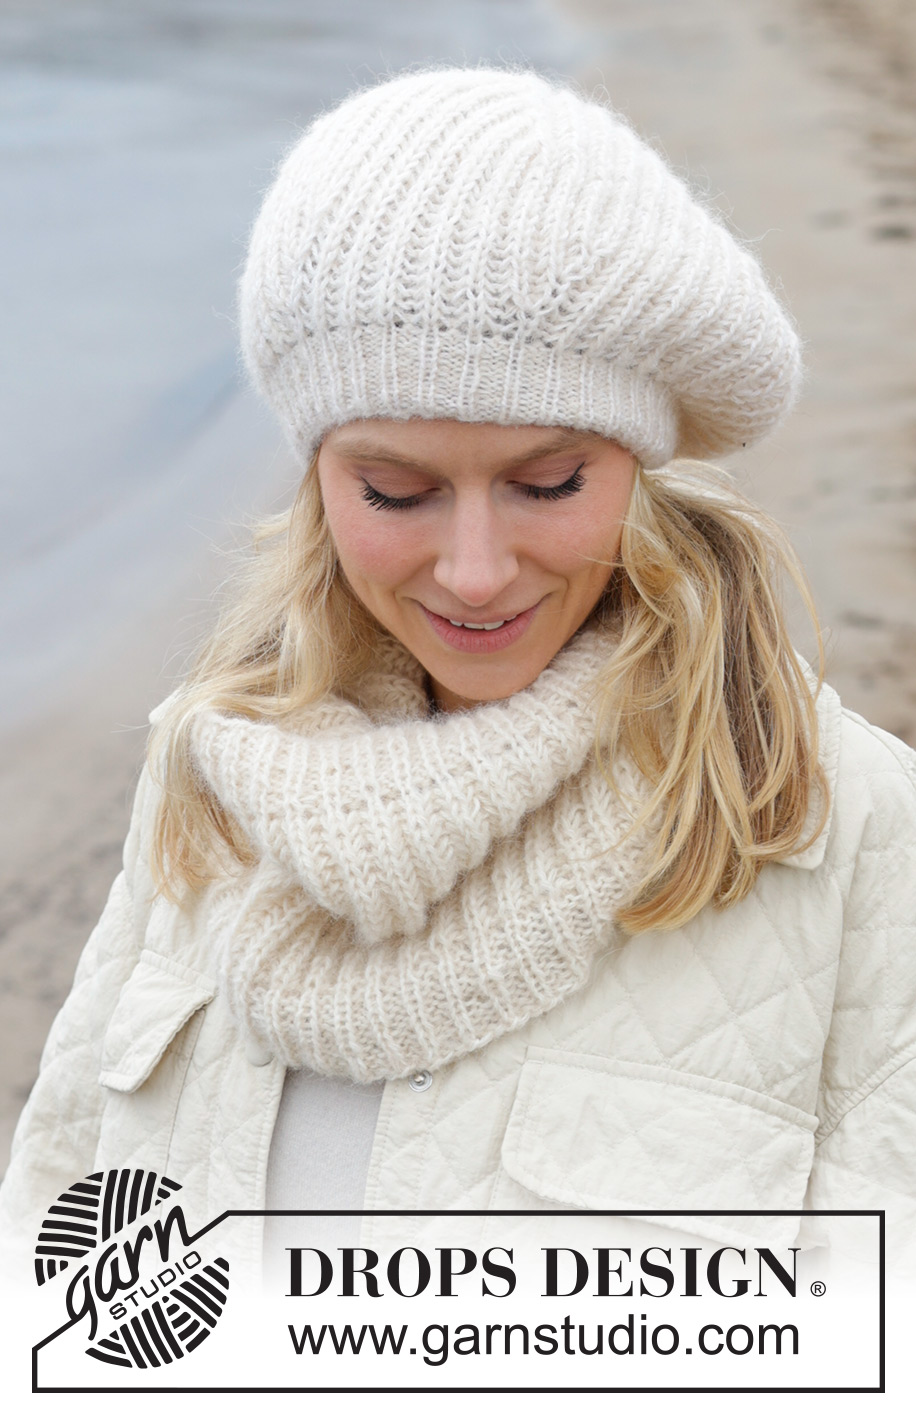
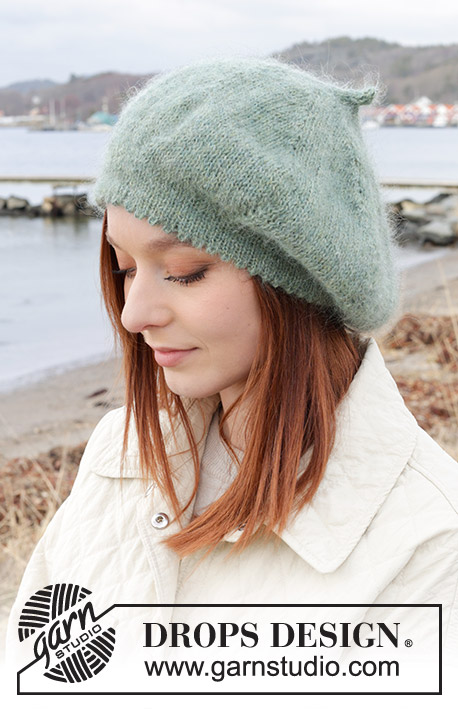
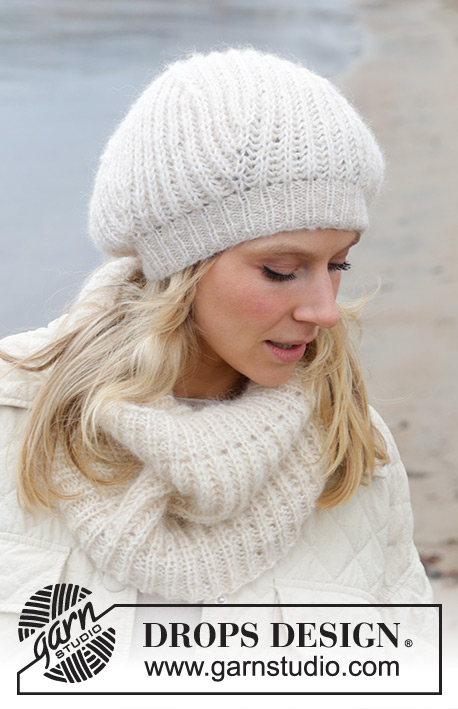
Scaldacollo e basco in DROPS Alpaca e DROPS Brushed Alpaca Silk. Lavorato dal basso verso l’alto a coste inglesi.
DROPS 242-5 |
|
|
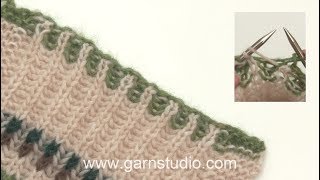
------------------------------------------------------- TECNICHE IMPIEGATE: ------------------------------------------------------- COSTE INGLESI (in tondo): GIRO 1: * 1 maglia diritto, 1 gettato, passare 1 maglia a rovescio senza lavorarla *, ripetere *-* fino alla fine del giro. GIRO 2: * 1 gettato, passare 1 maglia a rovescio senza lavorarla, lavorare insieme il gettato e la maglia passata *, ripetere *-* fino alla fine del giro. GIRO 3: * lavorare insieme a diritto il gettato e la maglia passata, 1 gettato, passare 1 maglia a rovescio senza lavorarla *, ripetere *-* fino alla fine del giro. Ripetere i giri 2 e 3. SUGGERIMENTO PER GLI AUMENTI: Aumentare 2 maglie nelle maglie diritto e nel gettato lavorando come segue: lavorare insieme a diritto la maglia e il gettato ma lasciarli sul ferro sinistro, 1 gettato, lavorare insieme a diritto la stessa maglia e il gettato un’altra volta (= 2 aumenti). Lavorare le nuove maglie a coste inglesi ma assicurarsi che, sul 1° ferro dopo gli aumenti, la maglia aumentata sia lavorata a diritto senza un gettato, dal momento che il suo gettato non è ancora stato lavorato. Tenere il segnapunti nella 1° di queste 3 maglie. SUGGERIMENTO PER IL LAVORO (conteggio delle maglie): Tutti i numeri di maglie indicati durante la lavorazione a coste inglesi sono conteggiati senza i loro rispettivi gettati. Le maglie e i gettati sono conteggiati come 1 maglia. SUGGERIMENTO PER LE DIMINUZIONI: Lavorare fino alla maglia con il segnapunti, passare il gettato e la maglia diritto come per lavorarle insieme a diritto, lavorare insieme a diritto le 2 maglie successive (compreso il gettato) e accavallare il gettato e la maglia sopra le maglie appena lavorate (2 maglie diminuite). Diminuire in questo modo all’altezza di ogni segnapunti (12 maglie diminuite sul giro). ------------------------------------------------------ INIZIO DEL LAVORO: ------------------------------------------------------- SCALDACOLLO – BREVE RIASSUNTO DEL LAVORO: Lavorato in tondo con i ferri circolari, dal basso verso l’alto. SCALDACOLLO: Avviare senza stringere 120 maglie con i ferri circolari n° 4 mm, 1 capo di DROPS Brushed Alpaca Silk e 1 capo di DROPS Alpaca (2 capi). Lavorare 1 giro diritto. Poi lavorare a coste in tondo (1 maglia diritto, 2 maglie rovescio) per 4 cm. Sull’ultimo giro lavorare insieme a rovescio tutte le sezioni di 2 maglie a rovescio a 1 maglia rovescio = 80 maglie. Passare ai ferri circolari n° 5 mm. Lavorare a COSTE INGLESI – leggere la descrizione sopra. FARE ATTENZIONE ALLA TENSIONE DEL LAVORO! Lavorare fino a quando il lavoro misura 26 cm. Passare ai ferri circolari n° 4 mm. Lavorare a coste (1 maglia diritto, 2 maglie rovescio) per 4 cm, lavorando i gettati come maglie (120 maglie). Intrecciare senza stringere, usando un ferro di una misura più grande. Lo scaldacollo misura circa 30 cm dal bordo di avvio. ------------------------------------------------------- BASCO – BREVE RIASSUNTO DEL LAVORO: Lavorato in tondo con i ferri a doppia punta / ferri circolari, dal basso verso l’alto. BASCO: Avviare 90-108 maglie con i ferri circolari n° 3,5 mm, 1 capo di DROPS Brushed Alpaca Silk e 1 capo di DROPS Alpaca (2 capi). Lavorare a coste in tondo (1 maglia diritto, 2 maglie rovescio) per 4 cm. Sull’ultimo giro lavorare tutte le sezioni con 2 maglie rovescio a 1 maglia rovescio = 60-72 maglie. Passare ai ferri circolari n° 5 mm. Lavorare a COSTE INGLESI – leggere la descrizione sopra. Quando sono state lavorati 4 giri, inserire 6 segnapunti con 9-11 maglie tra ognuna. Inserire tutti i segnapunti in una maglia diritto. Sul giro successivo (un giro in cui le maglie diritte sono lavorate insieme a diritto con i loro gettati), aumentare 2 maglie in ogni maglia con il segnapunti – leggere il SUGGERIMENTO PER GLI AUMENTI. Aumentare in questo modo ogni 6 giri altre 2 volte = 96-108 maglie – leggere il SUGGERIMENTO PER IL LAVORO sopra. FARE ATTENZIONE ALLA TENSIONE DEL LAVORO! Continuare a lavorare fino a quando il lavoro misura 13-14 cm dal bordo di avvio. Spostare tutti i 6 segnapunti di 6 maglie verso sinistra, inserendole nelle maglie diritto. Sul giro successivo diminuire 2 maglie all’altezza di ogni segnapunti – leggere il SUGGERIMENTO PER LE DIMINUZIONI (12 maglie diminuite). Diminuire in questo modo ogni 6 giri altre 5-6 volte = 24-24 maglie. Sul giro successivo lavorare a coste (1 maglia diritto, 1 maglia rovescio), lavorando i gettati insieme alle loro rispettive maglie. Lavorare 2 giri in questo modo. Lavorare tutte le maglie insieme 2 a 2 = 12-12 maglie. Tagliare il filo, farlo passare attraverso le maglie rimaste, tirare e affrancare bene. Il basco misura circa 23-24 cm. |
|
Avete terminato questo modello?Allora taggate le vostre foto con #dropspattern #cremechantillyhat o inviatele alla #dropsfan gallery. Avete bisogno di aiuto con questo modello?Troverete 15 video tutorial, una sezione per i commenti/domande e molto altro guardando il modello su www.garnstudio.com © 1982-2026 DROPS Design A/S. Ci riserviamo tutti i diritti. Questo documento, compreso tutte le sue sotto-sezioni, è protetto dalle leggi sul copyright. Potete leggere quello che potete fare con i nostri modelli alla fine di ogni modello sul nostro sito. |
|


Con oltre 40 anni di esperienza nel design di modelli di maglia e uncinetto, DROPS Design offre la più estesa collezione di modelli gratuiti su internet - tradotti in 17 lingue. Ad oggi vi possiamo fornire 324 cataloghi e 12290 modelli - 9561 dei quali sono tradotti in Italiano.
Ci stiamo impegnando molto per darvi il meglio che vi possiamo offrire in termini di maglia e uncinetto, ispirazioni e consigli così come filati di grande qualità ad un prezzo incredibile! Volete utilizzare i nostri modelli per qualcosa d'altro oltre al vostro uso personale? Potete leggere tutto ciò che è consentito nel testo sul Copyright in basso su tutte le pagine dei nostri modelli. Buon lavoro!
Lasciare un commento sul modello DROPS 242-5
Noi saremmo felici di ricevere i tuoi commenti e opinioni su questo modello!
Se vuoi fare una domanda, fai per favore attenzione a selezionare la categoria corretta nella casella qui sotto per velocizzare il processo di risposta. I campi richiesti sono indicati da *.