
Populaarsed kategooriad
Otsid lõnga?


Kommentaarid / Küsimused (84)
![]() Barbara kirjutas:
Barbara kirjutas:
In naald in doe je de markeerdraad in de 2e steek, maar op de foto bij het patroon zie ik dat de omslagen in het midden zitten. Dit klopt toch niet? Kunt u het alstublieft uitleggen?
04.07.2024 - 10:22DROPS Design vastas:
Dag Barbara,
Uiteindelijk komen de omslagen in het midden te zitten, maar je breit a.h.w. eerst overdwars, maar nadat je 80 keer hebt gemeerderd, brei je de andere kant. Als je eenmaal aan de slag bent ontdek je wel hoe het werkt.
04.07.2024 - 18:37
![]() Charleen kirjutas:
Charleen kirjutas:
If I wanted to knit this in less then 4 colours, how many yarns/metres in total would be required to knit the pattern.
16.01.2023 - 19:11DROPS Design vastas:
Dear Charleen, since this shawl has been worked with only several colours, we only have the amount for all colours together, but you might need 200 g of one single colour. Happy knitting!
17.01.2023 - 10:03
![]() Elsa Lourdes kirjutas:
Elsa Lourdes kirjutas:
Buenas noches, mi consulta es cuando indican en la primera fila : "un derecho, una hebra, un derecho una hebra, trabajar hasta que queden dos puntos" significa que en esa fila de 164 puntos ¿solo hago dos lazadas y el resto de derecho hasta llegar a los dos últimos puntos? o sigo con : derecho y hebra hasta llegar a los dos últimos puntos, le agradecería la respuesta, gracias.
04.10.2022 - 01:56DROPS Design vastas:
Hola Elsa, las 2 hebras (para los aumentos) se trabajan solo al inicio de la fila, el resto de la fila se trabaja en punto musgo hasta los 2 últimos puntos.
04.10.2022 - 15:32
![]() Jean Williams kirjutas:
Jean Williams kirjutas:
Can you show a picture of the bottom of this shawl as I am casting the 10 sts every 10 rows but what happens on the other side of the piece
25.05.2022 - 18:22DROPS Design vastas:
Dear Jean, these are the only photos that we have available of this model. On one side, you have small peaks, with the 10 cast-off stitches, while the second side is straight (with no cast-off stitches). Happy knitting!
25.05.2022 - 20:19
![]() Marion kirjutas:
Marion kirjutas:
Sehr schöne Anleitung. Absolut Fernsehtauglich. Stricke bereits das 2.Tuch.
11.05.2022 - 13:20
![]() Iris Simon kirjutas:
Iris Simon kirjutas:
Liebes Drops-Team, vielen Dank für die schnelle Antwort, und die vielen schönen Anleitungen die es bei euch gibt. Jetzt habe ich den Dreh raus. LG, Iris
16.03.2022 - 13:07
![]() Iris Simon kirjutas:
Iris Simon kirjutas:
Hallo, auch ich komme (wie Yvonne) mit der Anleitung nicht klar. Wenn ich ab Beginn an der 2. Masche zunehme, ist das am Rand. In den Bildern ist die Zunahme aber mittig zu sehen. Auch die Abnahme von je 10 Maschen passiert doch nicht erst nach 160 Reihen!? Ich bitte um Hilfe!
15.03.2022 - 09:40DROPS Design vastas:
Liebe Frau Simon, die Zunahmen befinden sich am Anfang vom Tuch am Anfan der Hinreihe, aber nach und nach werden Sie ca in der Mitte sein. So stricken Sie insgesamt for 160 Reihen dann ketten Sie die 10 Maschen ab, so wird das 2. Teil vom Tuch gestrickt. Dieses Tuch wurde schon mehrmals erfolgreich gestrickt, folgen Sie die Anleitung Schritt für Schritt und das Tuch wird nach und nach Form annehmen. Beim Ravelry können Sie auch viele Bilder von Strickerinnen schauen, vielleicht kann es auch Ihnen helfen. Viel Spaß beim stricken!
15.03.2022 - 10:13
![]() Ela kirjutas:
Ela kirjutas:
Szal jest cudowny. Wydziergałam już 4 szale. Moim zdaniem opis jest jasny do zrozumienia. Dziękuję.
07.01.2022 - 23:27
![]() Yvonne Hüneburg kirjutas:
Yvonne Hüneburg kirjutas:
Wird das Tuch in zwei Teilen gestrickt. Komm mit der Anleitung nicht klar. Vom Bild her sind die Umschläge in der Mitte aber in der Anleitung am Anfang der Reihe. Die Abnahmen für die Zacken beginnen erst nach 160 Reihen. Ich strick schon sehr lang aber ich komme nicht klar. LG Yvonne
13.12.2021 - 15:01DROPS Design vastas:
Liebe Yvonne, das Tuch wird nur in einem Teil getrickt, wenn Sie das 3. Foto schauen, sehen Sie daß der obere Teil über den Umschlag nach hinten gefaltet ist, dh etwas longer vor dem Umschlag. Folgen Sie die Anleitung genau wie beschrieben, so bekommen Sie das Tuch (nur Maschenprobe -wie üblich- beachten). Viel Spaß beim stricken!
14.12.2021 - 07:33
![]() Elaine Fritz kirjutas:
Elaine Fritz kirjutas:
Hello Diane, If I want to shorten this scarf, do I just reduce the number of times I repeat rows 3 and 4, and decrease two stitches rather than one stitch each time? Or would it be better to cast on fewer stitches to begin with? Thank you for your creativity and helpfulness.
18.06.2021 - 22:06DROPS Design vastas:
Dear Elanie, please understand that we cannot modify our patterns for each individual request. However, decreasing 2 stitches instead of one would make the angle much stronger, distorting the shape of the shawl. So if you must make it differently, try casting ott fewer stitches. Happy Stitching!
19.06.2021 - 00:38
|
|
Point the Way#pointthewayshawl |
|
 |
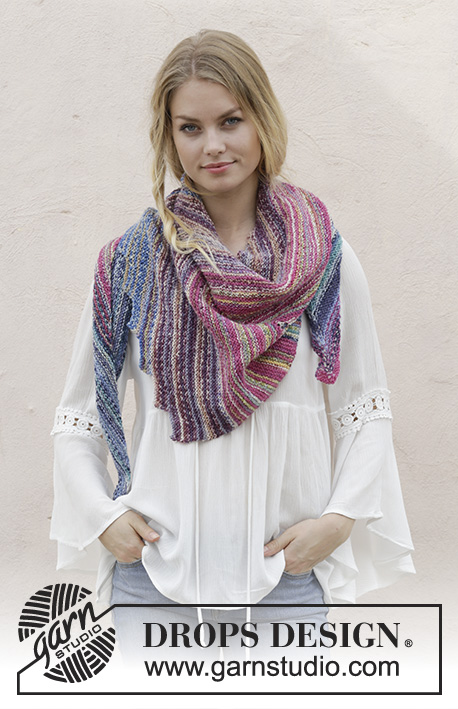 |
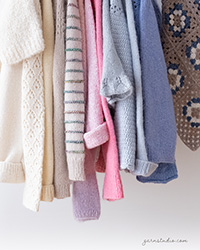
DROPS Fabel lõngast kootud ripskoes triibuline õlasall
DROPS 186-4 |
|
|
JUHEND RIPSKUDE / RIPSIVALL (edasi-tagasi kududes) 1 ripsivall = koo 2 rida parempidi silmuseid. TRIIBUD Koo triipe järgmiselt (NB! Vaheta värvi töö parempoolse rea lõpus). * koo 12 cm türkiis/sinine värviga, 3 cm 1 ripsivall türkiis/sinisega, 1 ripsivall roosa unistusega, 12 cm roosa unistusega, 3 cm 1 ripsivall roosa unistusega, 1 ripsivall lavendeliga, 12 cm lavendeliga, 3 cm 1 ripsivall lavendeliga, 1 ripsivall uduse merega, 12 cm uduse merega *, korda * kuni *. ---------------------------------------------------------- ÕLARÄTIK Kootakse lühemast küljest alustades risti üle. Loo 164 silmust 4,5 mm ringvarrastele türkiis/sinise lõngaga. Koo 1 rida parempidi silmuseid töö pahemal pool. Paigalda 1 silmusemärkija 2. silmusele real töö paremal pool. Koo ripskoes ja TRIIPE- vaata ülevalt ja koo nii: 1. RIDA (= töö paremal pool): 1 parempidi, 1 õhksilmus, 1 parempidi (silmusemärkijaga silmus), 1 õhksilmus, koo kuni jääb 2 silmust, koo 2 parempidi kokku. 2. RIDA (töö pahemal pool): koo 2 parempidi kokku, koo rea lõpuni, koo õhksilmused nii, et jääks augud. 3. RIDA (= töö paremal pool): koo kuni silmusemärkijaga silmuseni, 1 õhksilmus, 1 parempidi (silmusemärkijaga silmus), 1 õhksilmus, koo kuni jääb 2 silmust reale, koo 2 parempidi kokku. 4. RIDA (töö pahemal pool): koo 2 parempidi kokku, koo rea lõpuni, koo õhksilmused nii, et jääks augud. Korda ridu 3 ja 4, kasvata mõlemal pool silmusemärkijaga silmust, tehes õhksilmuse ning kahanda iga töö parempoolse rea lõpus ja pahempoolse rea alguses. Silmuste arv jääb samaks. Koo, kuni on kasvatatud kokku 80 kord mõlemal pool silmusemärkijaga silmust = 164 silmust on vardal (160 rida on kootud). 1. RIDA (= töö paremal pool): koo maha esimesed 10 silmust, koo kuni silmusemärkijaga silmuseni, 1 õhksilmus, 1 parempidi (= silmusemärkijaga silmus), 1 õhksilmus, koo kuni jääb 2 silmust, koo 2 parempidi kokku. 2. RIDA (töö pahemal pool): koo 2 parempidi kokku, koo rea lõpuni, koo õhksilmused nii, et jääks augud = 154 silmust on vardal. 3. RIDA (= töö paremal pool): koo kuni silmusemärkijaga silmuseni, 1 õhksilmus, 1 parempidi (silmusemärkijaga silmus), 1 õhksilmus, koo kuni jääb 2 silmust reale, koo 2 parempidi kokku. 4. RIDA (töö pahemal pool): koo 2 parempidi kokku, koo rea lõpuni, koo õhksilmused nii, et jääks augud = 154 silmust on vardal. 5.-10. RIDA: koo nagu 3. ja 4. rida = 154 silmust on real. Korda 1.-10. rida, kahandades 10 silmust igal 10 rea kohta. Jätka kudumist, kuni jääb 4 silmust vardale, koo silmused maha. Katkesta ja kinnita lõng. |
|
Kas oled teinud seda mustrit?Lisa oma piltidele viide #dropspattern #pointthewayshawl või saada link projektile meie #dropsfan galeriisse. Vajad abi selle mustriga?Garnstudio.com kodulehel on 11 õppevideot, küsimuste/vastuste osa ja muudki. © 1982-2026 DROPS Design A/S. Kõik õigused kaitstud. See dokument, ning selle alajaotused on kaitsud autoriõigustega. Loe rohkem, mida meie mustritega võib teha, iga mustrilehe alt meie kodulehel. |
|

Tegeledes üle 40 aasta kudumise ja heegeldamise disainidega, pakub DROPS Design ühte suurimat tasuta mustrite kollektsiooni internetis - tõlgituna 17 keelde. Tänaseks on meil 324 kataloogi ja 12190 mustrit - millest 9337 on tõlgitud Eesti keelde.
Me anname endast parima, et tuua teieni kõike mida kudumine ja heegeldamine võib pakkuda - inspiratsiooni, nõuandeid ning ka kvaliteetseid lõngu parima hinnaga! Soovid kasutada mustreid muukski, kui ainult oma tarbeks? Loe infot meie Copyright osas iga lehekülje all. Rõõmsat loomist!
Jäta kommentaar mustrile DROPS 186-4
Ootame kommentaare selle mustri kohta!
Kui soovid midagi küsida, siis kiiremaks vastuse saamiseks veendu, et valid õige kategooria alloleval formil. Vajaliku väljad *.