
Categorias populares
Procura um fio?


Comentários / Perguntas (16)
![]() Anita Olsson escreveu:
Anita Olsson escreveu:
Hur avslutar jag snyggt utan luvan
10.04.2026 - 11:29DROPS Design respondeu:
Hei Anita. Ta en titt på våre videoer om avfelling og velg den som du syns vil passe best på plagget. mvh DROPS Design
10.04.2026 - 14:06
![]() Achard escreveu:
Achard escreveu:
Bonjour, je ne comprends les 2 ransgs point mousse au milieu de l'explication de la bordure au crochet!! pouvez vous donner le correctif? merci 1 ms dans la 1ère m, *3 ml, sauter 1 m / 2 rangs au point mousse, 1 ms.....
26.03.2023 - 15:49DROPS Design respondeu:
Bonjour Mme Achard, cette bordure au crochet se fait le long des mailles point mousse, vous allez devoir sauter soit 1 maille (dans le sens horizontal) soit 2 rangs au point mousse (dans le sens vertical) à chaque fois que vous crochetez 3 mailles en l'air. Bonnes finitions!
27.03.2023 - 09:28
![]() Sahar Taha escreveu:
Sahar Taha escreveu:
Hi,l like your ponche modle for children and l do this one and it is great please can you make new modlefor children in your catalogue thanks a lot
29.04.2020 - 23:17
![]() Mélanie escreveu:
Mélanie escreveu:
Bonjour, pouvez vous expliquer à une débutante comment le un diagramme svp. Merci !
13.06.2019 - 02:26DROPS Design respondeu:
Bonjour Mélanie, bien sûr, vous trouverez ici toutes les explications sur la lecture des diagrammes. Bon tricot!
13.06.2019 - 09:11
![]() Bleue escreveu:
Bleue escreveu:
Hello; In the crochet edges part, there is an instruction * ch 3, skip 1 st / 2 rows in garter st, 1 sc in next st *. I do not understand the garter st part and there is no indication of any garter st with crochet in the tutorial videos. How do I do that? Could you give me any pattern or instruction ?
18.04.2019 - 11:40DROPS Design respondeu:
Hi Bleue, The instructions are asking you to skip either 1 stitch or 2 rows of garter stitch (depending on where you are on the edge), so the garter stitch refers to the knitting you already have done. I hope this helps and happy knitting/crocheting!
19.04.2019 - 14:15
![]() Rita Morin escreveu:
Rita Morin escreveu:
Ou sont les nopes dans le diagramme?
20.03.2019 - 18:13DROPS Design respondeu:
Bonjour Rita! Le nope se trouve au 8-me rang du diagramme, au milieu, le carre avec un symbole rond. Bon tricot!
20.03.2019 - 21:27
![]() Trui escreveu:
Trui escreveu:
Kan iemand mij nog eens uitleggen hoe je een breiwerk afzet? Het is te lang geleden... alvast bedankt... Trui
03.02.2019 - 13:44DROPS Design respondeu:
Dag Trui,
Bedoel je opzetten? Of afkanten? Bekijk evt. een van onze video's hierover voor hulp hierbij.
08.02.2019 - 16:54
![]() Lisa escreveu:
Lisa escreveu:
Hi - I've tried several different cast on methods - but they all are too tight (I'm not casting on tightly and I AM using a larger needle). Which cast on method would you recommend for this pattern so that the bottom isn't taught/tight. I want the edge to stretch with the rows of ribbing at the bottom. Thanks for any help/advice! Much appreciated!
01.01.2017 - 03:44DROPS Design respondeu:
Dear Lisa, you can use a needle size one haf a size or one size larger than the one you will use for the poncho. Happy knitting!
02.01.2017 - 08:48Marion escreveu:
Hallo. Benötige dringend Hilfe. Ich bin mitten am Stricken dieses Objektes (DROPS CHILDREN / 23 / 47, Hermione by DROPS Design) und jetzt ist die Anleitung halb weg. Weder die Fotos noch das Stickmuster A1-A3 ist vorhanden. Gibt es die komplette Strickanleitung vielleicht als PDF file? Benötige schnelle Hilfe bitte. Es ist ein Geschenk und muss nächste Woche fertig sein. Vielen Dank im Voraus. Marion
21.11.2016 - 19:05DROPS Design respondeu:
Liebe Marion, Strickschrift mit Diagrams A.1 bis A.3 sind ganz unten nach der schrifftlichen Anleitung verfügbar. Wenn Sie sie nicht sehen können, versuchen Sie die Seite zu aktualisieren und den Browser-Cache zu leeren. Viel Spaß beim stricken!
22.11.2016 - 08:52Violet escreveu:
Hi. I'm a little confused by the first part of the pattern and I hope you can help me decipher it. The pattern says "Work diagram A-1 (= 13-14-15-16-17 repetitions on the round)." However, the diagram of A1 shows more than 17 rounds. Do I work the whole of the A1 diagram or just the number of rounds specifies, e.g. 17? Sorry if I'm being a bit dense! Thanks!
24.04.2016 - 00:46DROPS Design respondeu:
Dear Violet, you have to work diagram A.1 one time in heigh, but diagram A.1 is worked 17 times on the round, for size 11/12 years. Happy knitting!
24.04.2016 - 22:45
|
|||||||||||||
Hermione#hermioneponcho |
|||||||||||||
 |
 |
||||||||||||
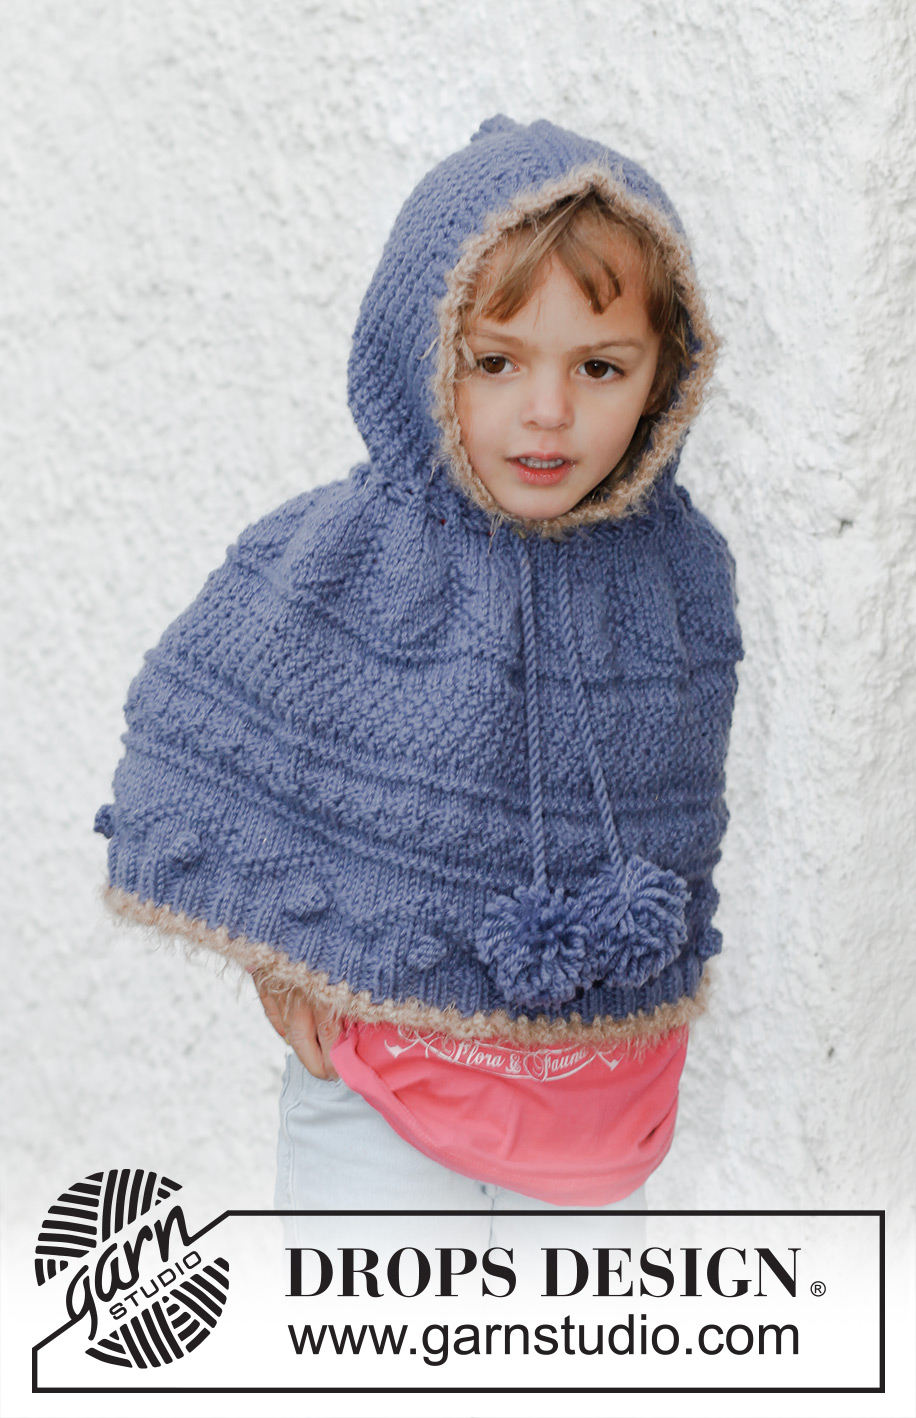
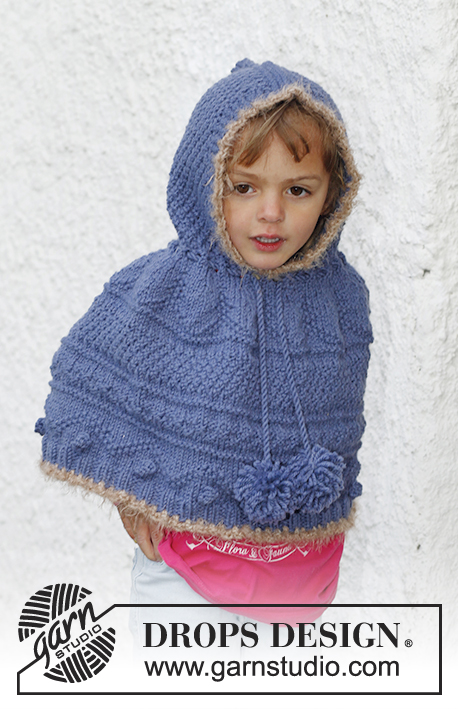
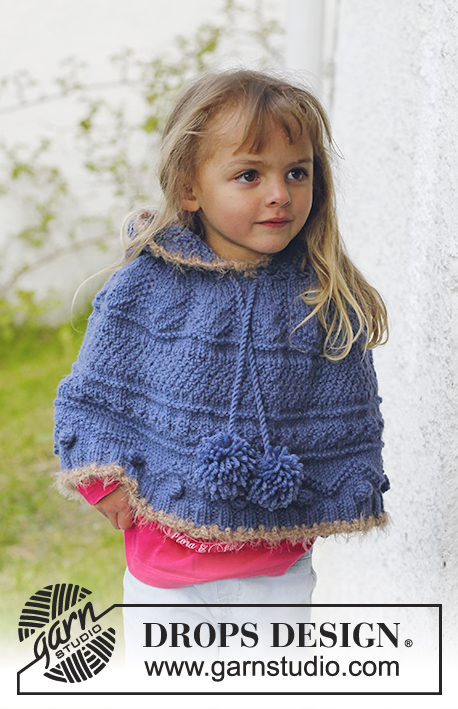
Poncho em tricô com capuz, ponto texturado e pompons em DROPS Nepal. Tamanhos 3 - 12 anos.
DROPS Children 23-47 |
|||||||||||||
|
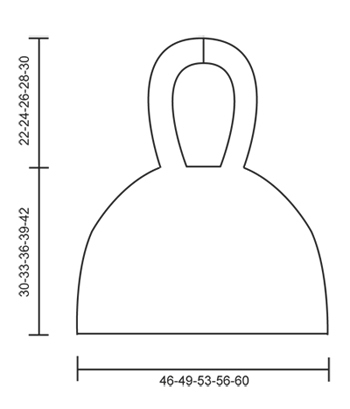
---------------------------------------------------------- NOTA: Existem termos diferentes de tricô e croché em português de Portugal e do Brasil. TRICÔ : Malha = Ponto Canelado = Barra Ponto Jarreteira = Cordões de Tricô Ponto Liga = Ponto Tricô CROCHÉ : mpa – meio ponto alto pa – ponto alto pad – ponto alto duplo pat – ponto alto triplo pb – ponto baixo pbx – ponto baixíssimo pc – ponto corrente ---------------------------------------------------------- PONTO JARRETEIRA (em idas e voltas na agulha circular) : 1 "barra" jarreteira = 2 carreiras meia. PONTO FANTASIA : Ver diagrama A-1 a A-3. Os diagramas mostram o ponto fantasia pelo direito. ---------------------------------------------------------- PONCHO : Tricota-se em redondo na agulha circular de baixo para cima. Montar 156-168-180-192-204 ms/pts com a agulha circular 5 mm e o fio Nepal. Colocar um marcador no princípio da carreira (= no lado). Tricotar o diagrama A-1 (= 13-14-15-16-17 vezes em toda a carreira). NÃO ESQUECER DE OBTER A MESMA TENSÃO DA INDICADA PARA A AMOSTRA ! Depois A-1, continuar em A-2 até a peça medir 20-23-26-29-32 cm. Tricotar e diminuir depois, seguindo A-3 – AO MESMO TEMPO, na última carreira de A-3, distribuir 2-4-6-8-10 diminuições. Depois de A-3, restam 76-80-84-88-92 ms/pts e a peça mede cerca de 30-33-36-39-42 cm de altura. Tricotar 19-20-21-22-23 ms/pts meia. Tricotámos, agora, até meio da frente – as carreiras passam a começar a partir daqui. Tricotar a carreira seguinte da seguinte maneira : *2 ms/pts tricotadas juntamente em meia, 1 laçada*, repetir de * a * em toda a carreira. Tricotar 1 carreira liga/tricô e tricotar 1 carreira meia. Tricotar o capuz. CAPUZ : Tricota-se em idas e voltas na agulha circular a partir do meio da frente da seguinte maneira : 4 ms/pts em PONTO JARRETEIRA - ver acima -, A-2 até restarem 4 ms/pts, 4 ms/pts em ponto jarreteira. Continuar desta maneira até o capuz medir 22-24-26-28-30 cm de altura, e, depois, tricotar 4 carreiras em ponto jarreteira em todas as ms/pts. Arrematar, dobrar o capuz ao meio e uni-lo na parte de cima. ORLAS EM CROCHÉ : Fazer a seguinte orla a toda a volta da abertura do capuz e na parte de baixo do poncho com o fio Symphony ou Melody e a agulha de croché 5 mm da seguinte maneira : 1 pb na 1.ª m/p, * 3 pc, saltar 1 m/p / 2 carreiras em ponto jarreteira, 1 pb na m/p seguinte *, repetir de * a * em toda a carreira e terminar com 1 pbx no 1.º pb. CORDÕES E BORLAS : Cortar 3 fios Nepal com cerca de 2.5 metros, enrolá-los juntamente, torcendo muito bem, dobrá-los ao meio e deixá-los enrolarem-se por si próprios. Dar um nó em cada ponta. Enfiar o cordão na carreira de ajours do alto do poncho – começar a meio da frente. Fazer 2 pompons bem cheios com o fio Nepal, com um diâmetro de cerca de 5 cm. Fixá-los a cada uma das pontas do cordão à volta do decote. |
|||||||||||||
Explicações do diagrama |
|||||||||||||
|
|||||||||||||
 |
|||||||||||||
 |
|||||||||||||
Terminou este projecto?Então, identifique as suas fotos com as tags #dropspattern #hermioneponcho ou mostre-as na galeria #dropsfan. Precisa de ajuda para este modelo?Encontrará 8 turotiais em vídeo, uma rubrica Comentários/Perguntas e muito mais ao visitar a página do modelo em www.garnstudio.com © 1982-2026 DROPS Design A/S. Todos os direitos reservados. Este documento, incluuindo as suas su-secções, tem copyrights. Saia mais o que pode fazer com os nossos modelos no fim de cada uma das páginas do nosso site. |
|||||||||||||


Com mais de 40 anos no design de modelos de tricô e de croché, a DROPS Design oferece uma das mais vastas colecções demodelos gratuitos na Internet - traduzidos em 17 línguas. Neste dia de hoje, temos 324 catálogos e 12290 modelos - dos quais 12271 estão traduzidos em português.
Trabalhamos com muito empenho para lhe proporcionar o melhor que o tricô e o croché têm para oferecer, para lhe fornecer inspiração e conselhos bem como fios da mais elevada qualidade a preços incríveis! Gostaria de usar os nossos modelos para outros fins que não uso pessoal? Pode ler o que lhe é permitido fazer no Copyright texto que se encontra na parte de baixo de todos os nossos modelos. Bom tricô! Bom croché!
Deixe um comentário acerca do modelo DROPS Children 23-47
Gostaríamos muito de saber o que tem a dizer-nos acerca deste modelo!
Se deixar uma pergunta acerca do modelo, certifique-se de que escolhe a categoria adequada no formulário abaixo para acelerar o processo relativo à resposta. Os campos obrigatórios estão assinalados com um *.