
Oblíbené kategorie
Hledáte přízi?


Komentáře / Otázky (66)
![]() Linda Langlois napsala:
Linda Langlois napsala:
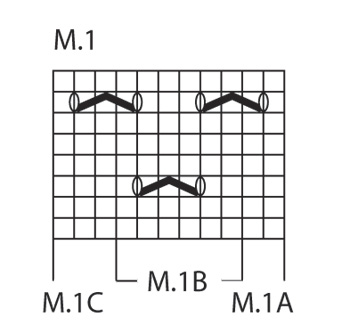
Bonjour, mon questionnement se situe au début du rang 7 c'est-à-dire: est-ce que je commence par une maille endroit selon le graphique ou si je dois faire le M.1A (2 mailles) avant le commencer le M.1B. Le nombre de répétition du motif est-il 4 fois comme le rang 3? J'ai essayé de le faire en commençant par 1 m. end., 1 jeté et en continuant avec le M.1B et en terminant le rang par 1 m. end. mais j'arrive à 5 répétitions au lieu de 4. Est-ce correct?
07.11.2019 - 15:10Odpověď DROPS Design :
Bonjour Mme Langlois, vous devez toujours tricoter: 1 x M.1A, puis vous répétez M.1B et terminez par M.1C, au 7ème rang de M.1, tricotez les 2 premières m de A, puis vous répétez les mailles de B et terminez par les mailes de C - cf réponse ci-dessous pour le détail des mailles du 7ème rang. Bon tricot!
07.11.2019 - 15:23
![]() Linda Langlois napsala:
Linda Langlois napsala:
: M.1A (= 2 sts), then repeat M.1B a total of 4 times in width (= 24 sts) and finish with M.1C (= 3 sts) = 2+24+3= 29 stitches. Happy knitting! mais pour le rang 7???
05.11.2019 - 19:10
![]() Linda Langlois napsala:
Linda Langlois napsala:
Pouvez-vous m'explique le rang 7 du diagramme par rapport au rang 3? J'essaie de comprendre le M.1B Merci
05.11.2019 - 18:22Odpověď DROPS Design :
Bonjour Mme Langlois, au rang 7 de M.1, vous tricotez: 1 m end, 1 jeté (= 2 m pour A), glissez la m suivante (=la dernière m de A, 2 m ens à l'end, m glissée par-dessus m tricotée), 1 jeté, 3 m end, 1 jeté (= M.1B), tricotez maintenant la dernière m de M.1B avec les 2 premières m du M.1B suivant (puis de M.1C la dernière fois). Bon tricot!
06.11.2019 - 08:43
![]() Christine napsala:
Christine napsala:
I am almost ready to decrease for the toe shaping...once again, I do not understand...I have 52 stitches, but the pattern says separate 25 stitches , for the underfoot and 25 stitches for the upper foot...what happens to the other 2 sts?, sigh...sorry to be such a pain...
03.10.2019 - 02:34Odpověď DROPS Design :
Dear Christine, there should be 25 stitches for both upper and under foot + 1 stitch with marker on each side = 52 sts in total. Happy knitting!
03.10.2019 - 09:29
![]() Kendall napsala:
Kendall napsala:
Christine,thanks for your help I appreciated it😊I figured out to put the 35 stitches to the side by talking it over with my sister,she knits too,and the comment just confirmed it which is great and if you still need help on when to start the lace pattern,you start the lace pattern the row after you pick up the 14 side stitches go across the top of the sock and pick up the other 14 stitches once you get back to the 29 stitches that’s when you do the lace pattern I hope I helped😊
01.10.2019 - 15:40
![]() Christine napsala:
Christine napsala:
Kendall, clearly I was wrong. This is not a typo error. As you can see from the answers. I was wrong and hope I have not confused you. now I understand. if you need help, don’t be shy, I can now help 😊
01.10.2019 - 02:06
![]() Christine napsala:
Christine napsala:
Thank you for your answer. Does that mean that I should put 3 stitches from the 35 to the 14 stitches picked up on both sides, and work the decrease including those 3 stitches? Thank you.
30.09.2019 - 14:11Odpověď DROPS Design :
Dear Christine, you will decrease before the 29 stitches (first 3 from the 35 sts are worked with the picked up stitches in stocking stitch) and after the 29 stitches in pattern (= the last 3 from the 35 sts are worked with the picked up sts in stocking st), ie these 3 sts on either side of the 29 middle sts will be worked in stocking stitch and decreased for instep. Happy knitting!
30.09.2019 - 16:04
![]() Christine napsala:
Christine napsala:
At what point do you start working with the Diagram please? I am totally confused. I am at the point where I have picked up 14 stitches on both sides as well as the 35 stitches that were on the stitch holder. I now have 76 stitches on the needles, but I am unsure how to proceed at this point. With big thanks in advance.
28.09.2019 - 20:03Odpověď DROPS Design :
Dear Christine, once you get the 76 sts on the needle (= heel is now worked),k you now work the stitches from under foot in stocking stitch (= over the first 3 sts from the 35 sts slipped on a thread + the last 3 sts from these 35 sts (=29 sts remain for upper foot) + the stitches from heel while decreasing for instep and work the 29 stitches (upper foot, the stitches slipped on a thread) in pattern: : M.1A (= 2 sts), then repeat M.1B a total of 4 times in width (= 24 sts) and finish with M.1C (= 3 sts) = 2+24+3= 29 stitches. Happy knitting!
30.09.2019 - 10:26
![]() Christine napsala:
Christine napsala:
Kendall, I just started this yesterday and came across the same problem. I figured it out to be simply a typo, and followed the pattern with 35 (for the medium sock). It is working out perfectly like that. I hope this helps.
28.09.2019 - 18:49
![]() Kendall napsala:
Kendall napsala:
How come you go from 35 stitches on top of the foot to 29?wheres the rest of the stitches?and then at the end when you work the toe where’s the missing two stitches?
28.09.2019 - 16:28
|
|||||||
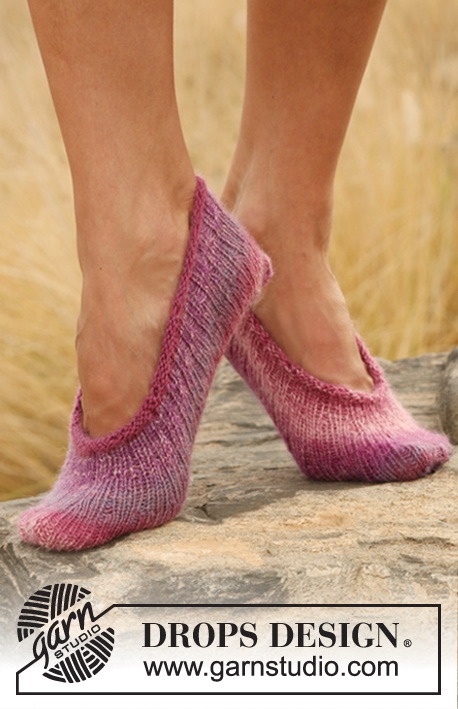
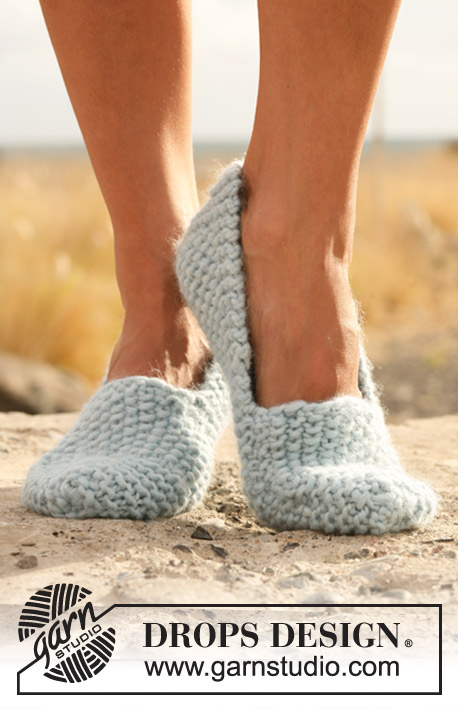
Neptunia Socks#neptuniasocks |
|||||||
|
|
|||||||
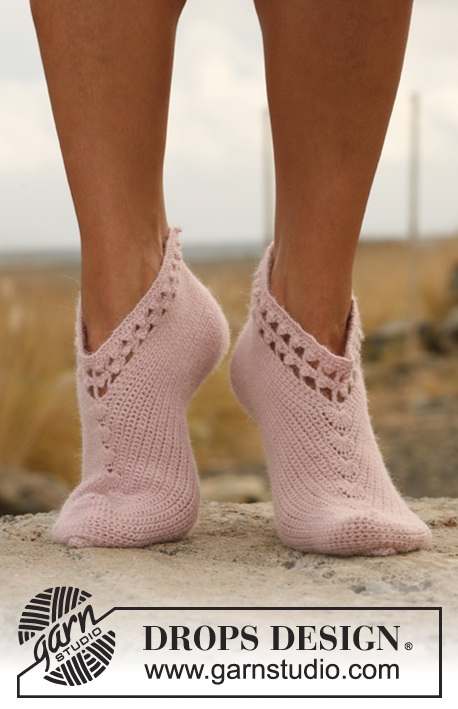
DROPS kotníkové ponožky pletené krajkovým vzorem z příze "Fabel".
DROPS 129-18 |
|||||||
|
VZOR: Viz schéma M.1. TVAROVÁNÍ PATY (pleteme lícovým žerzejem): 1. řada (= lícová): pleteme po posledních 5-5-6 ok v řadě, 1 oko sejmeme hladce, 1 oko upleteme hladce a sejmuté přes ně přetáhneme, práci otočíme. 2.ř. (= rubová): pleteme po posledních 5-5-6 ok v řadě, 1 oko sejmeme obrace, 1 oko upleteme obrace a sejmuté přes ně přetáhneme, práci otočíme. 3.ř. (= lícová): pleteme po posledních 4-4-5 ok v řadě, 1 oko sejmeme hladce, 1 oko upleteme hladce a sejmuté přes ně přetáhneme, práci otočíme. 4.ř. (= rubová): pleteme po posledních 4-4-5 ok v řadě, 1 oko sejmeme obrace, 1 oko upleteme obrace a sejmuté přes ně přetáhneme, práci otočíme. Tímto způsobem pokračujeme v ujímání (vždy o 1 oko snížíme počet ok zbylých v řadě), až nám v řadě zůstane 13-13-15 ok. ---------------------------------------------------------------------- PONOŽKA: Pleteme v kruhových řadách na ponožkových jehlicích. Na ponožkové jehlice č.2,5 nahodíme přízí Fabel 50-56-60 ok. Upleteme 1 kruhovou řadu hladce a pokračujeme žebrovým vzorem 1/1 (tj. 1 oko hladce, 1 obrace) do výše 2-2-3 cm. Nyní ponecháme prvních 21-21-25 ok na jehlicích (= pata) a posledních 29-35-35 ok odložíme na pomocné jehlice (= nárt). Nad oky paty upleteme v řadách lícovým žerzejem 5-5,5-6 cm výšky. Do středu paty umístíme značku – díl budeme nadále měřit od tohoto místa! Nyní TVARUJEME PATU – viz výše! Po dokončení tvarování nabereme po obou stranách paty 13-14-15 ok a odložených 29-35-35 ok vrátíme z pomocné jehlice zpět na jehlice = 68-76-80 ok. Pleteme opět v kruhových řadách. Před a za 29-29-35 ok nártu umístíme značku. Nad oky chodidla pokračujeme lícovým žerzejem, nad 29-29-35 oky nártu pleteme takto: vzor M.1A (= 2 oka), vzor M.1B opakujeme nad následujícími 24-24-30 oky (= 4-4-5x) a končíme vzorem M.1C (= 3 oka). SOUČASNĚ ujímáme na obou stranách, takto: poslední 2 oka před oky nártu spleteme hladce anglicky, první 2 oka za oky nártu spleteme hladce. Takto ujímáme v každé 2. kruhové řadě, celkem 10-12-12x = 48-52-56 ok. Pleteme do výše 18-19-22 cm od značky na patě - 4-5-5 cm zbývá uplést do požadovaných rozměrů. Nyní si označíme boční strany ponožky (tj. první oko na každé straně) = mezi značkami máme na horní i dolní straně 23-25-27 ok. Tvarujeme špičku: pleteme lícovým žerzejem nad všemi oky a SOUČASNĚ ujímáme na obou stranách obou označených ok – začínáme 2 oka před označeným okem: 2 oka spleteme hladce, 1 hladce (= označené oko) , 2 oka spleteme hladce anglicky. Takto ujímáme na obou stranách v každé 2. kruhové řadě, celkem 4-7-6x, poté v každé kruhové řadě, a to celkem 6-4-6x = 8 zbylých ok. Přízi odstřihneme, protáhneme zbylými oky, stáhneme a zapošijeme. |
|||||||
Vysvětlivky ke schématu |
|||||||
|
|||||||
 |
|||||||
Dokončili jste tento model?Pak označte své fotky tagem #dropspattern #neptuniasocks nebo je pošlete do galerie #dropsfan. Potřebujete s tímto návodem poradit?Otevřete-li si návod na stránce garnstudio.com, najdete tam 18 výukových video-ukázek, Komentáře/Dotazy a další užitečné informace. © 1982-2026 DROPS Design A/S. Vyhrazujeme si veškerá práva. Tento dokument, včetně všech jeho dílčích částí, podléhá autorským právům. Podrobnější komentář k možnostem užití našich návodů najdete dole pod každým návodem na našich stránkách. |
|||||||


V oblasti pletené a háčkované módy působí DROPS Design více než 40 let. Díky tomu vám můžeme nabídnout jednu z nejrozsáhlejších kolekcí modelů s bezplatnými návody dostupnými na internetu - navíc v 17 jazycích. K dnešnímu dni máme na 324 katalogů a 12290 návodů celkem - z nich je už 7603 dostupných v [češtině].
Přidejte komentář k návodu DROPS 129-18
Rádi bychom věděli, co si o tomto modelu myslíte!
Pokud se chcete na něco zeptat, dbejte prosím na to, abyste ve formuláři níže vybrali správnou kategorii - díky tomu se dříve dozvíte, co potřebujete vědět. Povinná pole jsou označena *.